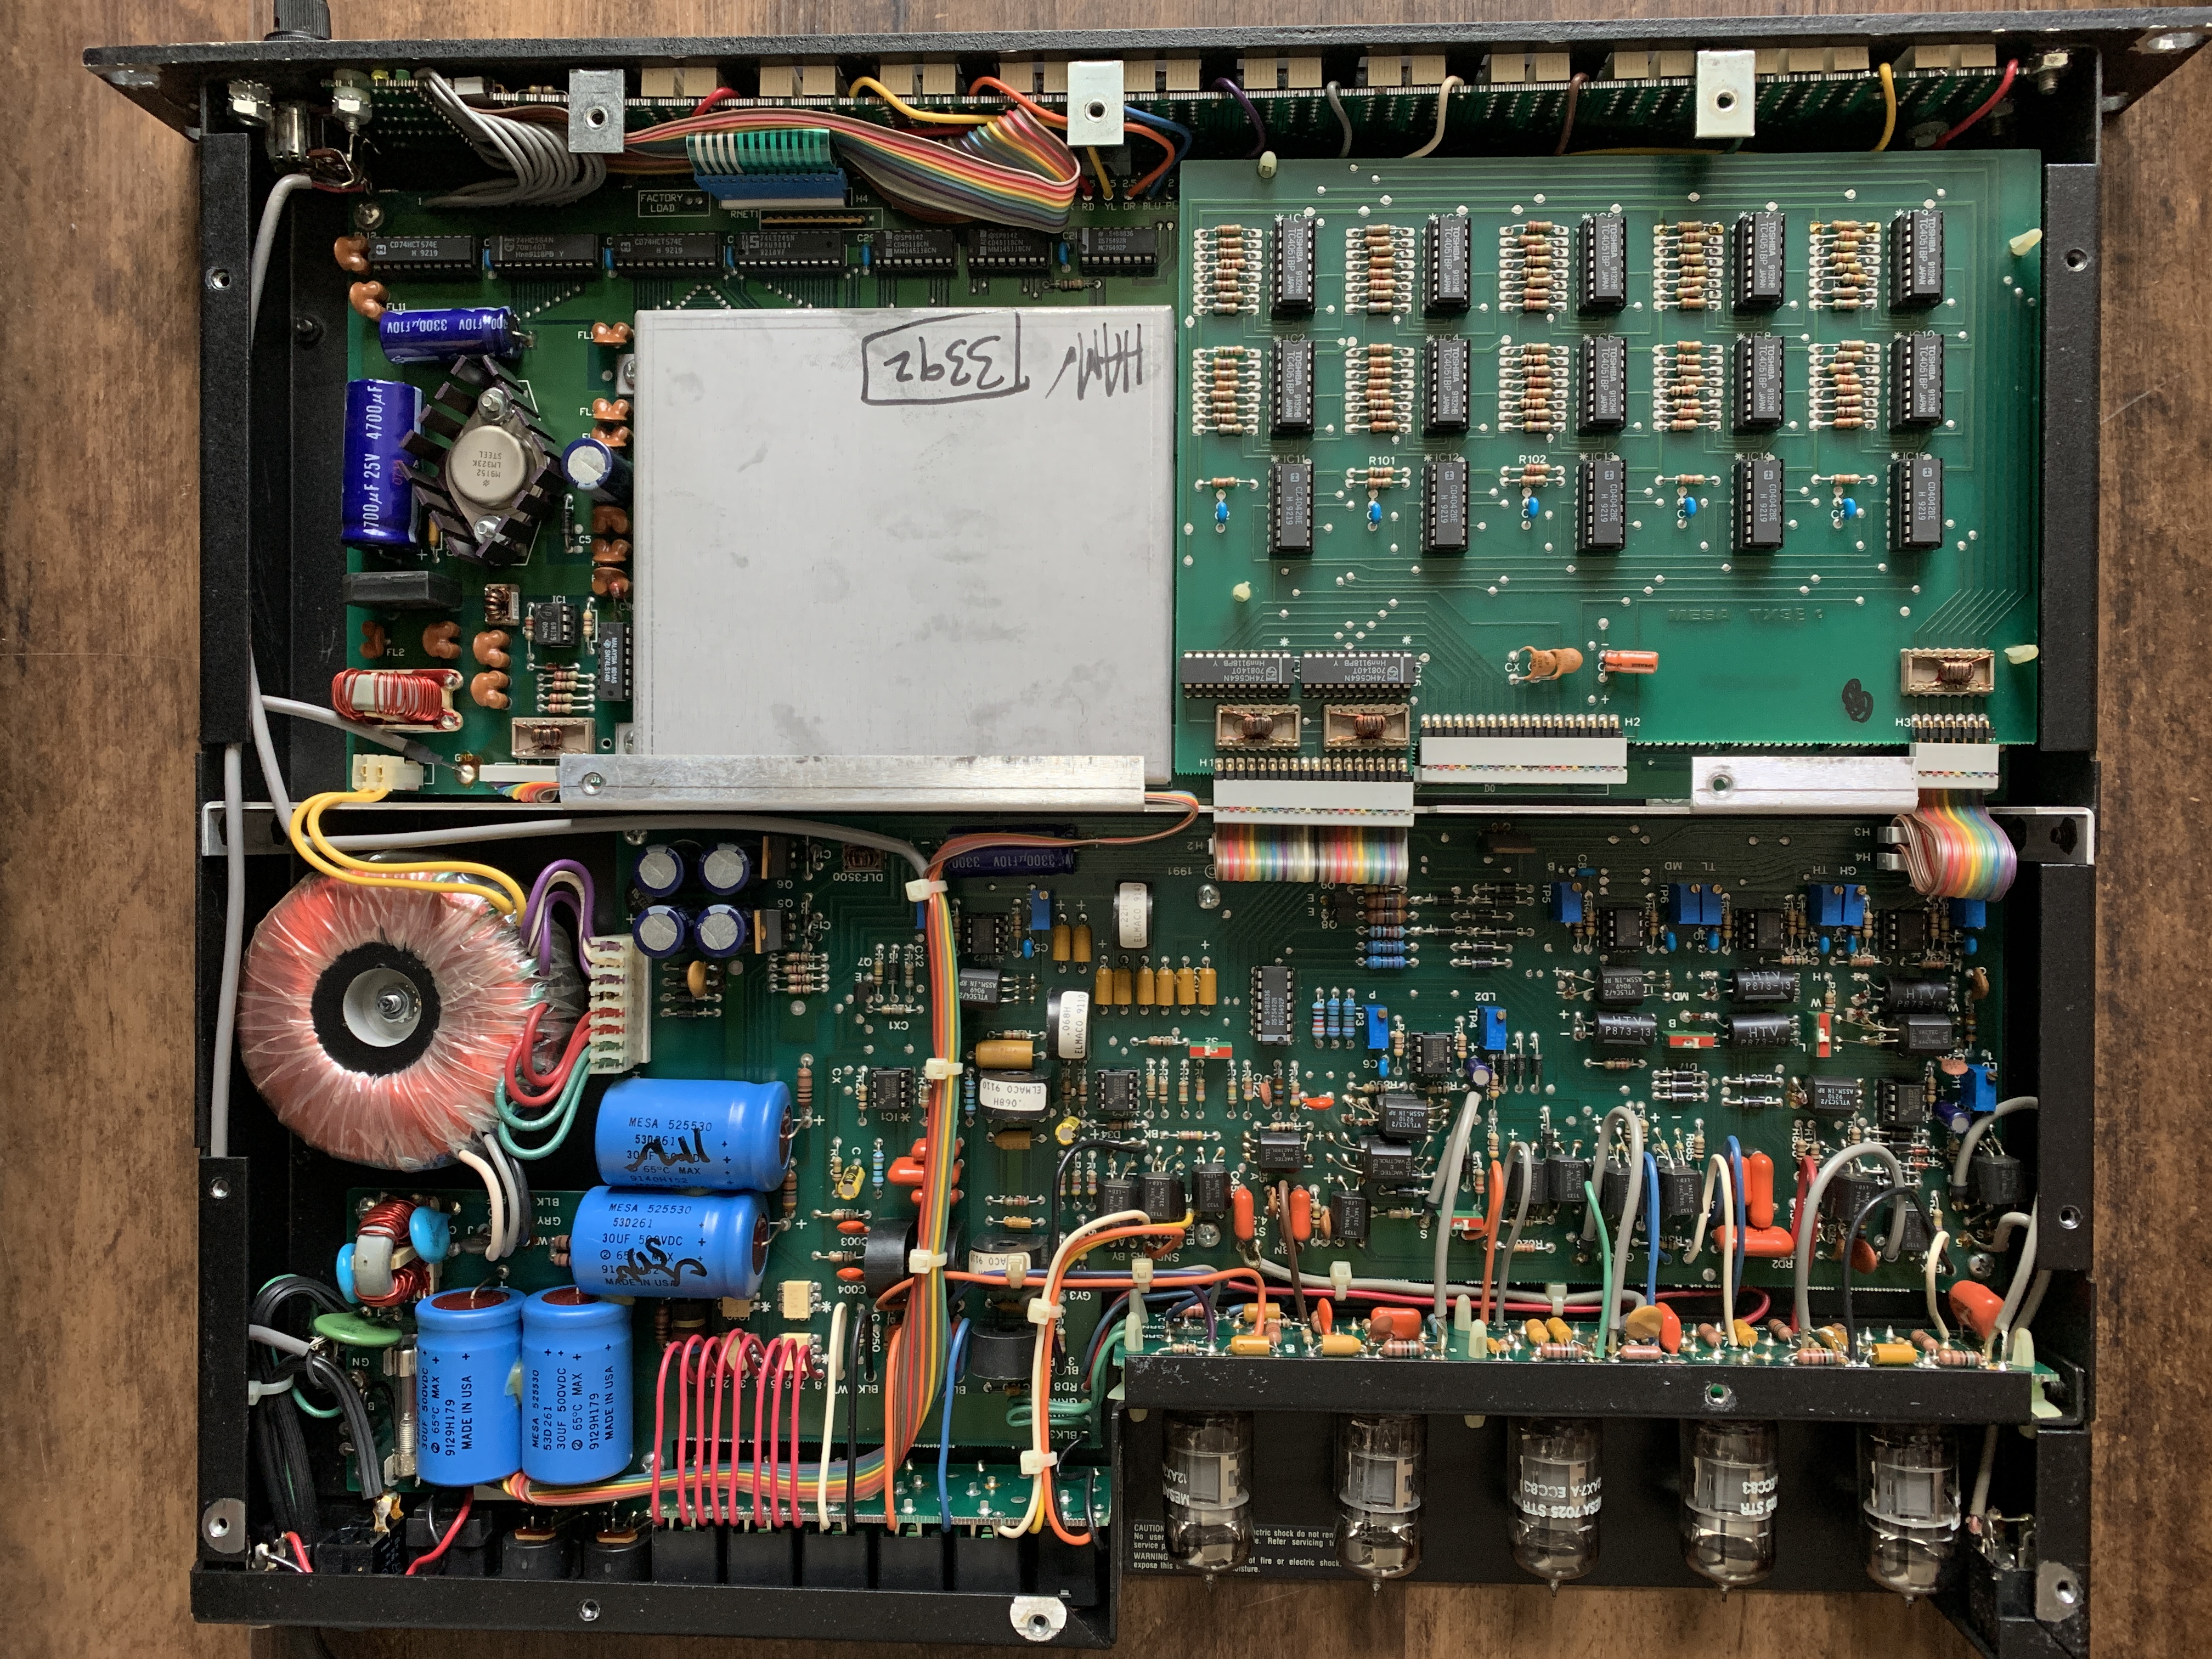
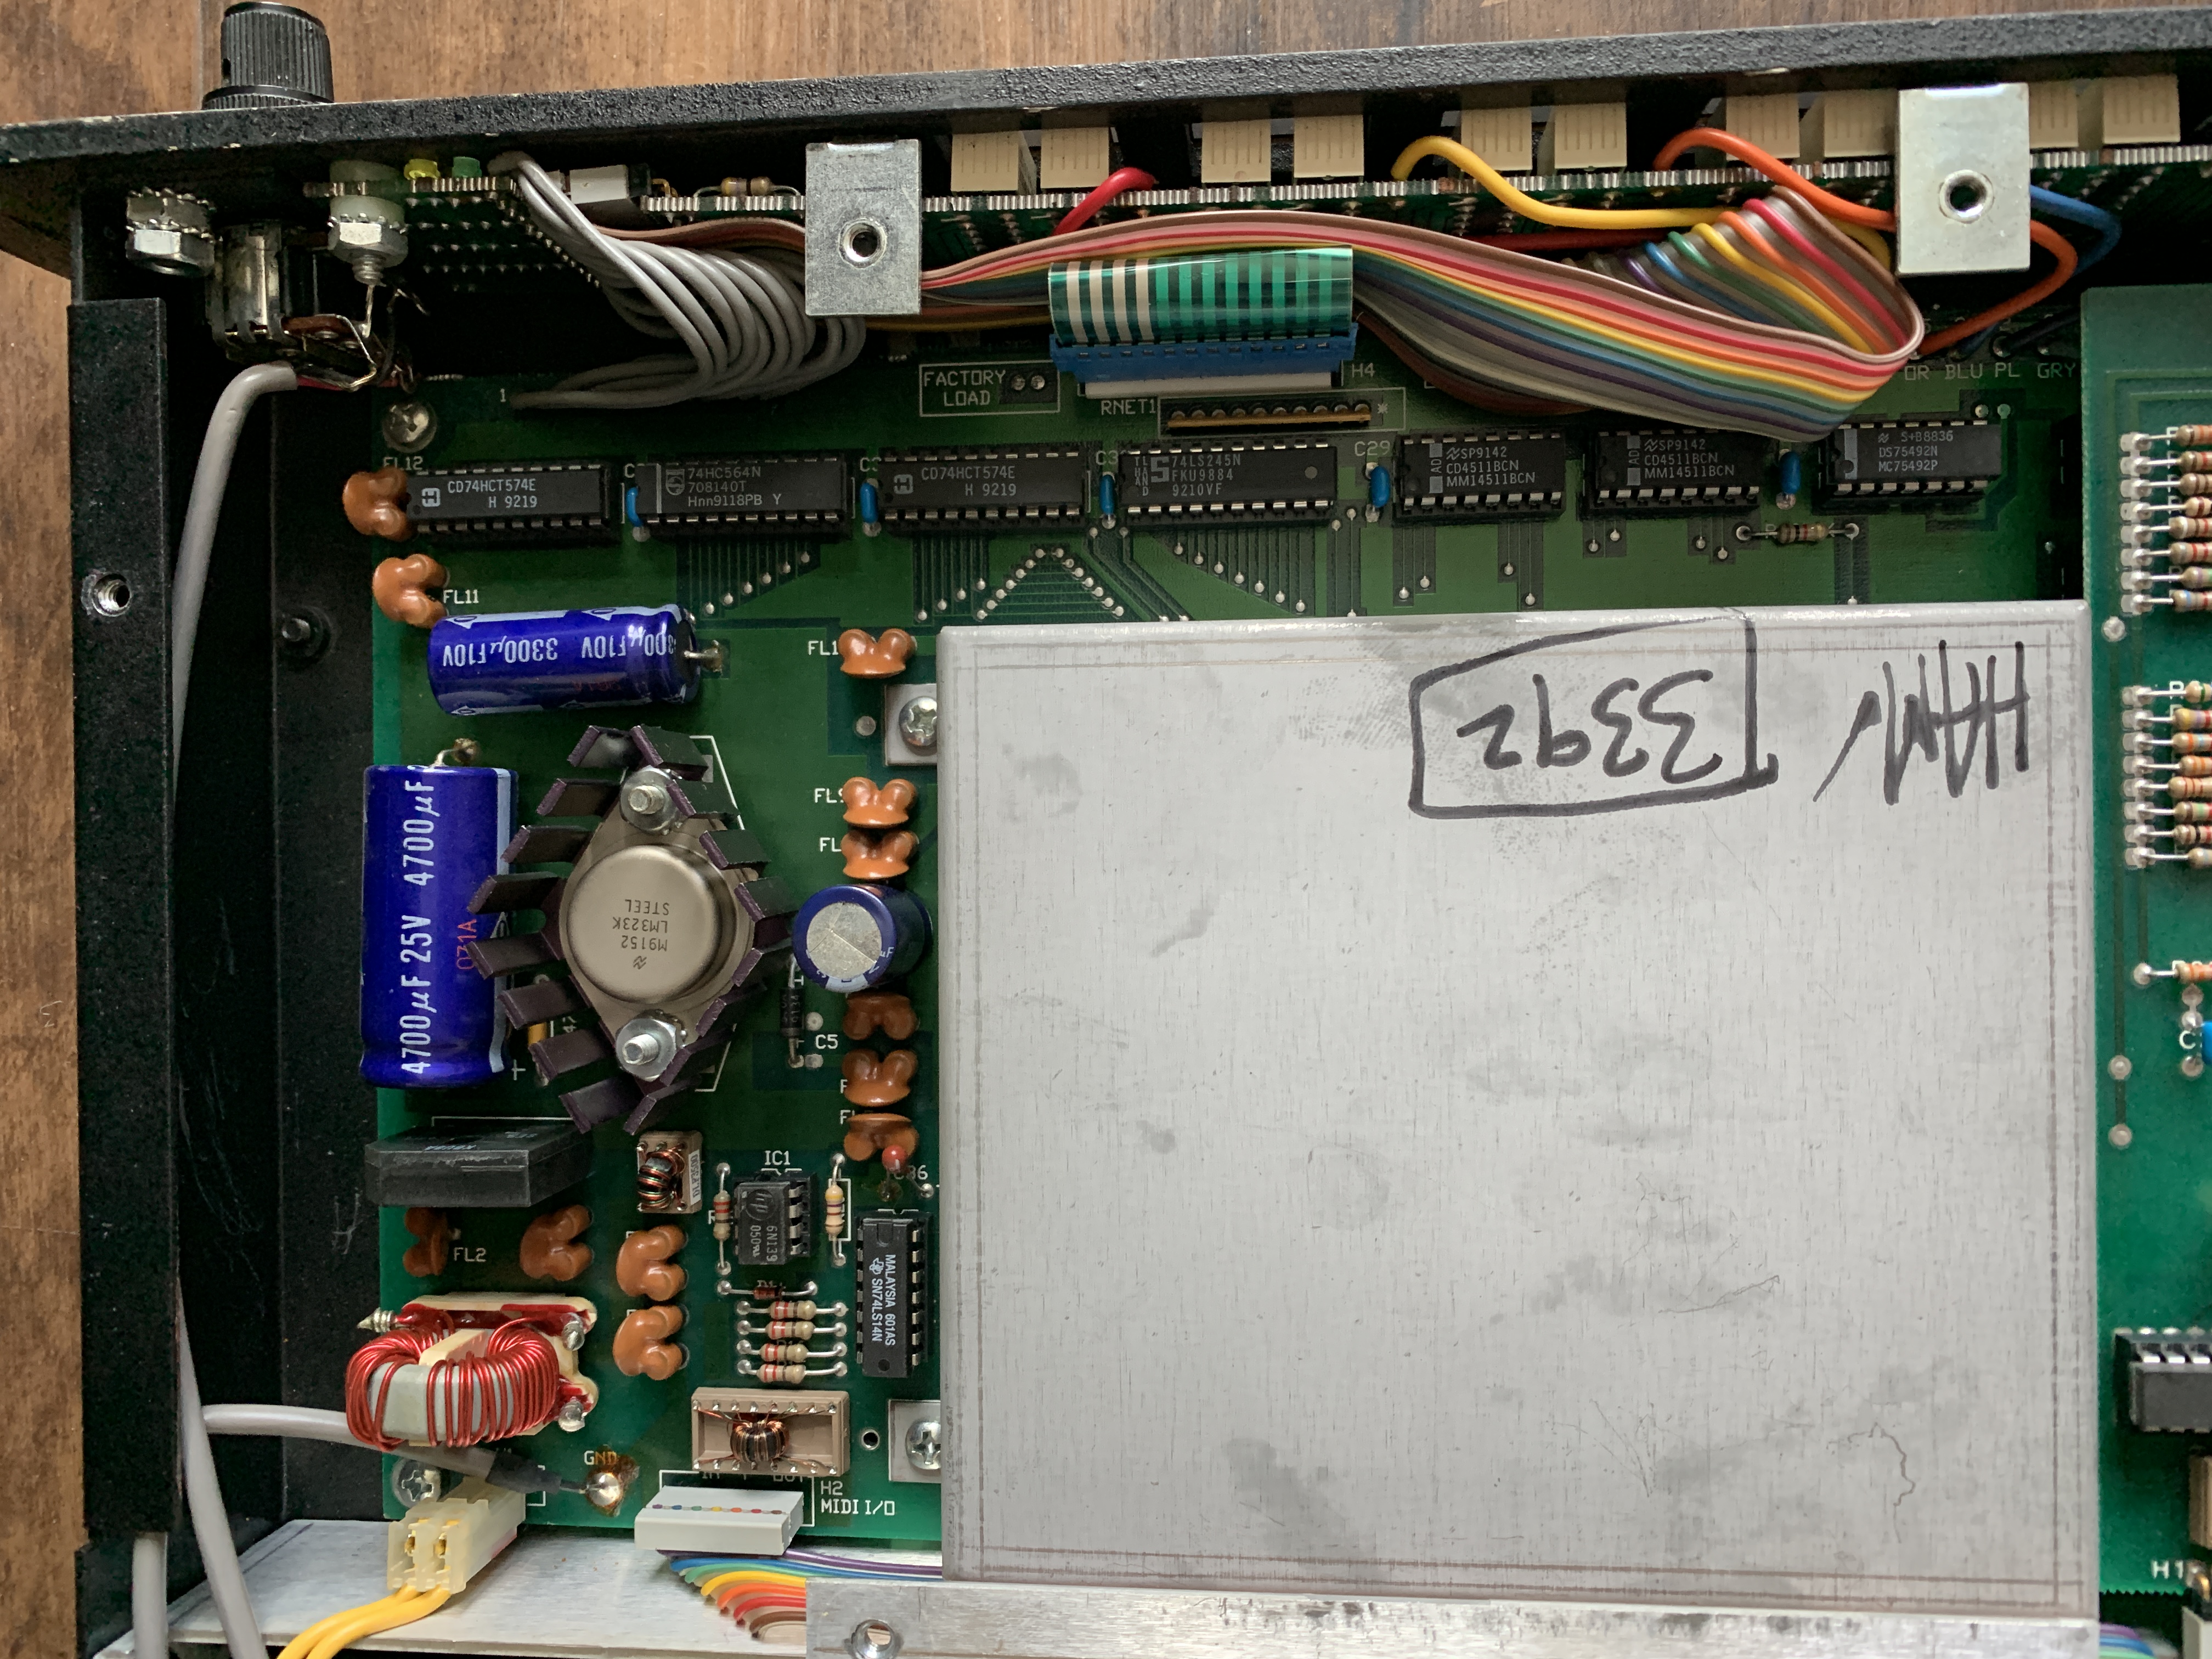
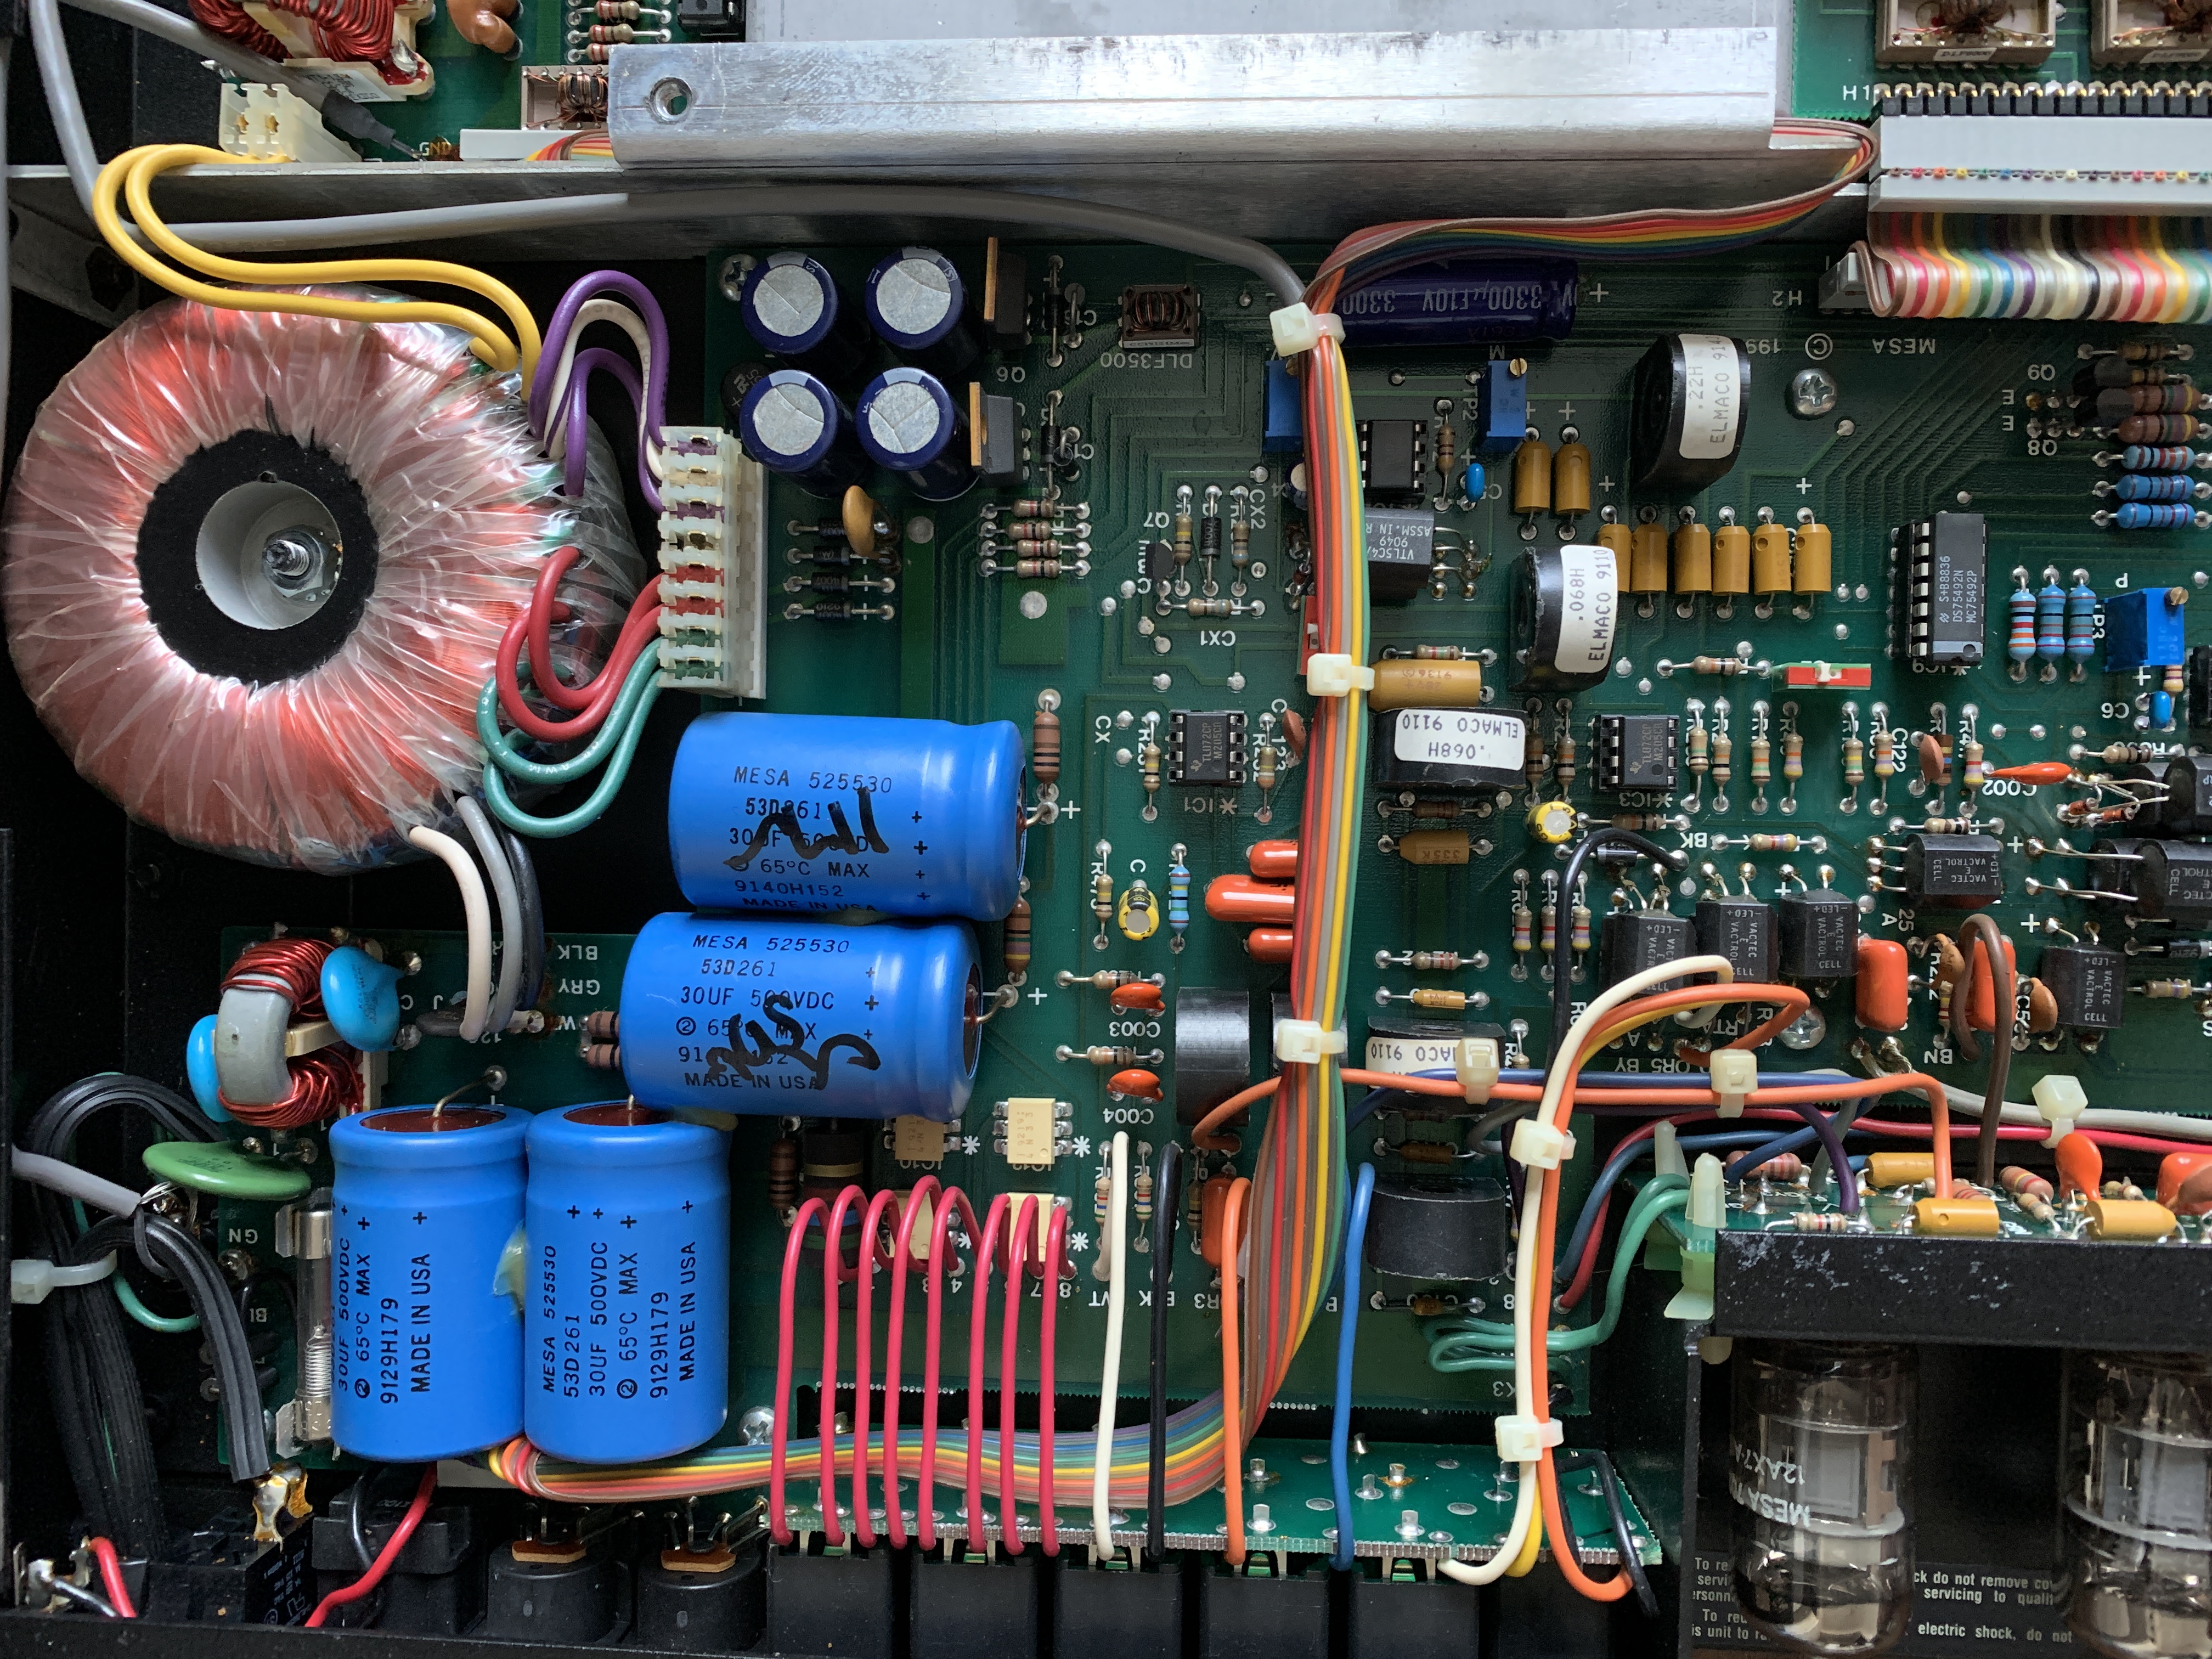
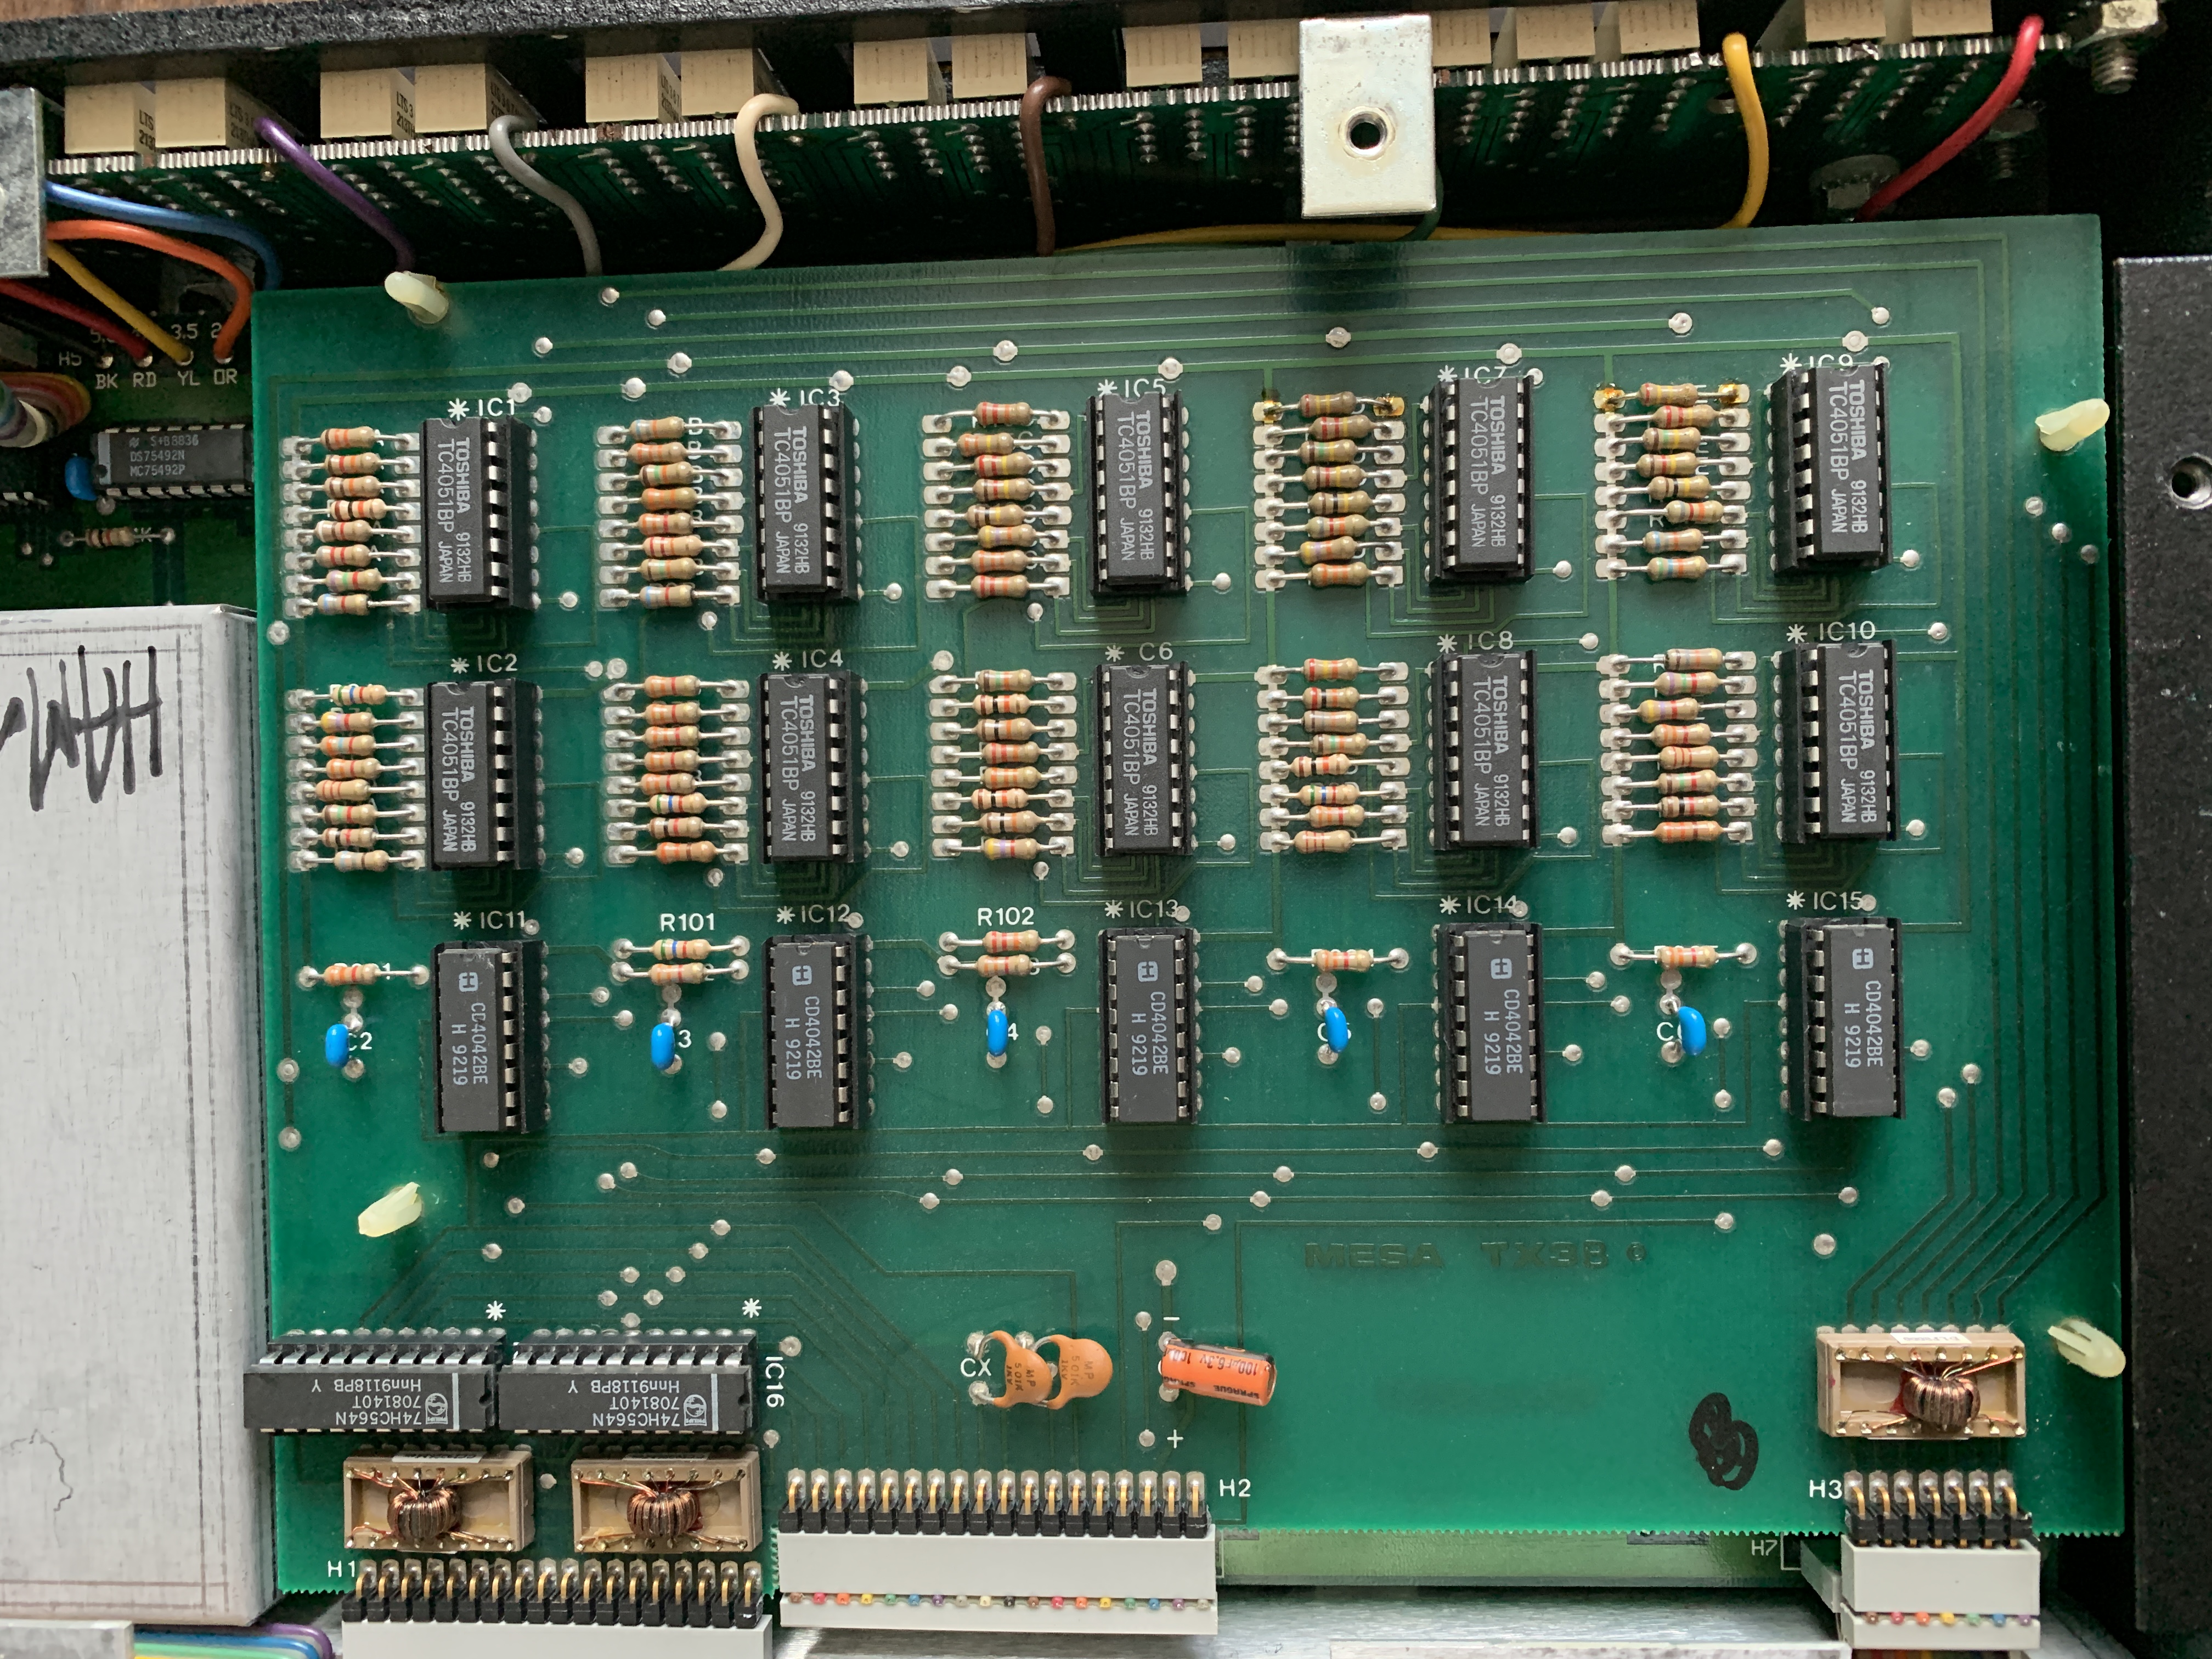
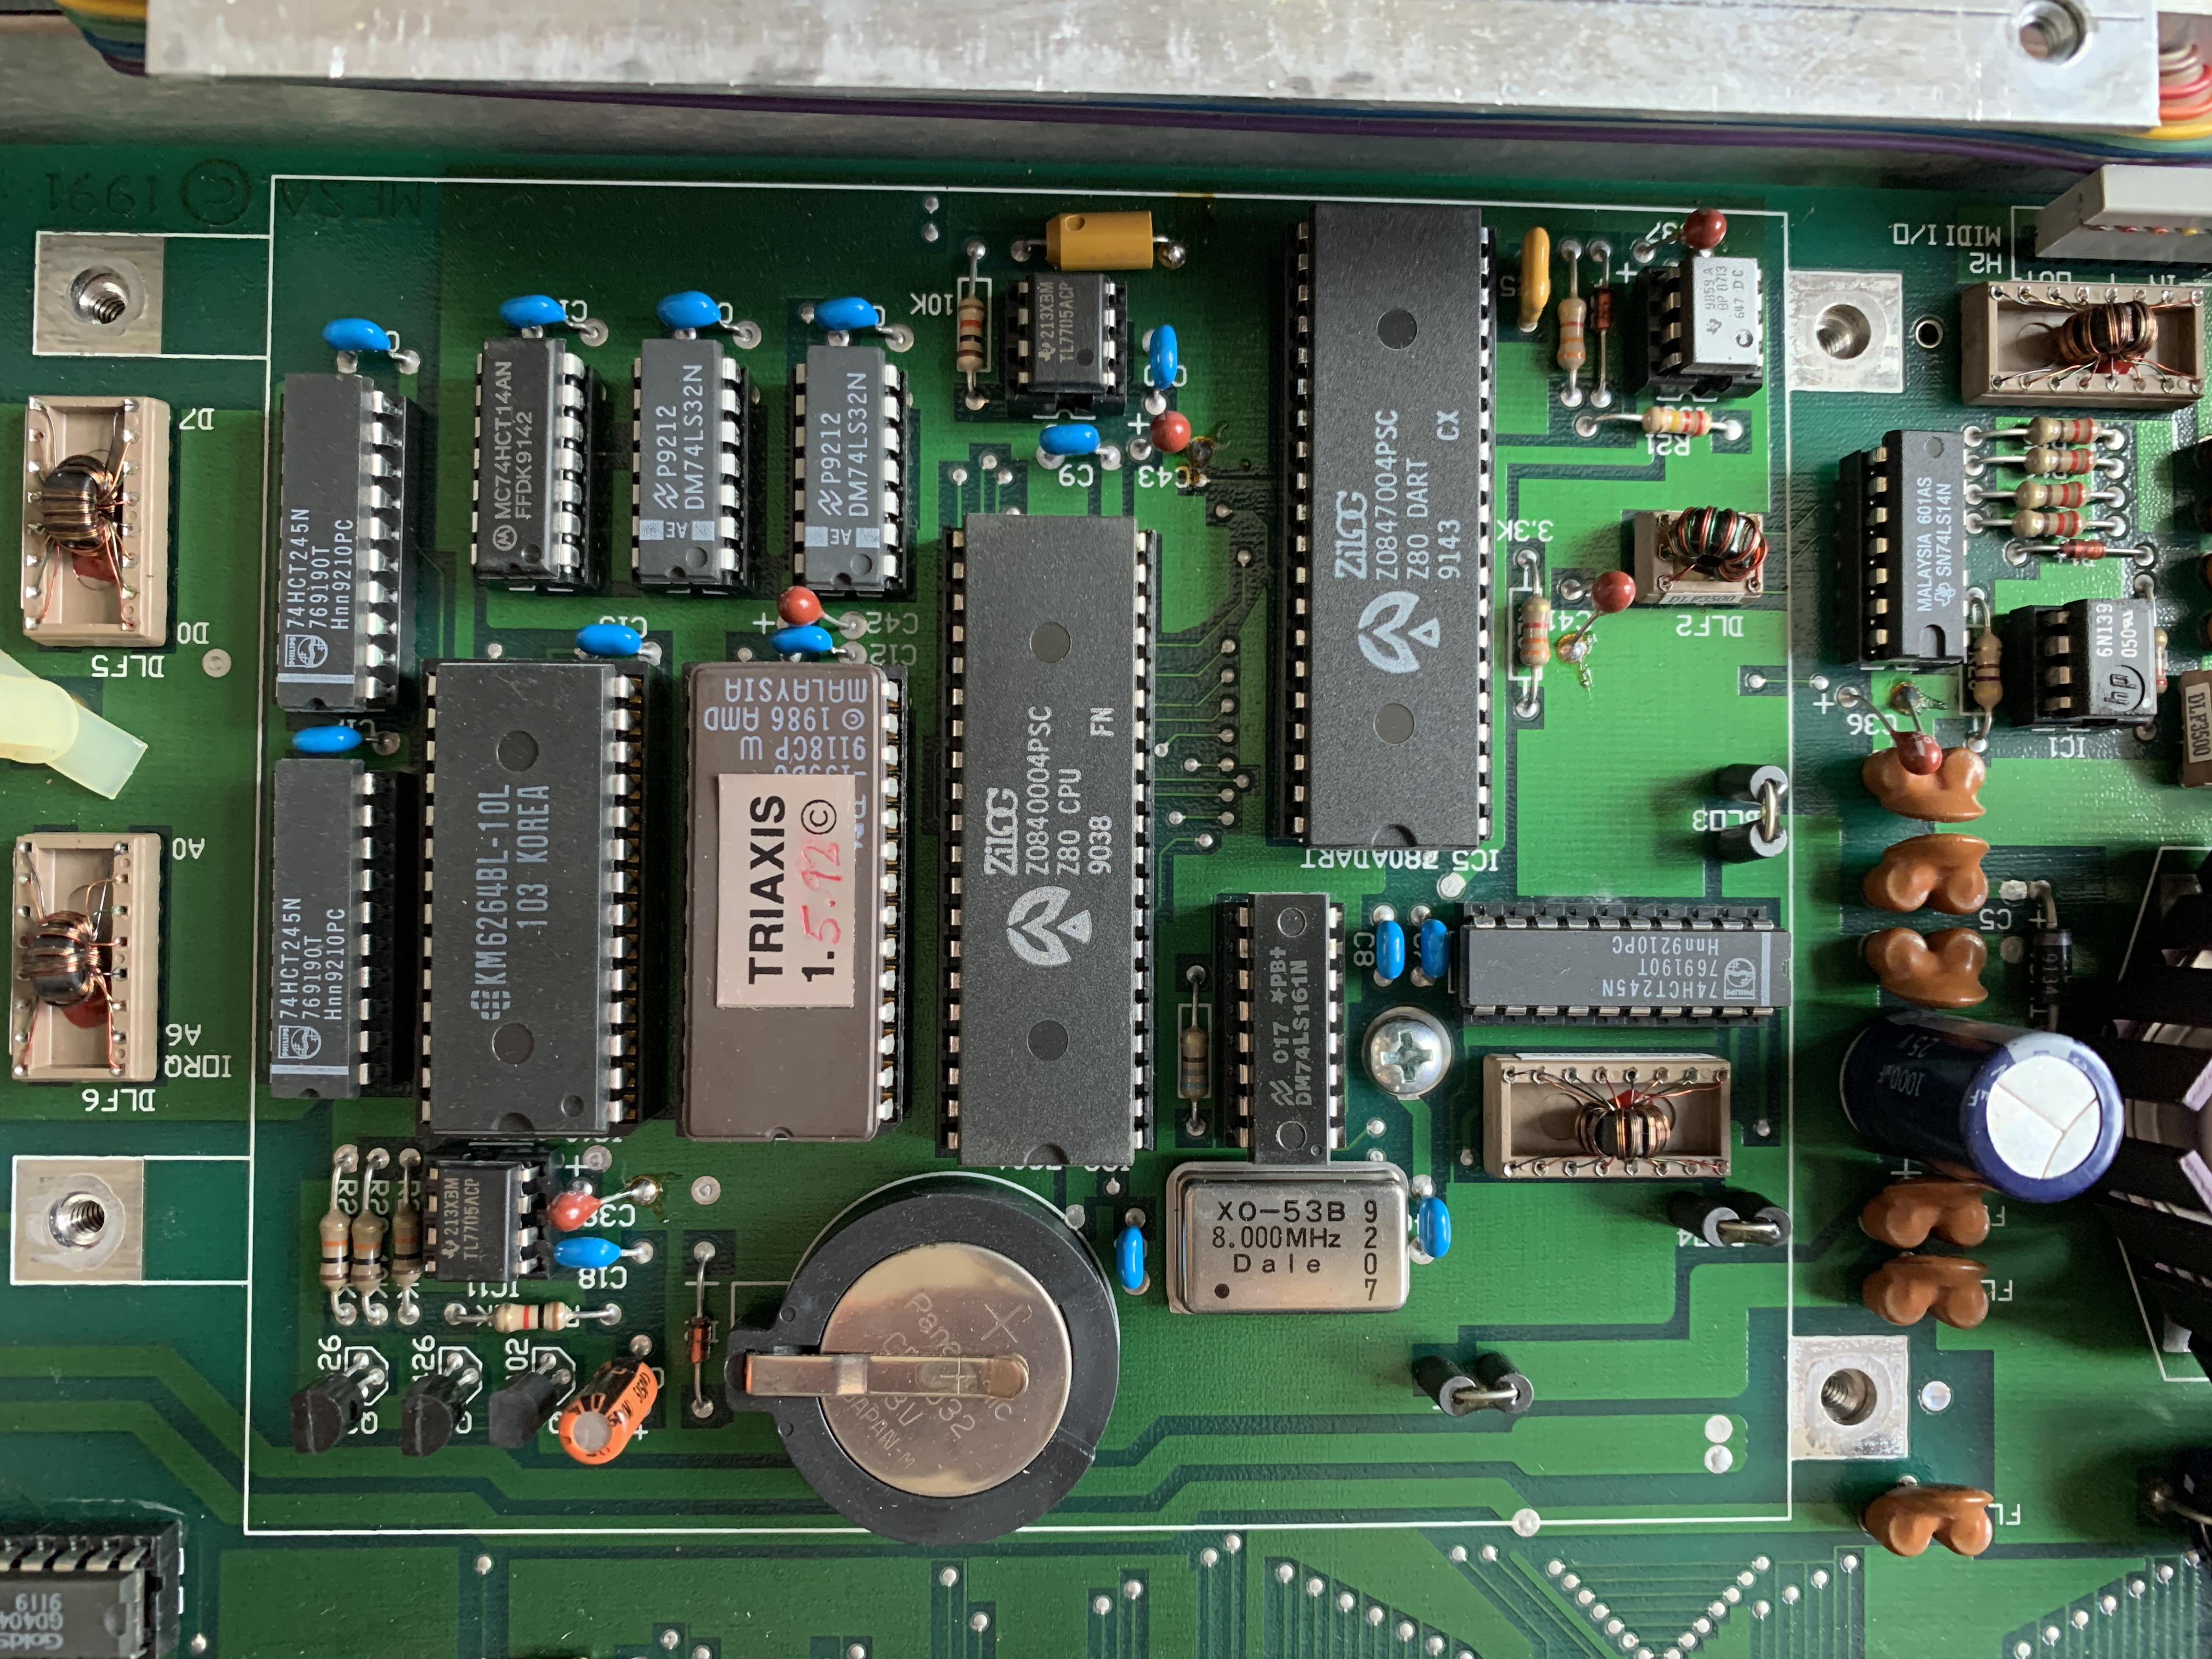
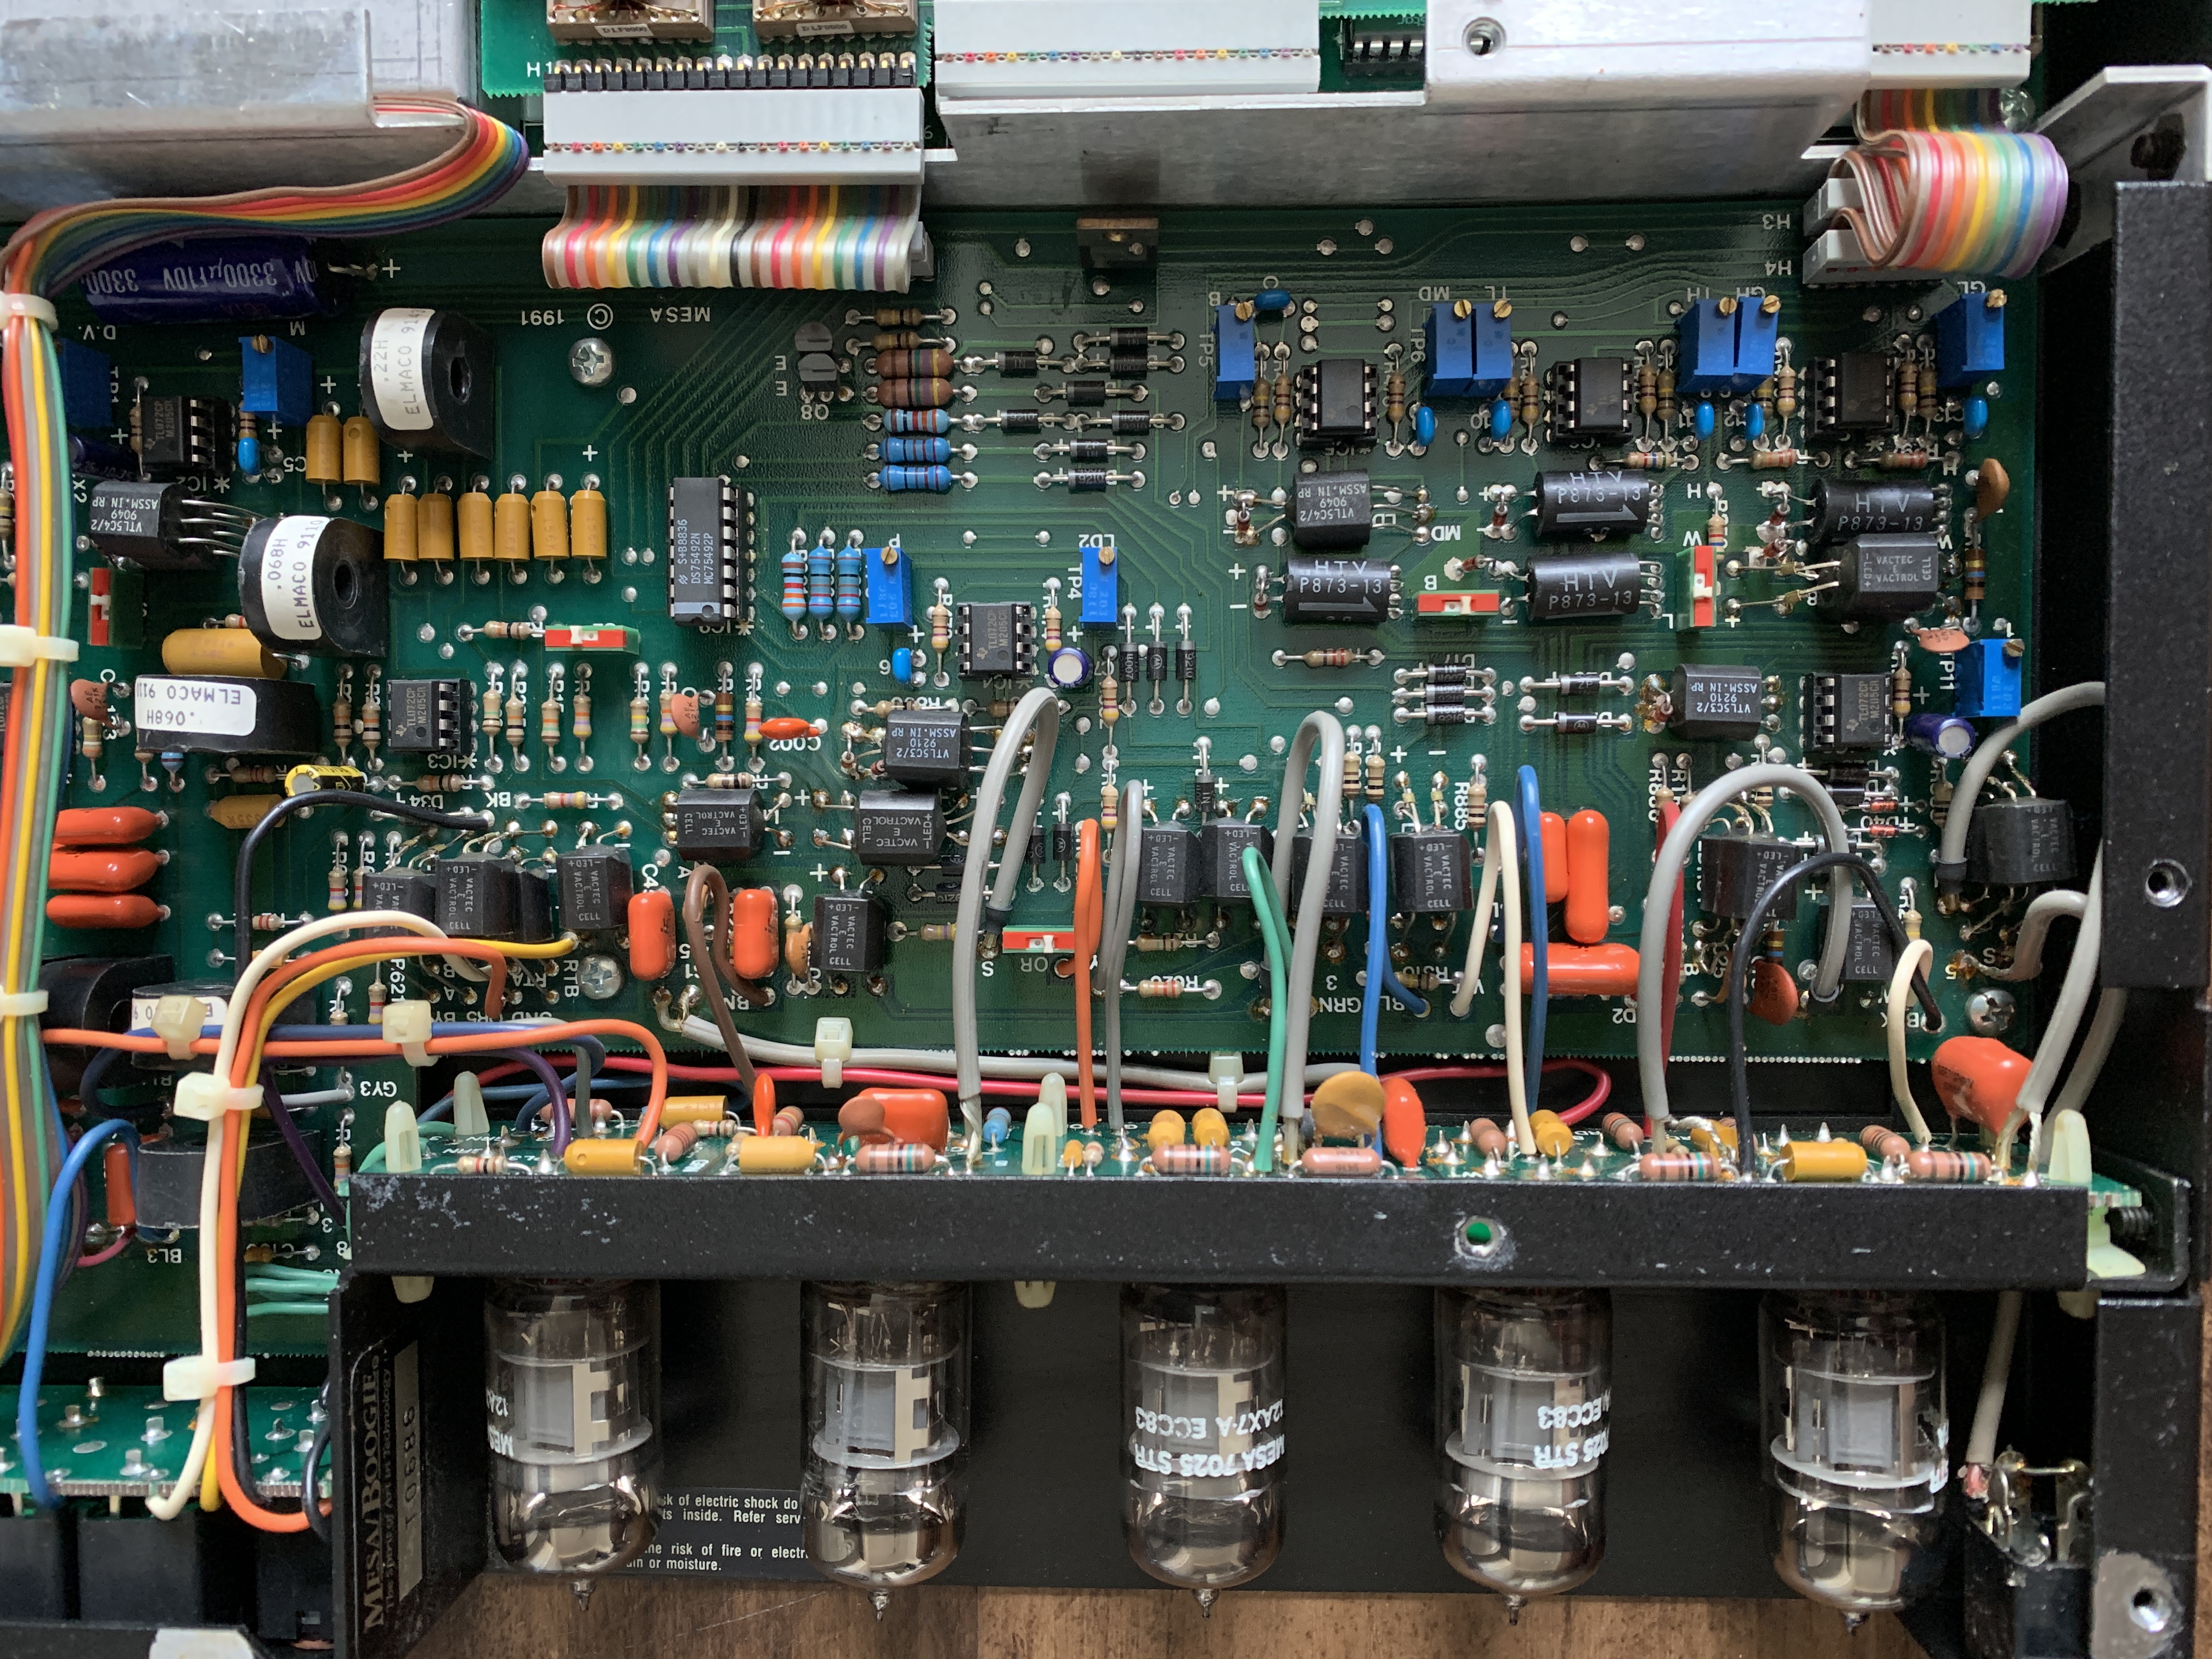
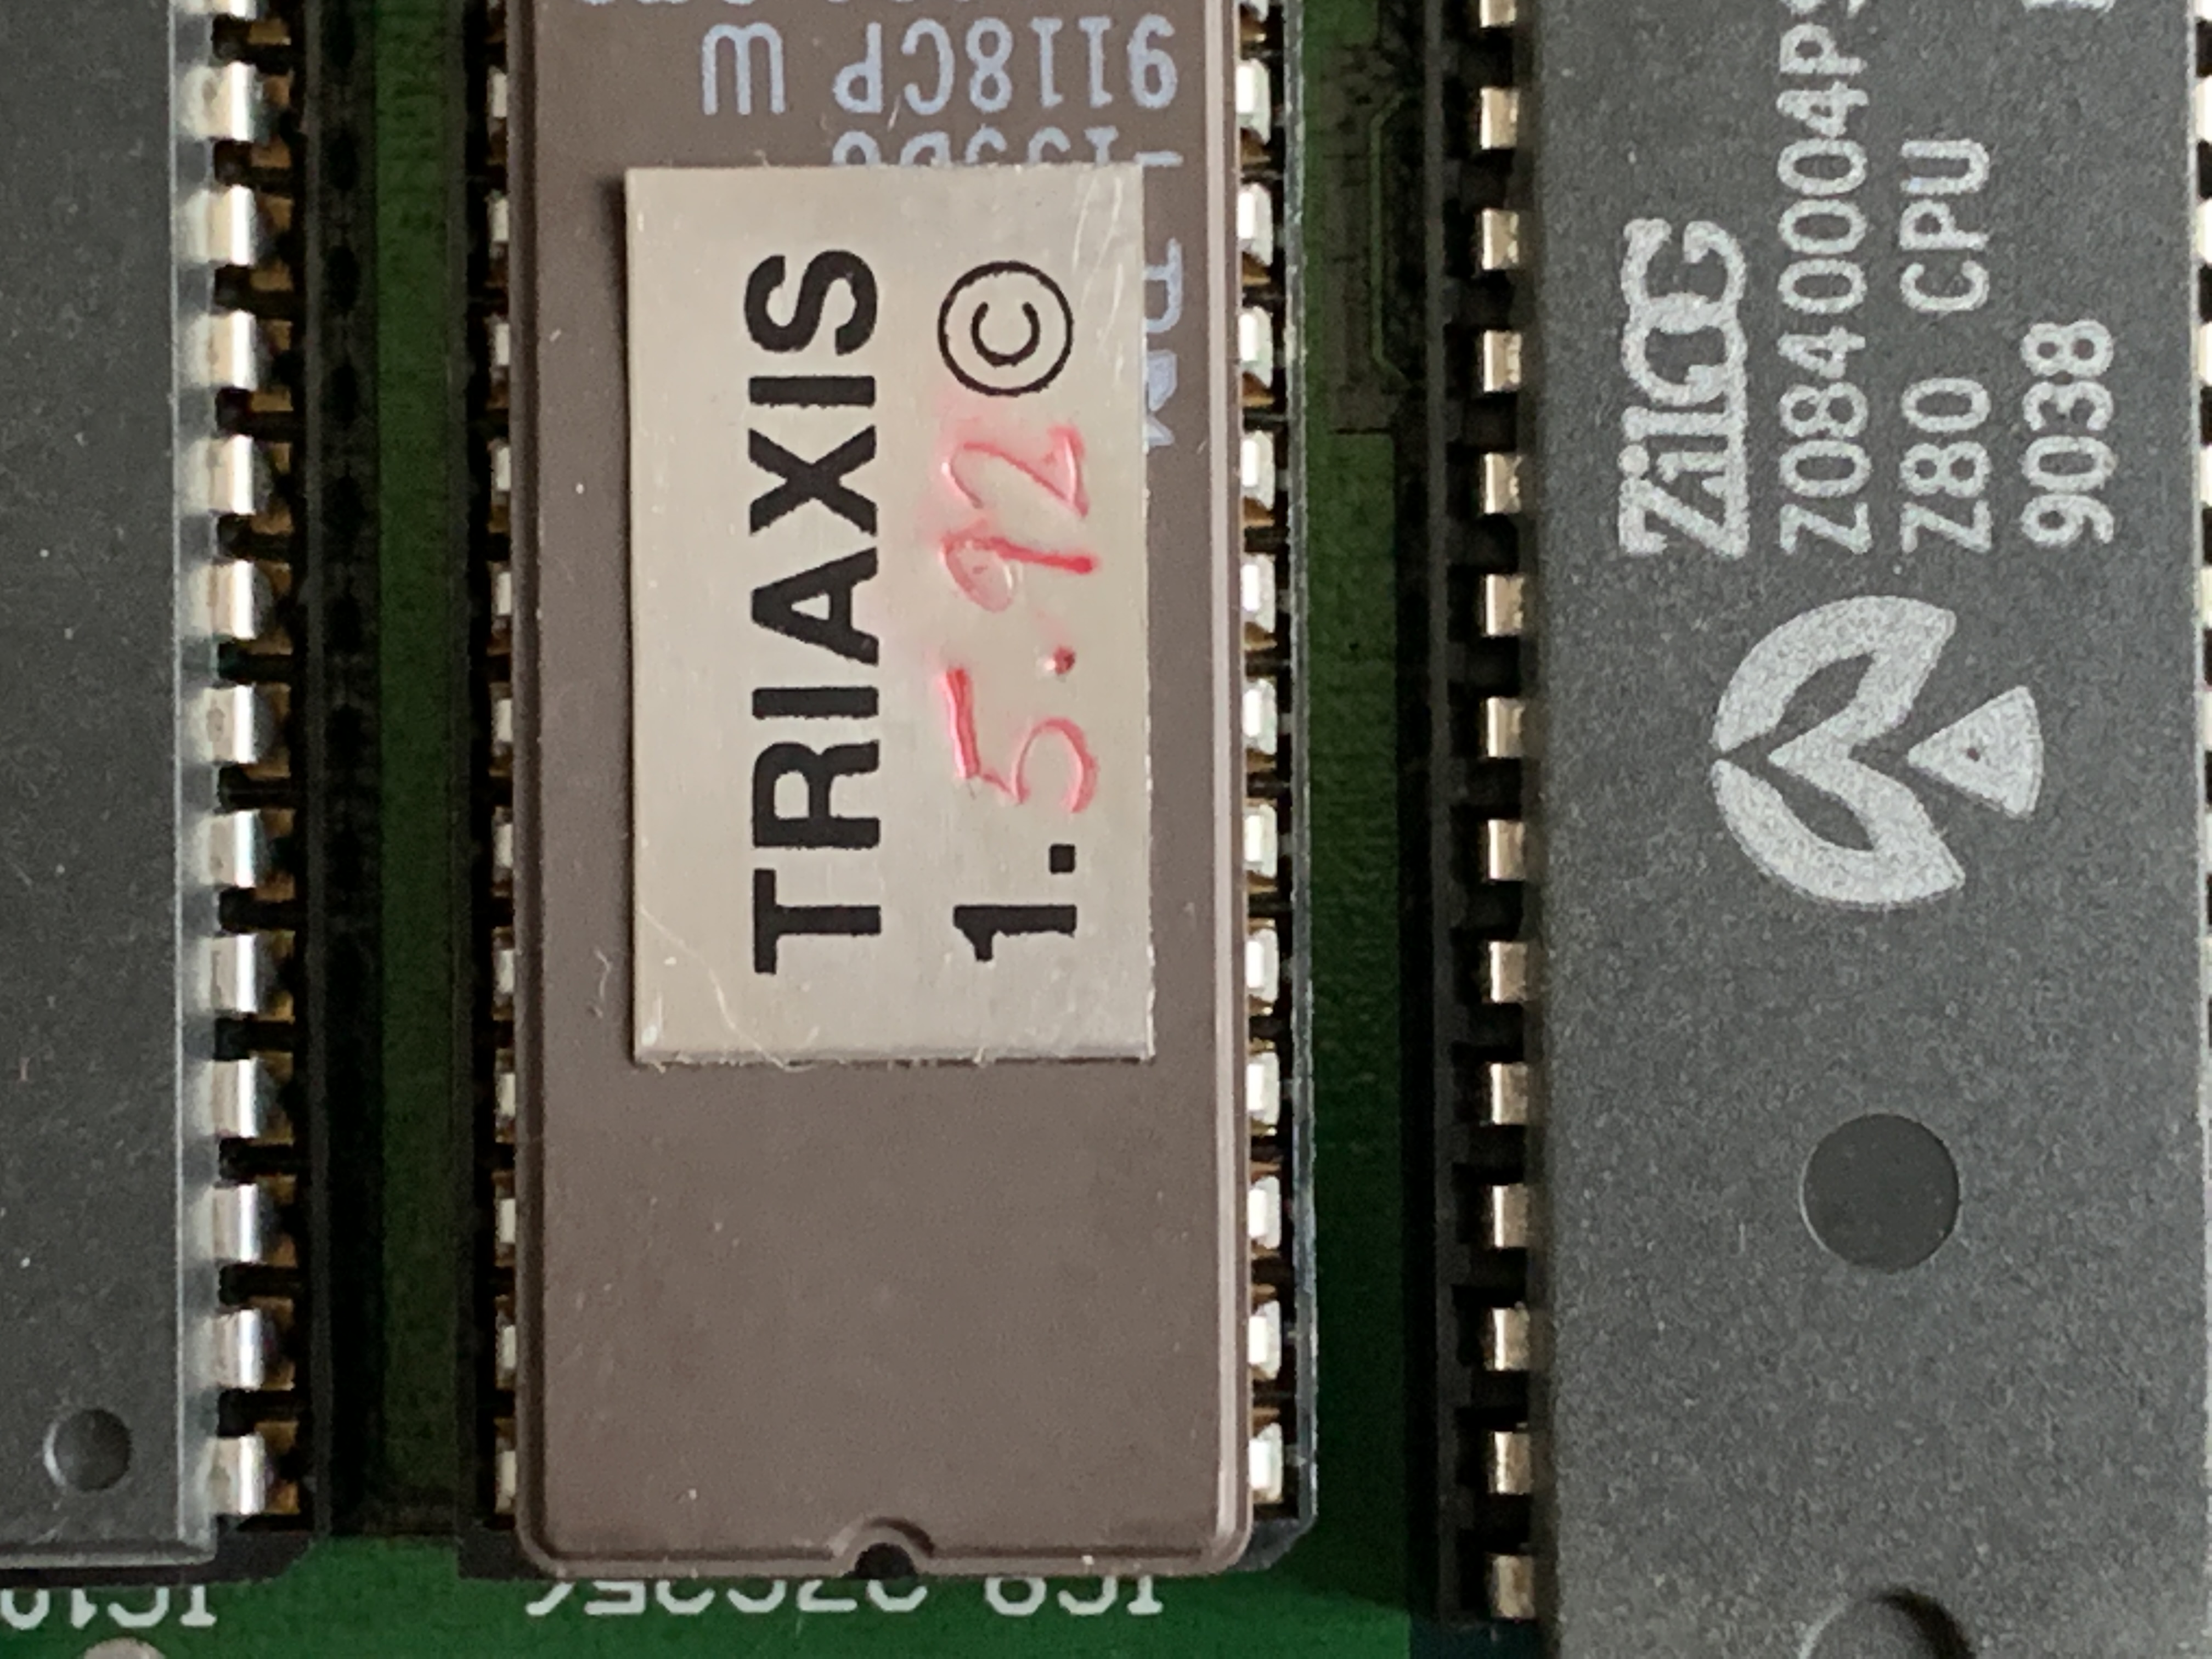
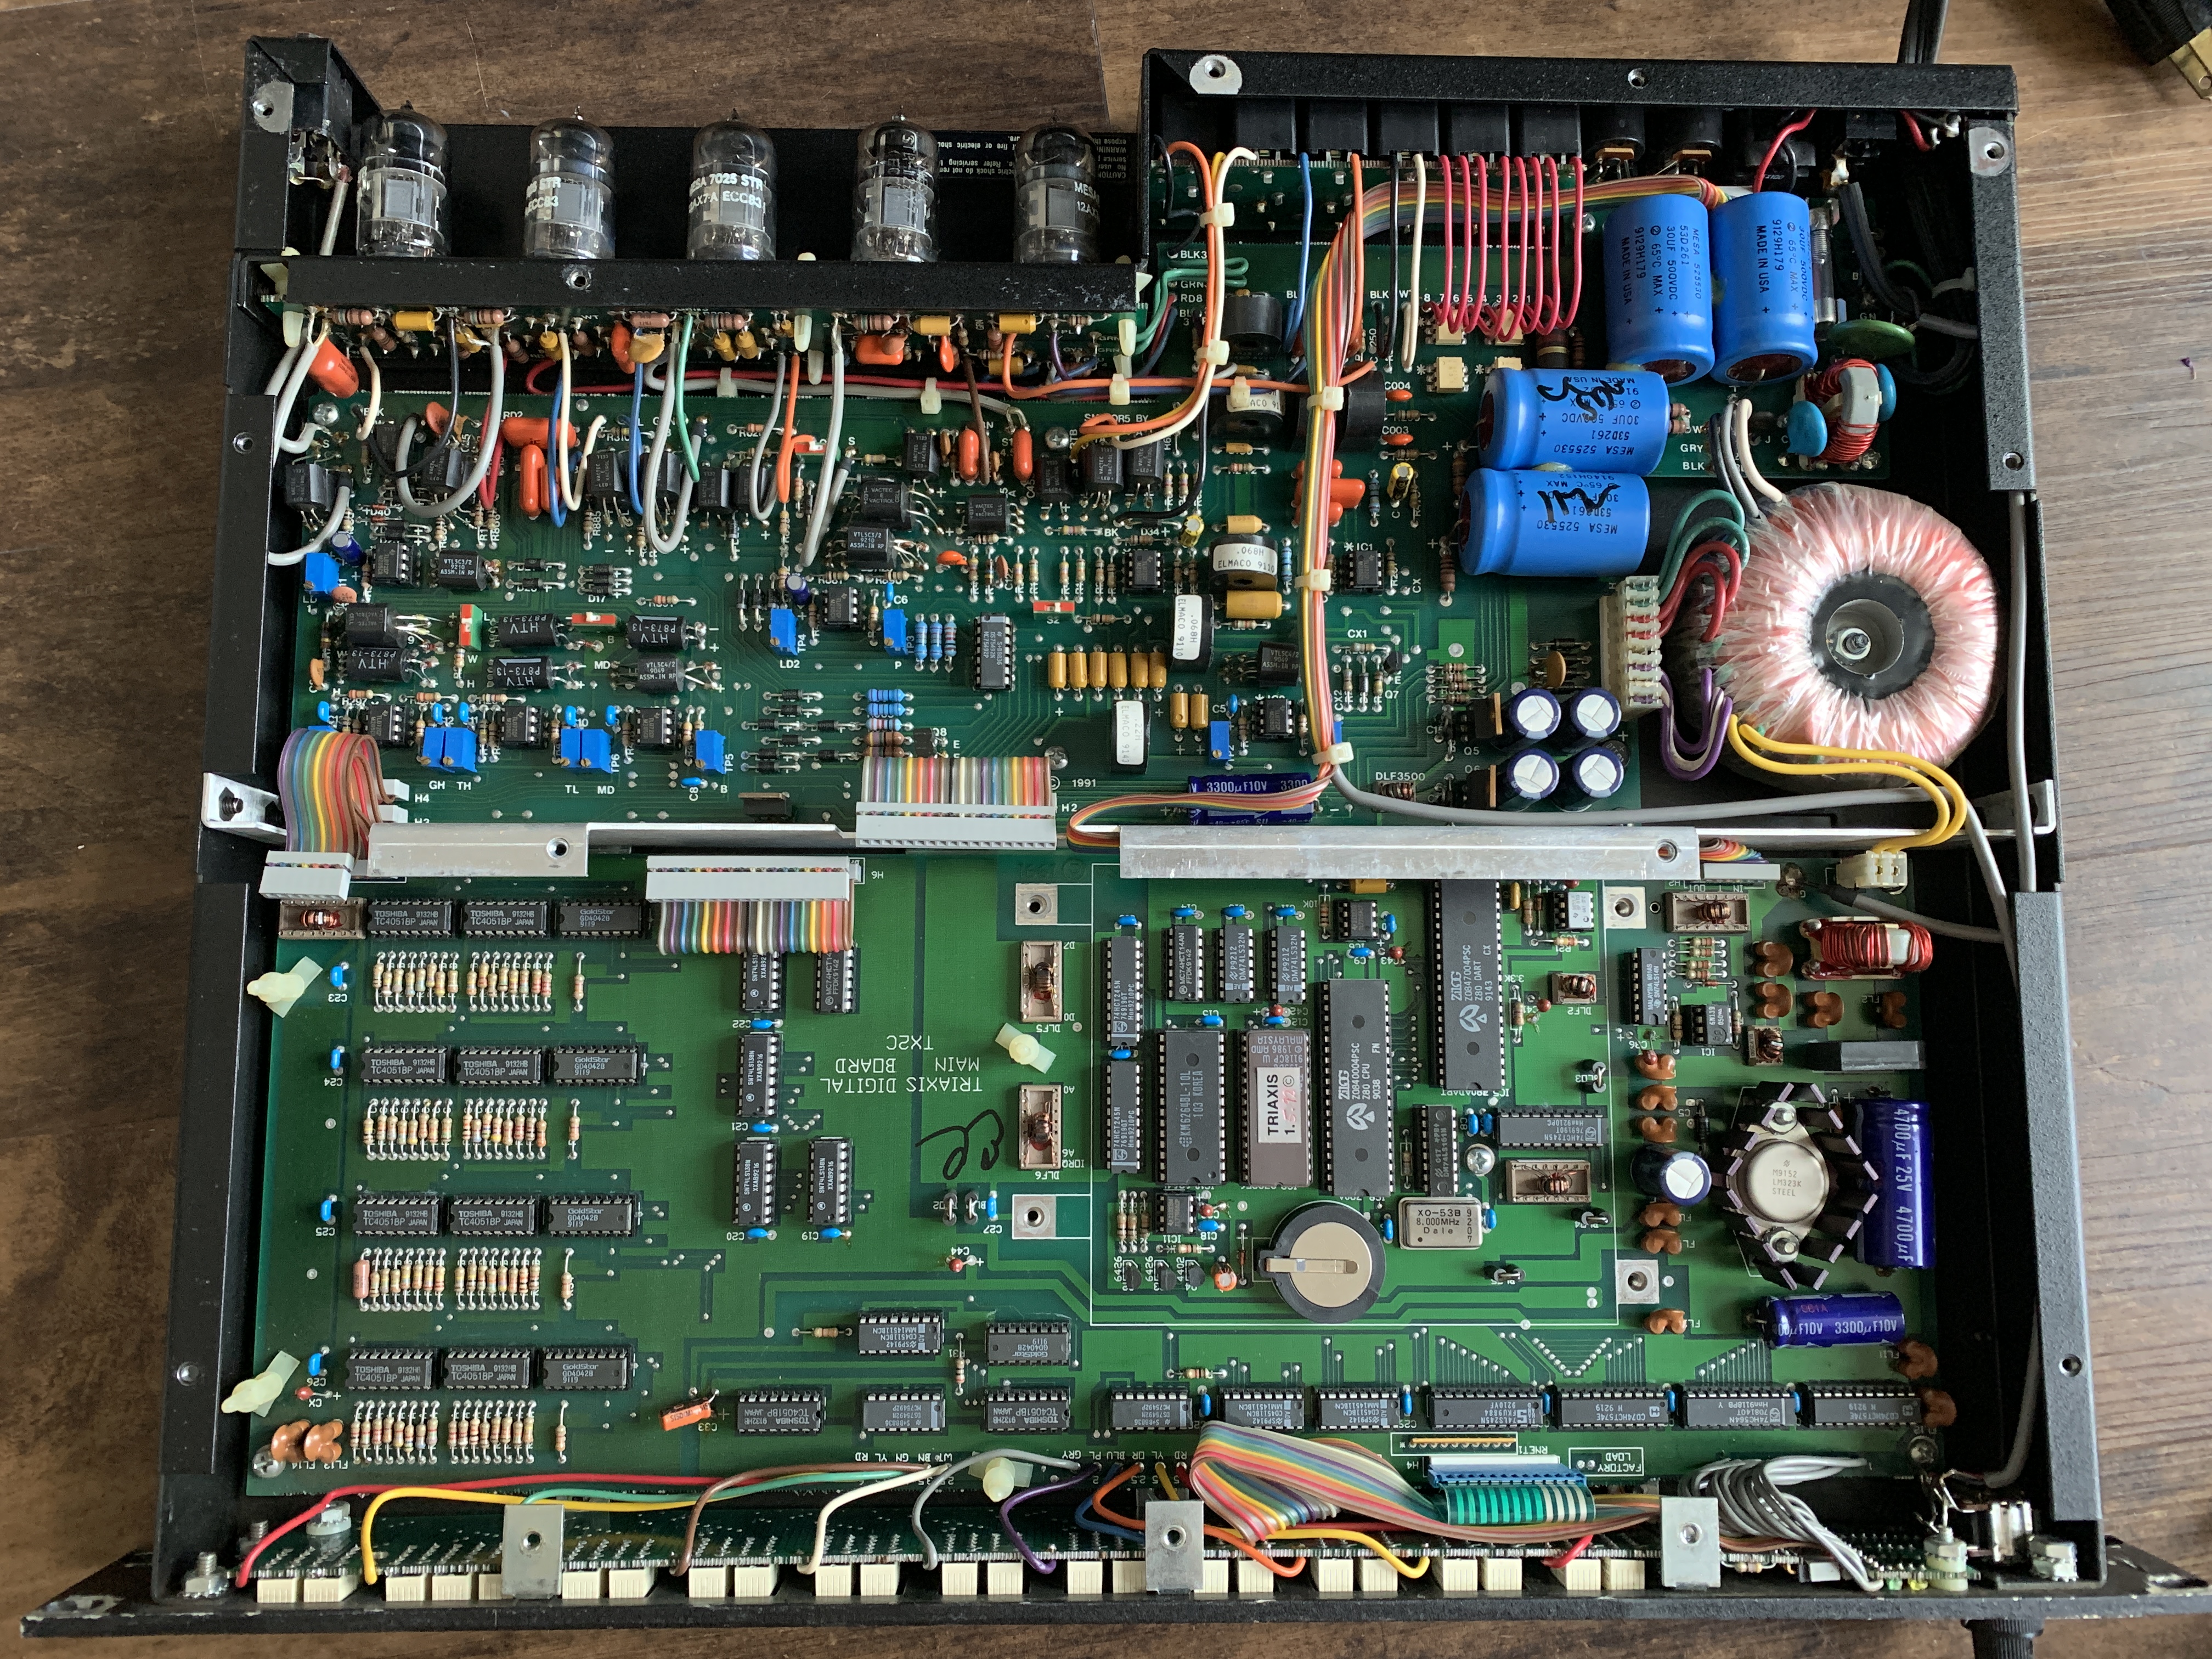
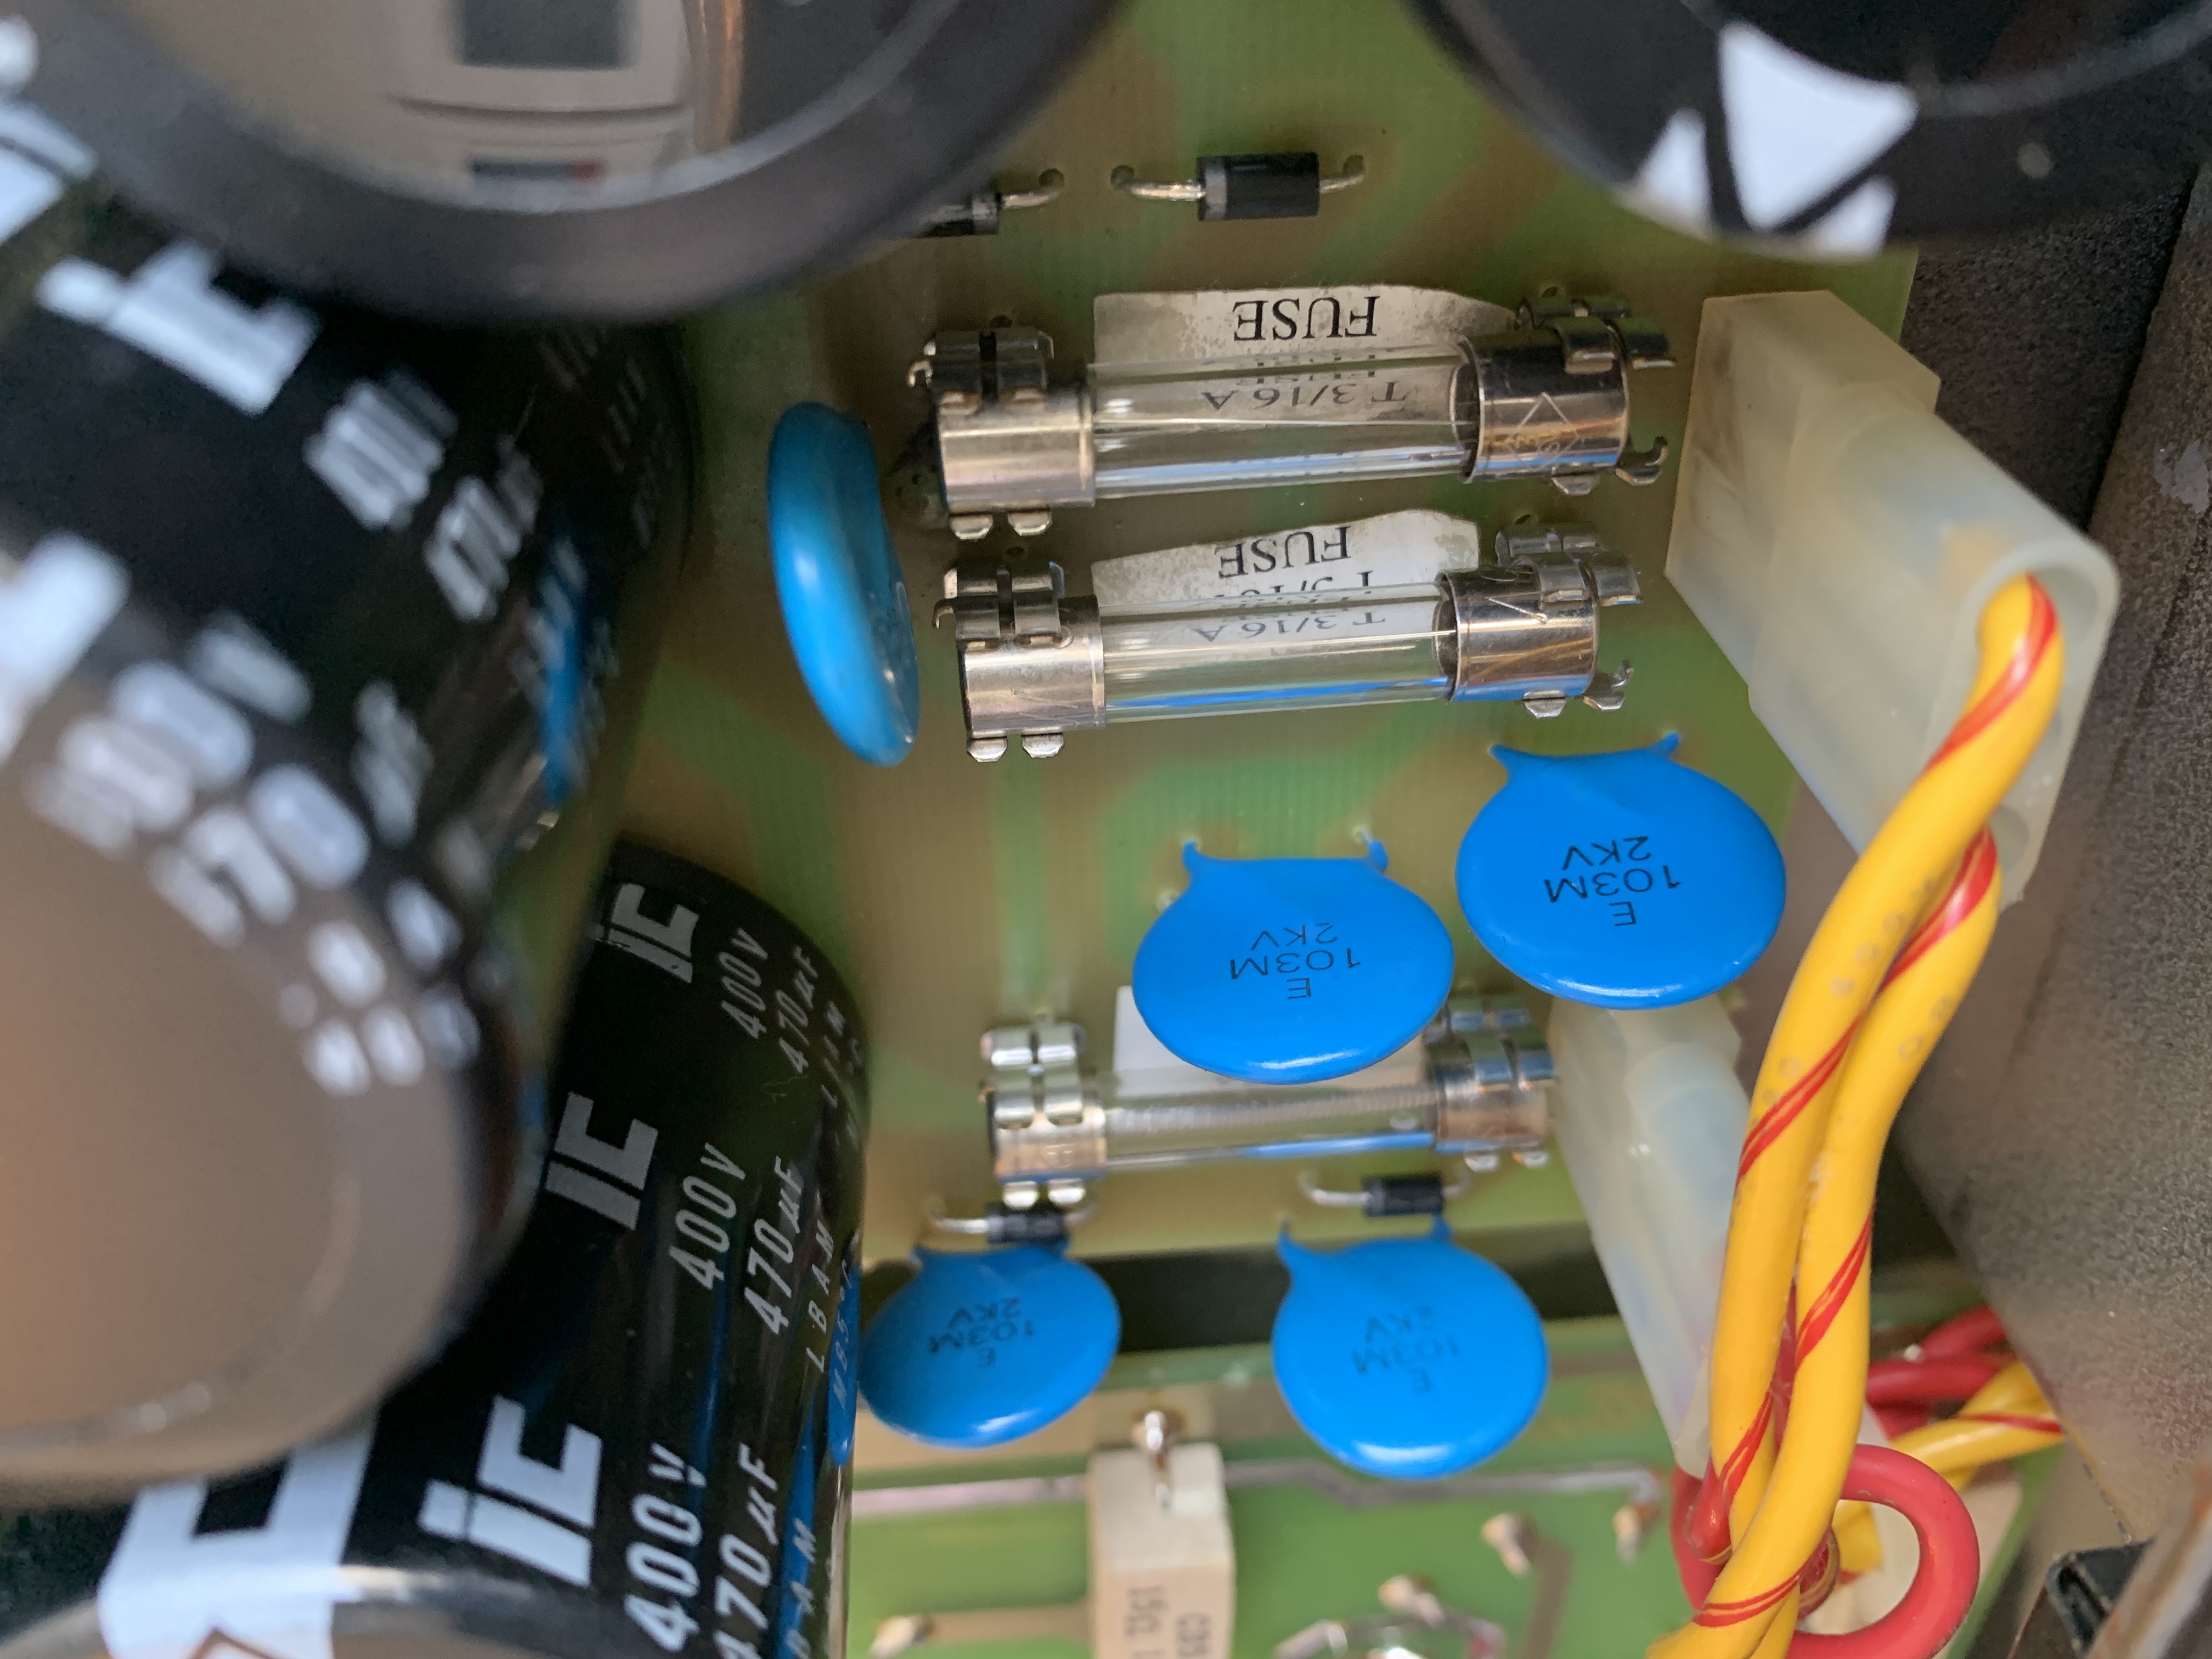
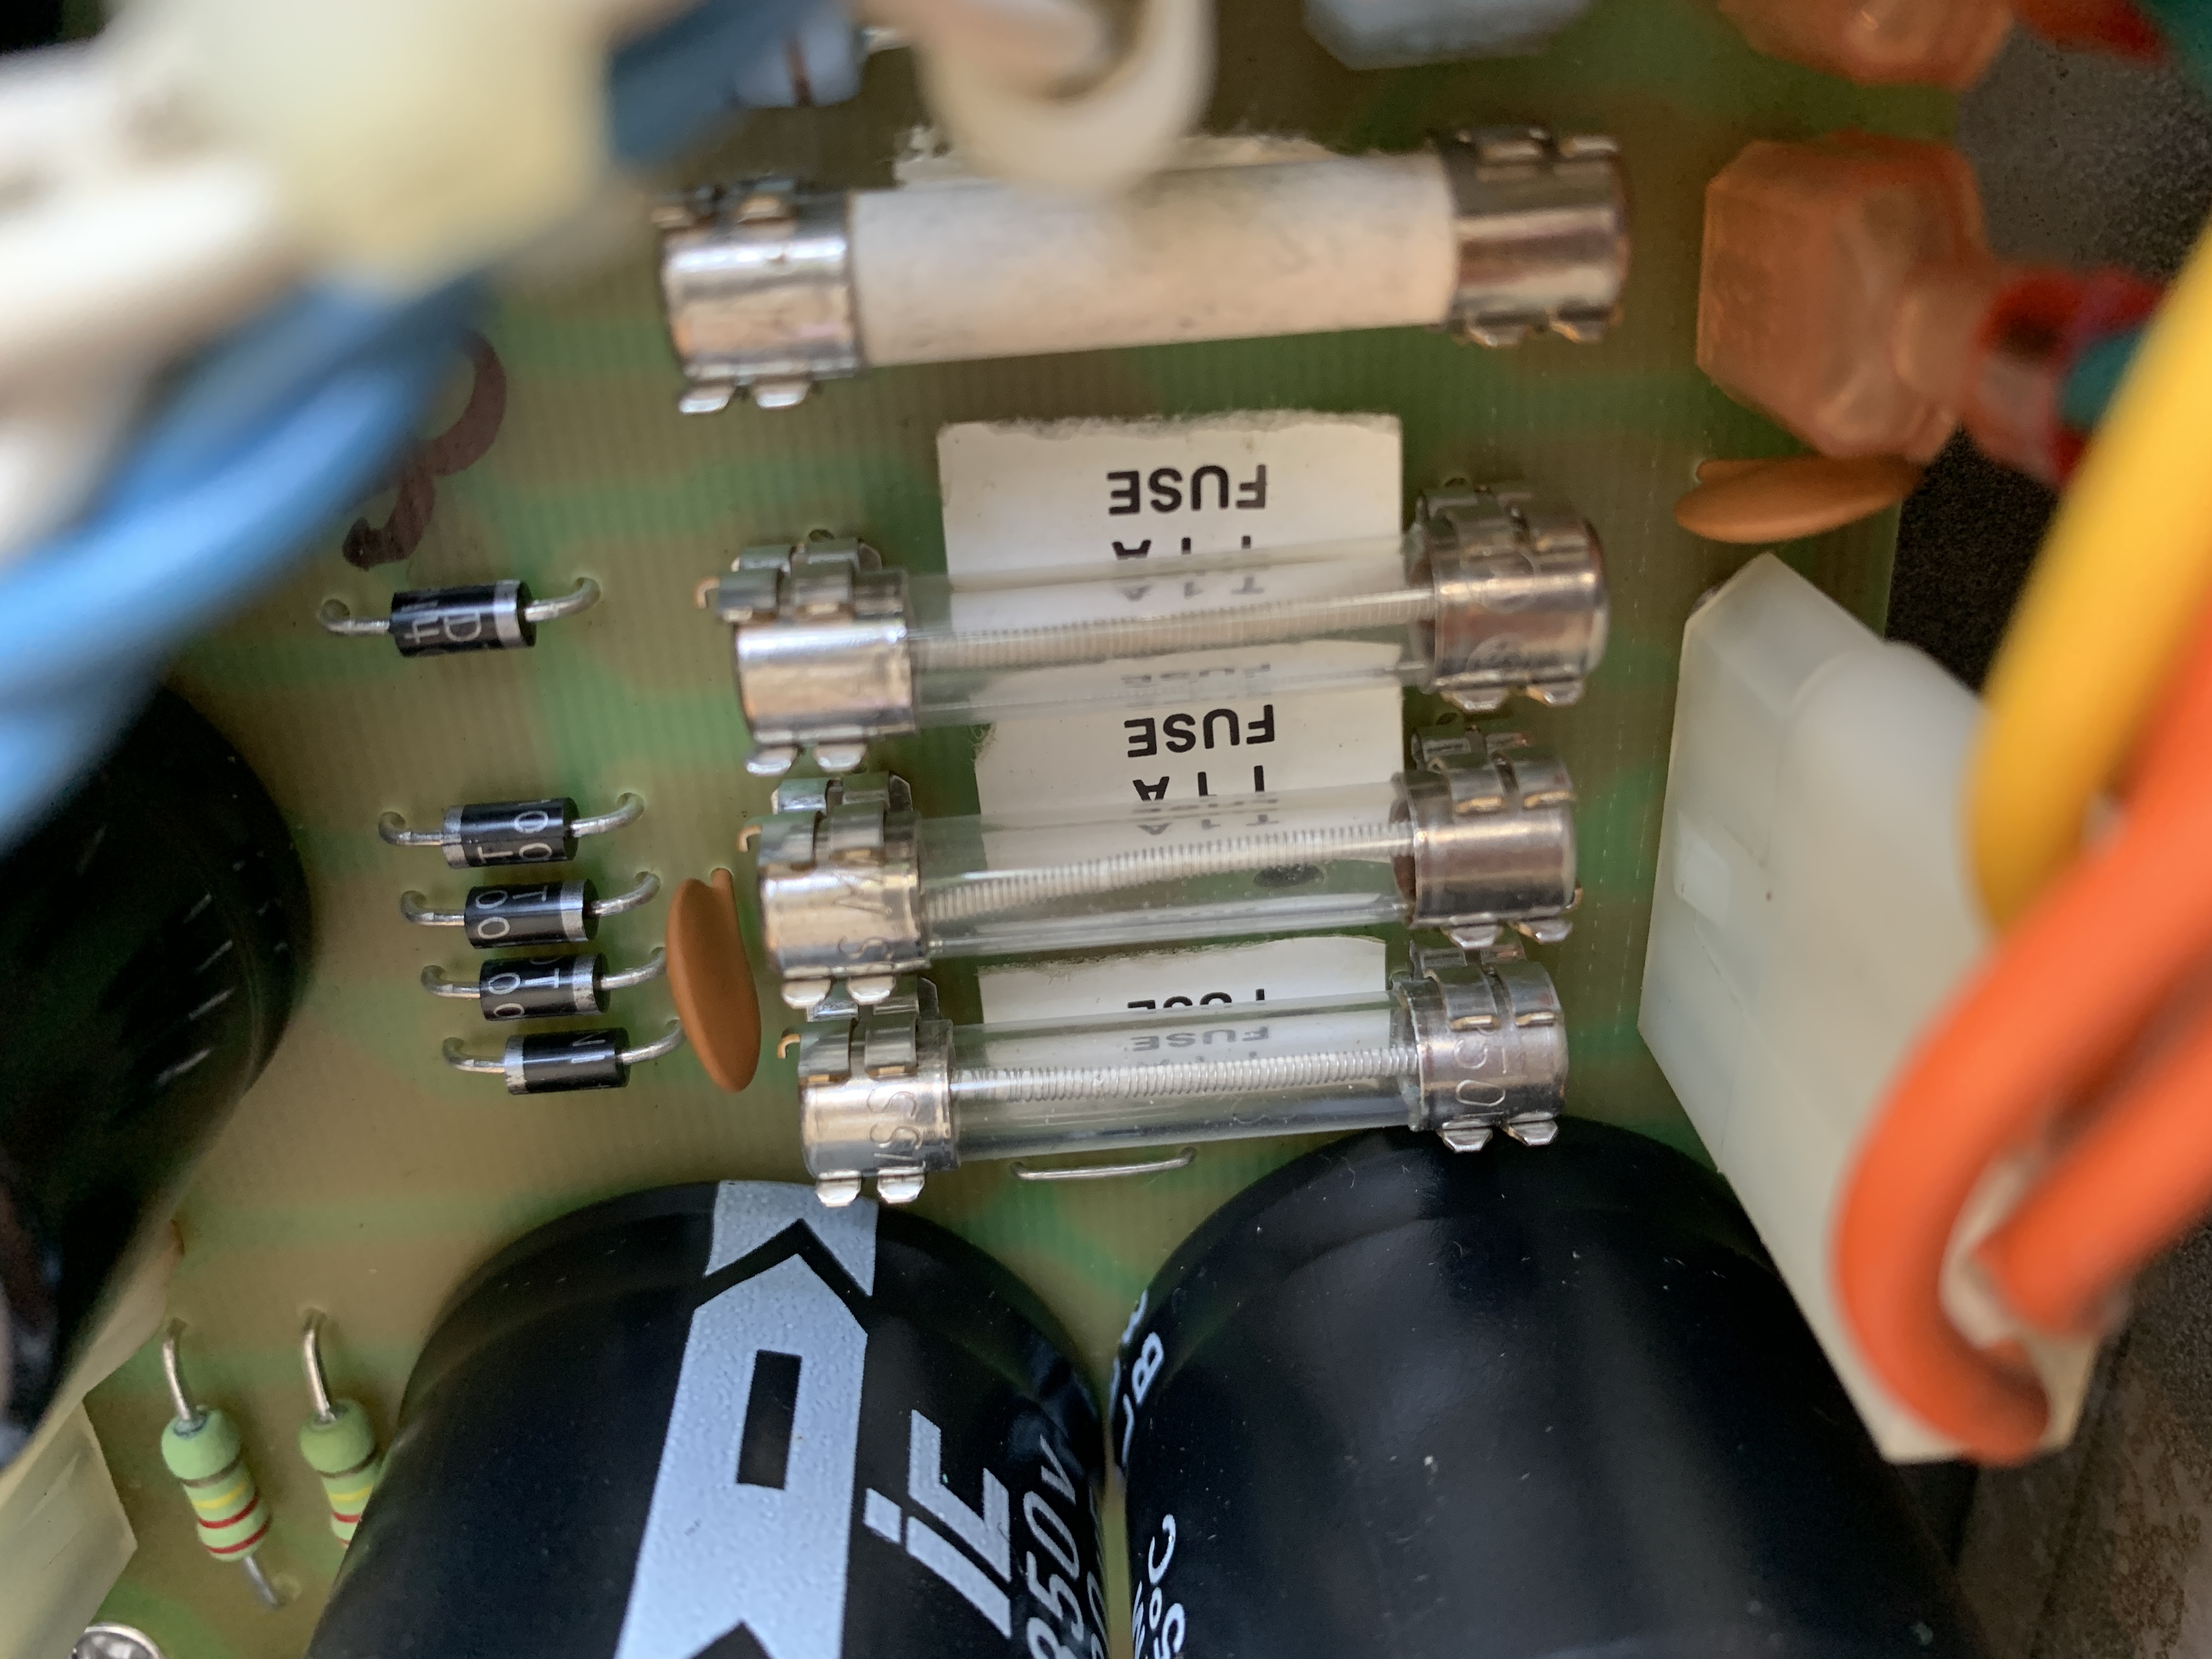
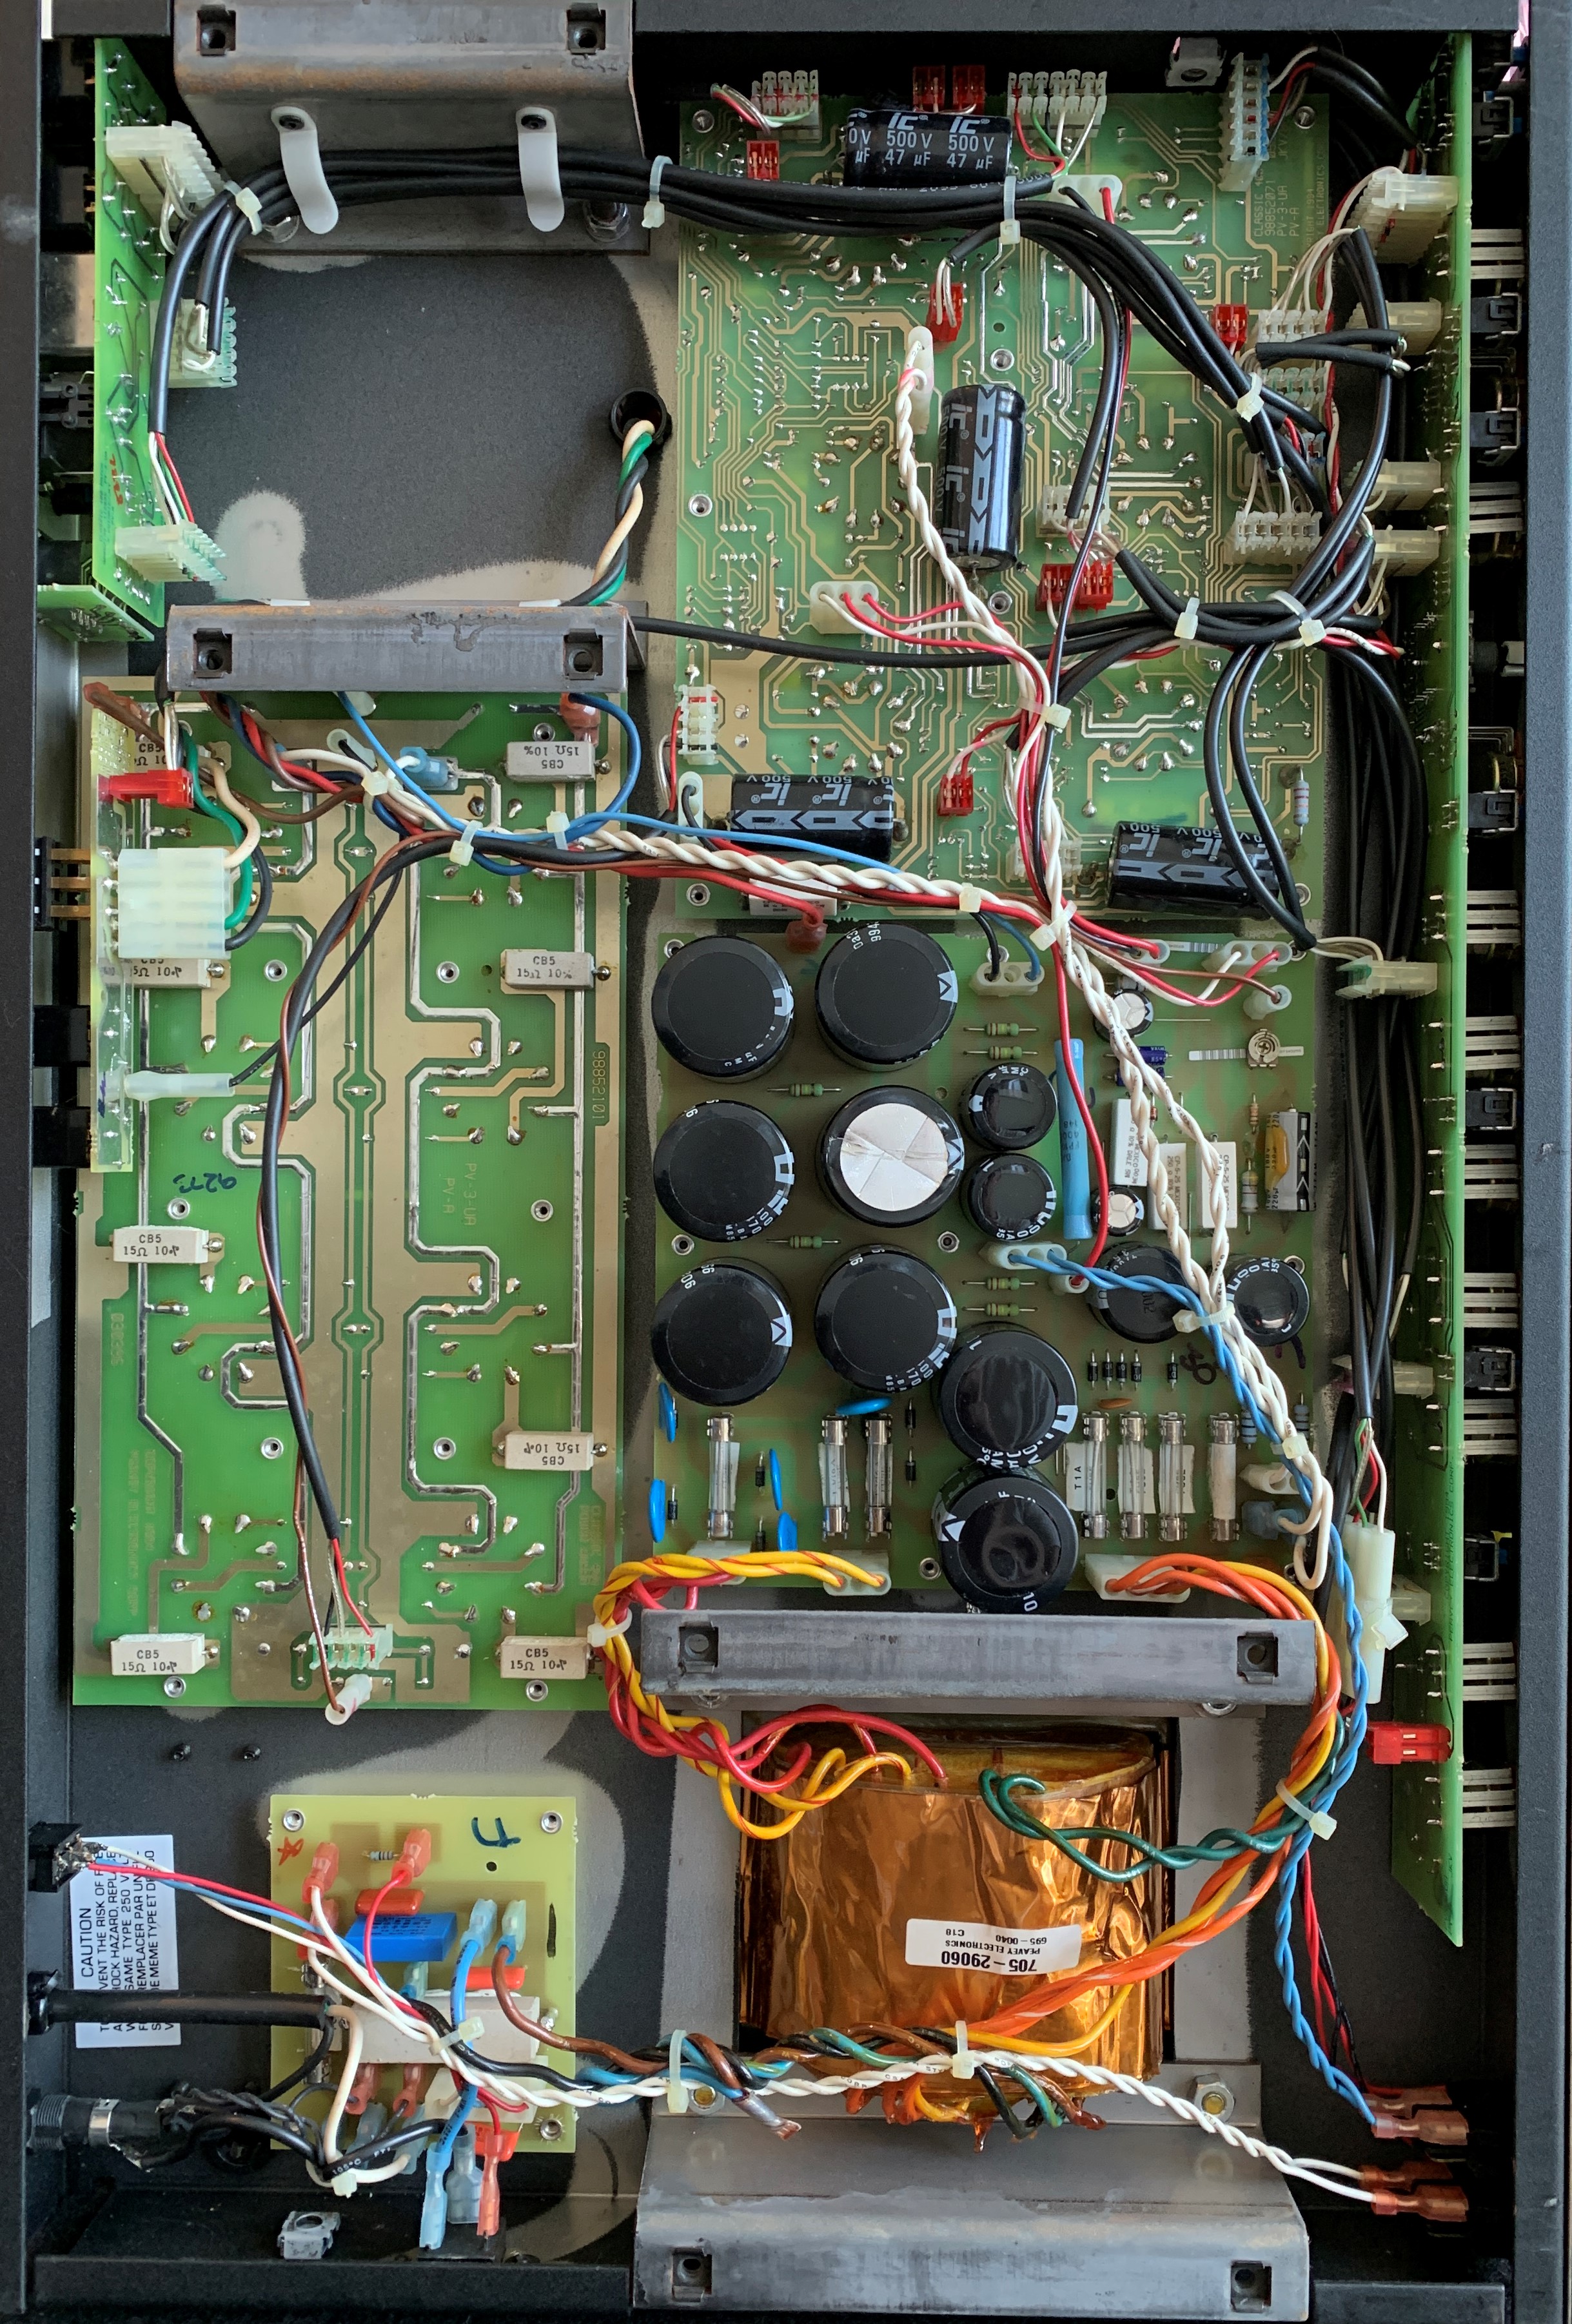
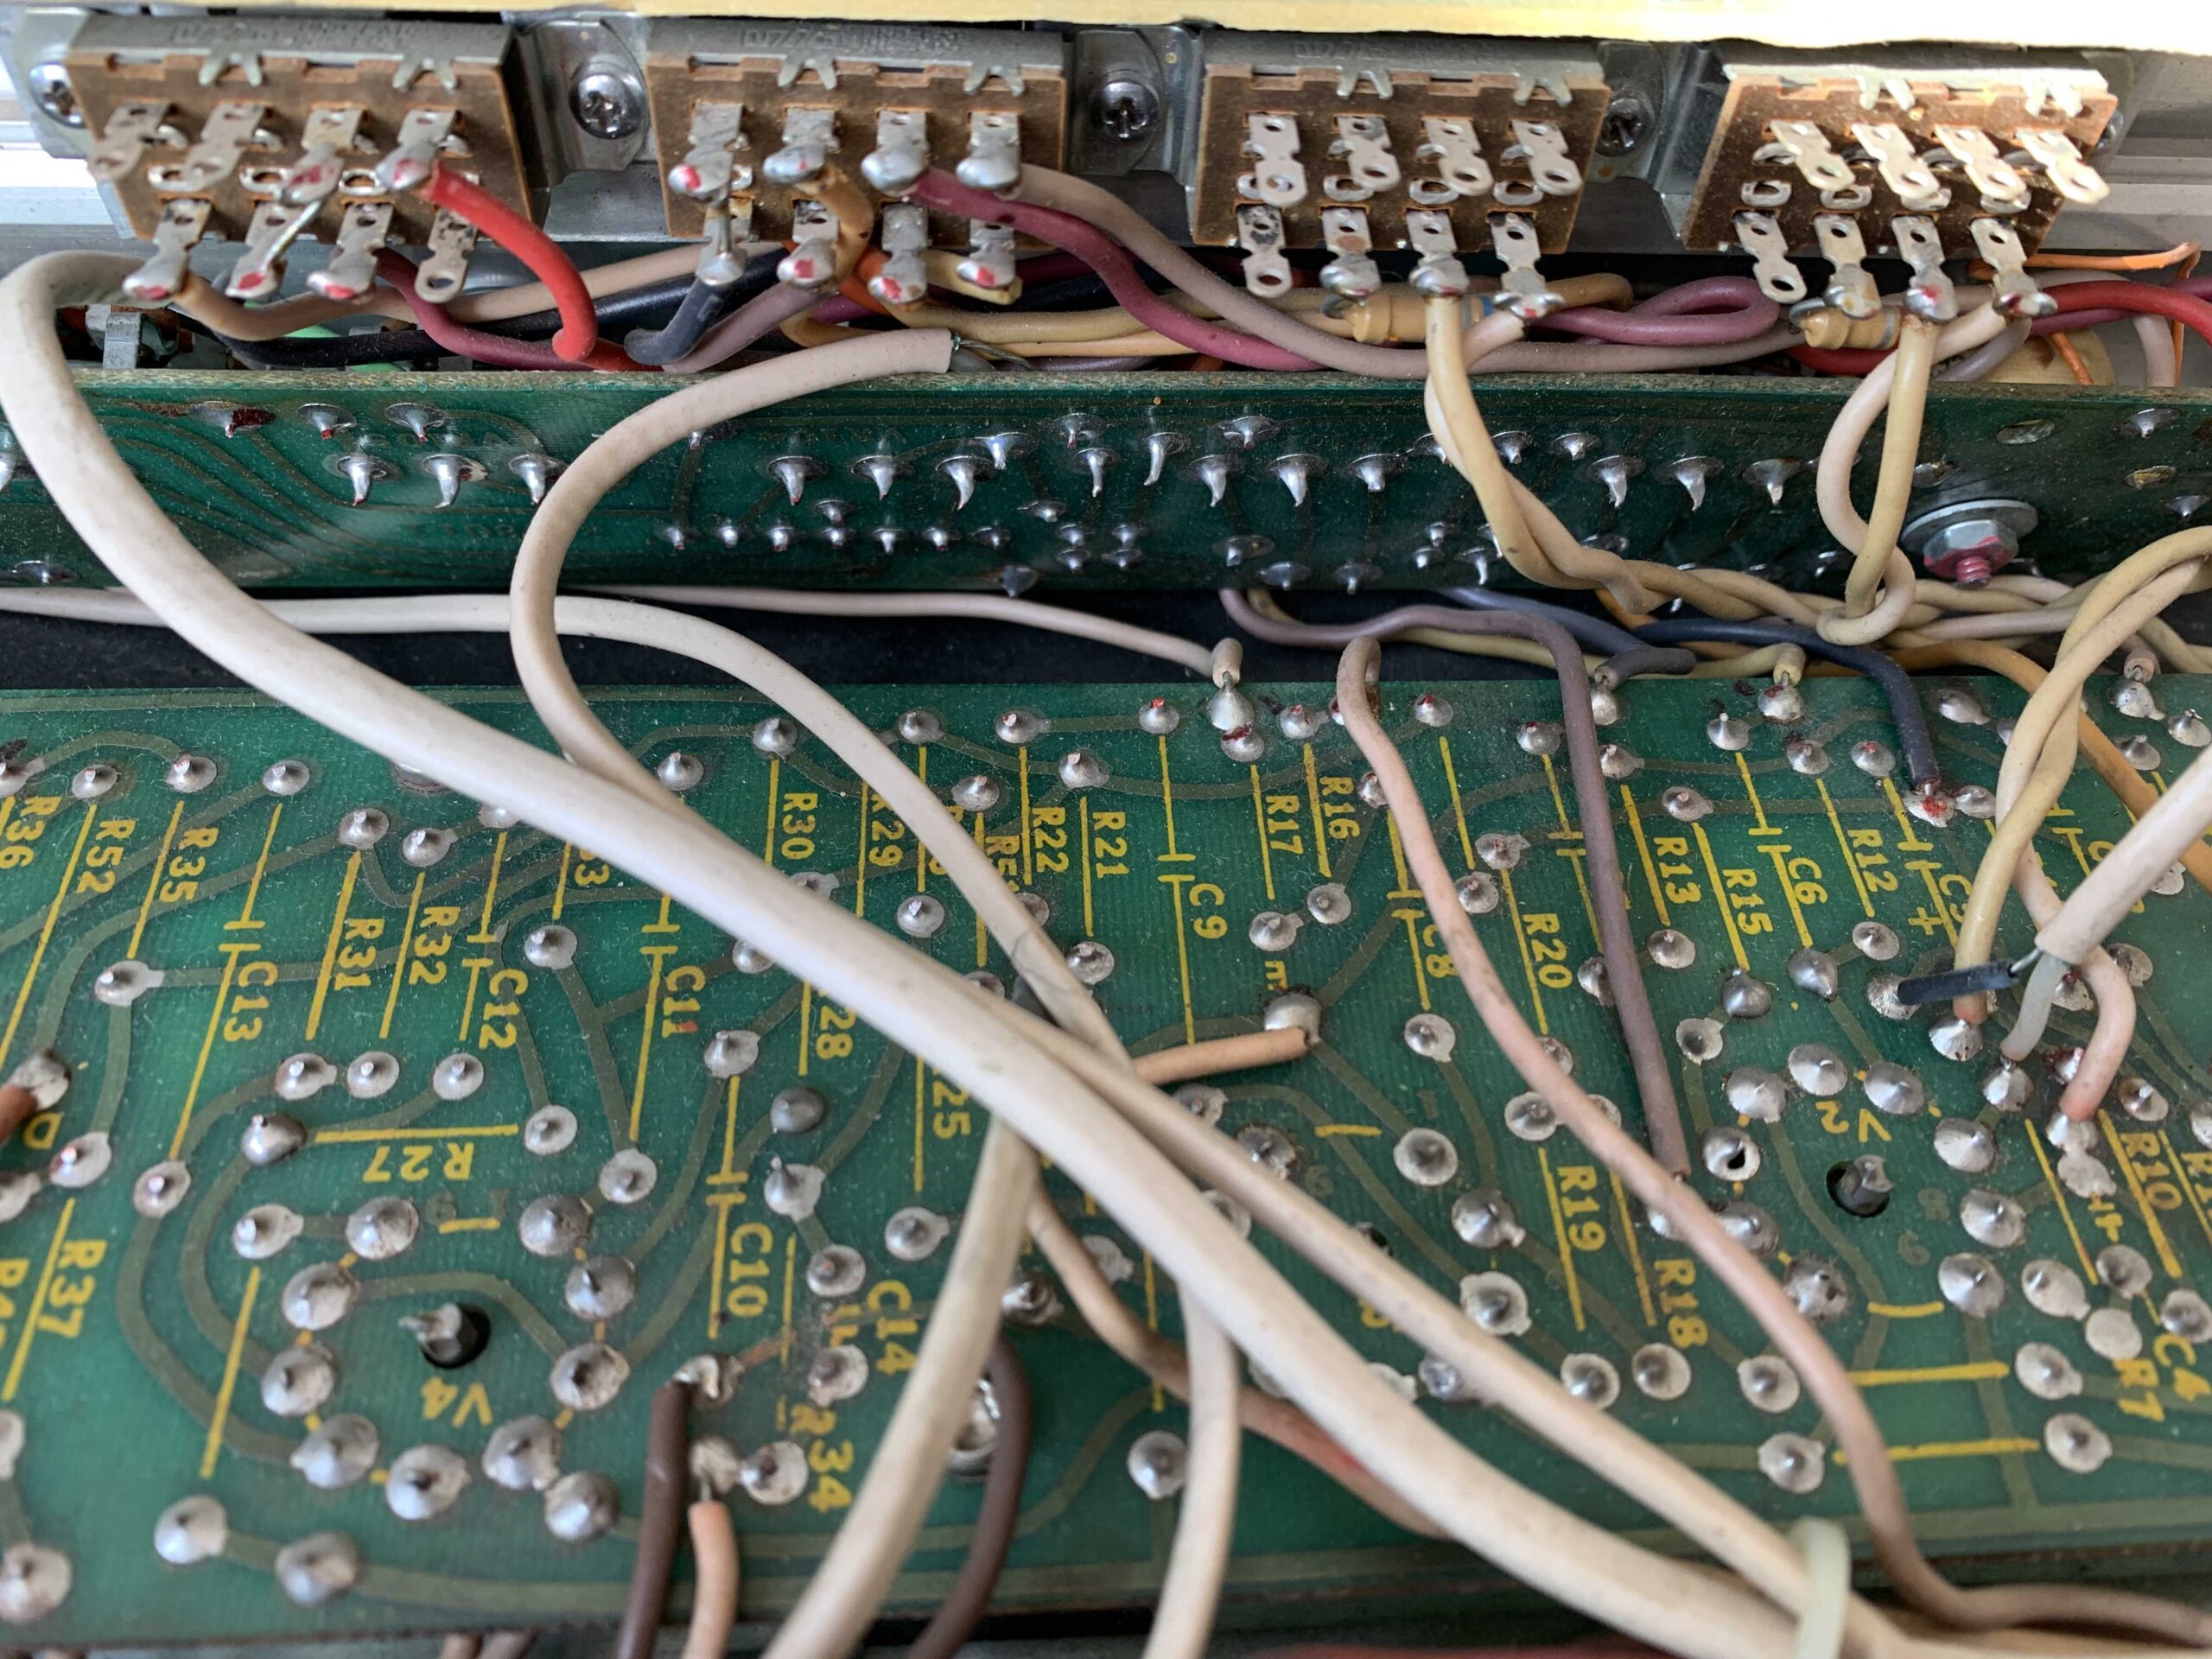
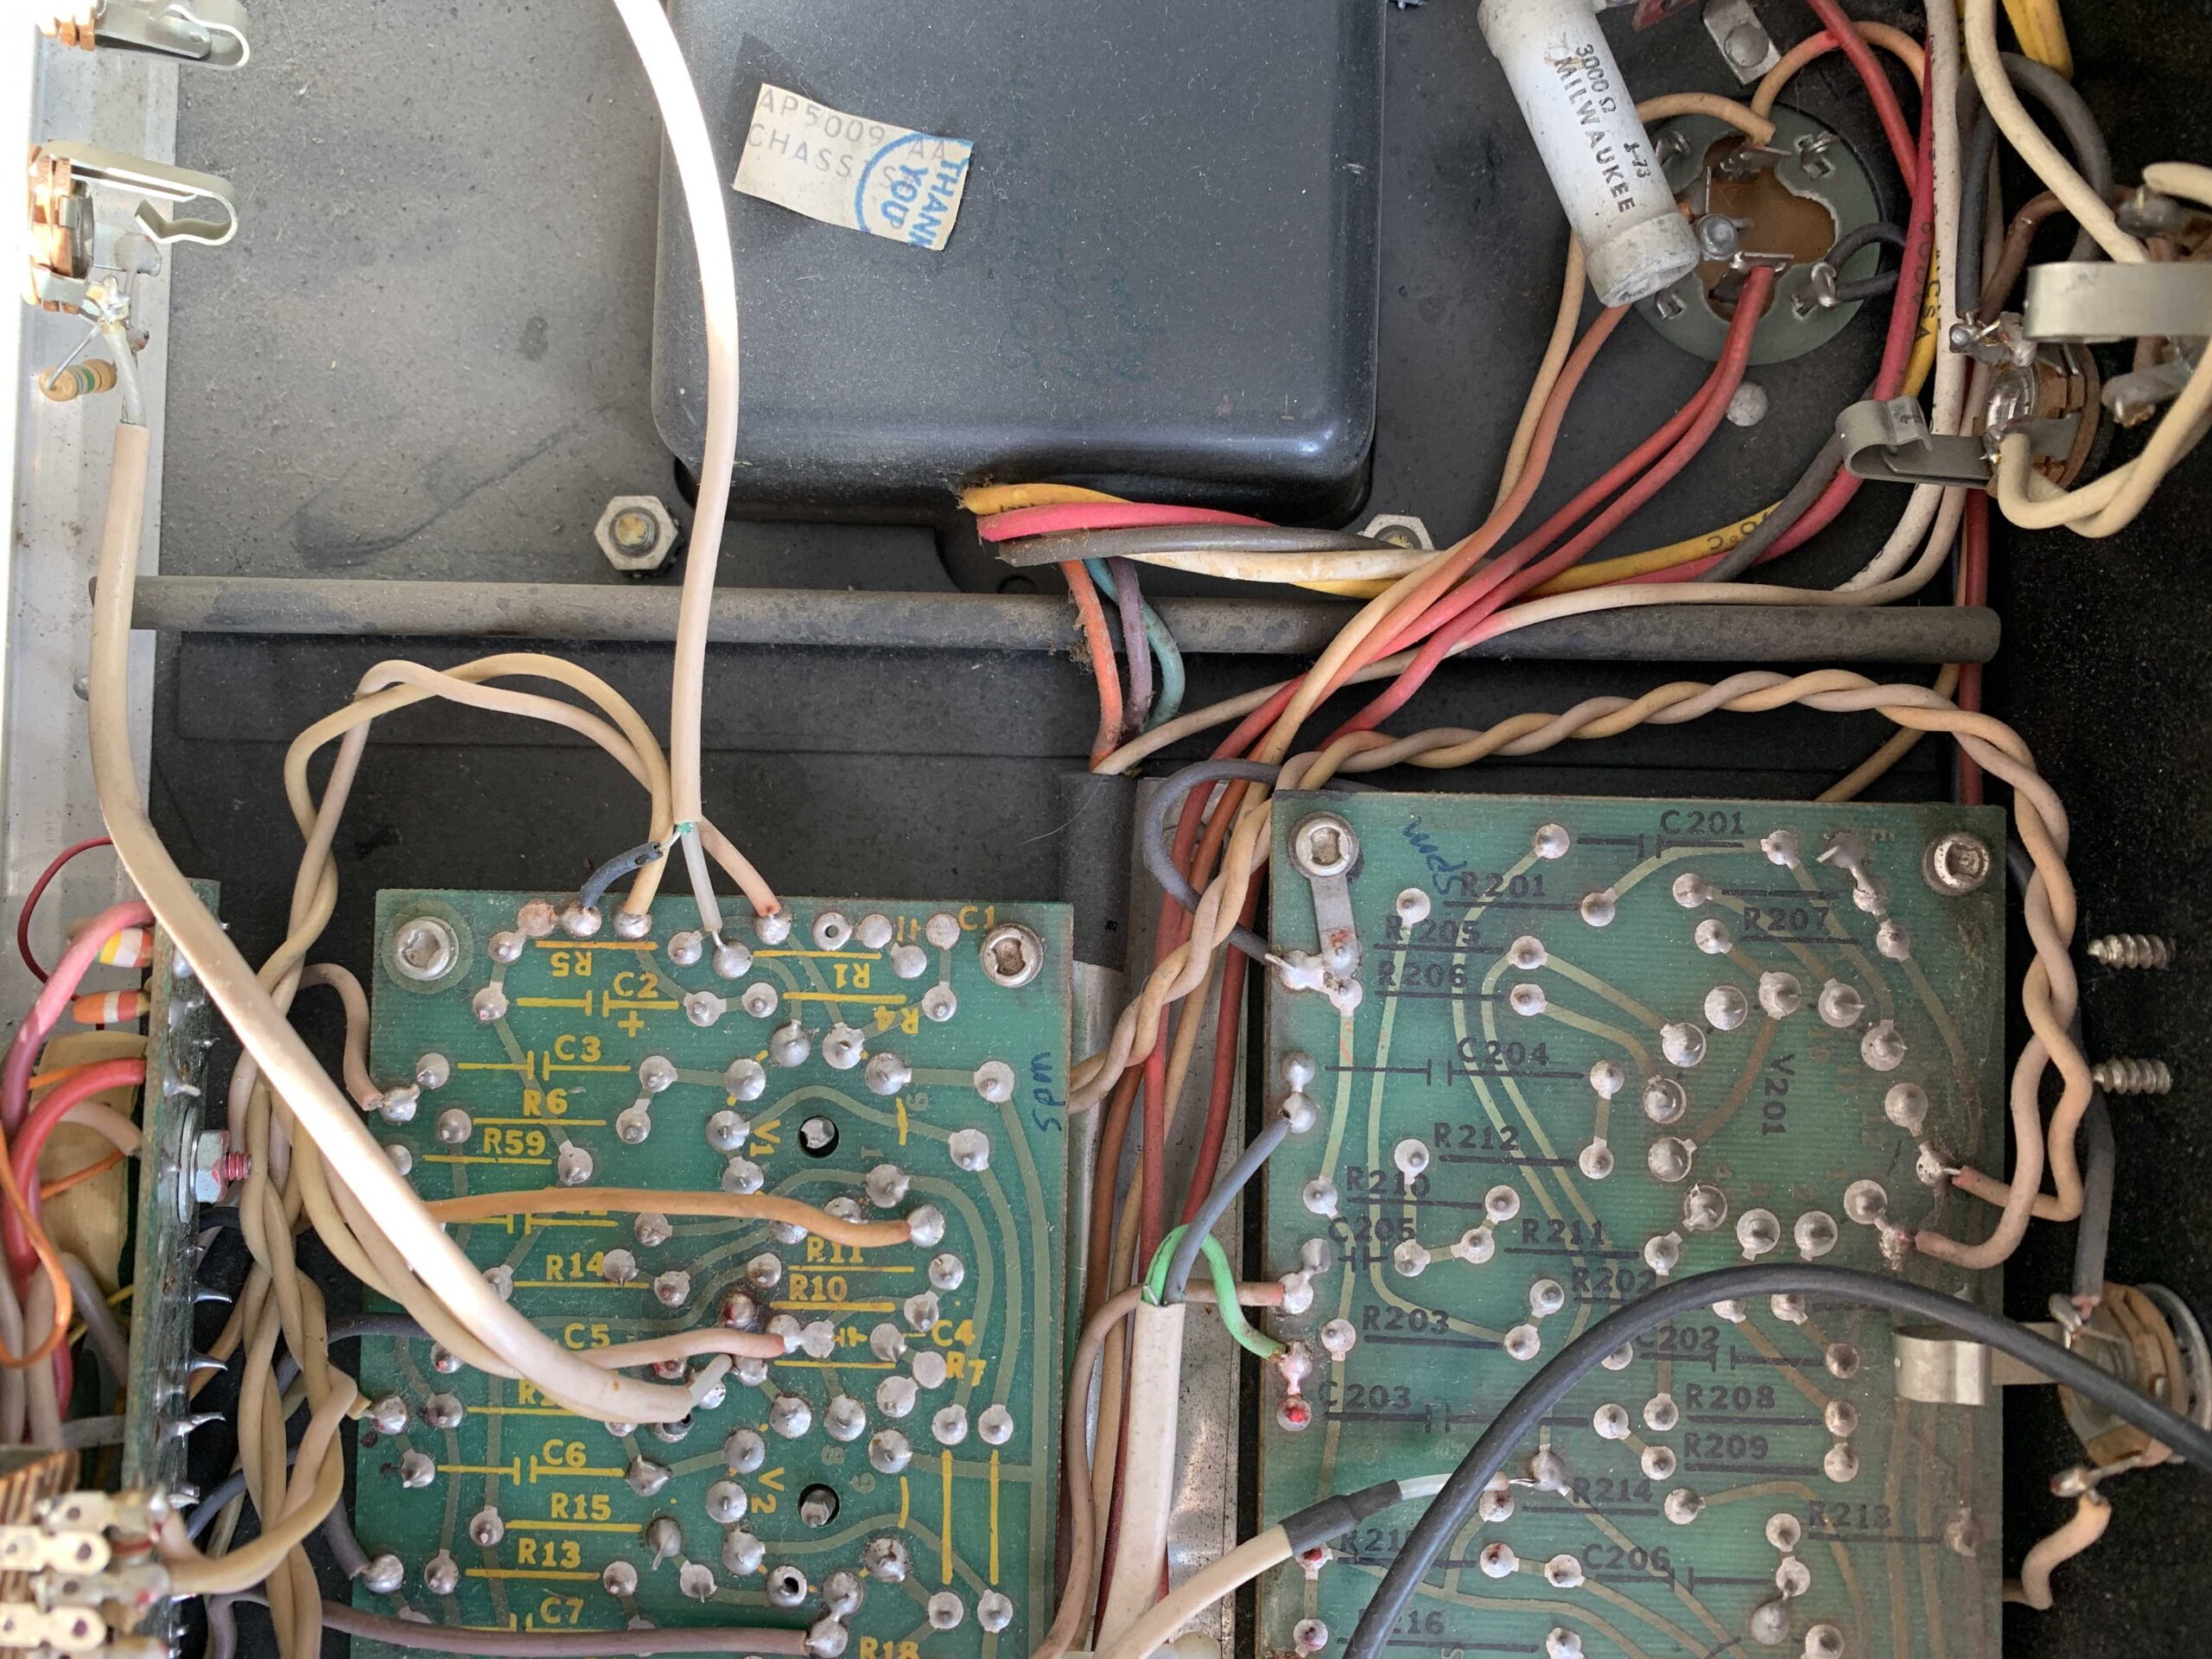
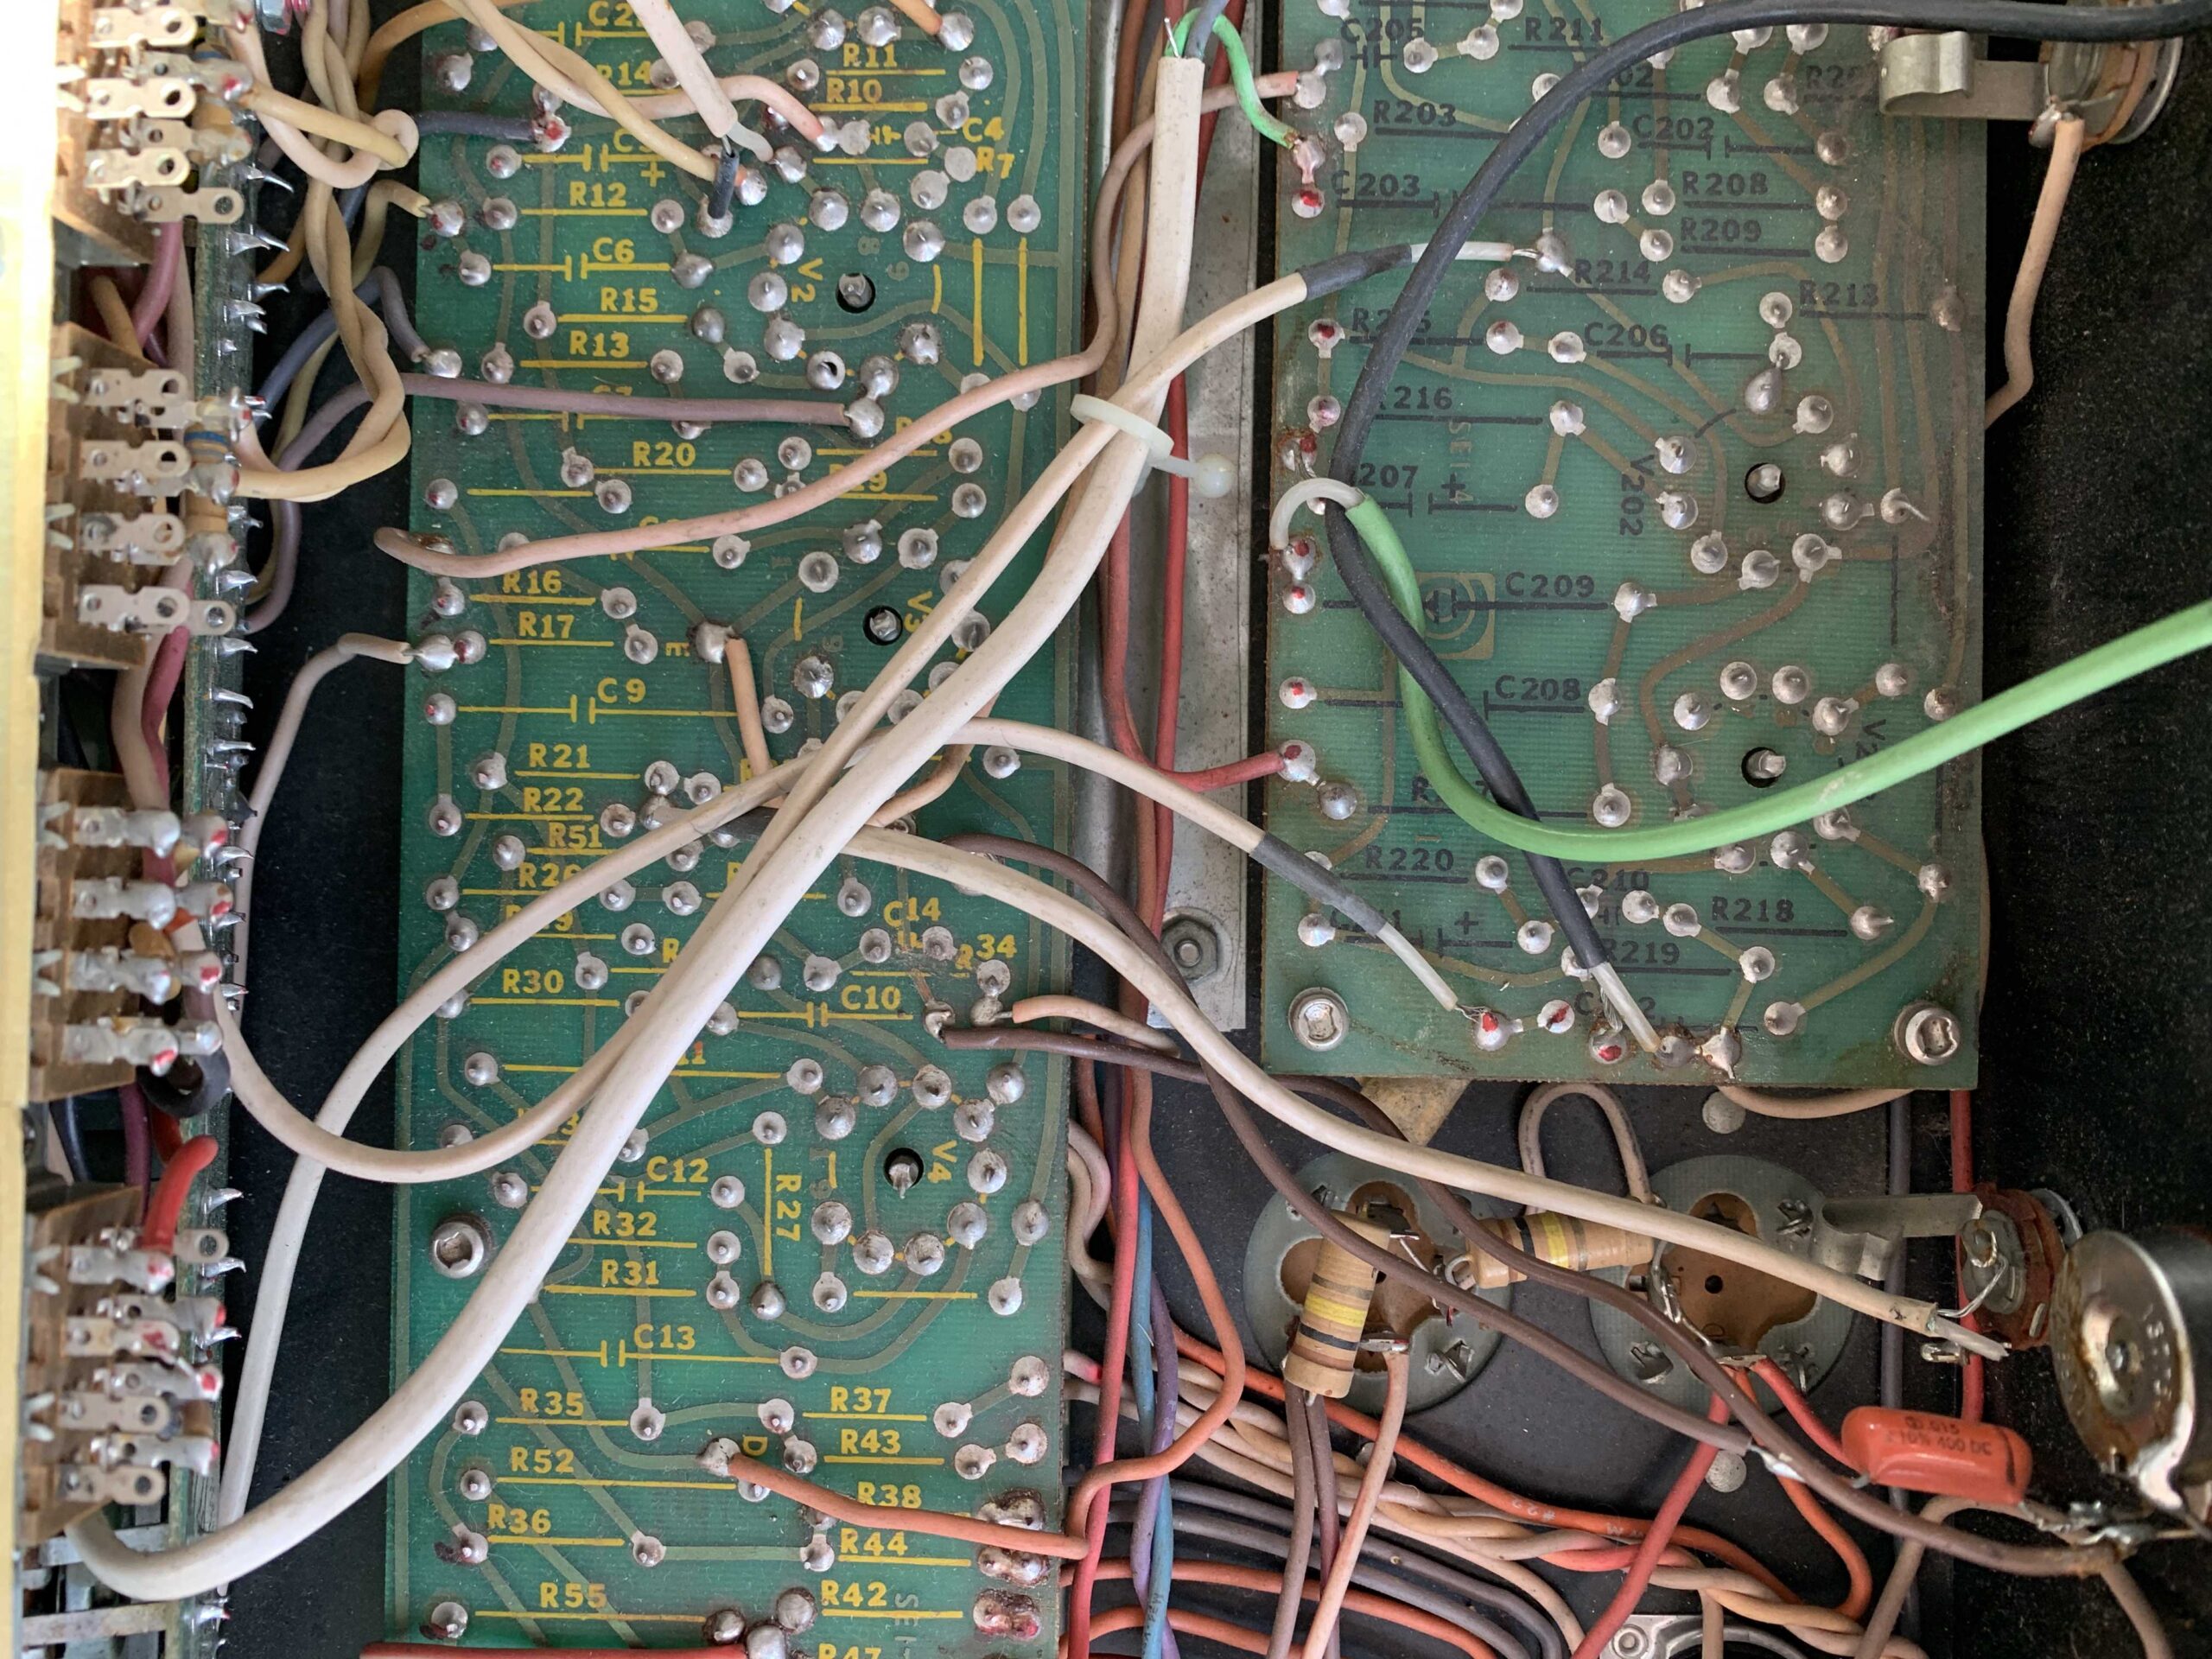
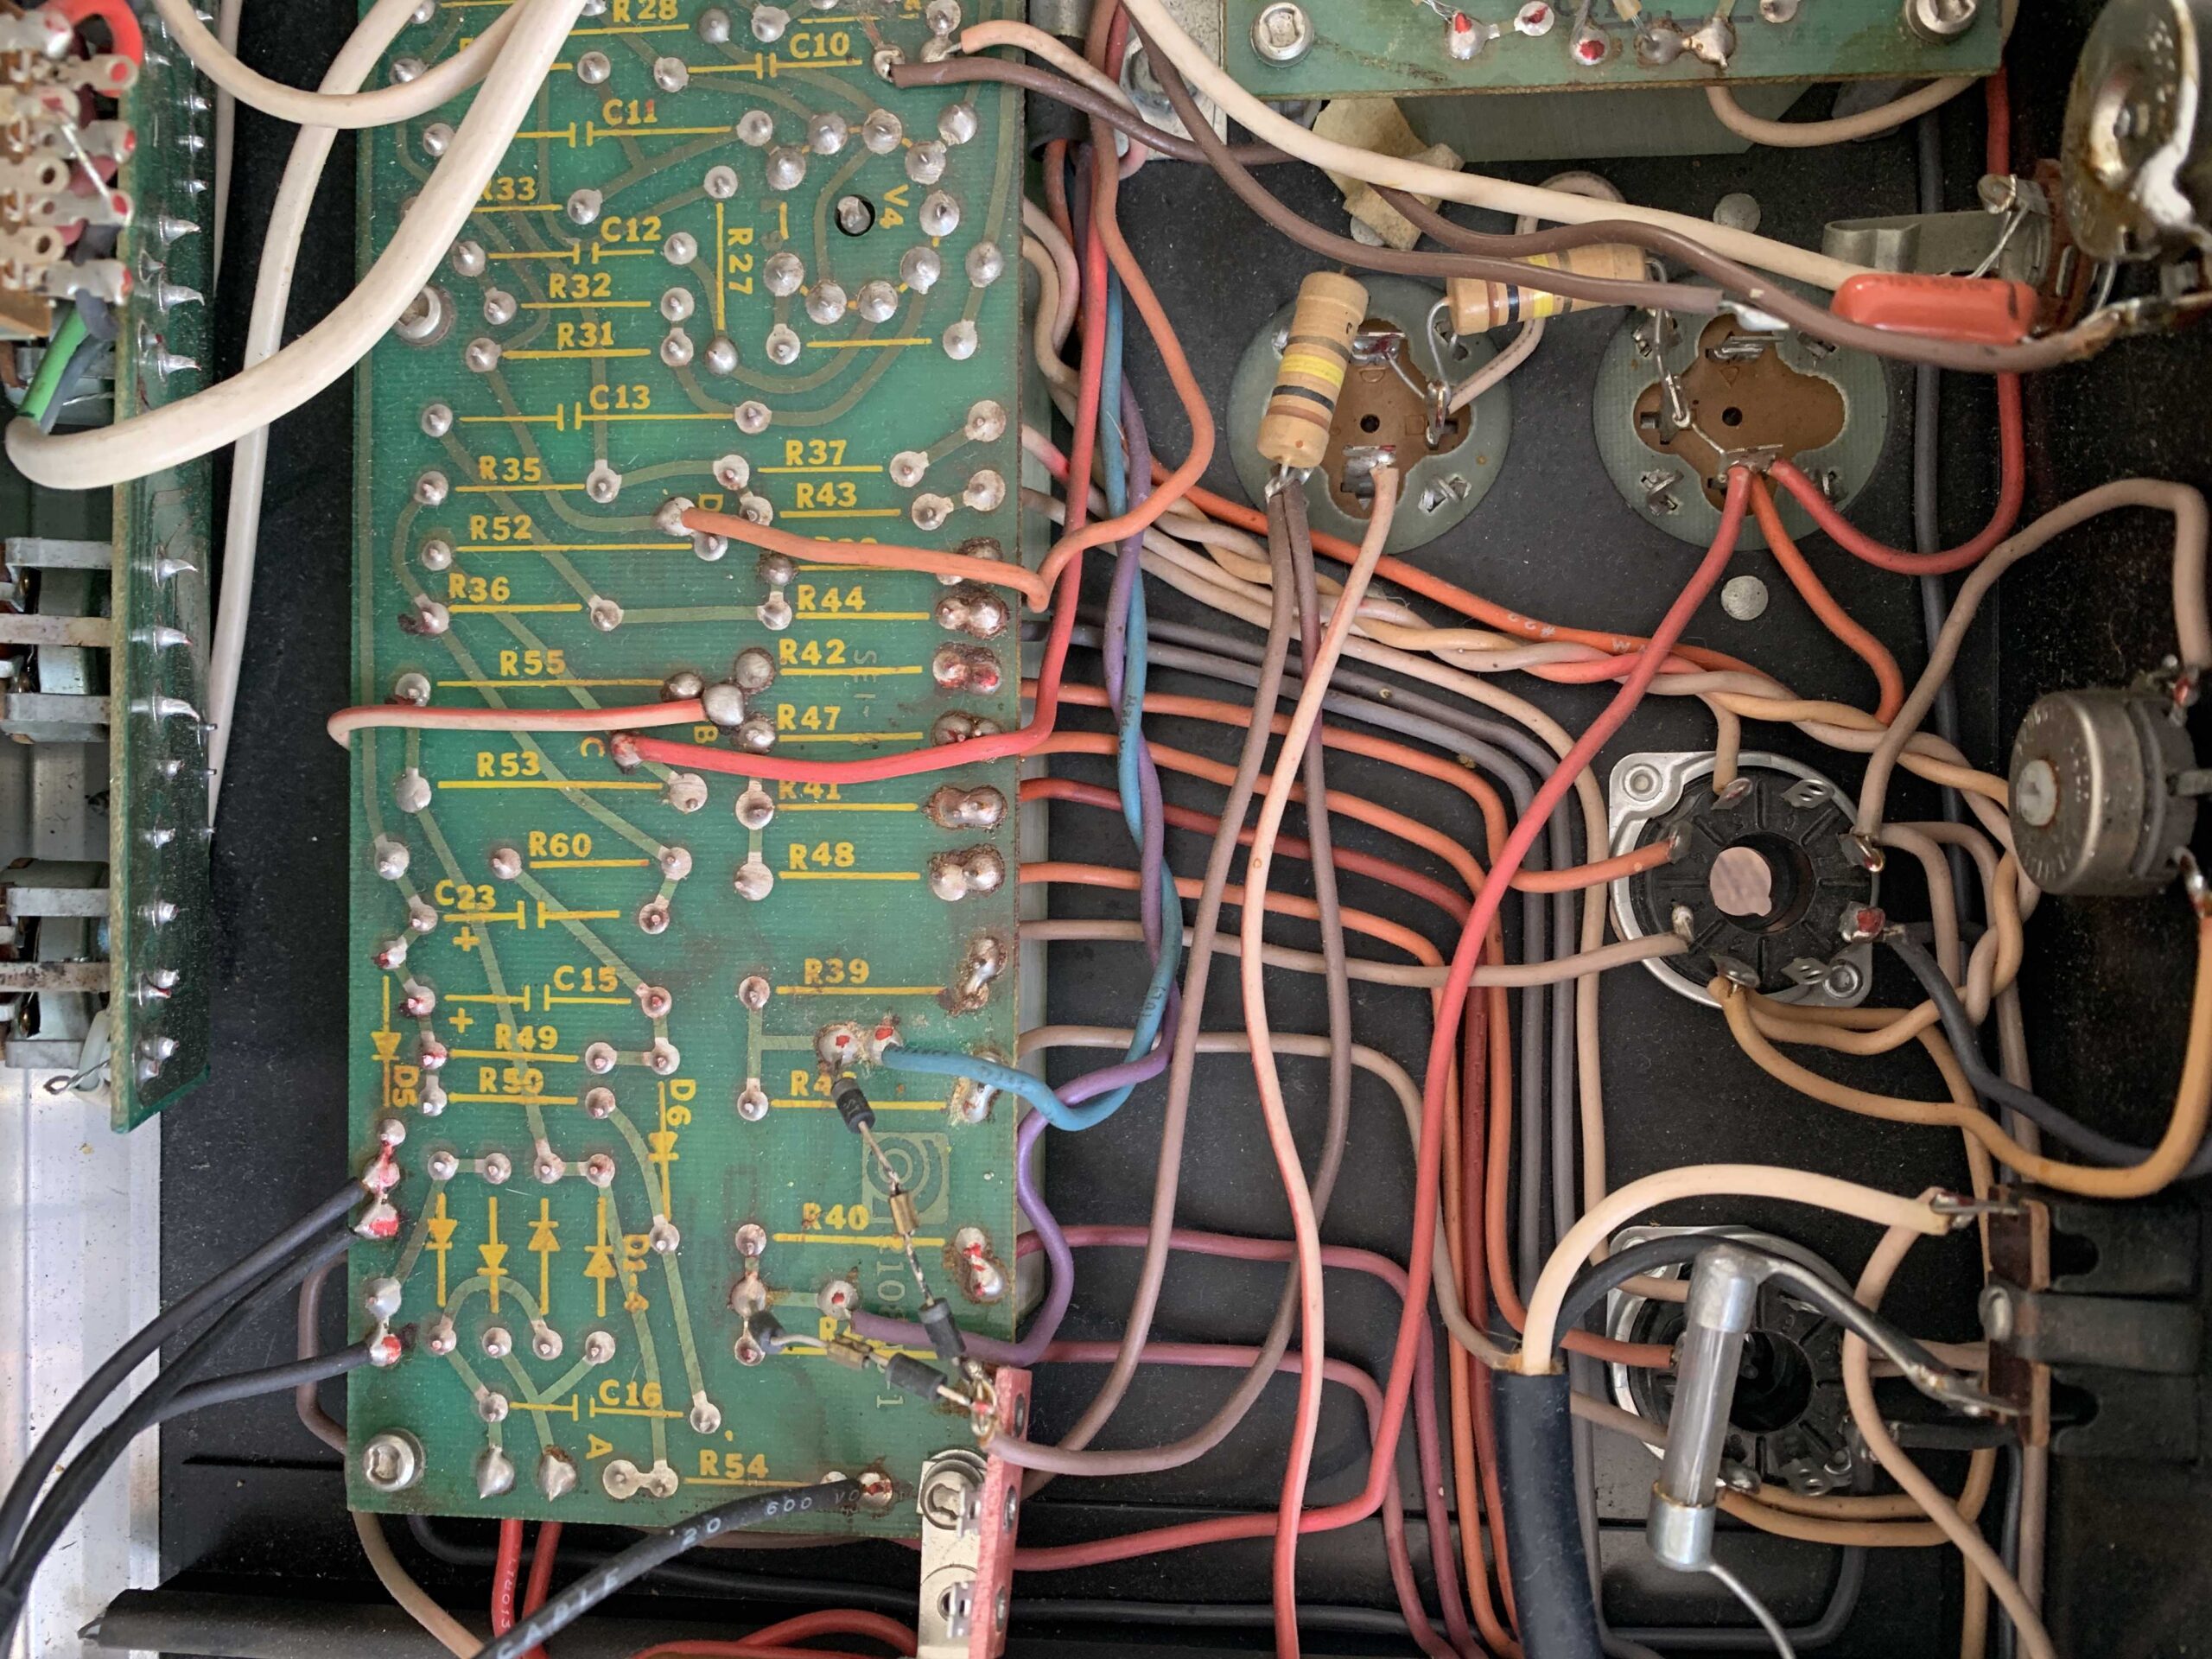
I am posting some internal photos from my Mesa Tri-Axis. I decided to acquire an earlier version of the guitar tube preamp. Basically, I wanted to have the unit as close to the original factory design, version 1. Not only does this mean there are less components to fail, but I do not require the continuous control feature. I actually like and use the tone character of this older preamp better than with the Phat mod and TX4 Recto board.
Category: Uncategorized
Audio Archive
Here are some clips from raw recording by Civilized Animals in the early 2000’s.
“All I Be”

Here is a track I did with my friend Sleep is Famous
It was a single track we did in Seattle for fun.
“Running Scared”
M80 Records Guitar & Bass Rack Rig
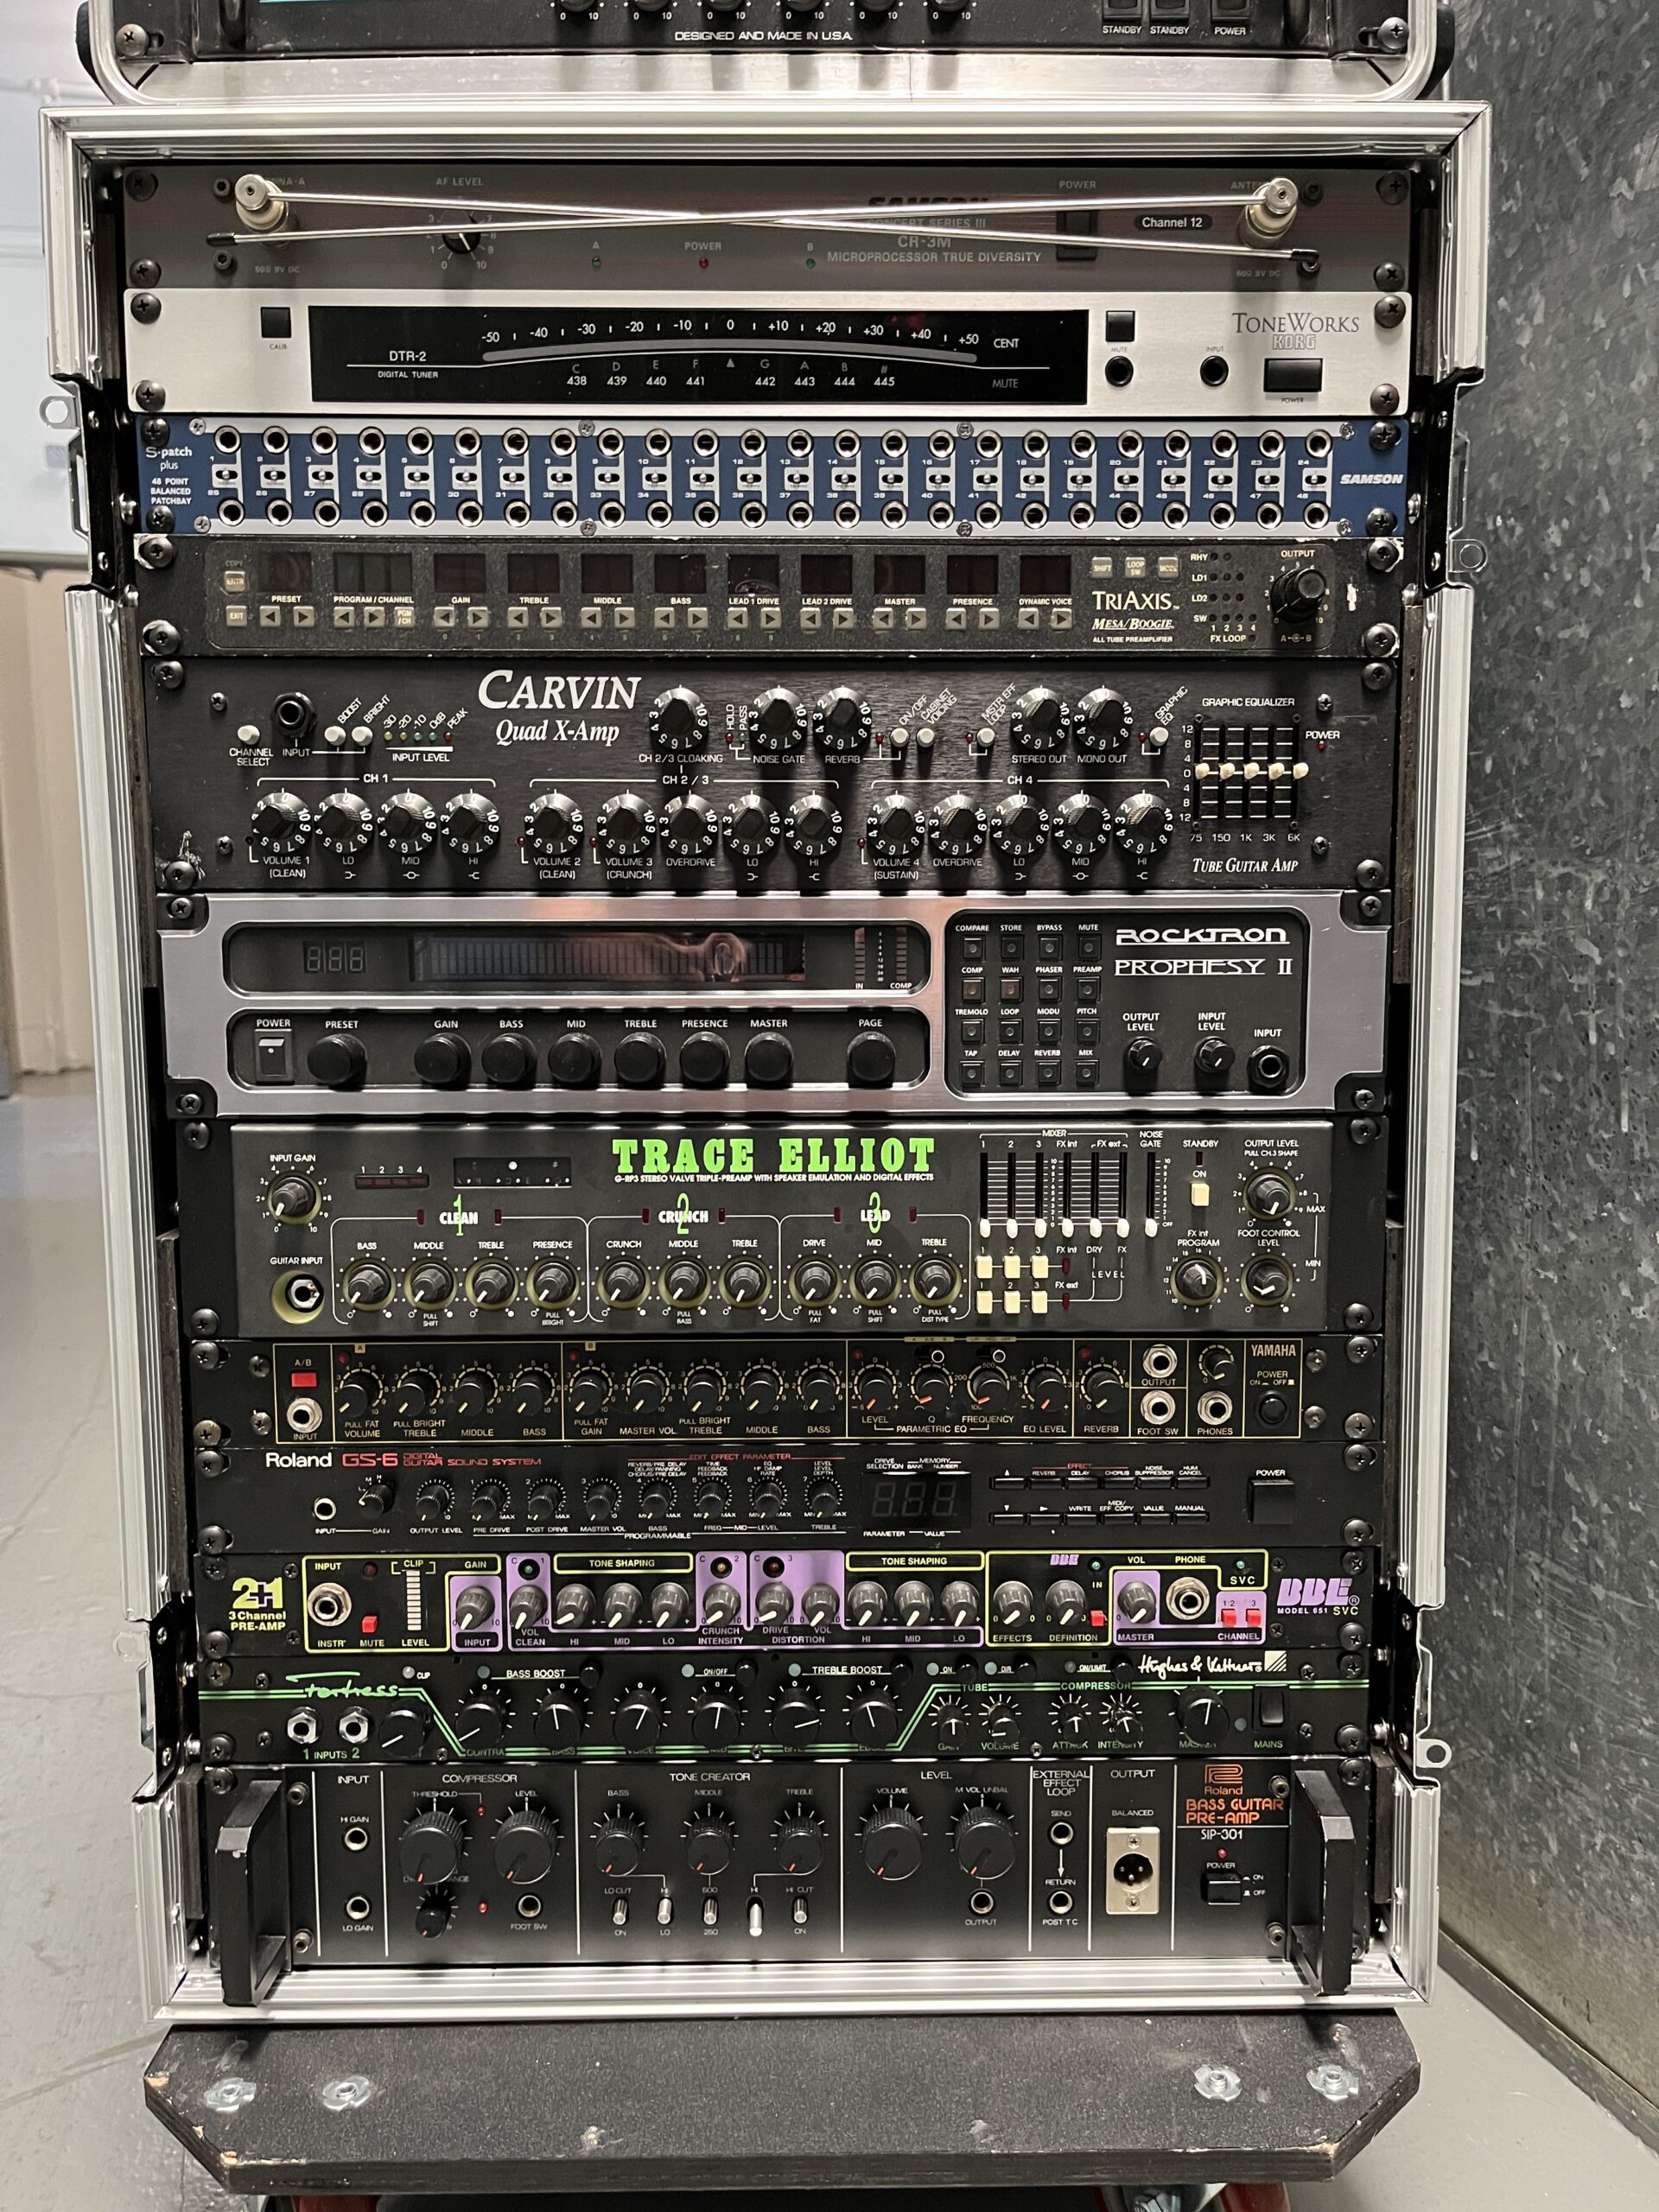
Recently I put together a few rack components to make a guitar/bass rack rig. I have the outputs running stereo to a pair of Ampeg SS-212 EC cabinets. See my Palmer Mach 402 post for a pic of the power amplifier rack used for this rig. These cabinets are stereo and the power amps have double outputs on each channel output. This could allow me to cross the speakers if I wanted, meaning running a true stereo on each cabinet. Currently I have them panned full left/right. This rig has the following items: Samson CR-3M wireless system, Korg DTR-2 Tuner, Samson S-Patch Bay, Mesa Tri-Axis Preamp (Tube), Carvin Quad X Preamp (Tube), Rocktron Prophesy II (Tube), Trace Elliot G-RP3 (Tube), Yamaha PG-1 Guitar Preamp (Solid State), Roland GS-6 Guitar Preamp (Solid State), BBE Model651SVC (Solid State), Hughes & Kettner Fortress (Tube), & Roland SIP-301 (Solid State).
The rack case I picked up on Ebay from Seismic Audio for cheap, new with casters, double mounting rails & covers. On the back I placed a Mo West Custom Custom Preamp and Rack Rider. For all the preamp units mounted in this rack I have the original footswitches.
Siegmund Midnight Special 5 Watt Octal Tube Amp
I was searching around for small tube amps to add to my collection. I came across this rackmount version which would have fit nicely in my guitar rack. The layout looks super clean and the sound is what I am looking for. Unfortunately, I just noticed their website www.seigmundguitars.com is down at the moment. Anyway check out the pics for reference and keep your eye out for this custom build in the used market.
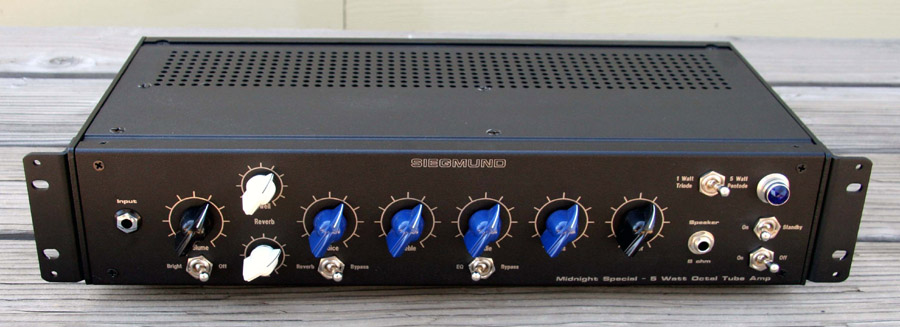
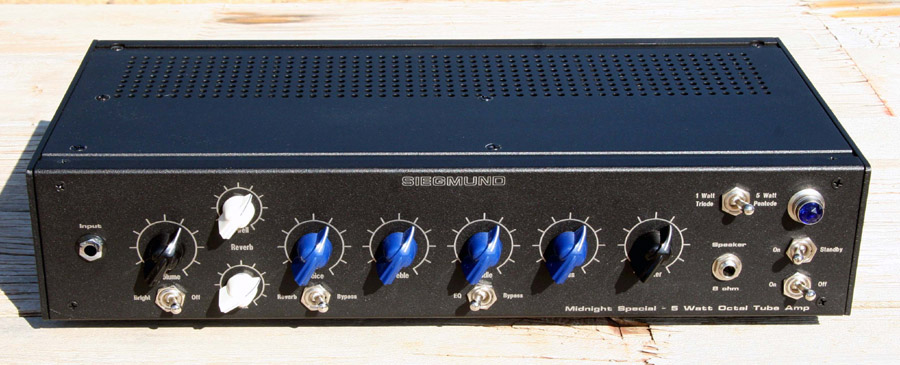
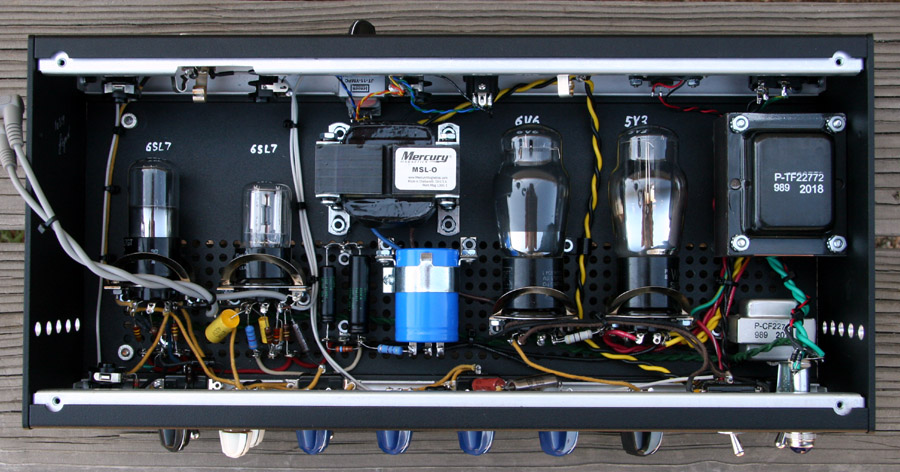
The Midnight Special 5 Watt is an enhanced version of the tried-and-true Midnight Special Combo introduced in 2000 and the best known Siegmund amplifier.
The chassis is a 2U rackmount with removable brackets and a variety of features with ‘Live Amp Sound’ Line Out and Pentode/Triode switch.
Hand wired point to point cloth wiring
NOS vintage Octal tubes
Versatile, interactive tone controls
Optimized features for recording and live gigging
Transformer-less Reverb
True bypass Master Volume
Unique no-compromise Custom Output Transformer
by Mercury Magnetics
Highest quality NOS components
Class A single-ended 5 Watts
self-biasing output stage
Pentode and Triode switch
Tube Rectifier 5Y3
Octal base preamp tubes 2x 6SL7
Transformless tube reverb
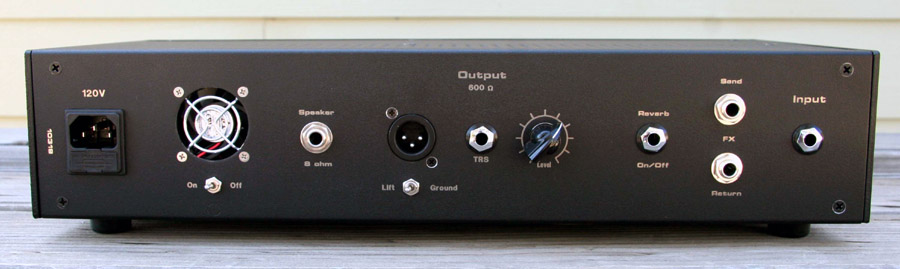
LAS Line Out ™ with Level Control and XLR and TRS outputs
Series FX loop
Reverb On/Off jack
Sprague Vitamin Q paper/oil tone capacitors
Carbon composition resistors
F&F; and Sprague ATOM TVA filters
Point to point wiring
Powder coated Aluminum chassis
100,120,220,240VAC 50/60Hz
Handmade in USA
17 x 8 x 3.5 ; 10 lbs.
This compact version of the Midnight Special is designed for the player who desires a versatile tube amp for both recording and live gigging, making the speaker cabinet an option but not a requirement.
The LAS Line Out ™ mimics the response of a speaker voice coil and can be plugged into a mixer or PA, giving a big lively tube sound without the need of transporting a large and heavy tube amp and speaker cabinet.
Octal preamp tubes have a wider tonal spectrum and sound more relaxed and revealing with less compression than later 9 pin versions.
In combination with the harmonic richness of the custom wound extended range output transformer by Mercury Magnetics
the Midnight Special reveals the pure power & beauty of the vibrating string.
The Midnight Special is entirely hand-built, using the best-sounding NOS caps and resistors.
Point-point wiring is the same technique used by the military and in aviation construction for reliability.
The class A self-biasing output stage has musical even-order harmonic break-up.
The 6V6 power tube can be switched to give 5 Watts in Pentode or 1 Watt in Triode operation.
The LAS Line Out ™ with Level control has XLR and TRS outputs. When the speaker cable is unplugged an internal load takes over.
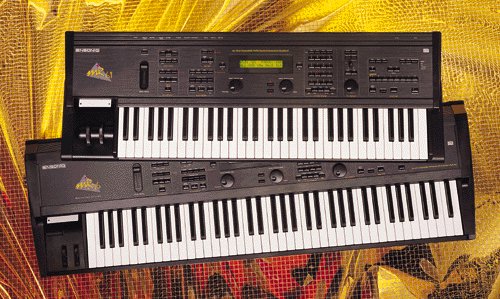
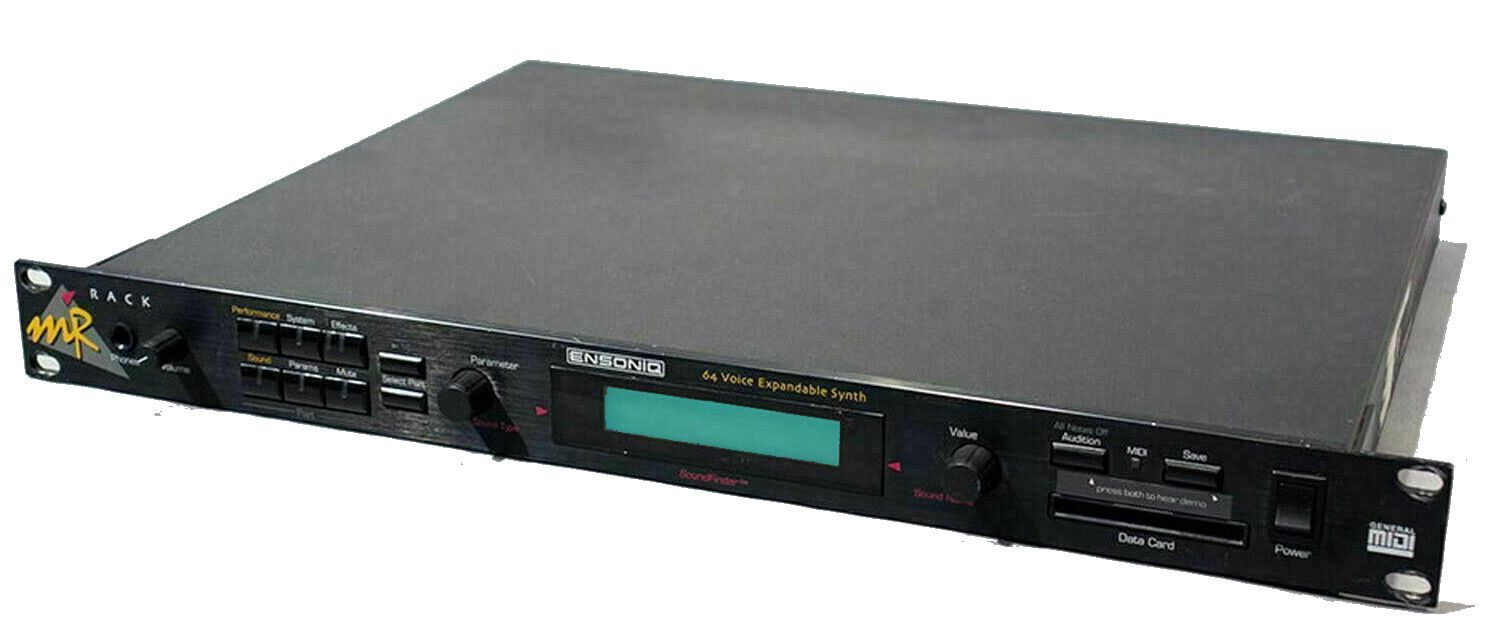
Ensoniq MR61 Synthesizer Upgrade
Recently I picked up this great vintage synth that was in good shape. I noticed that the midi jacks were pushed in and replaced them with new ones for just a few dollars. After playing on this synth, I found that it’s ease to create complex midi sequences was it’s strongest attribute. I felt like if I had some more patches on this unit I would be able to create some awesome songs. After digging on the internet, I found this guy in Poland that took all the expensive expansion boards and recreated them into one module for a very reasonable price. I decided to take a shot and paid through PayPal, sure enough arrived quickly with tracking provided. You can find his link here> MR61 Expansion by Raddek
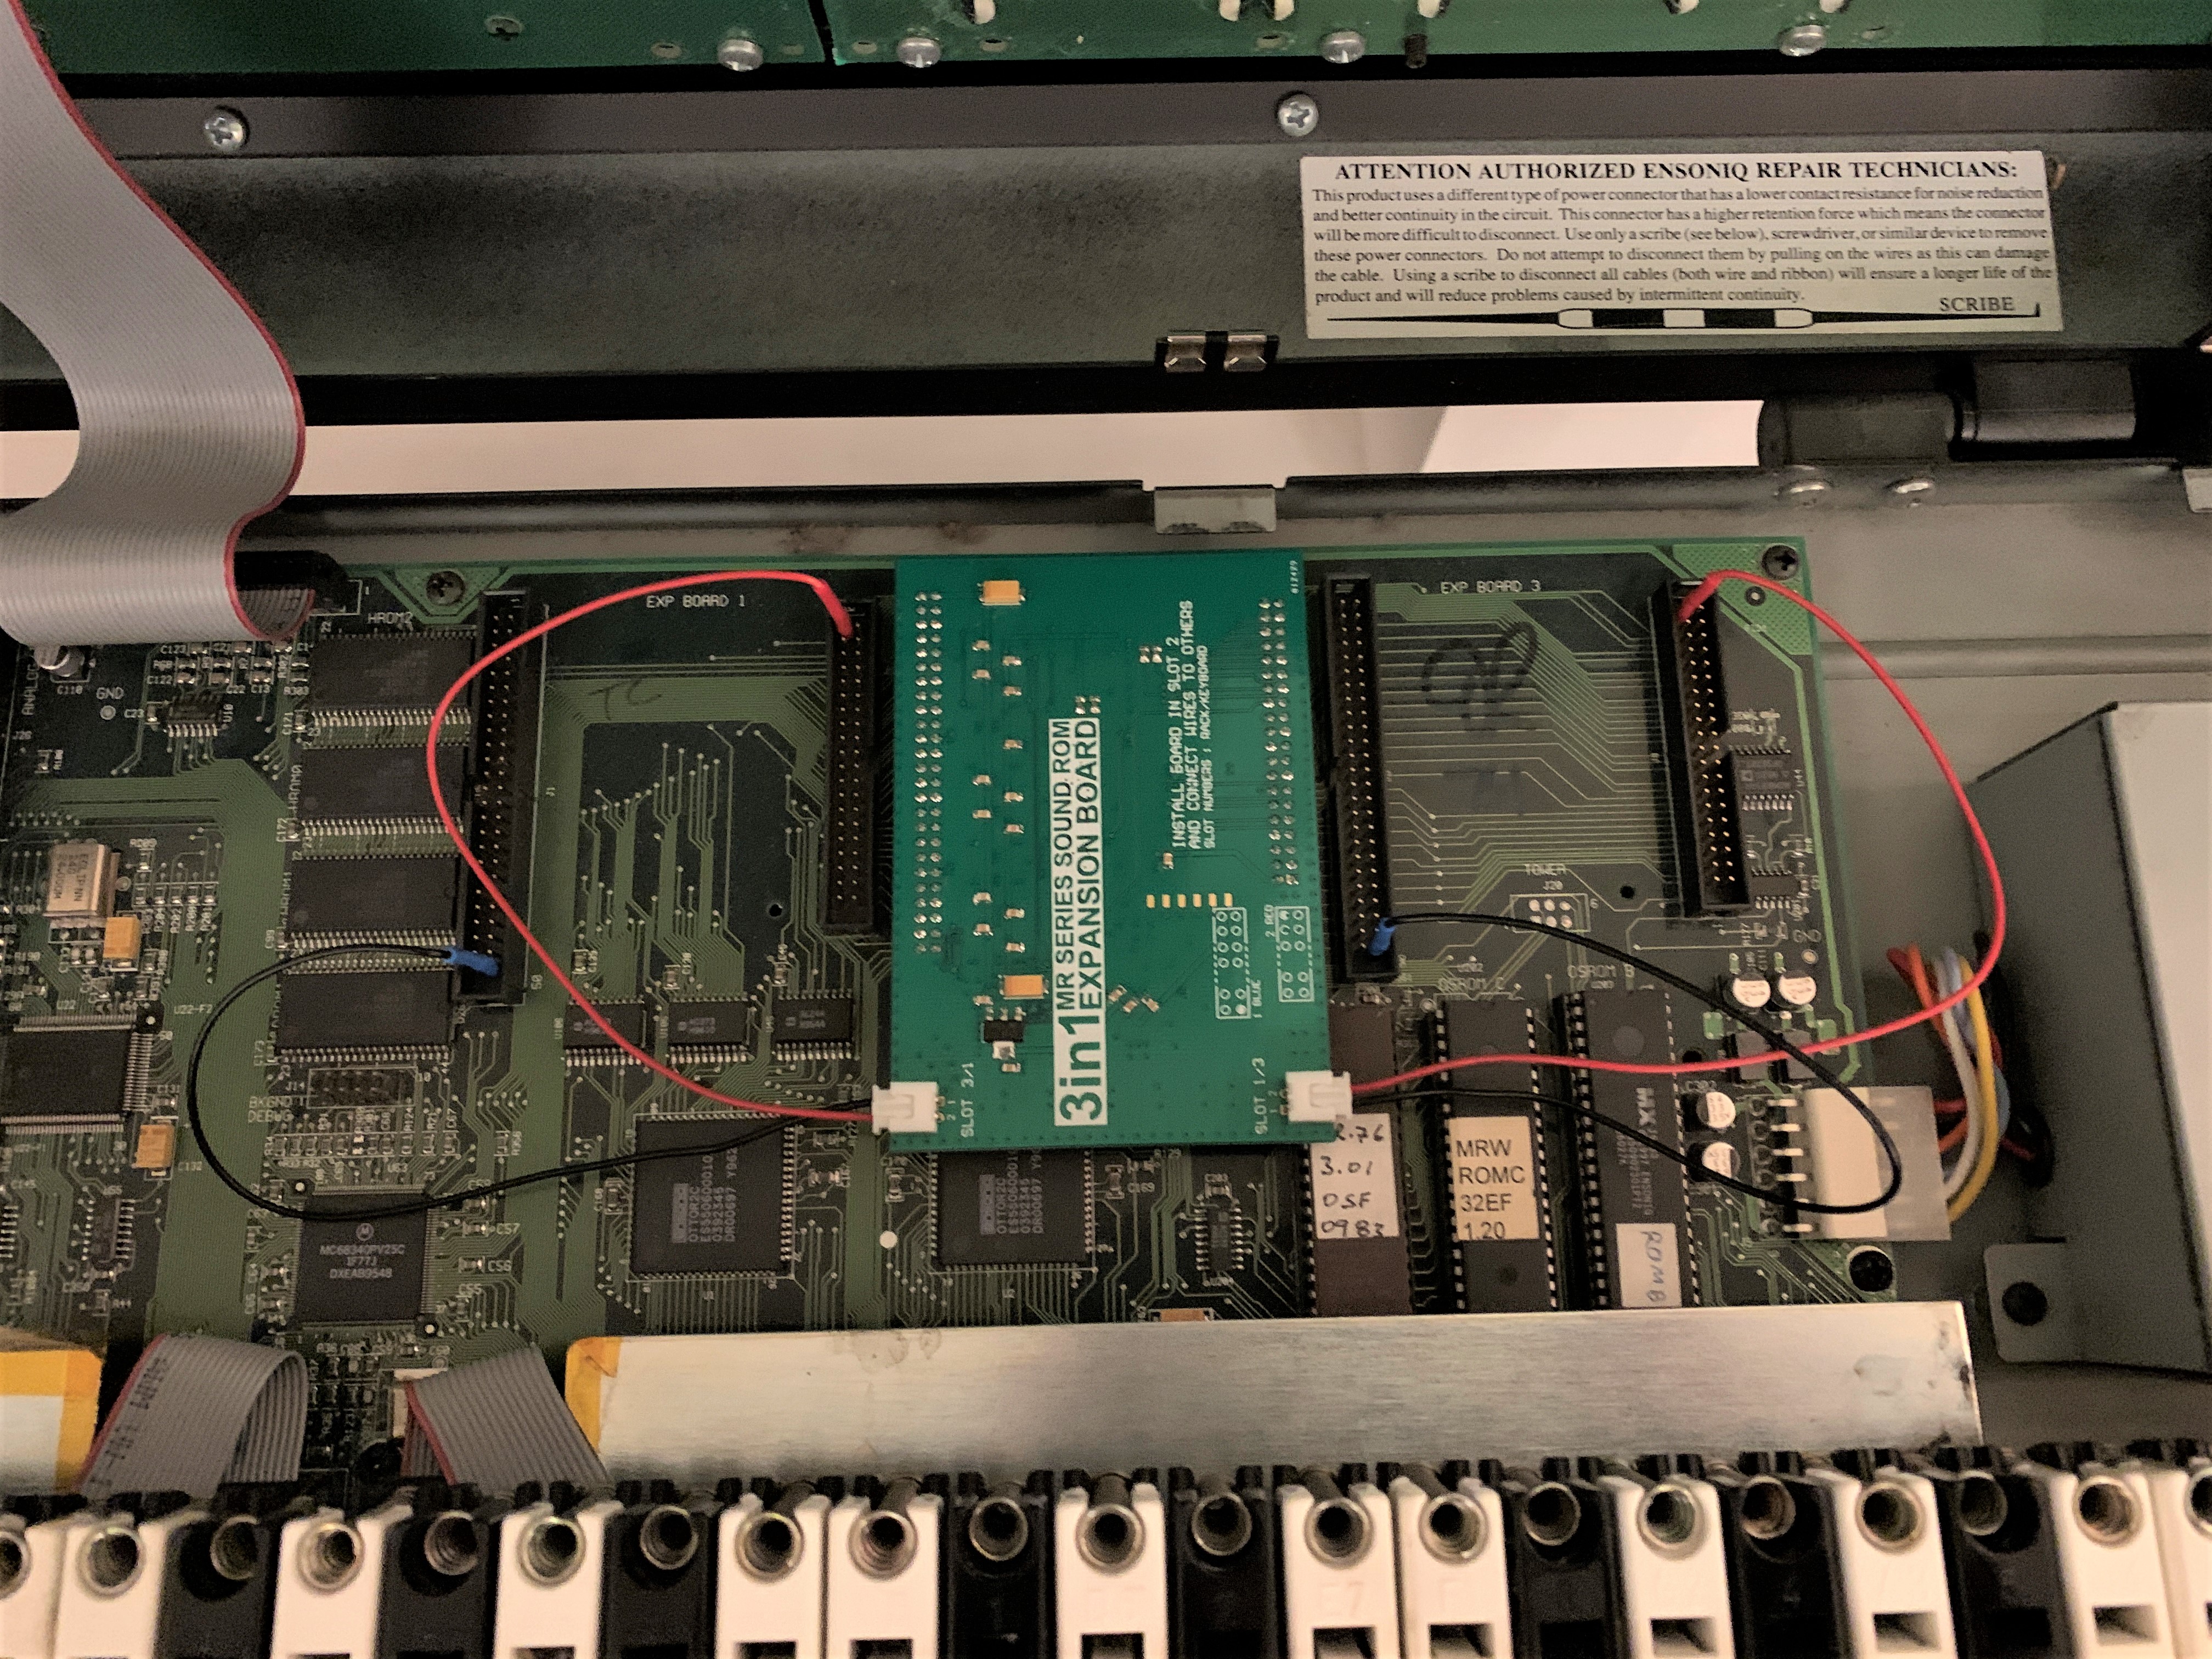
The installation was super easy and didn’t require any soldering. The expansion pack showed up in the database of patches. This particular card does not have the drum patches. You don’t need them when installing into the keyboard MR61 because they are already in the unit by default.
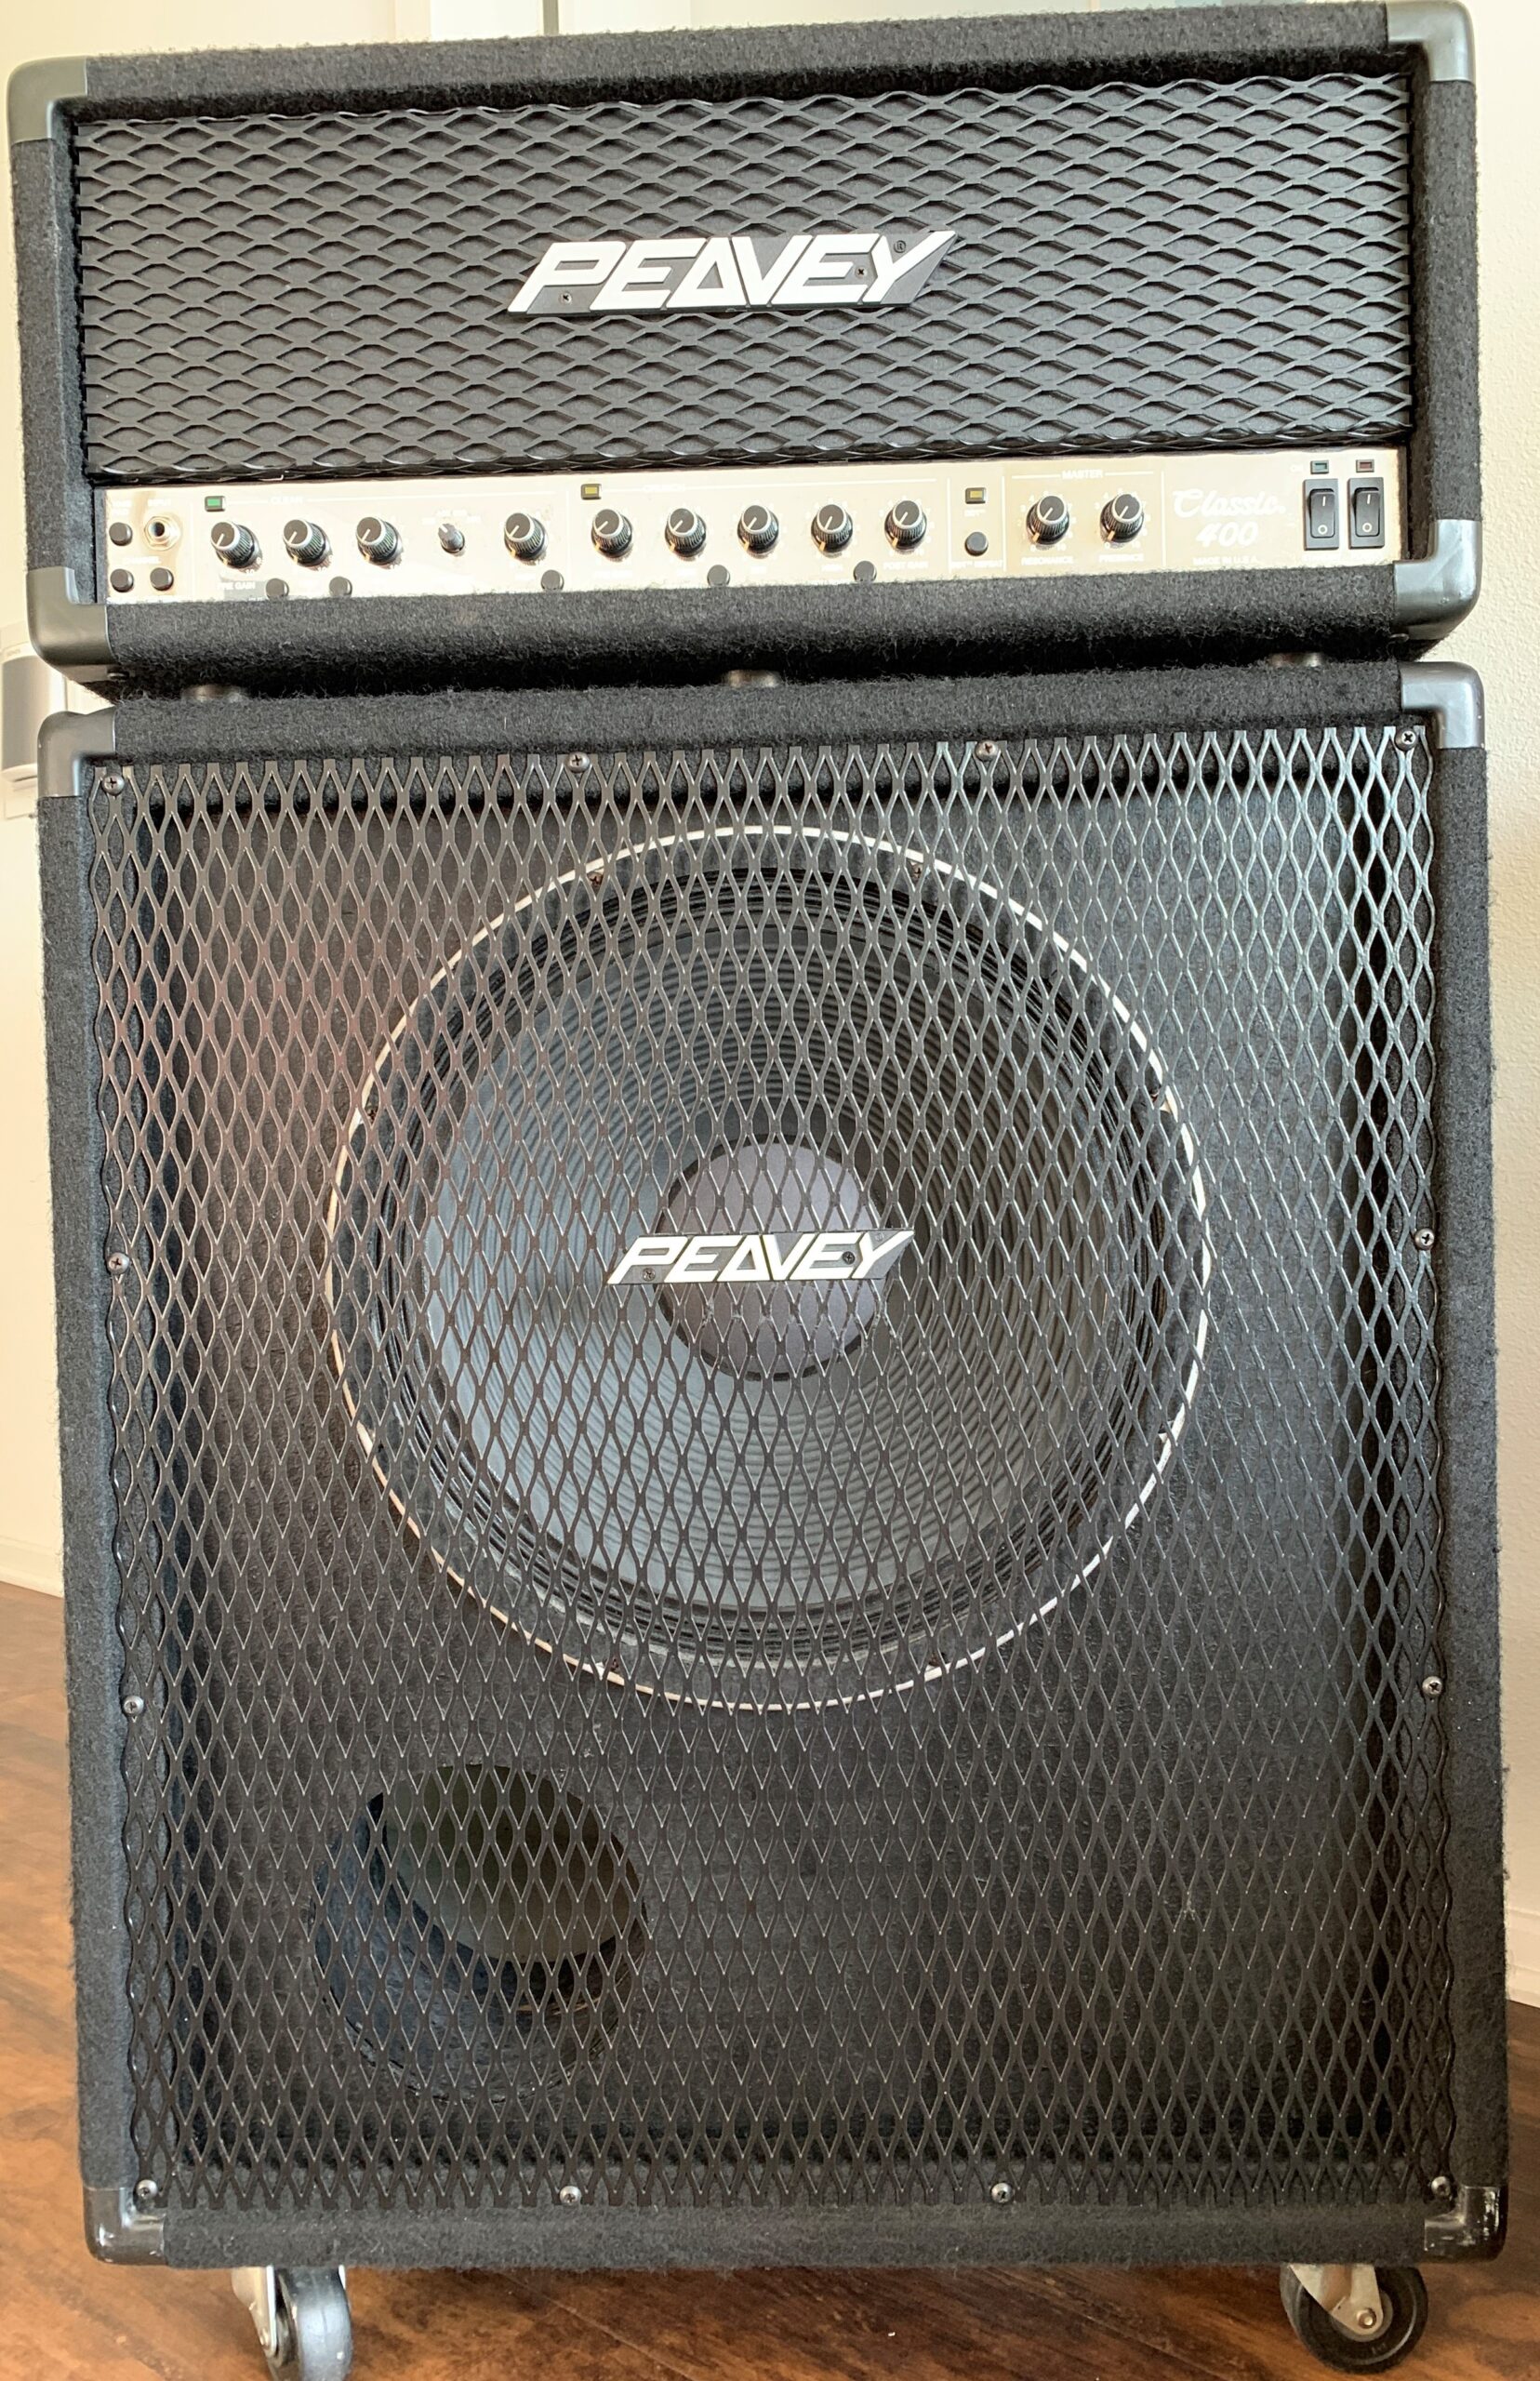
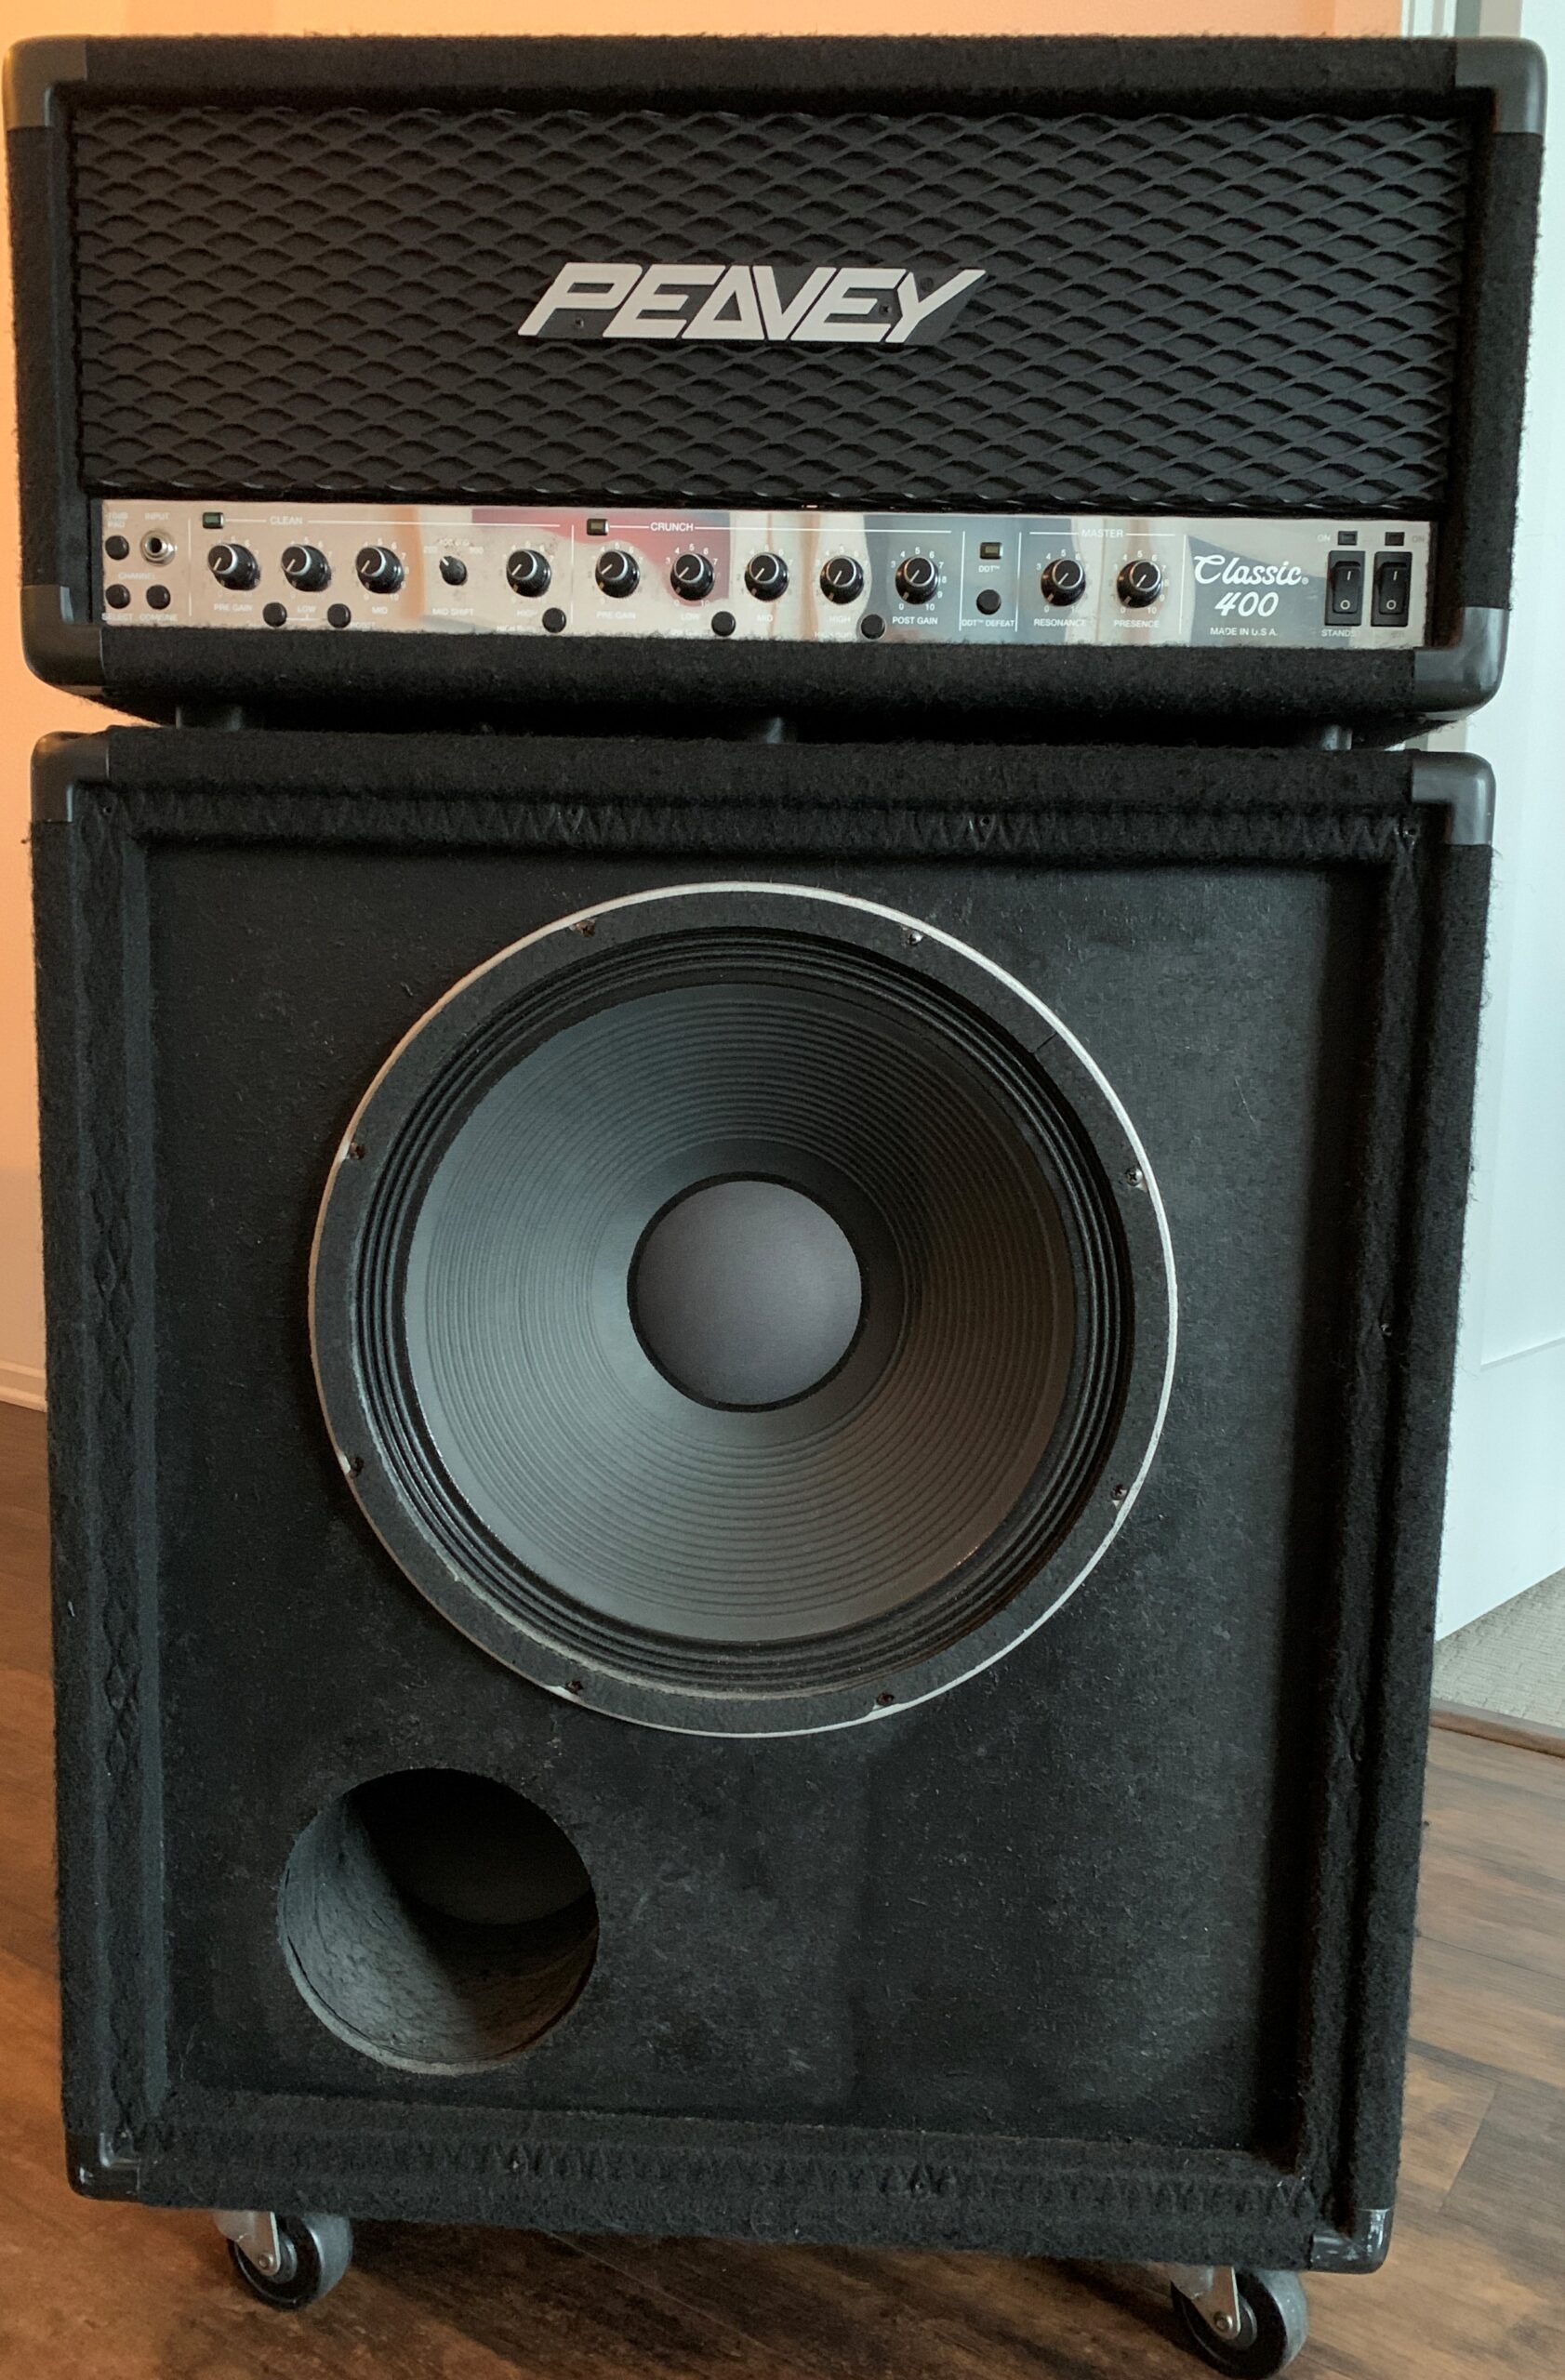
Peavey Classic 400 All Tube Monster Bass Amplifier
I am currently working on a peavey classic 400 project that I acquired overseas. This is the USA built Peavey Classic 400 bass tube amplifier head made for Japan model. As you can see it is not in tweed but in black, covered in carpet. It dates back to 1996 and weighs in at almost 100lbs for the head only. The only issue with this “labeled non-functioning” head was a few burned out tubes. I am going to replace one capacitor that may have been effected by the burned out KT88. This project is on going and I am still waiting for some parts. I am going to locate a matching cabinet and then update pics, documentation and manuals. Please take a look at some pics before I post the final article.
The cabinets that were released during this period have a specific width and depth. Peavey is constantly changing their cabinet profiles but for this project I would like to see a solid block of both head and cabinet profiles.
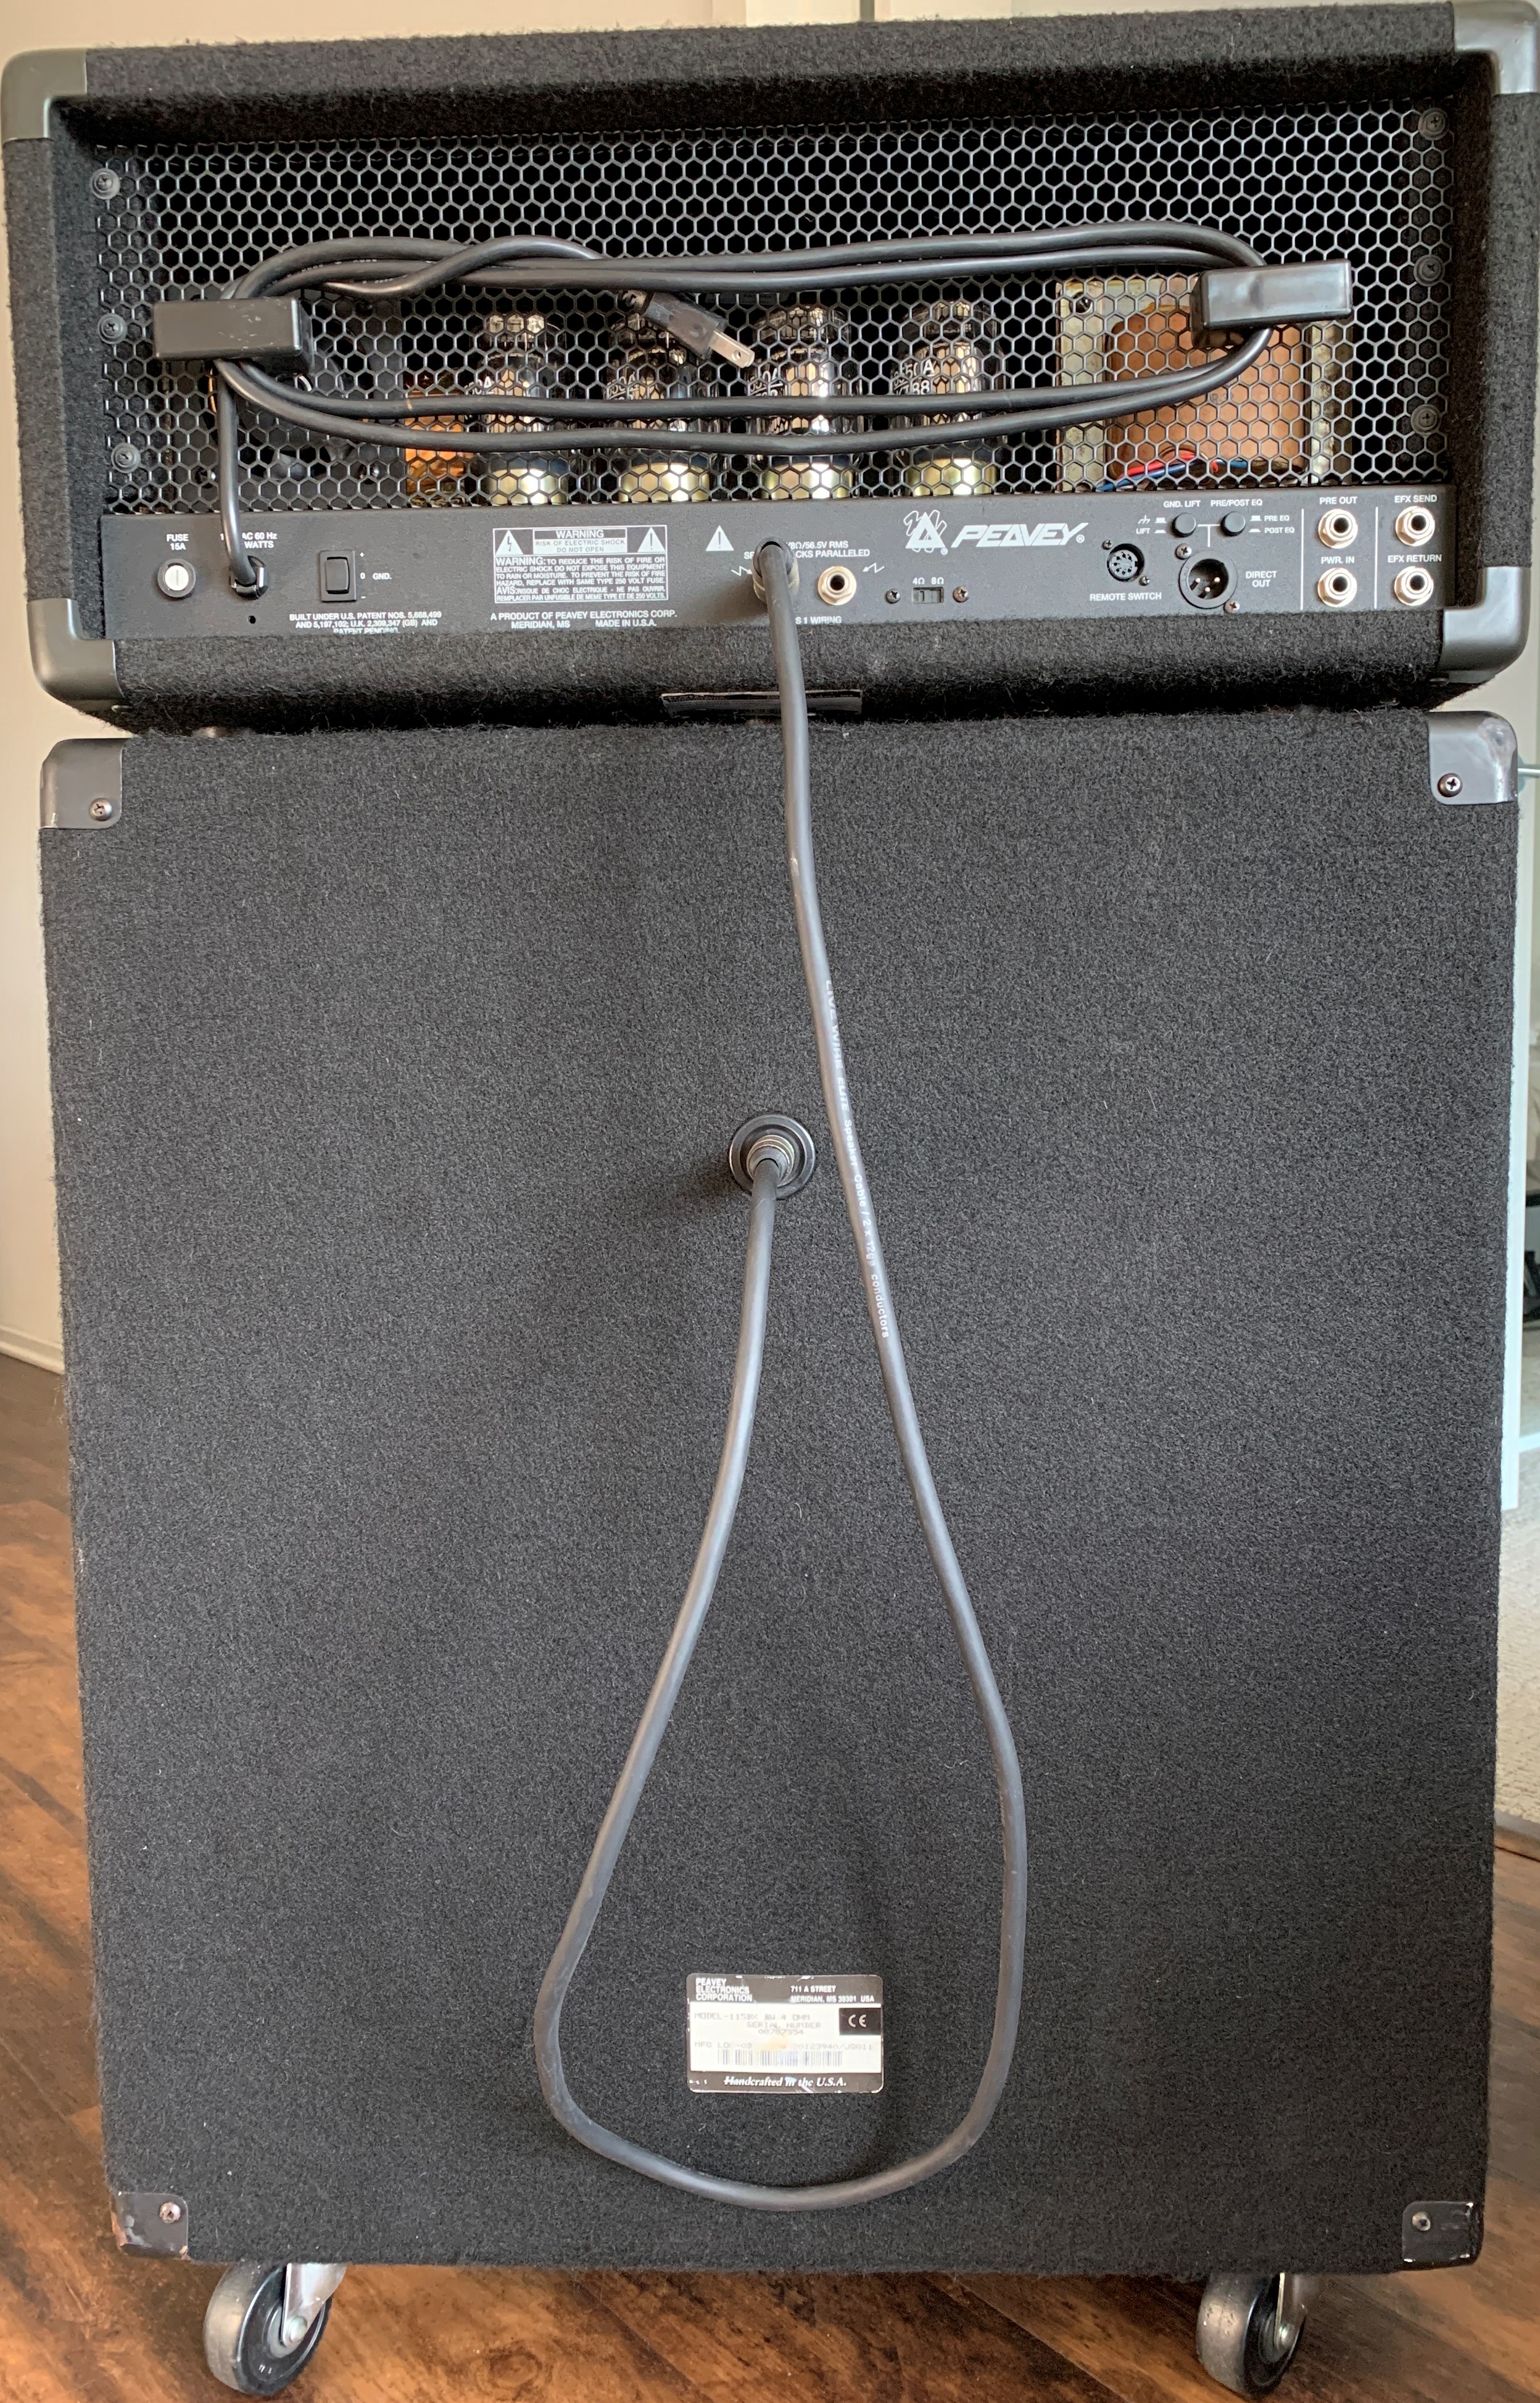
The head will need this matching profile: (24.5″ Width & 17.25″ Depth)
The choice of cabinets are these: (210TX, 410TX, 115BX & RBS-2)
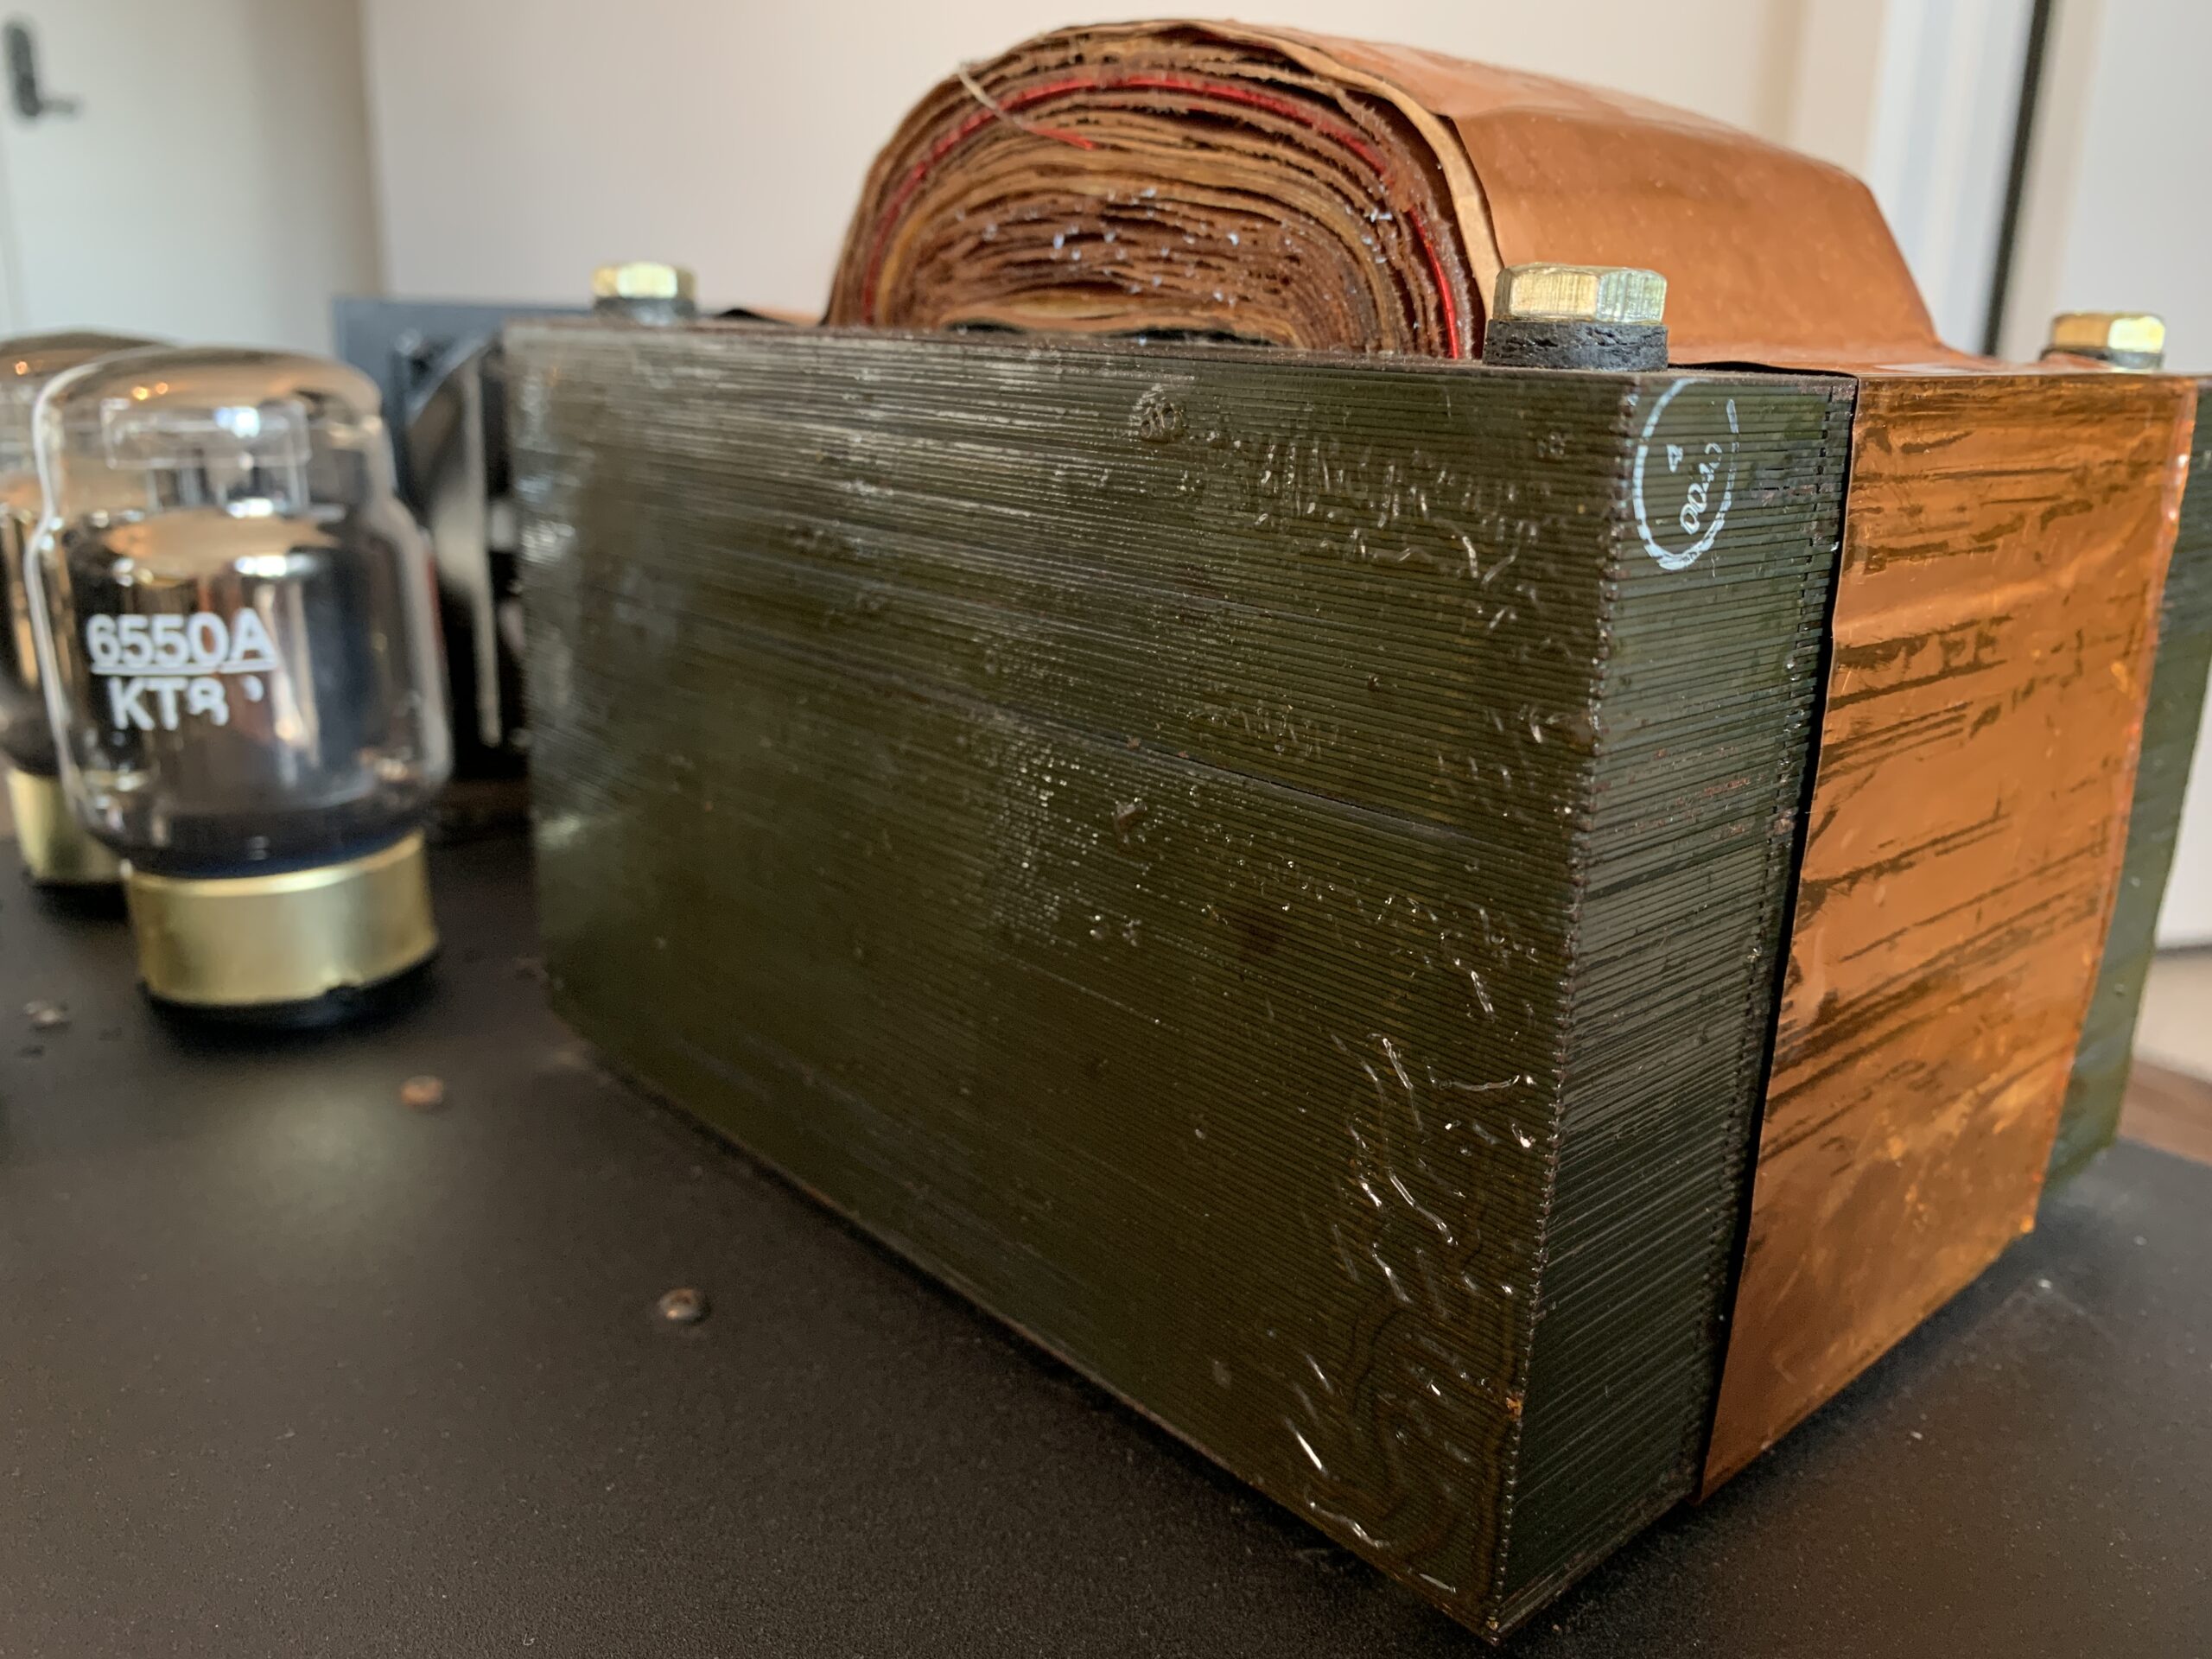
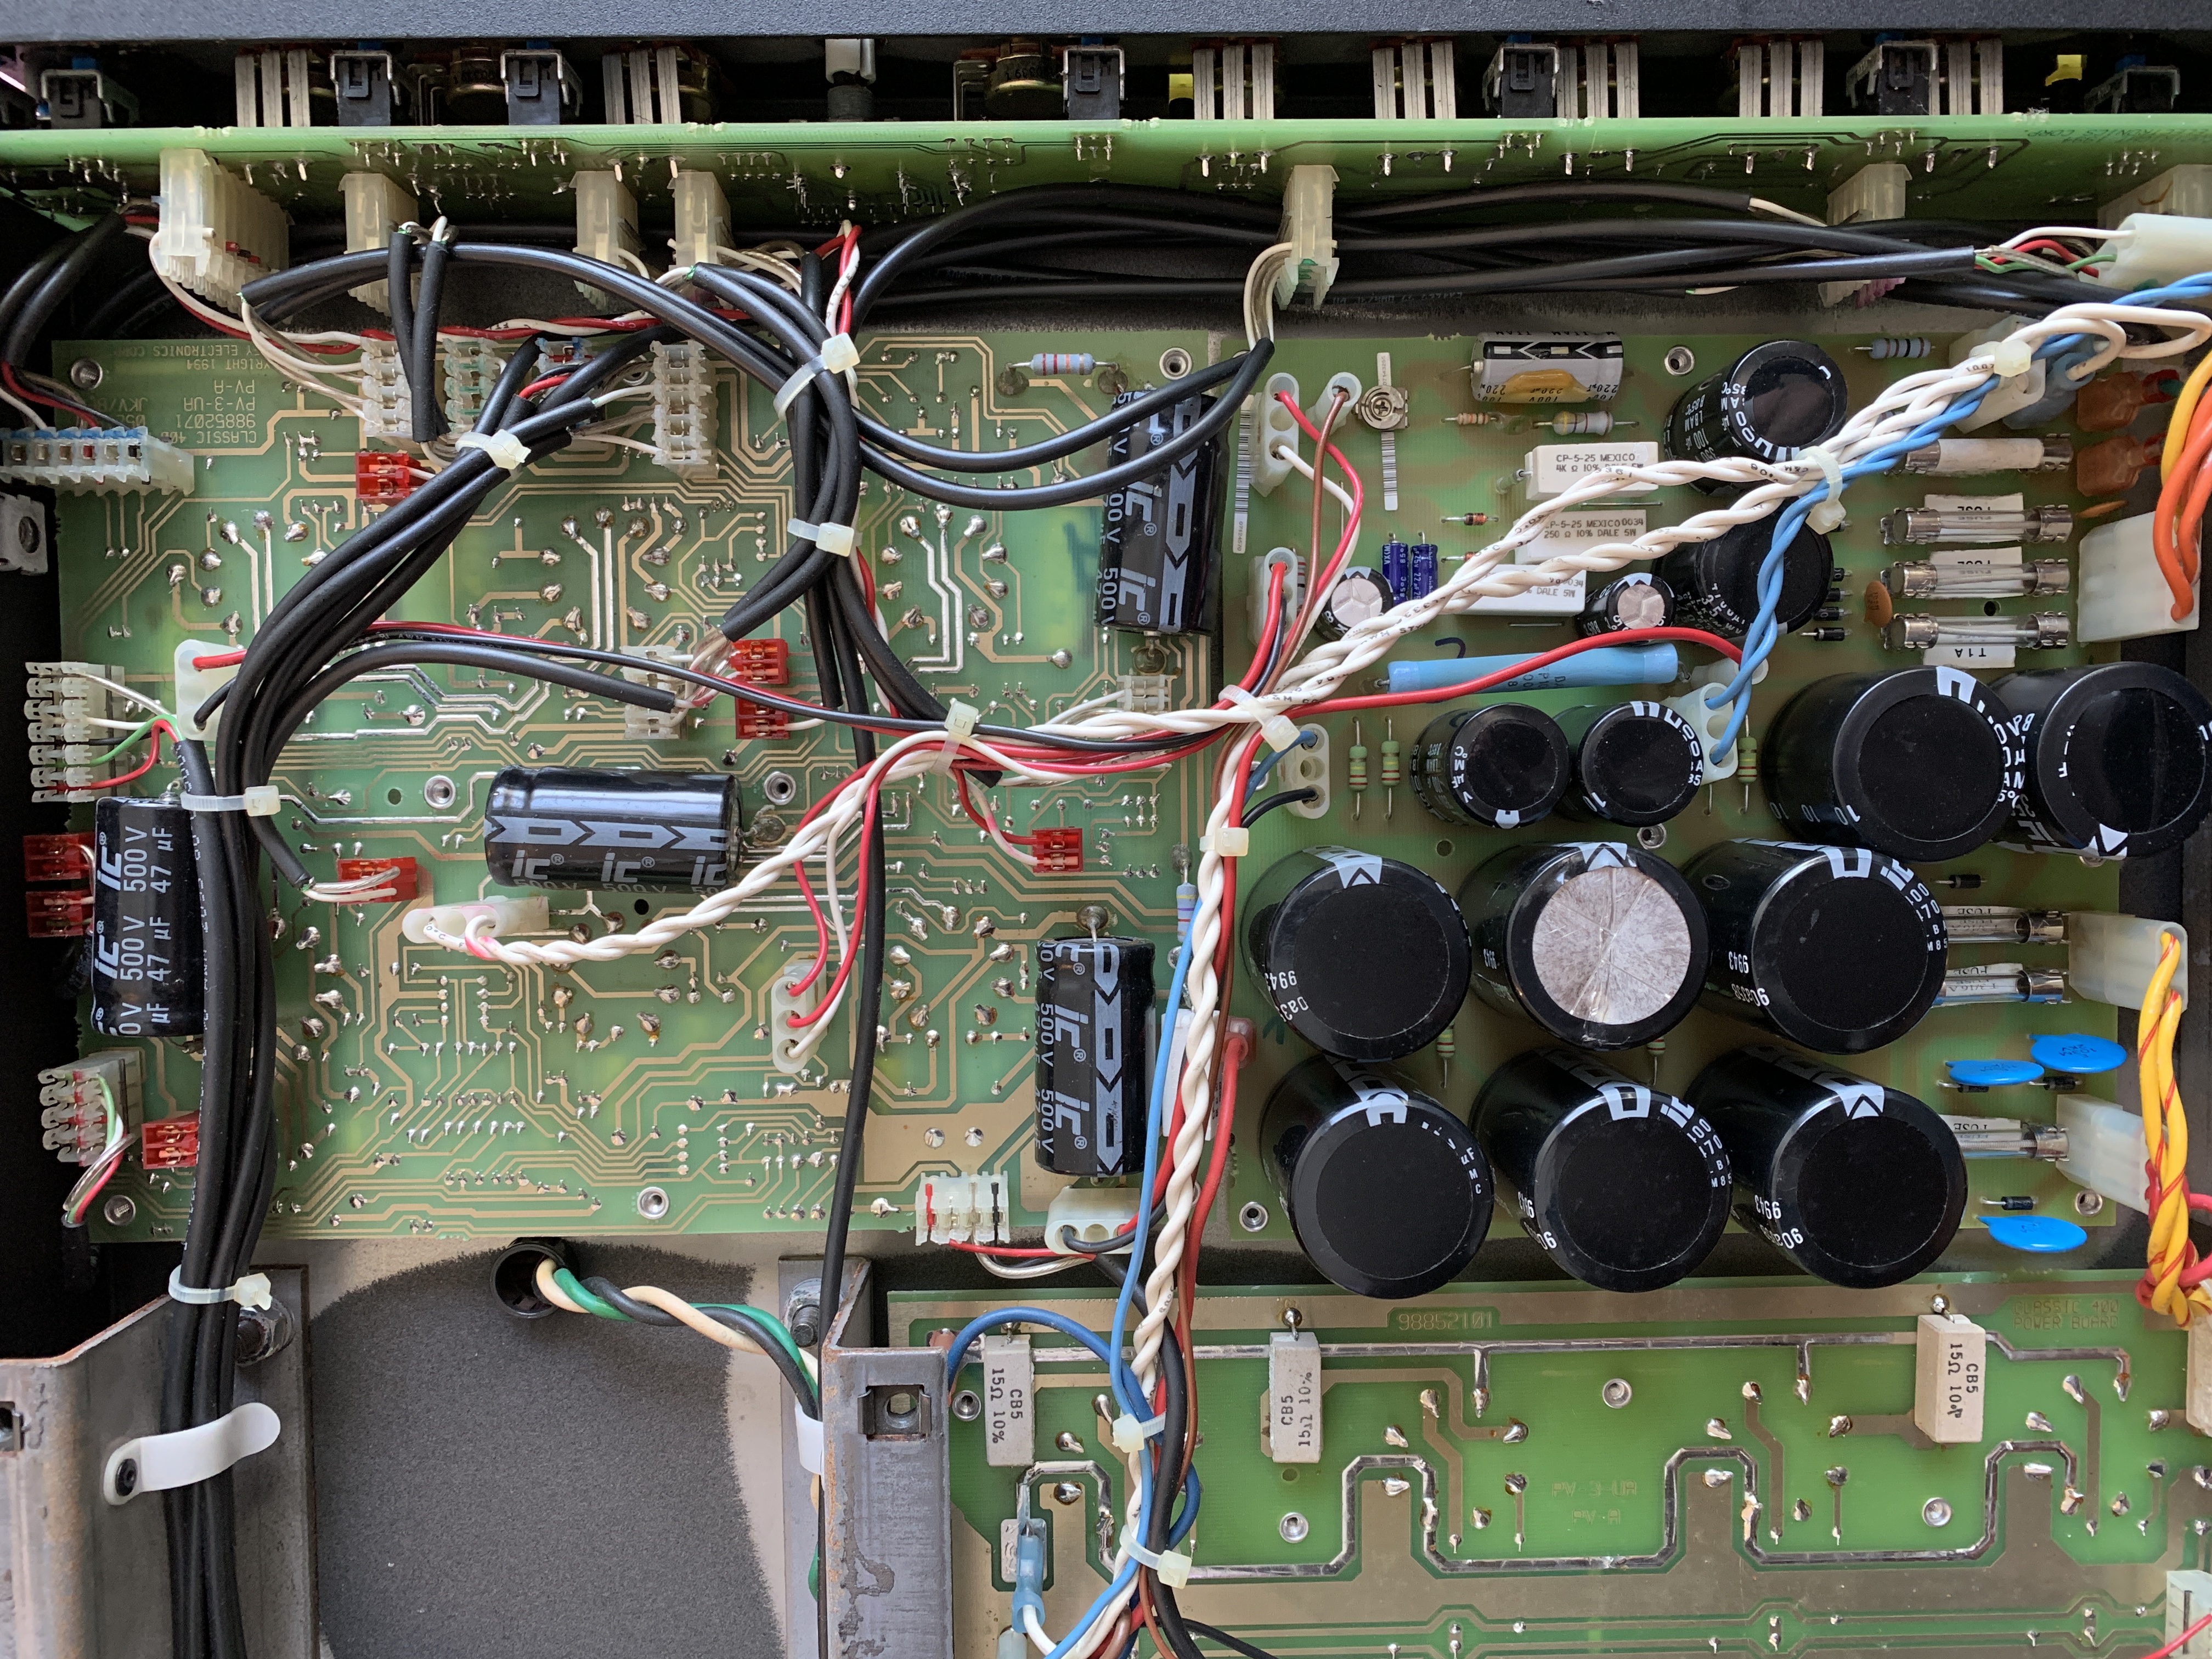
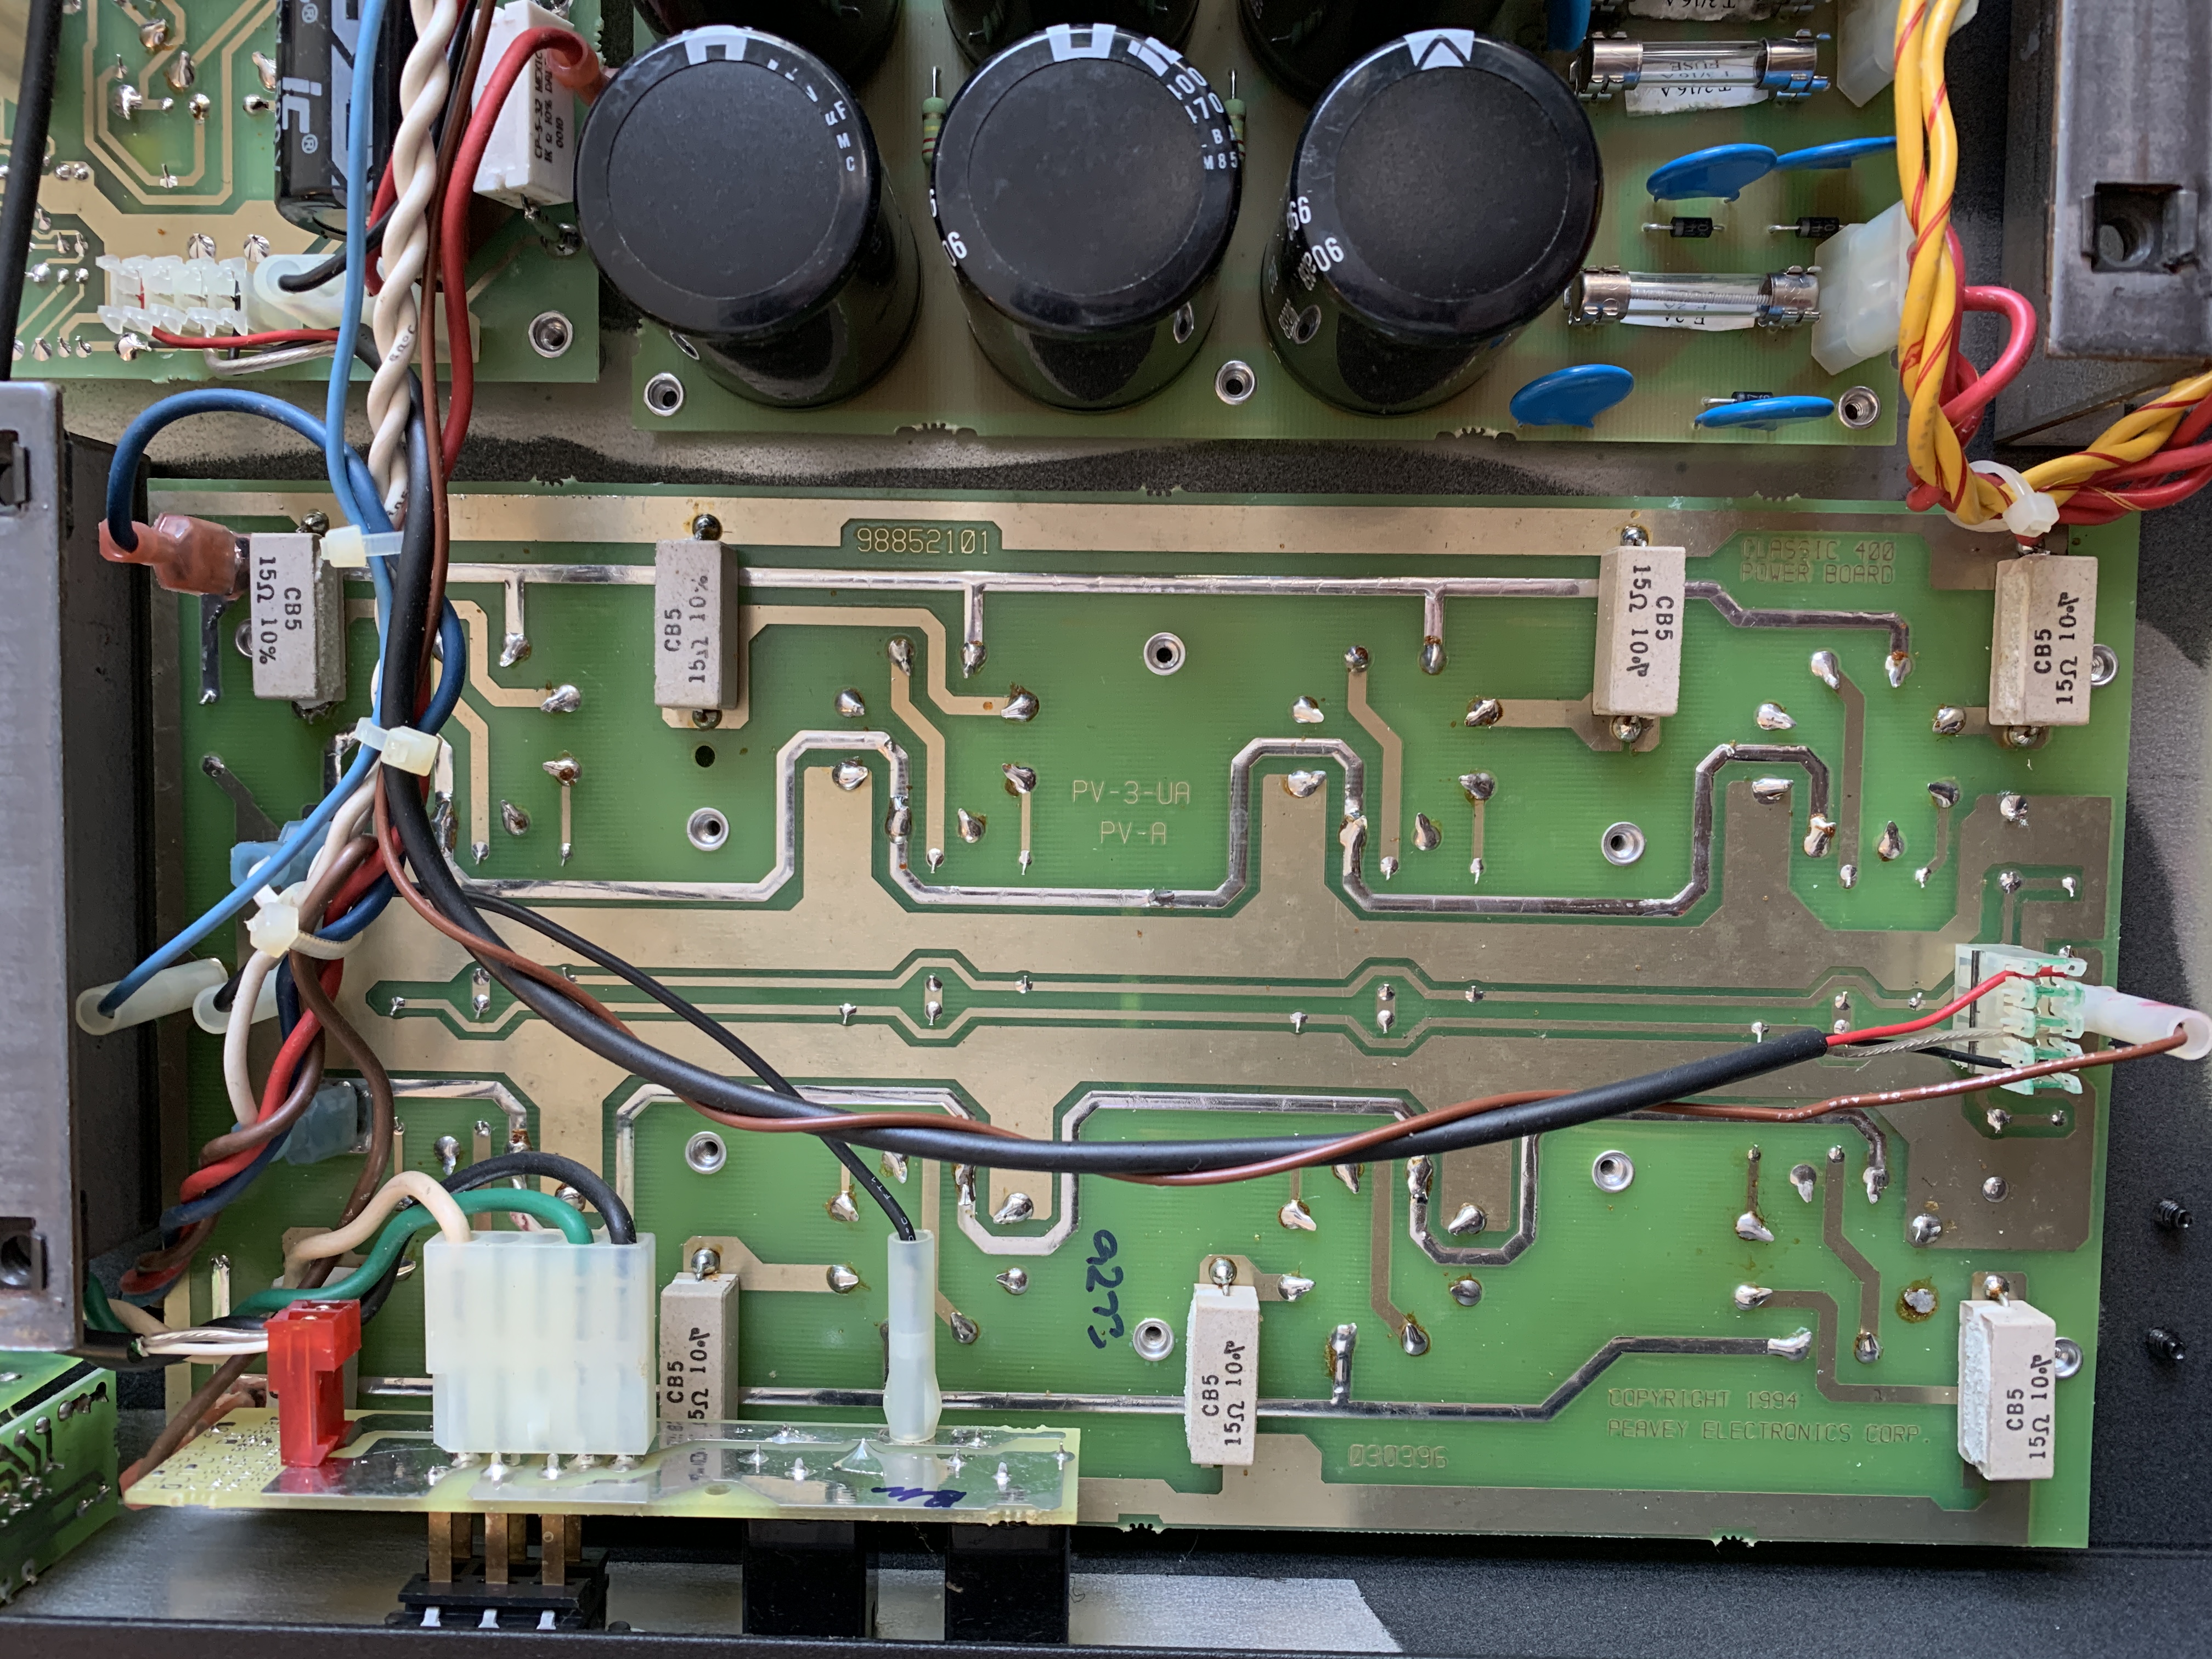
Well after much investigation I have some bad news. This amplifier needs a new output transformer. I was able to verify that all the tubes were operational and the preamp circuit was sending signal through. The tube were receiving 650vdc and everything on the main board was operational. I contacted Peavey and the output transformer for this model is not available. I reached out to Mercury Magnetics and I sent in my old output transformer to be reverse engineered. Hopefully this will mean that they will soon be offering these on their website. There is a three month turn time to tear down, inspect and reverse engineer my old output transformer. When it arrives it should be a pretty straight forward install and I will post pictures of the final rig. Not the repair I was hoping for but sometimes vintage gear repair is unpredictable.

So the results came back from Mercury Magnetics and the output transformer tested as good. “It passed 3,000 volt Hi-Pot and all secondary’s were tested and no fault found. We could not detect an intermittent issue nor a break down in insulation or any shorts primary to secondary.” Currently only the preamp signal is passing through to the speakers which means that I am back to the beginning of diagnostics. I will have to look into this further and it is turning out to be quite the difficult repair. So far, tubes, output transformer, primary transformer all test good. The preamp signal is coming from the send outputs and all the faceplate controls work. B+ supply voltage is reading around 675v and the signal gets to the power section. I feel like it has to be something minor I am overlooking.
Update: Still seeking the culprit, some transistors on the preamp circuit were replaced but that did not resolve the issue either. There may be a concern that the center tap voltage is not getting to the output transformer correctly. In the beginning that was an item that was measured as ok. I now have the help of Jeff Snider to help diagnose this repair and resolve it finally. Will update the results when they are in.
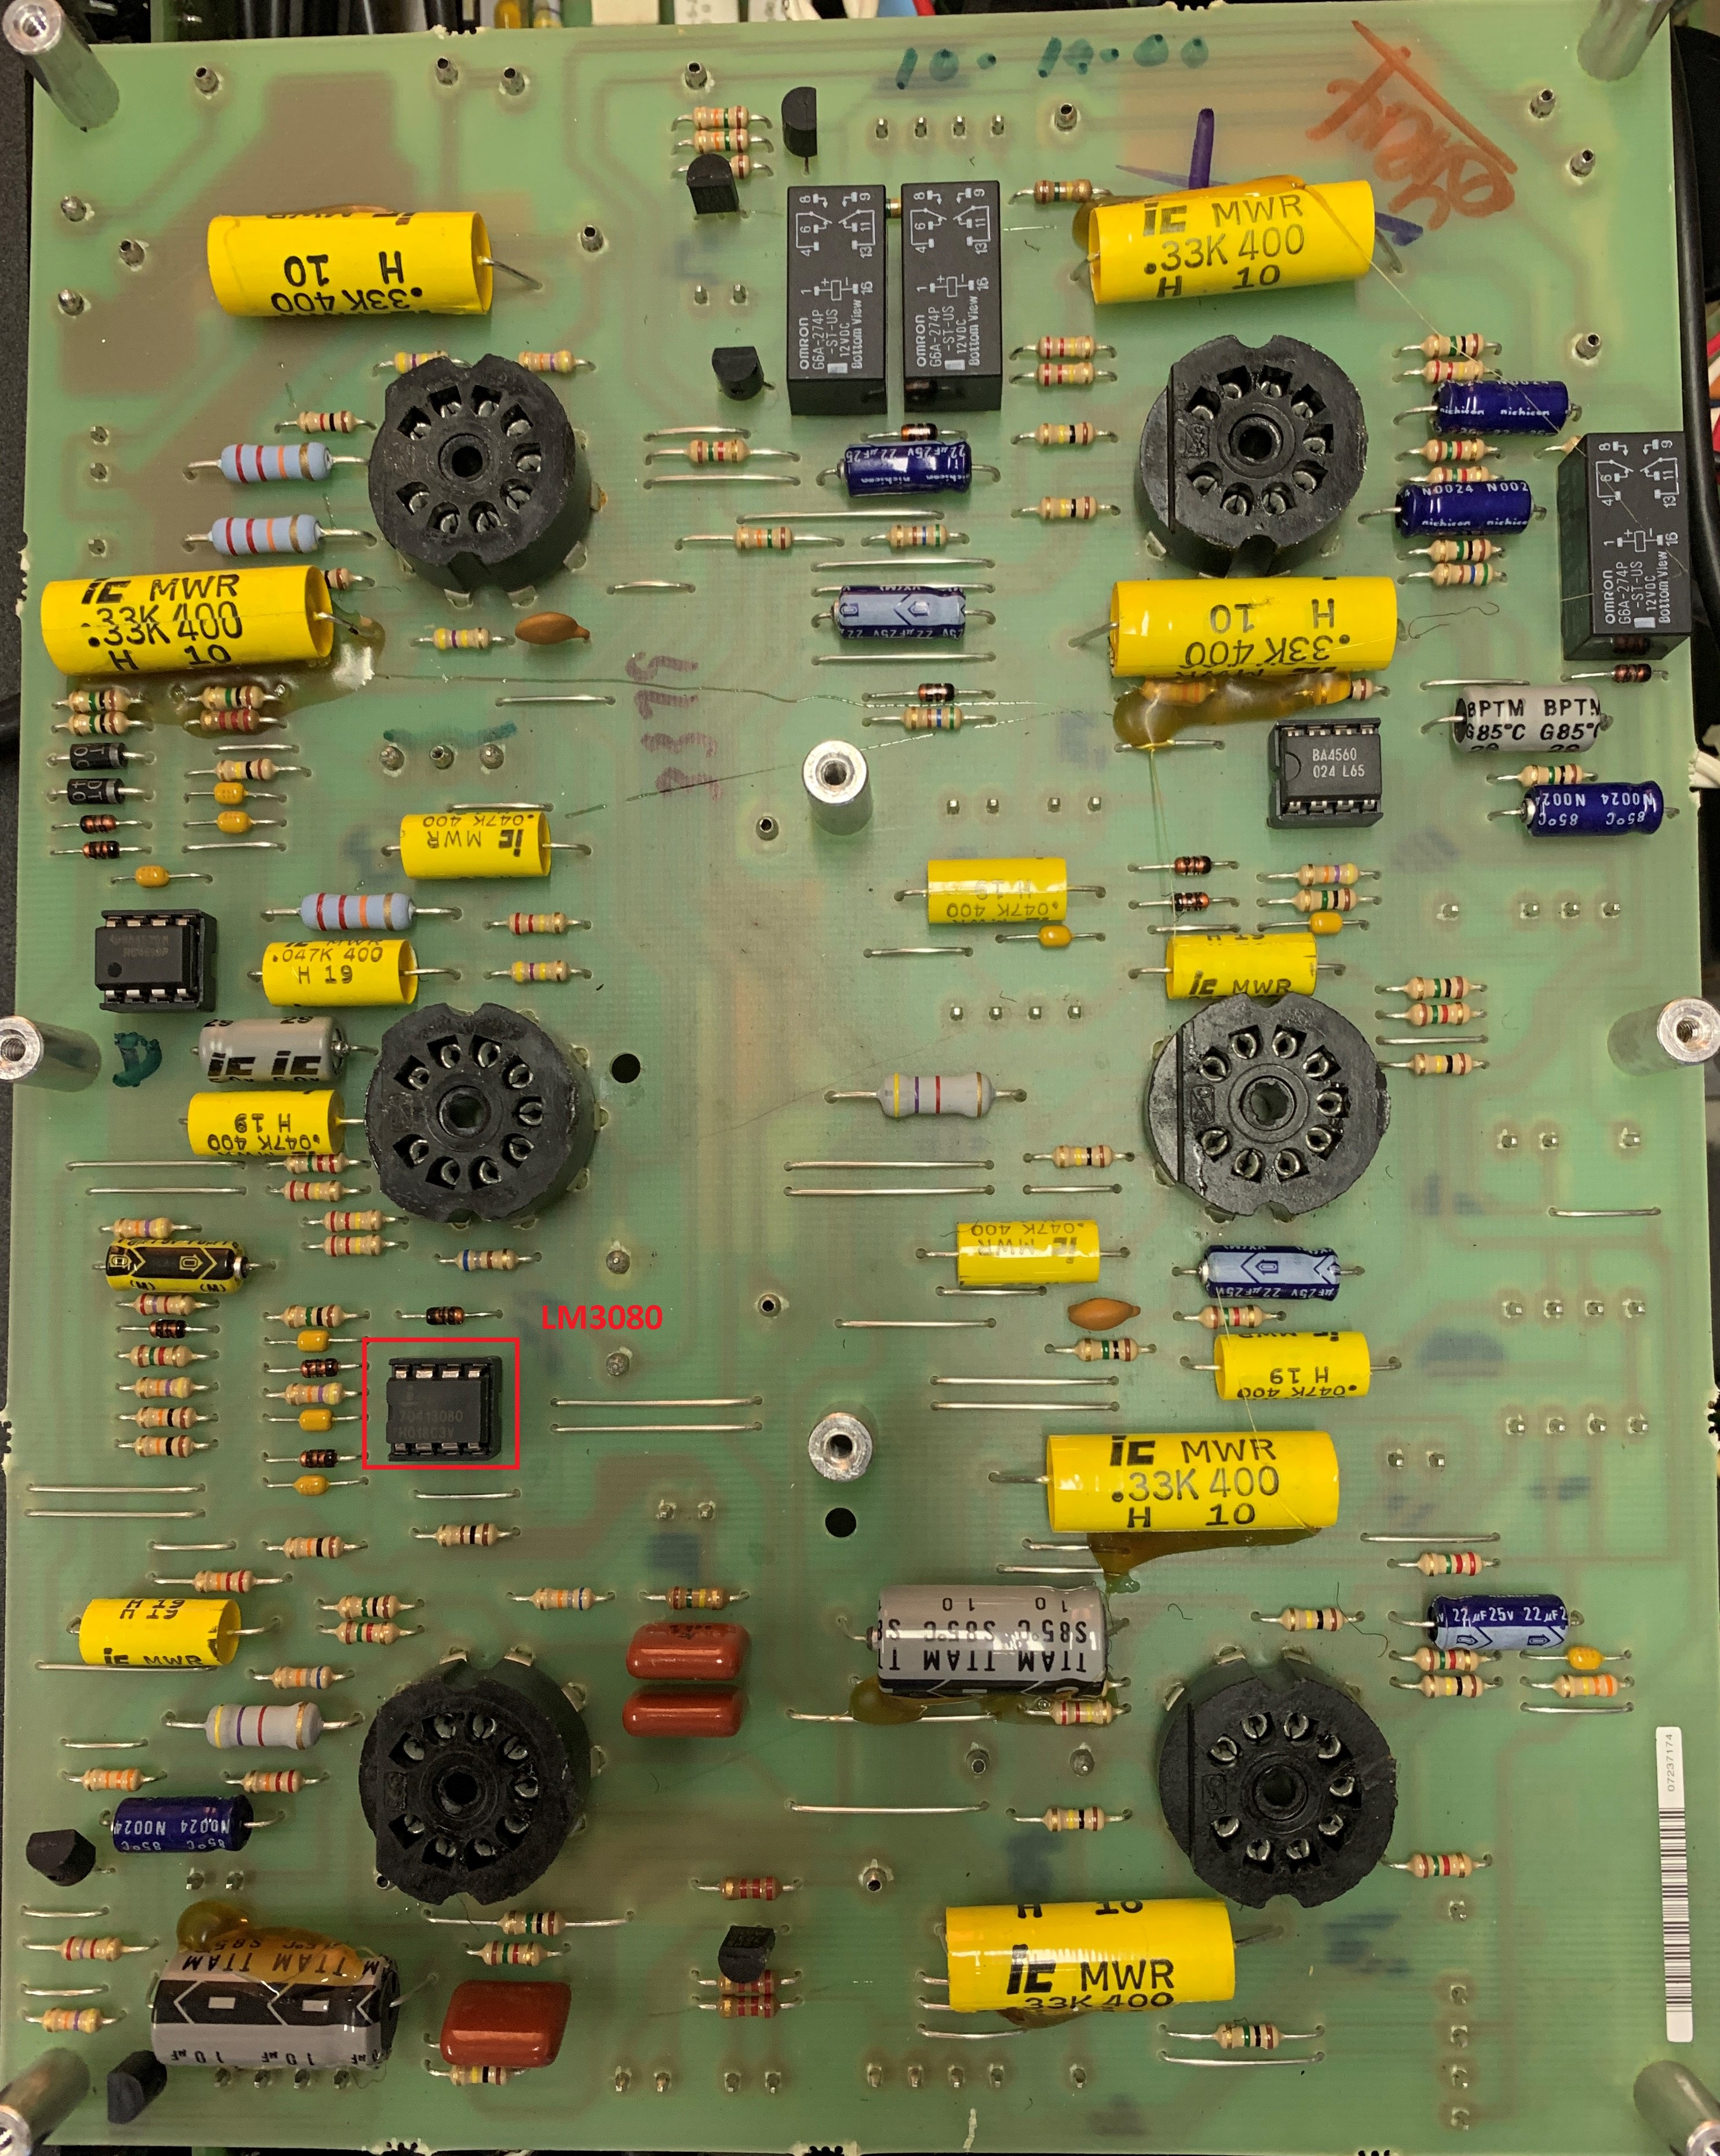
Ok the results are in: 08/28/21
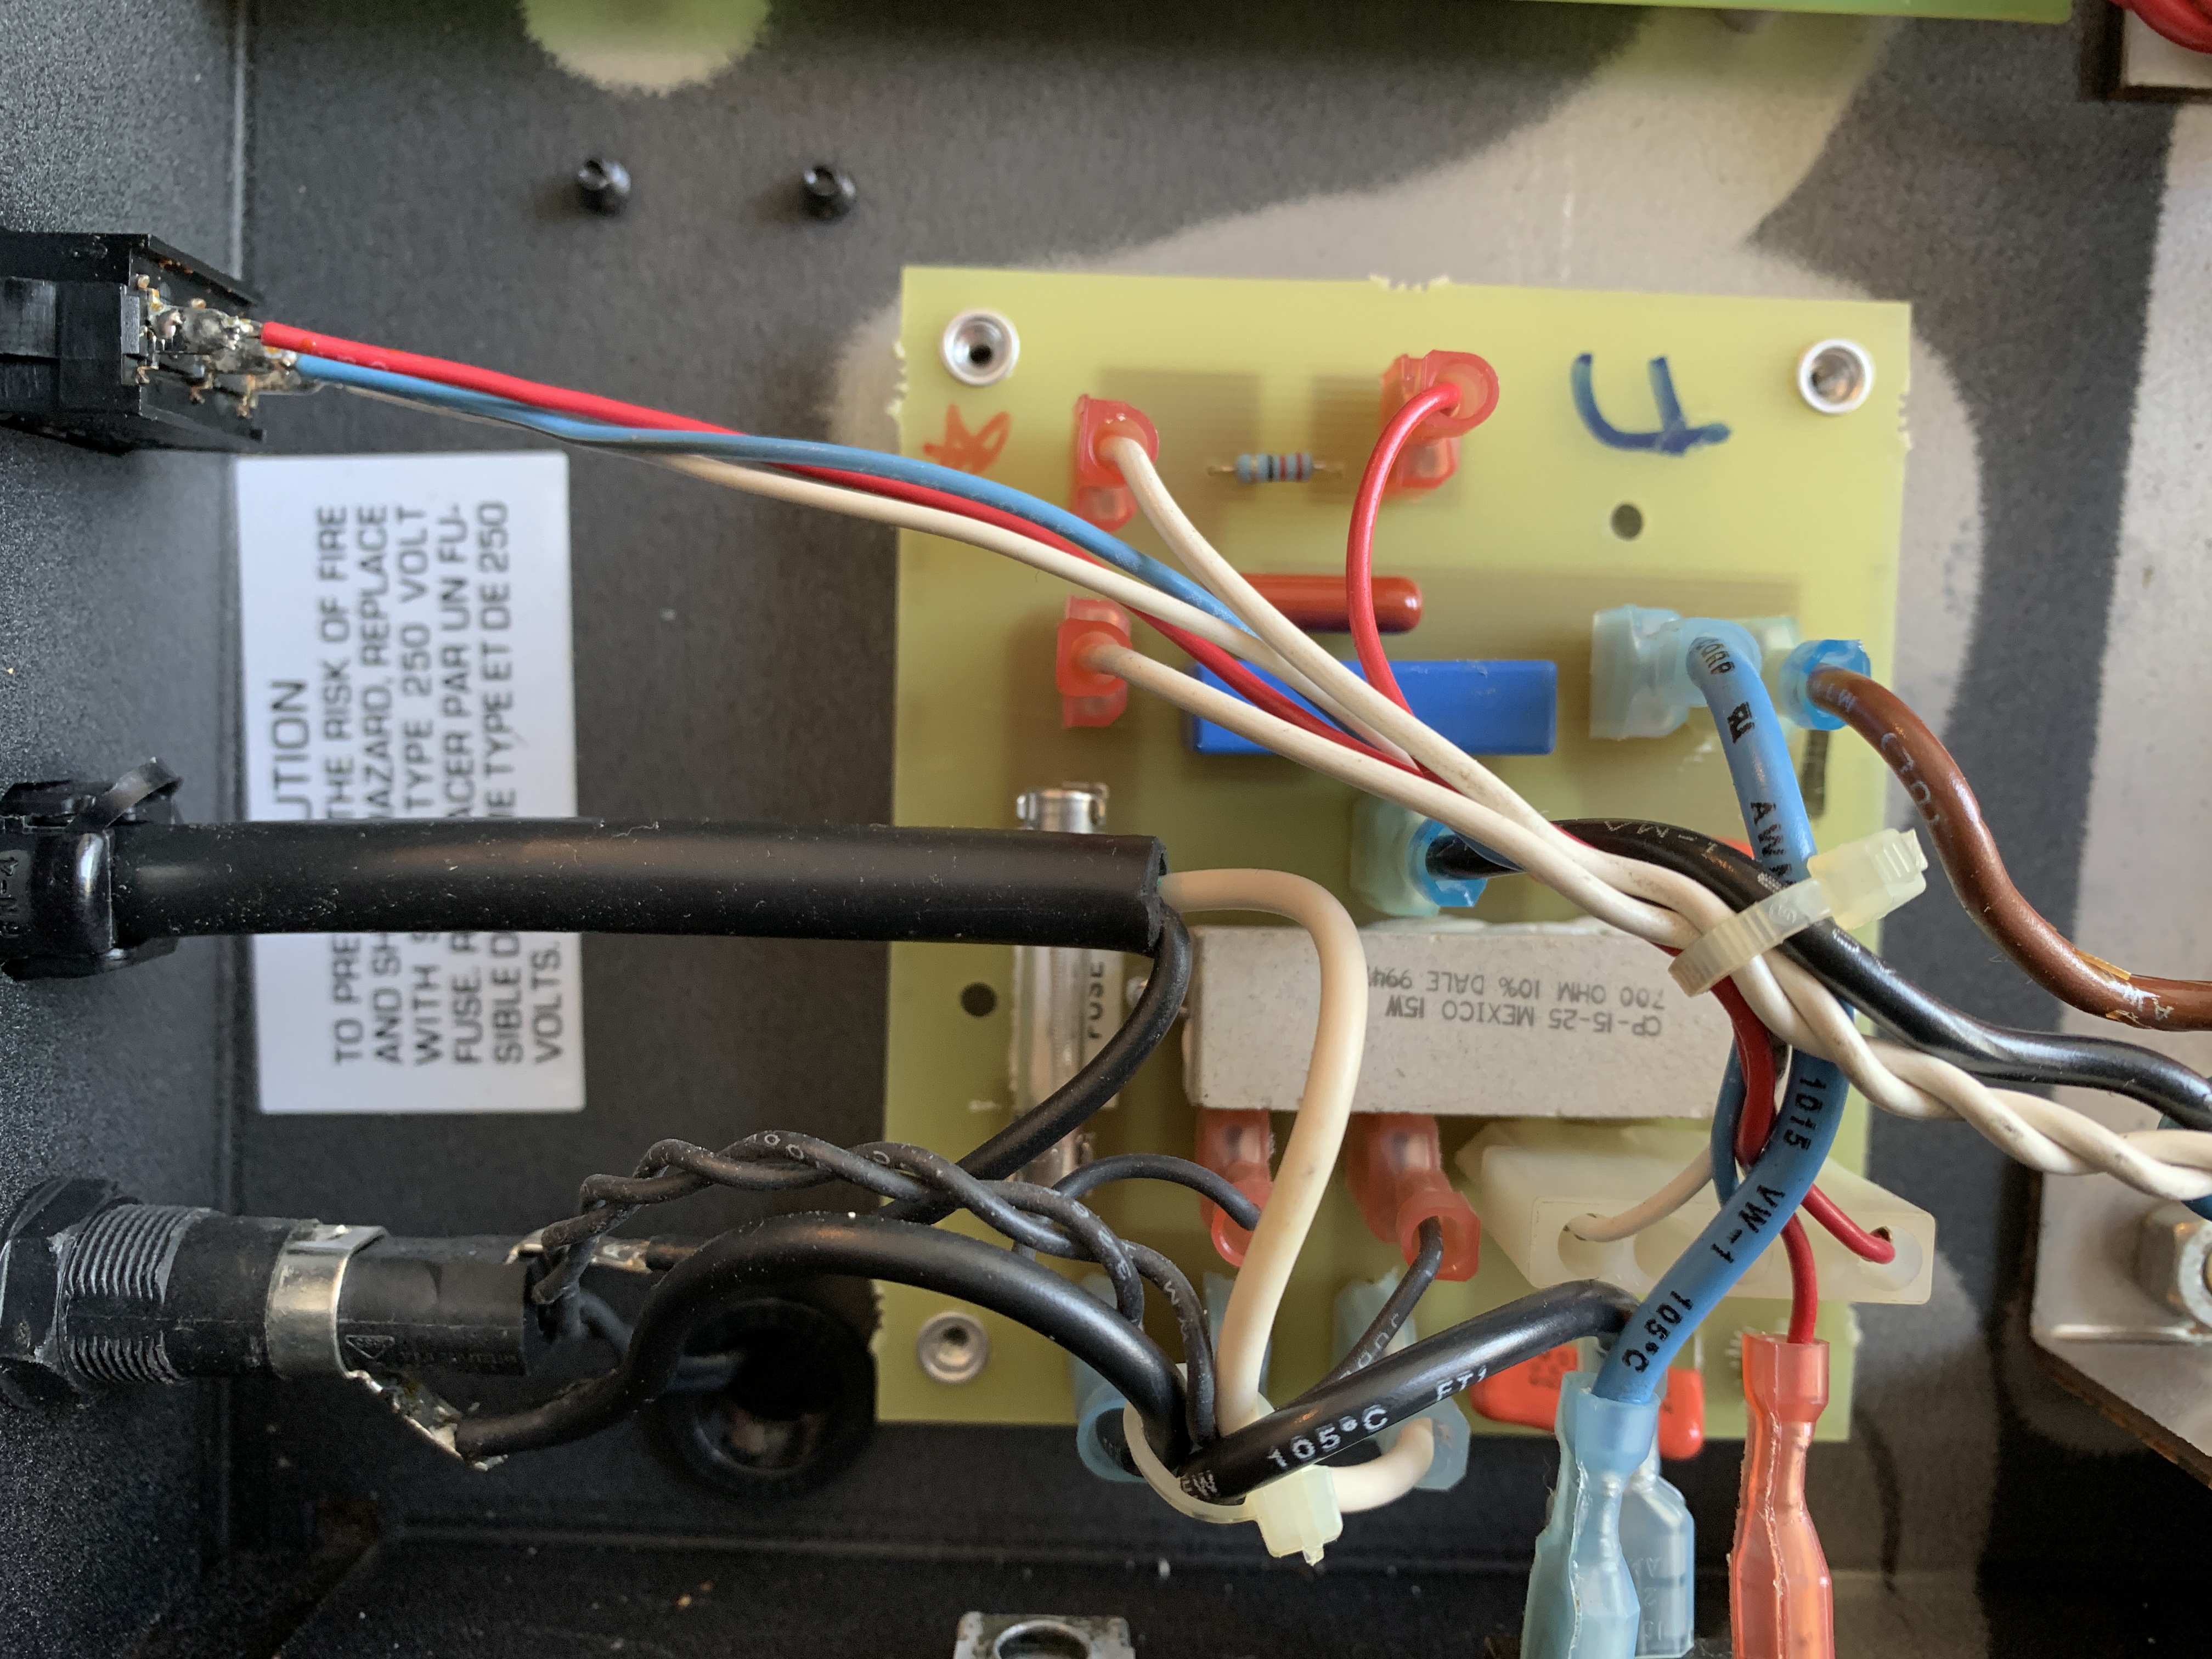
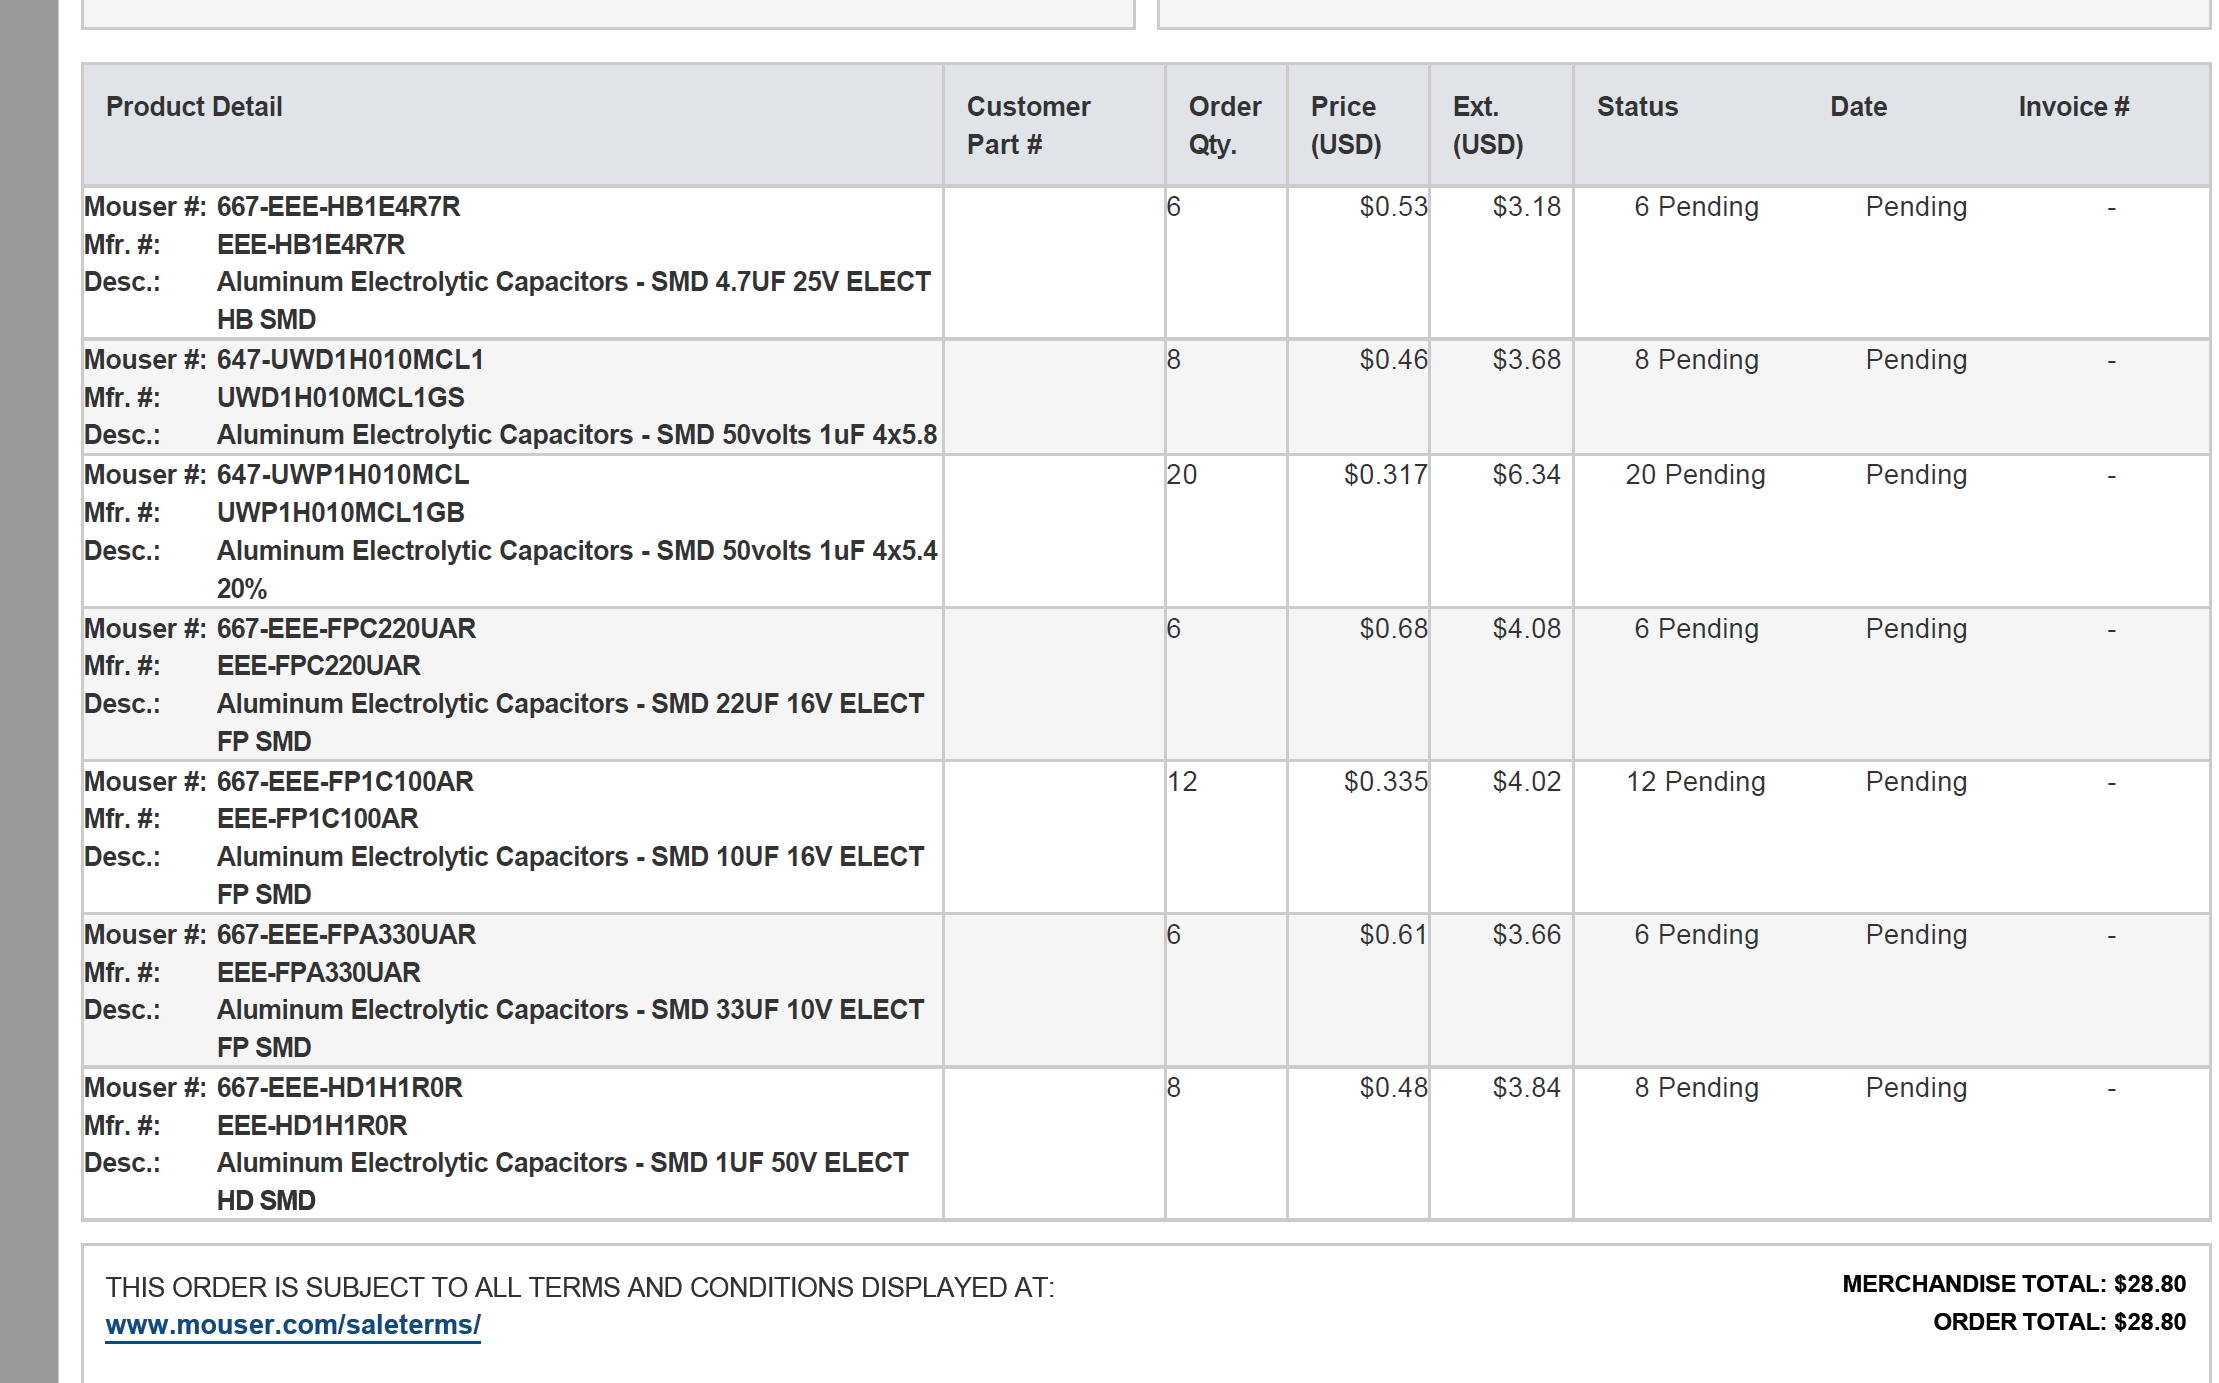
This particular model has a primary transformer that is rated (Japan) at 100v. When running it on (US) 120V it also increased the output of the low voltage line to 17.5vdc. This in turn caused an operational amplifier on the preamp circuit to burn out LM3080. Ideally to run at 120V, this chip should be LM3080A which is rated at 22v max or LM3080N rated at 18v max. These chips are discontinued and hard to find. He was able to source an LM3080N rated at 18V max and recommended I run a 20A variac or step down transformer until I can source a higher rated chip. (This chip is located under the preamp board)
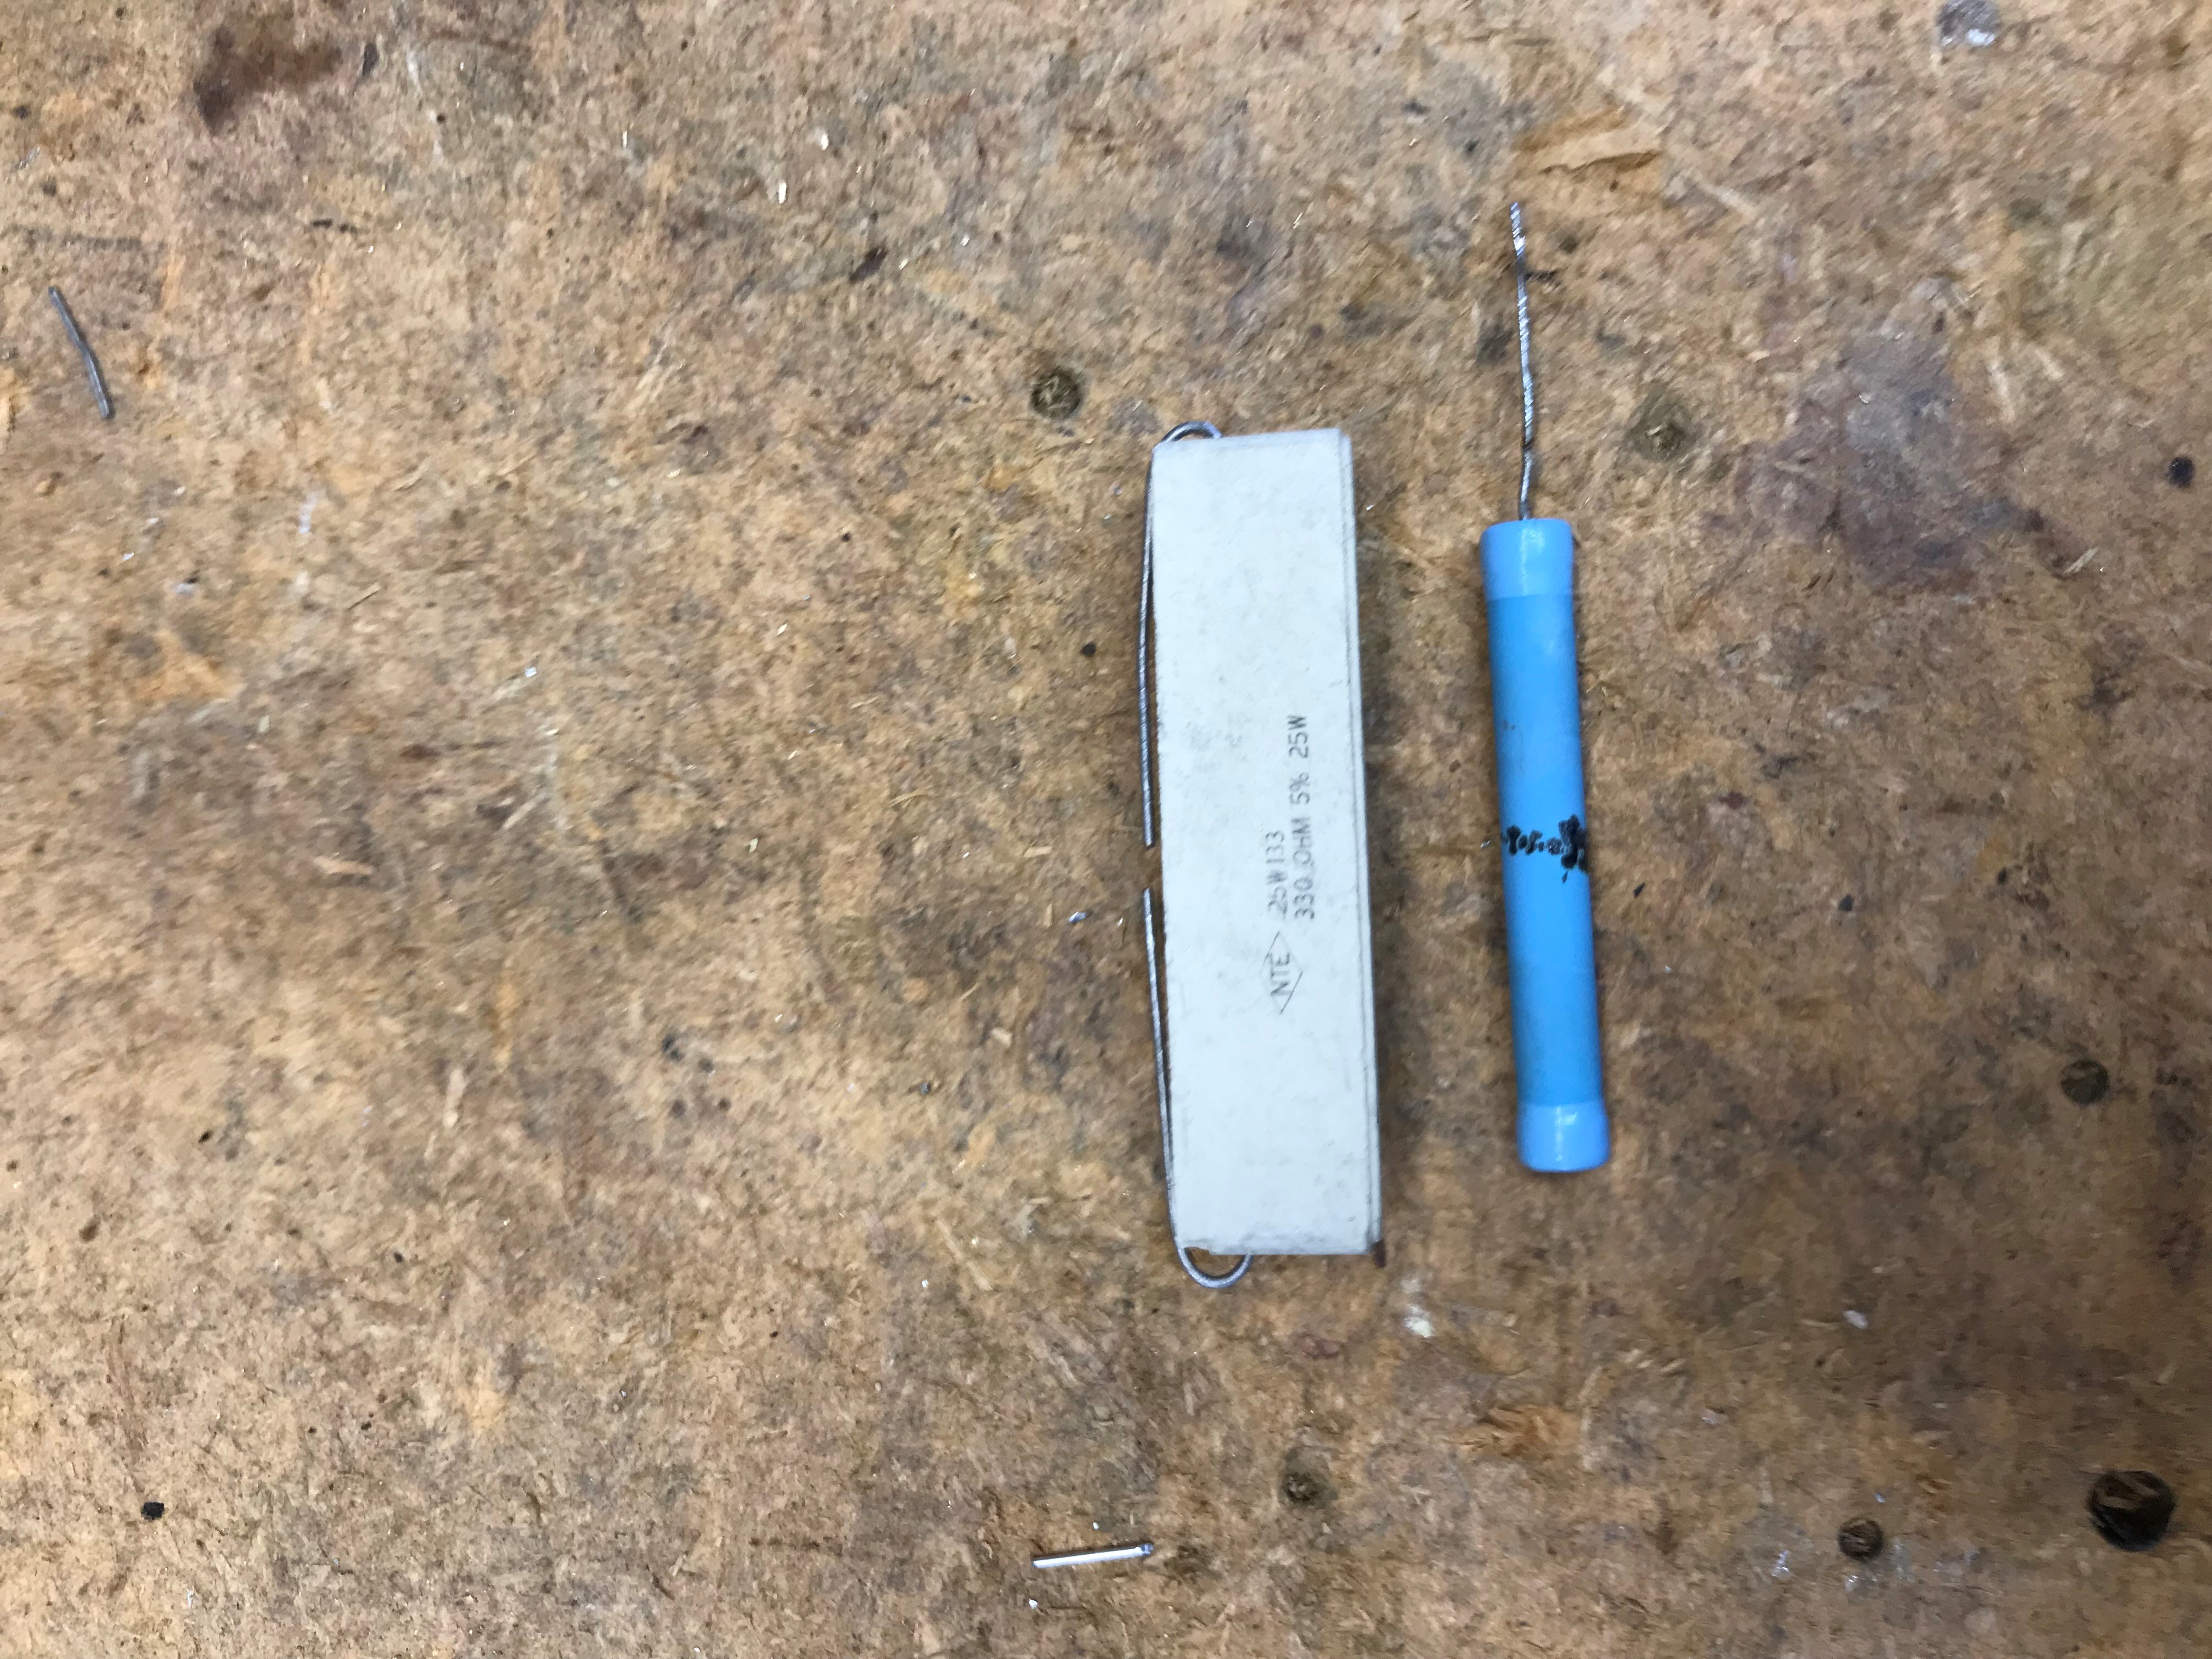
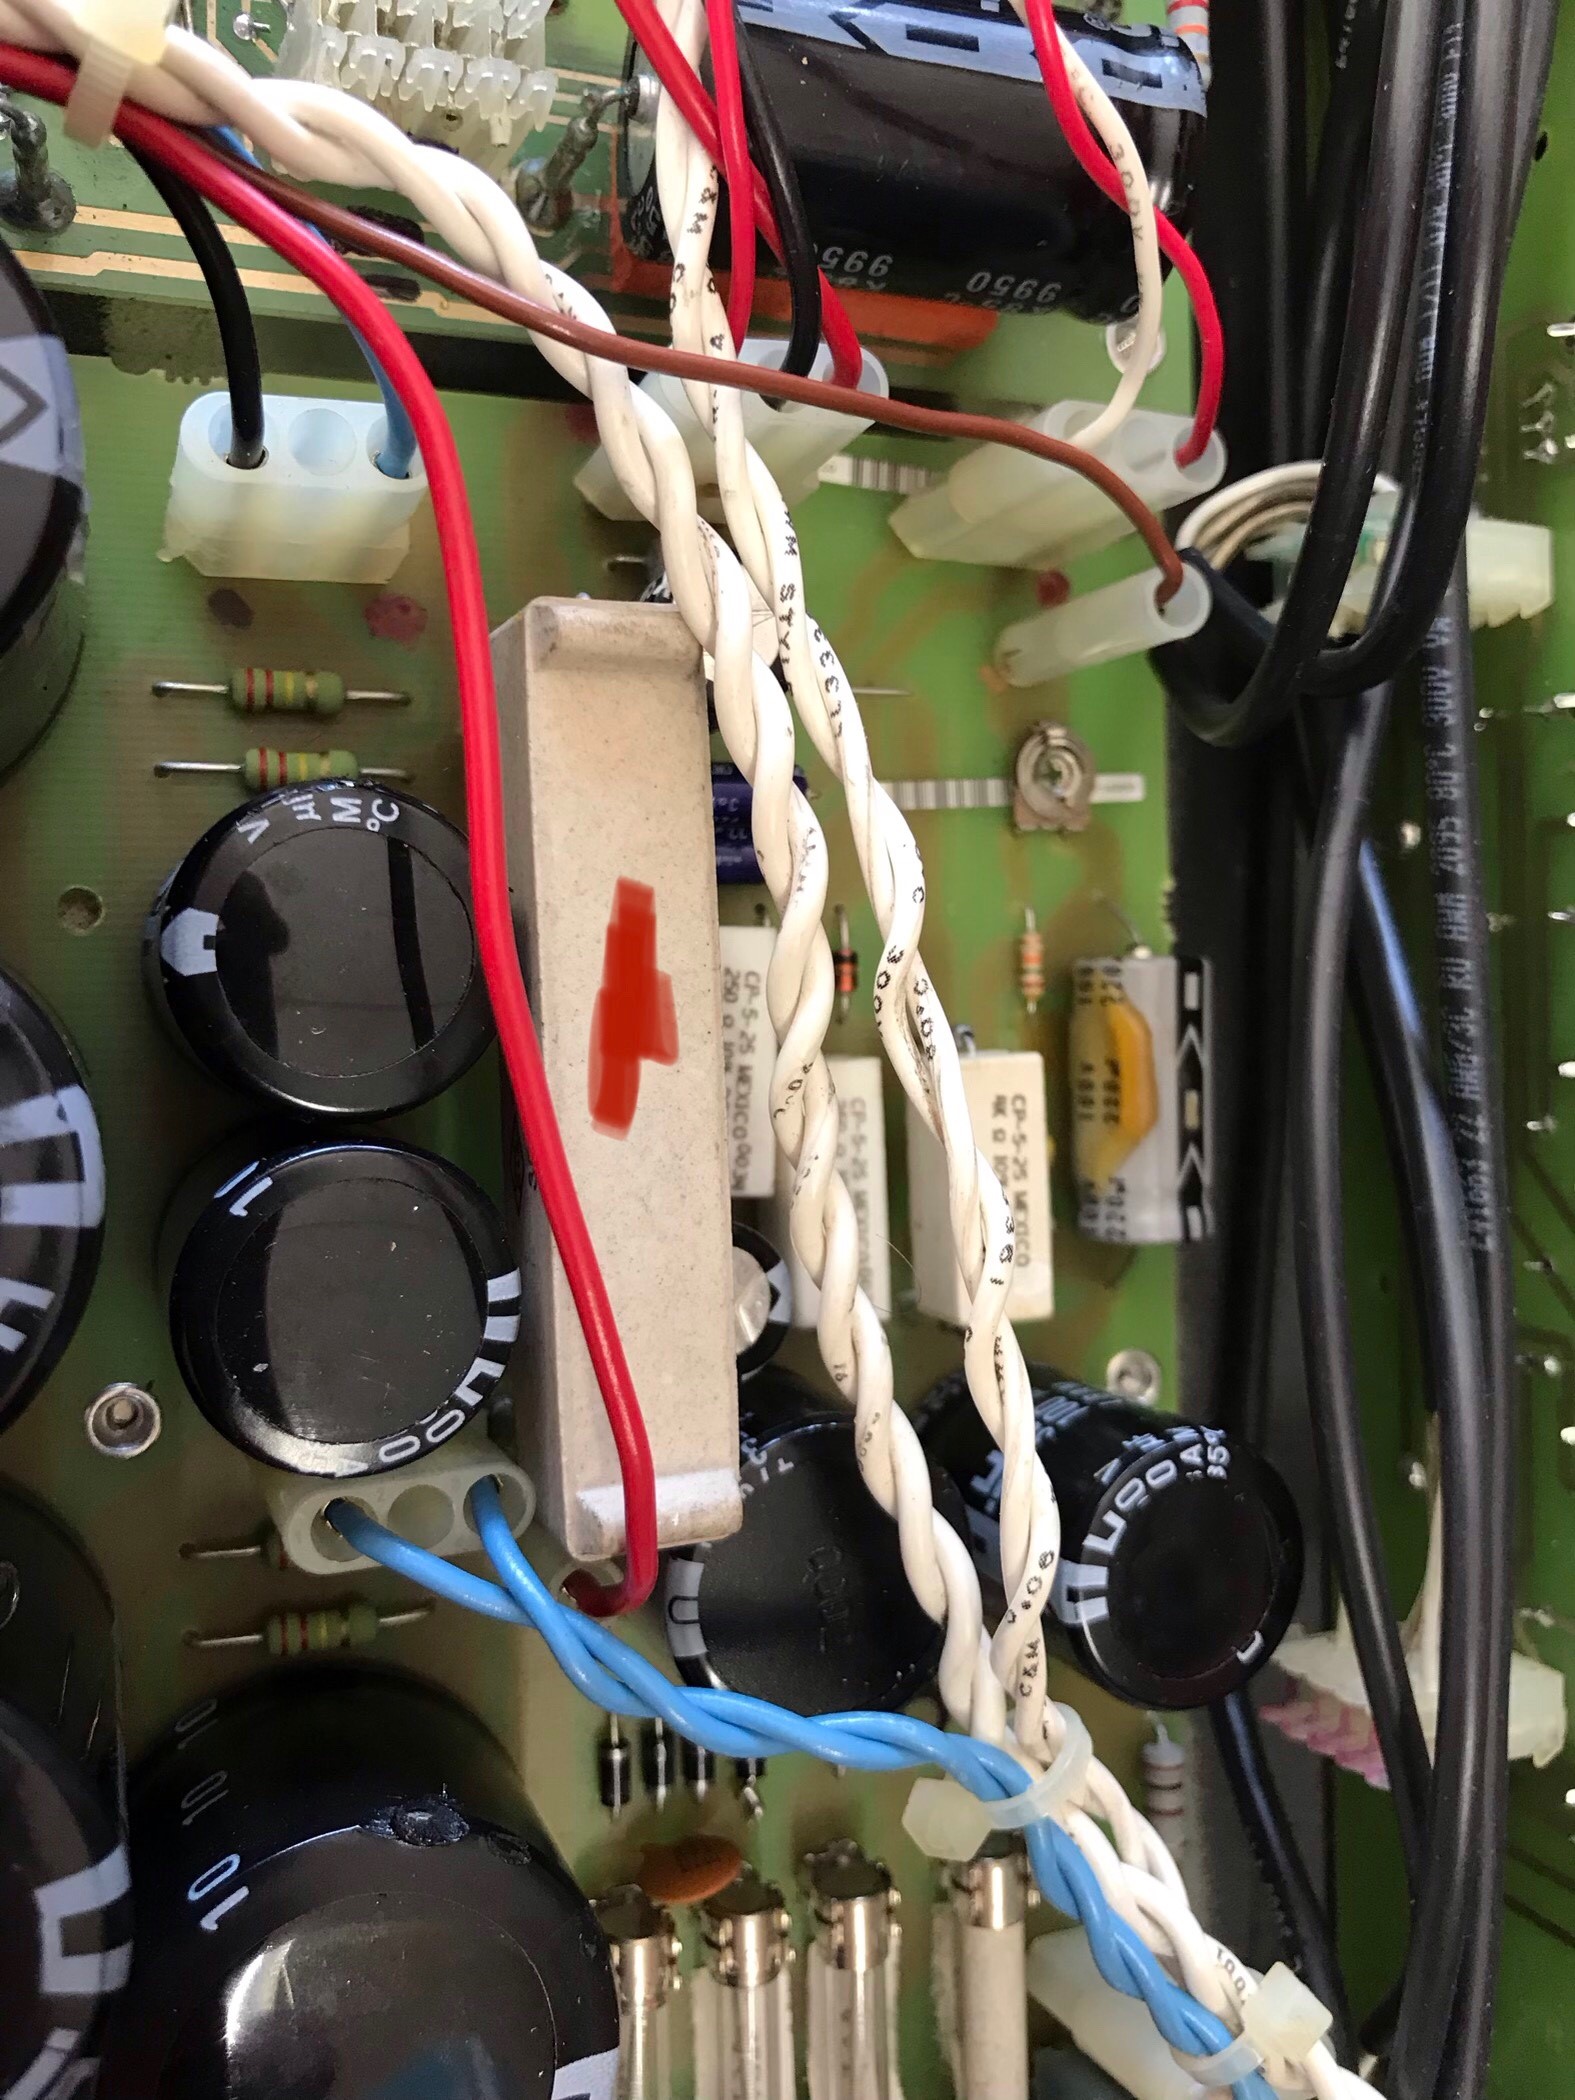
Next a resistor was bad causing high voltage line to not make it’s way to the power tubes grid plates. It has a burn in the center suggesting that the original component was burned over time. He increased the size from 15w to 25w since there was enough space. Ideally this power amp could use a filter choke in this location instead of a resistor. Unfortunately due to the size of the power transformer, a filter choke would have to be the size of a 50w output transformer and just wouldn’t fit.
Lastly there were preamp tube problems. There are 5-12AX7 & 1-12AT7. The AT7 was in the wrong location (no markings on the chassis, located back row towards the center of the amp v6). The forward bank v1-v3 (closer to faceplate) of 3 tubes have a dc filament voltage and 1additional tube at v4. The rear bank has 2 ac filament lines at v5 & v6 . 1 tube in the locations v1-v4 had a bad filament causing a break in the dc filament voltage which are in series. He changed all 4 of the 12AX7’s in this category. The filament was burning out due to the increased voltage from the transformer causing all v1-v4 filaments to go dark. Normal voltage should be +/-12.6vdc and the readings were +/-17.5vdc. It may be possible to source some JAN tubes that have a higher filament voltage rating so that the amp can run at 120vac. In this case the best solution will be to run the amp with a 20a step down transformer at 100vac.
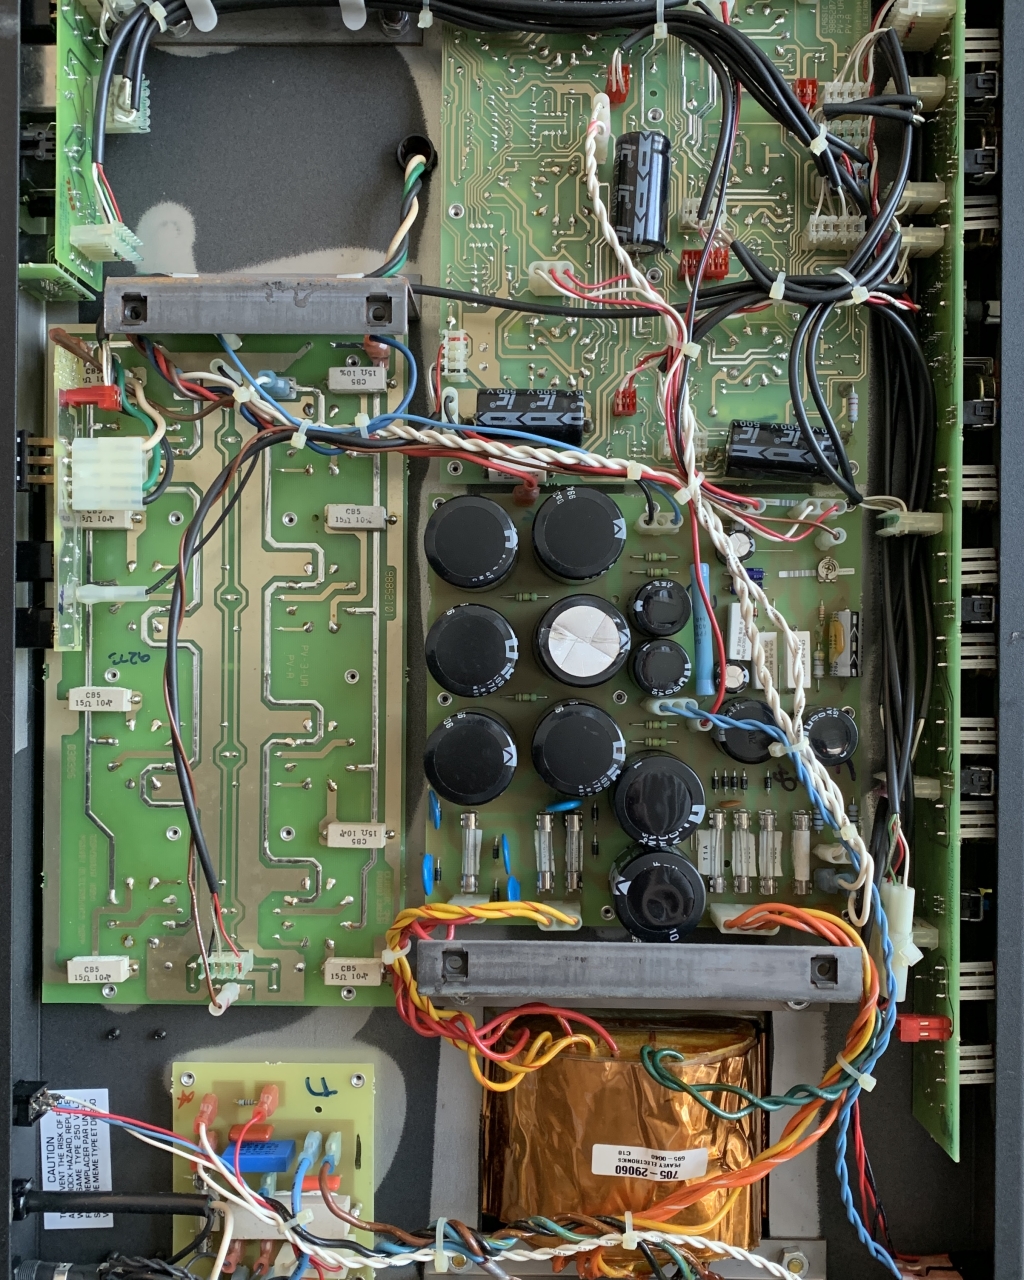
The amp was final biased using a matched octet of new 6550 ruby tubes. Overall summary, not any easy repair to diagnose. The tweed models have the 120vac rated transformers, in my opinion they just don’t look as nice. I will post a pic of the full rig when I get the head back. Below are the documents associated with this investigation and additional photos.


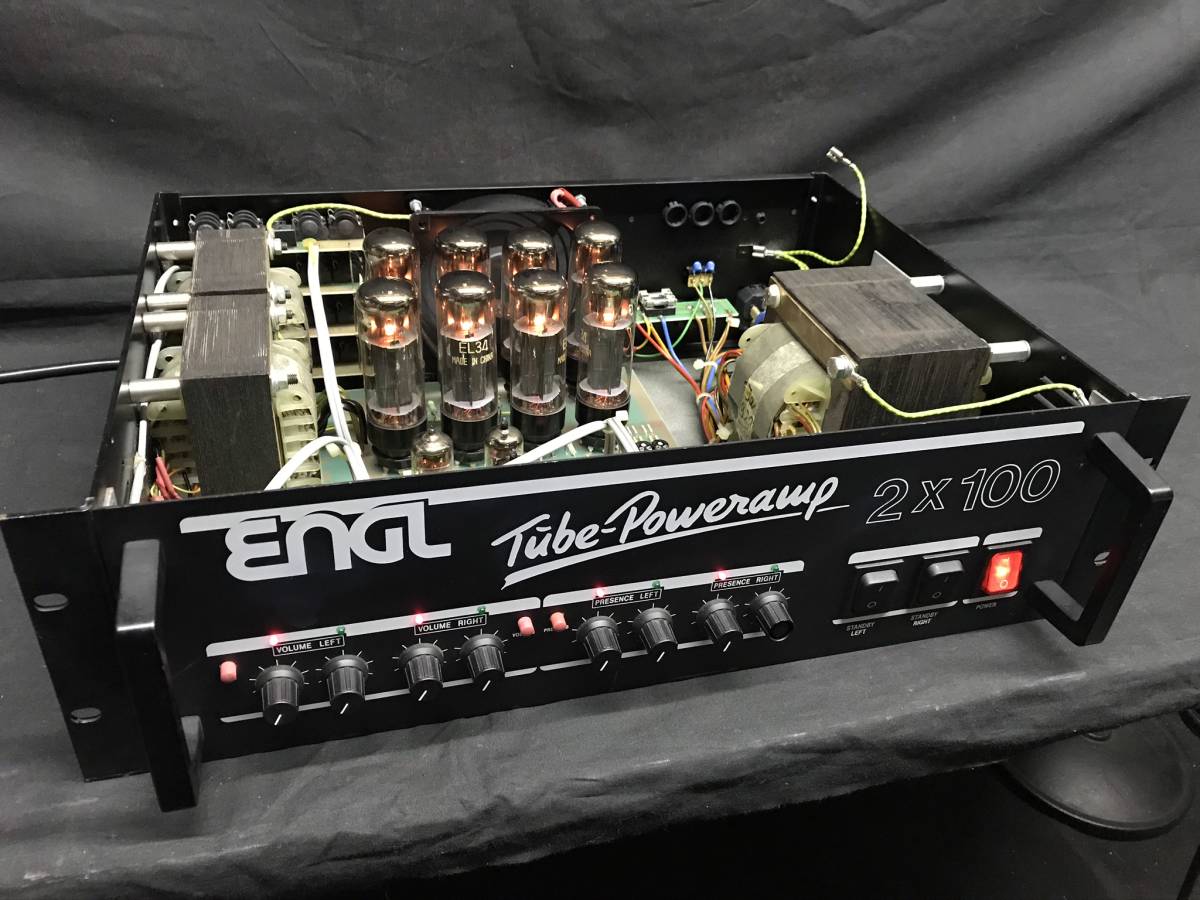
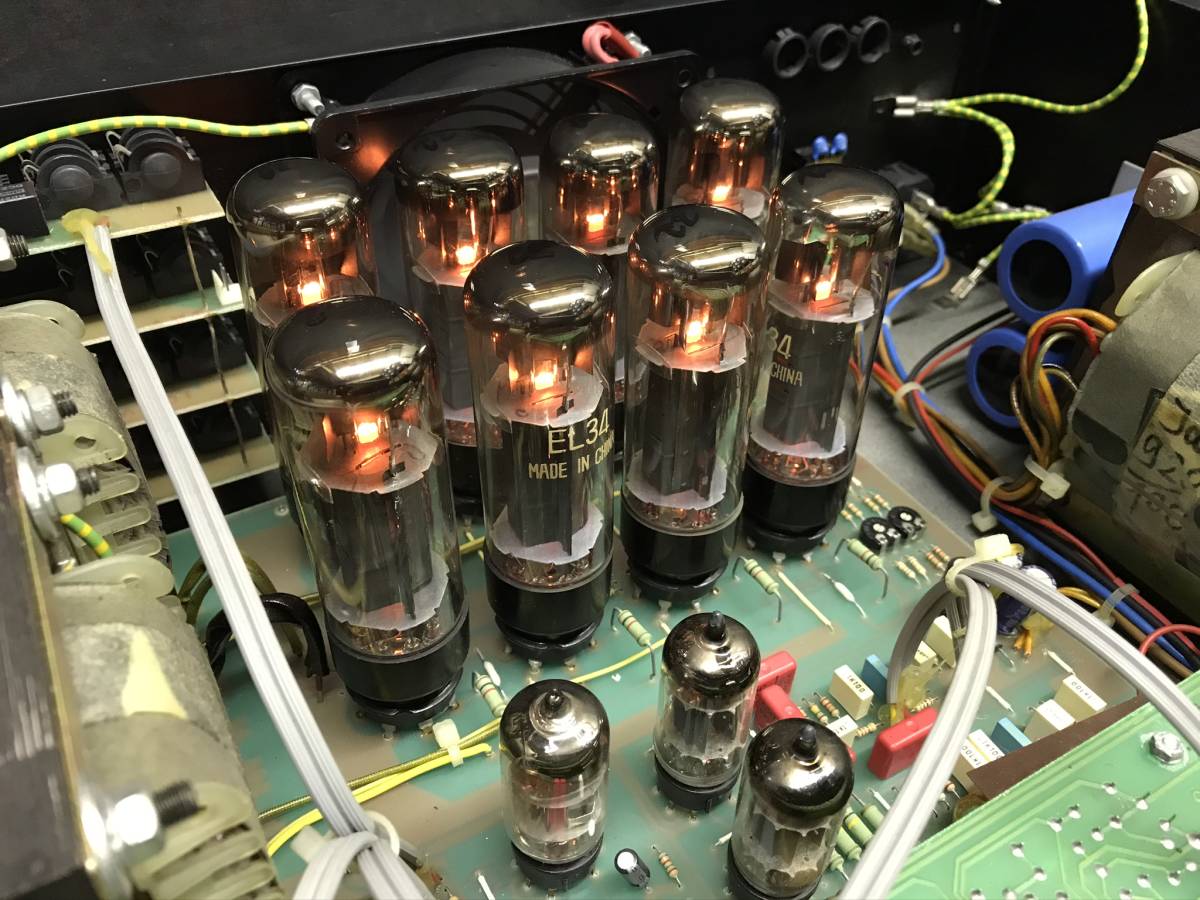
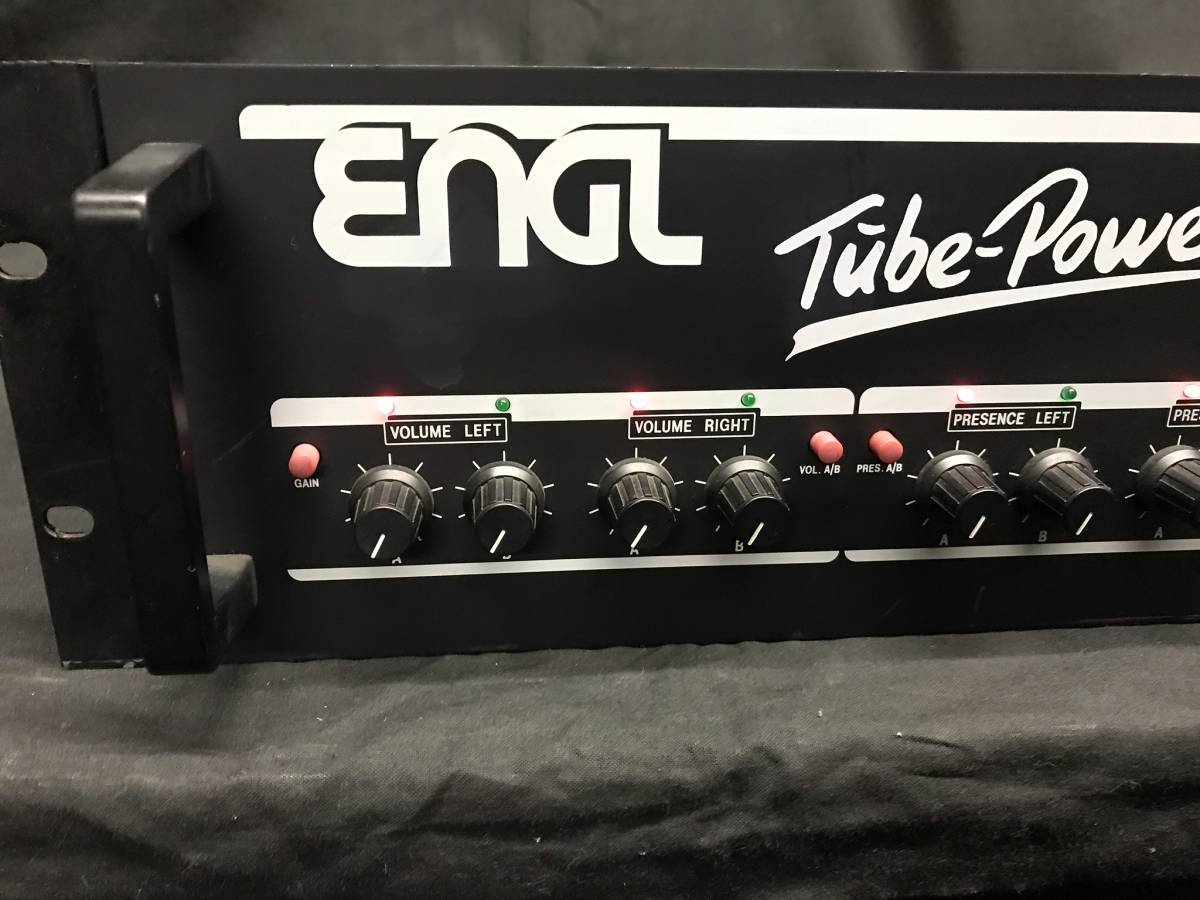
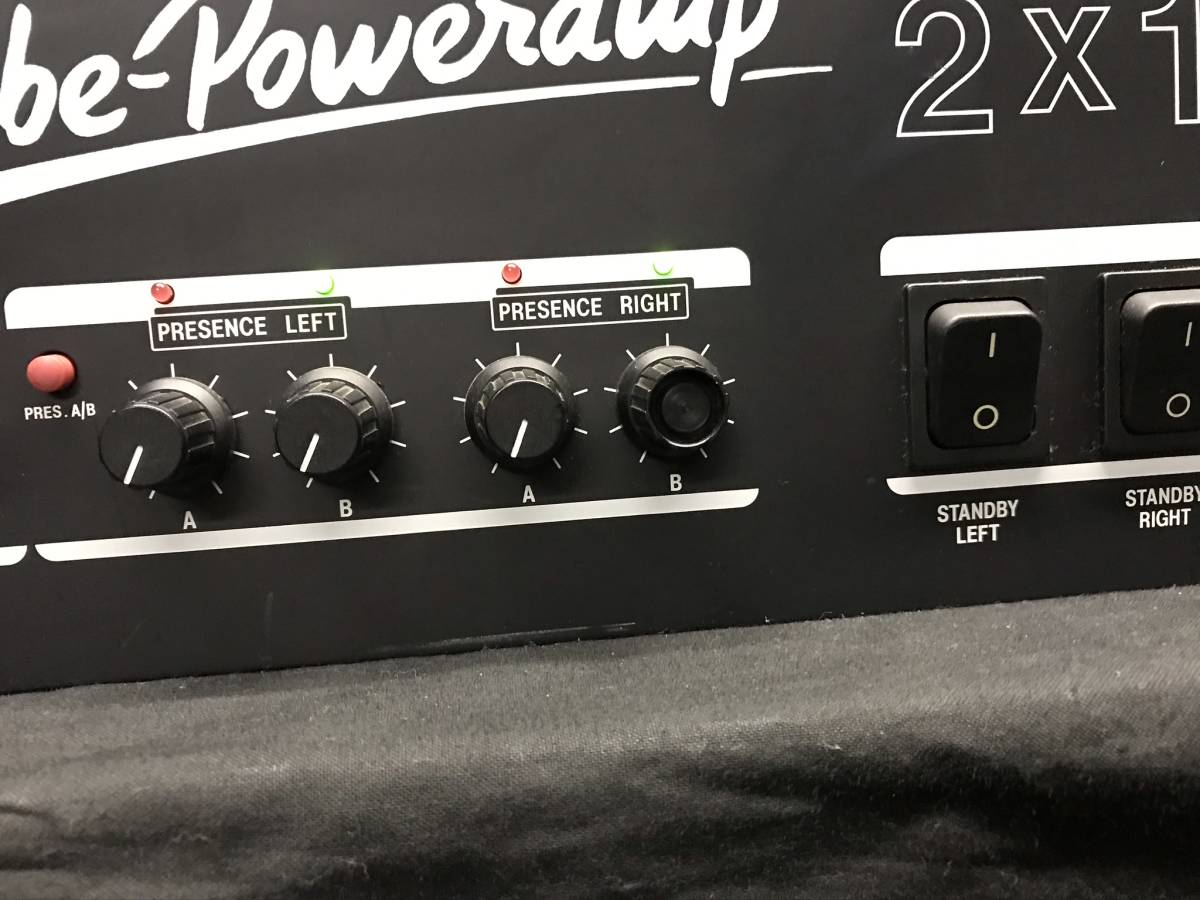
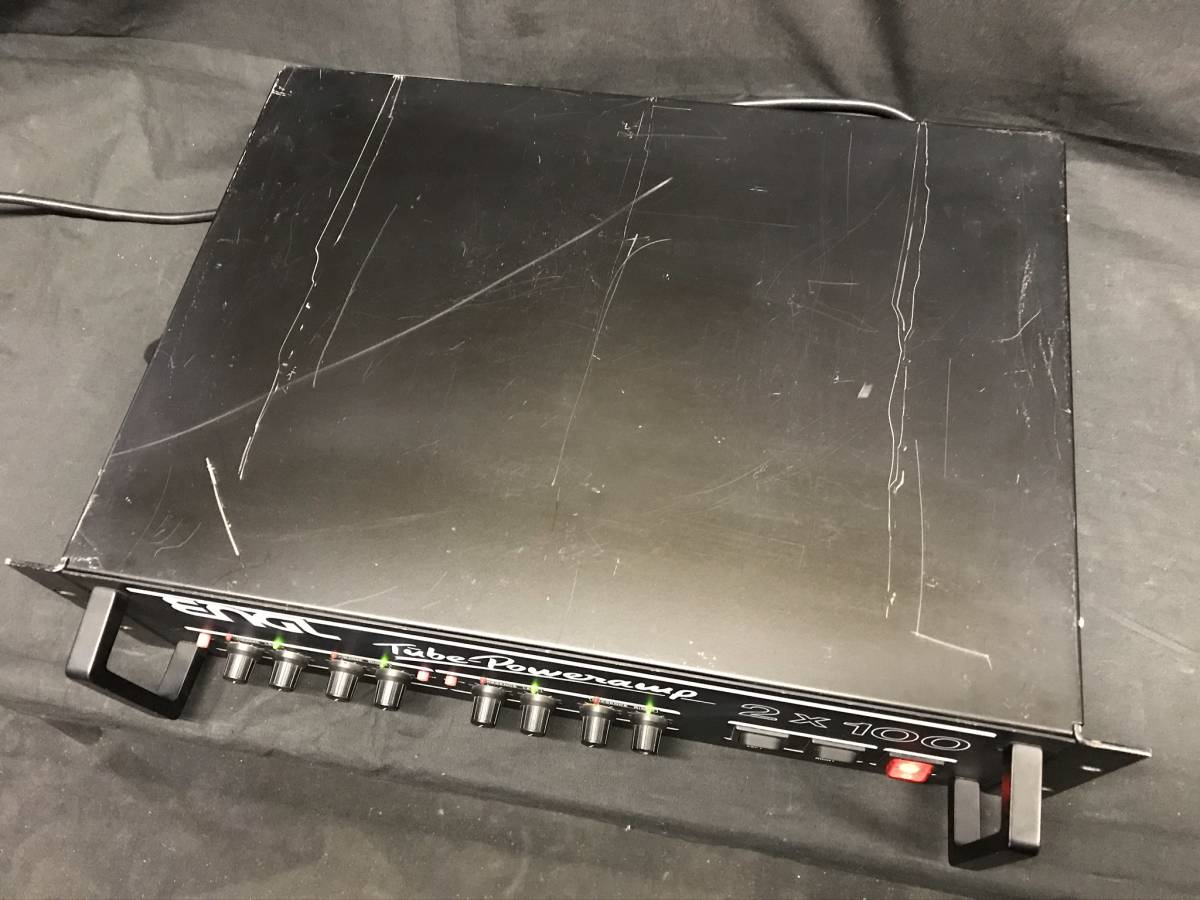
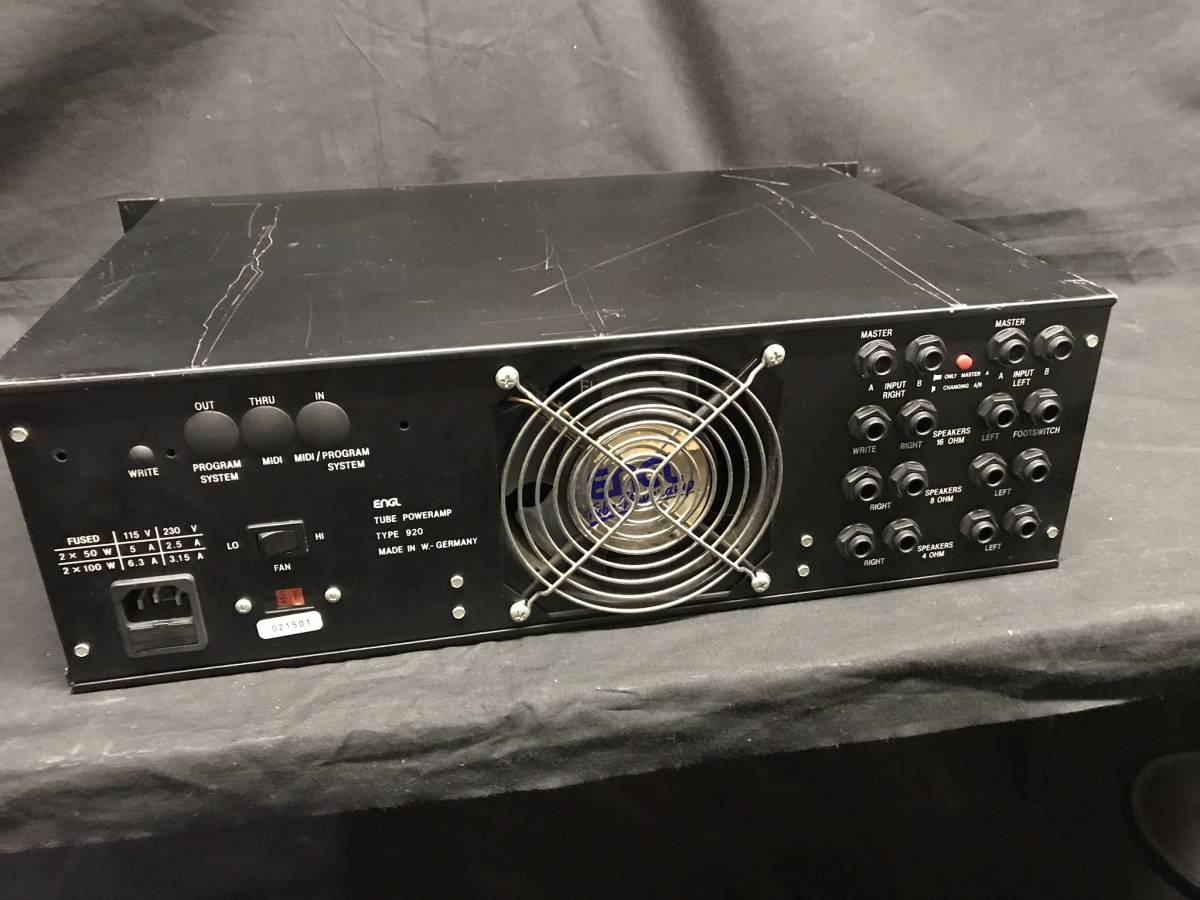
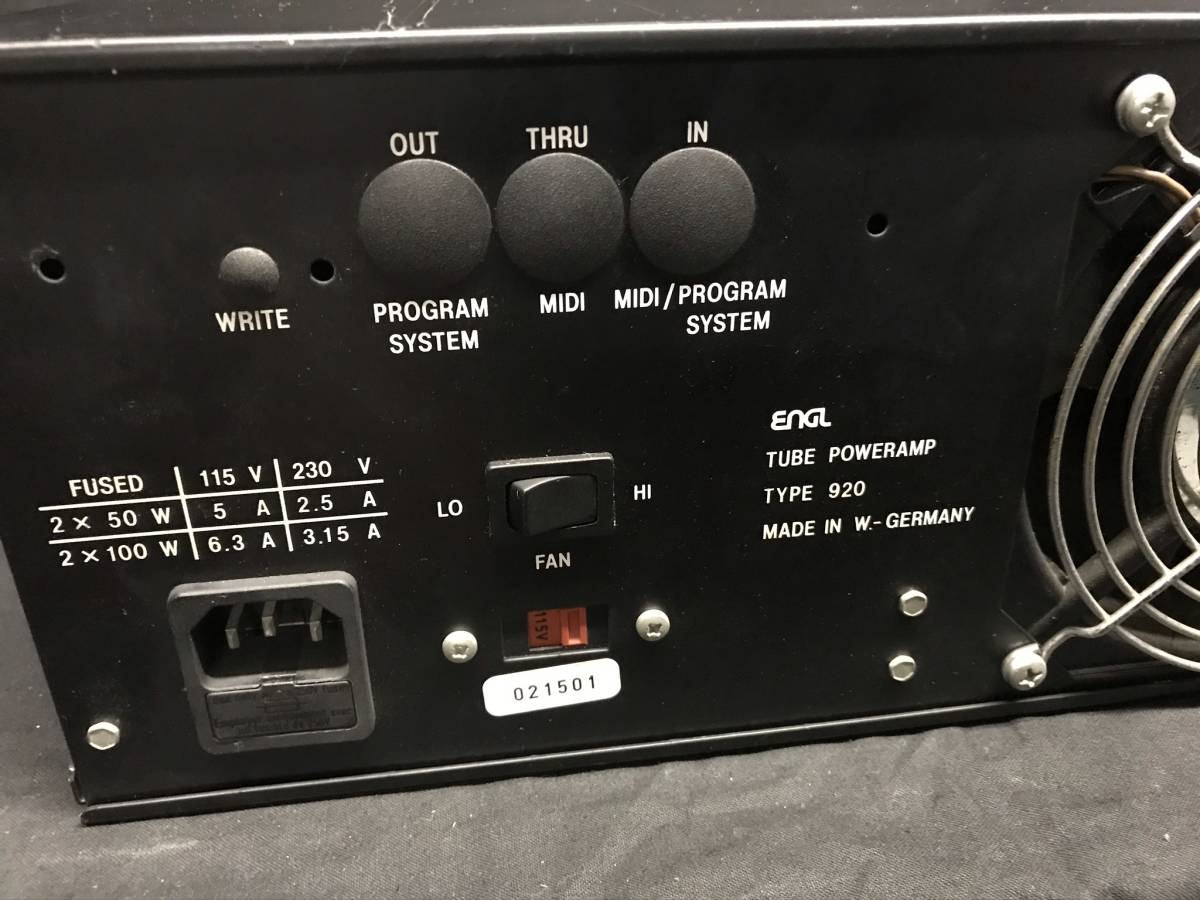
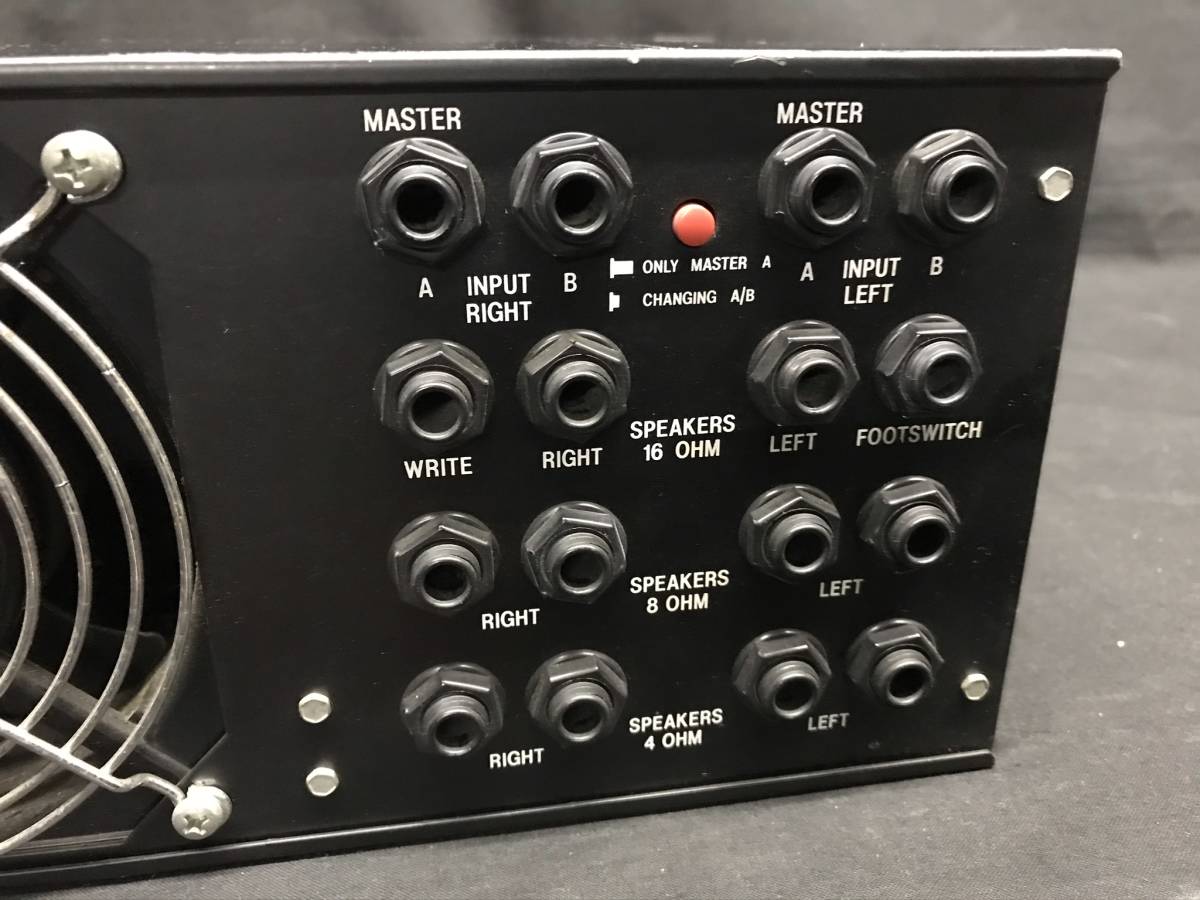
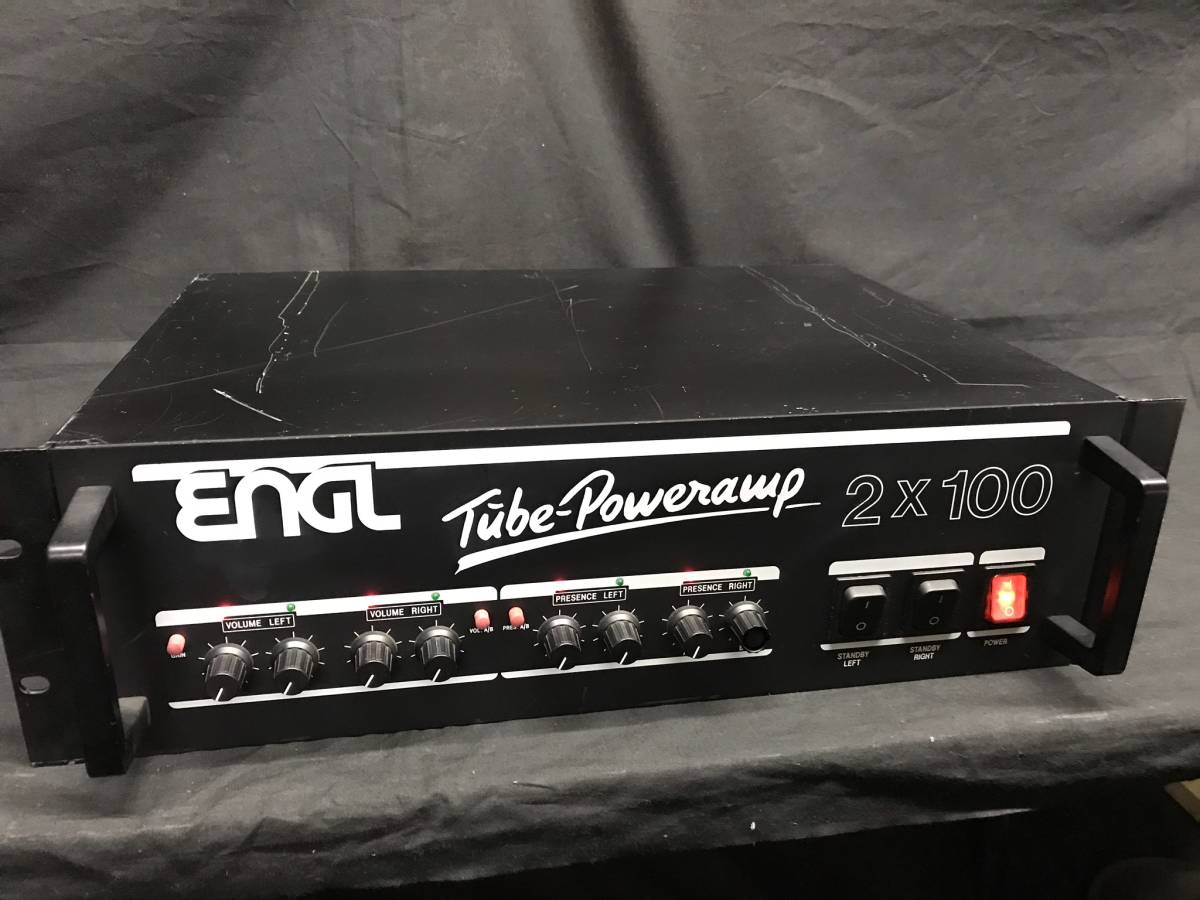
ENGL Tube-Power Amp 2X100 E920
There are many all tube stereo power amplifiers out there for guitar rugs. This unit I usually don’t see too often so here are some pictures of it. I was tracking this one from an auction site I use called JAUCE The unit was labeled as non functioning so it seemed like a bargain project at $100 USD. They are a very reputable broker for Japanese gear. Be very careful about purchasing heavy objects since it can get costly to ship.
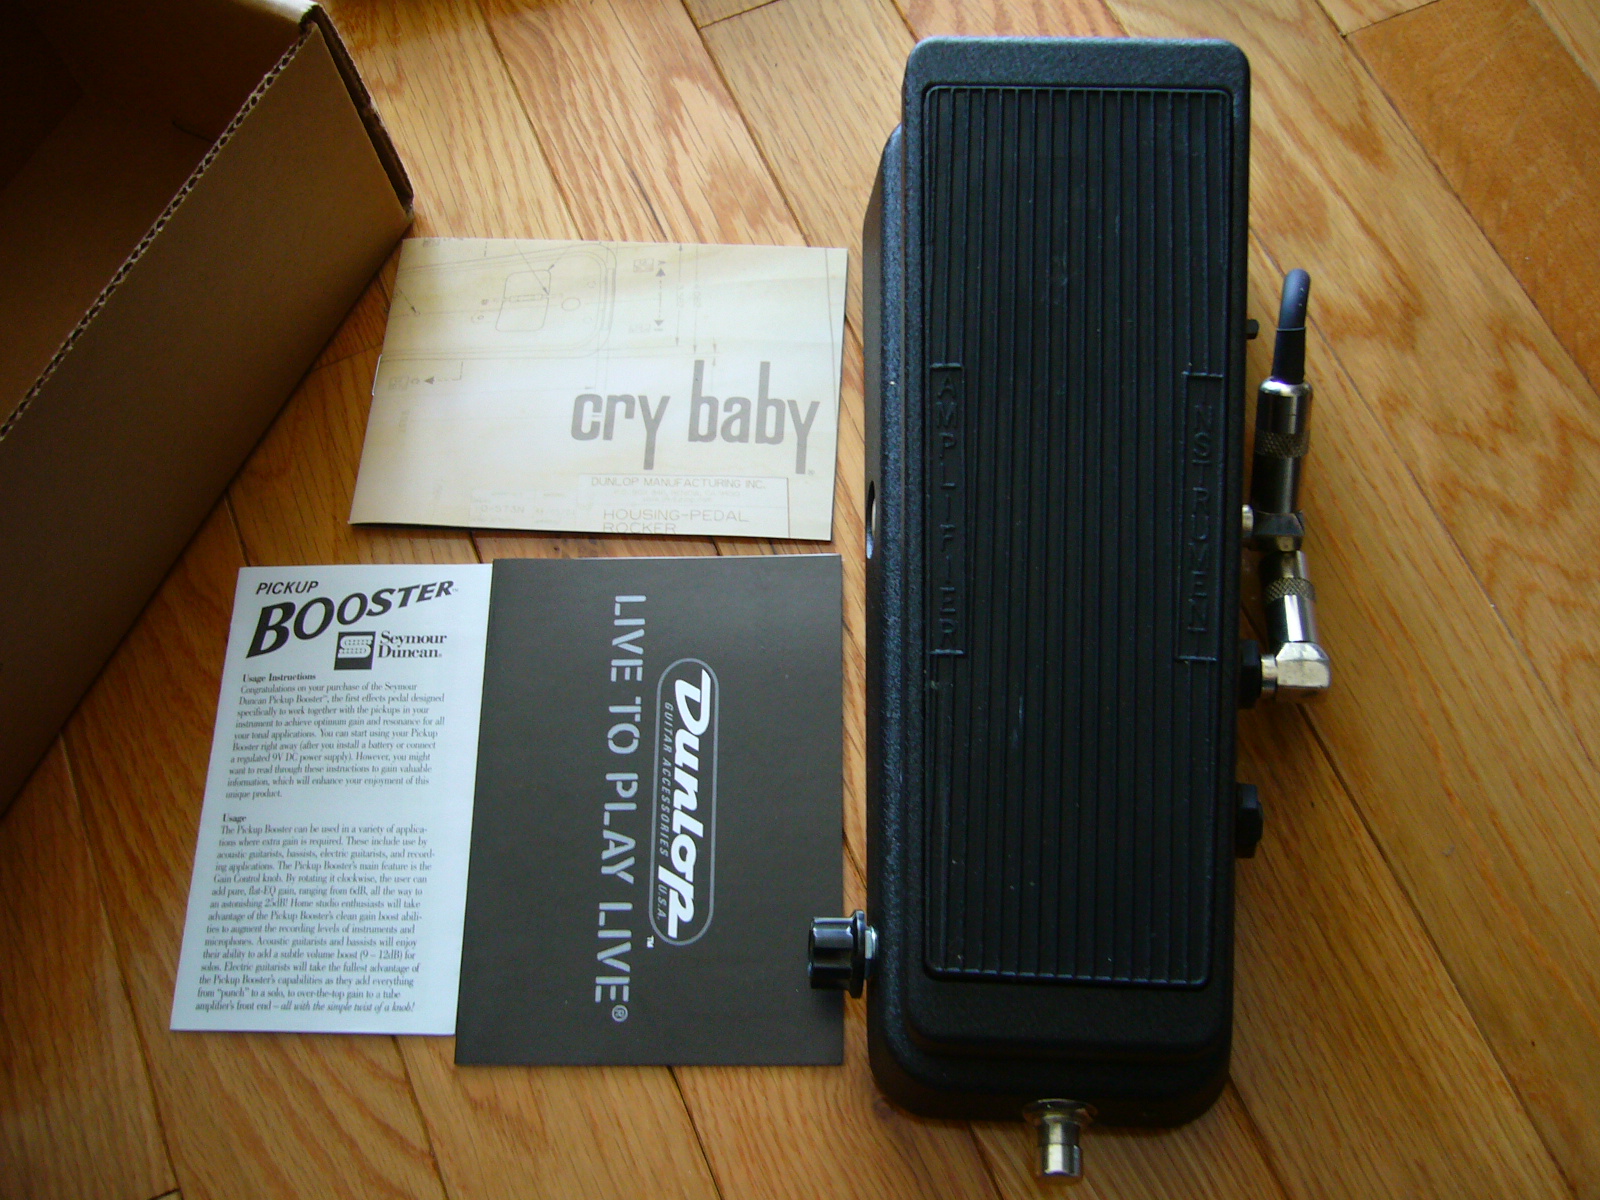
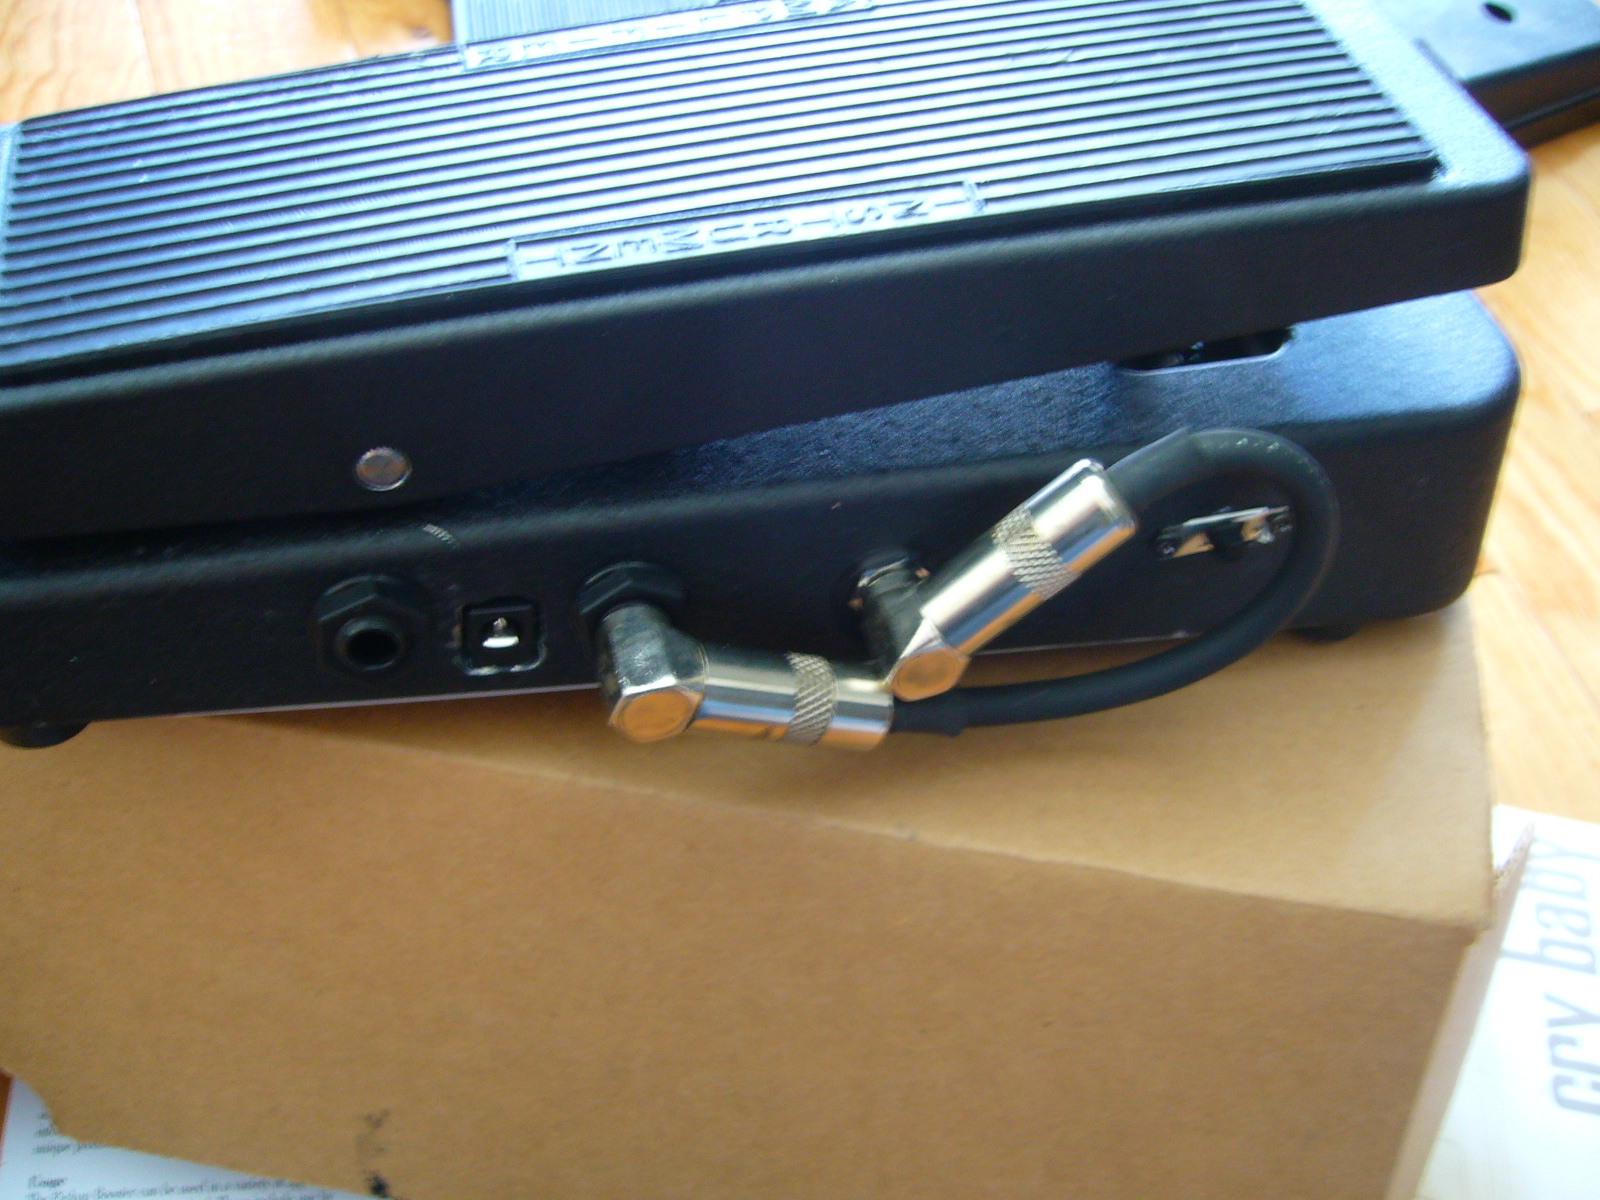
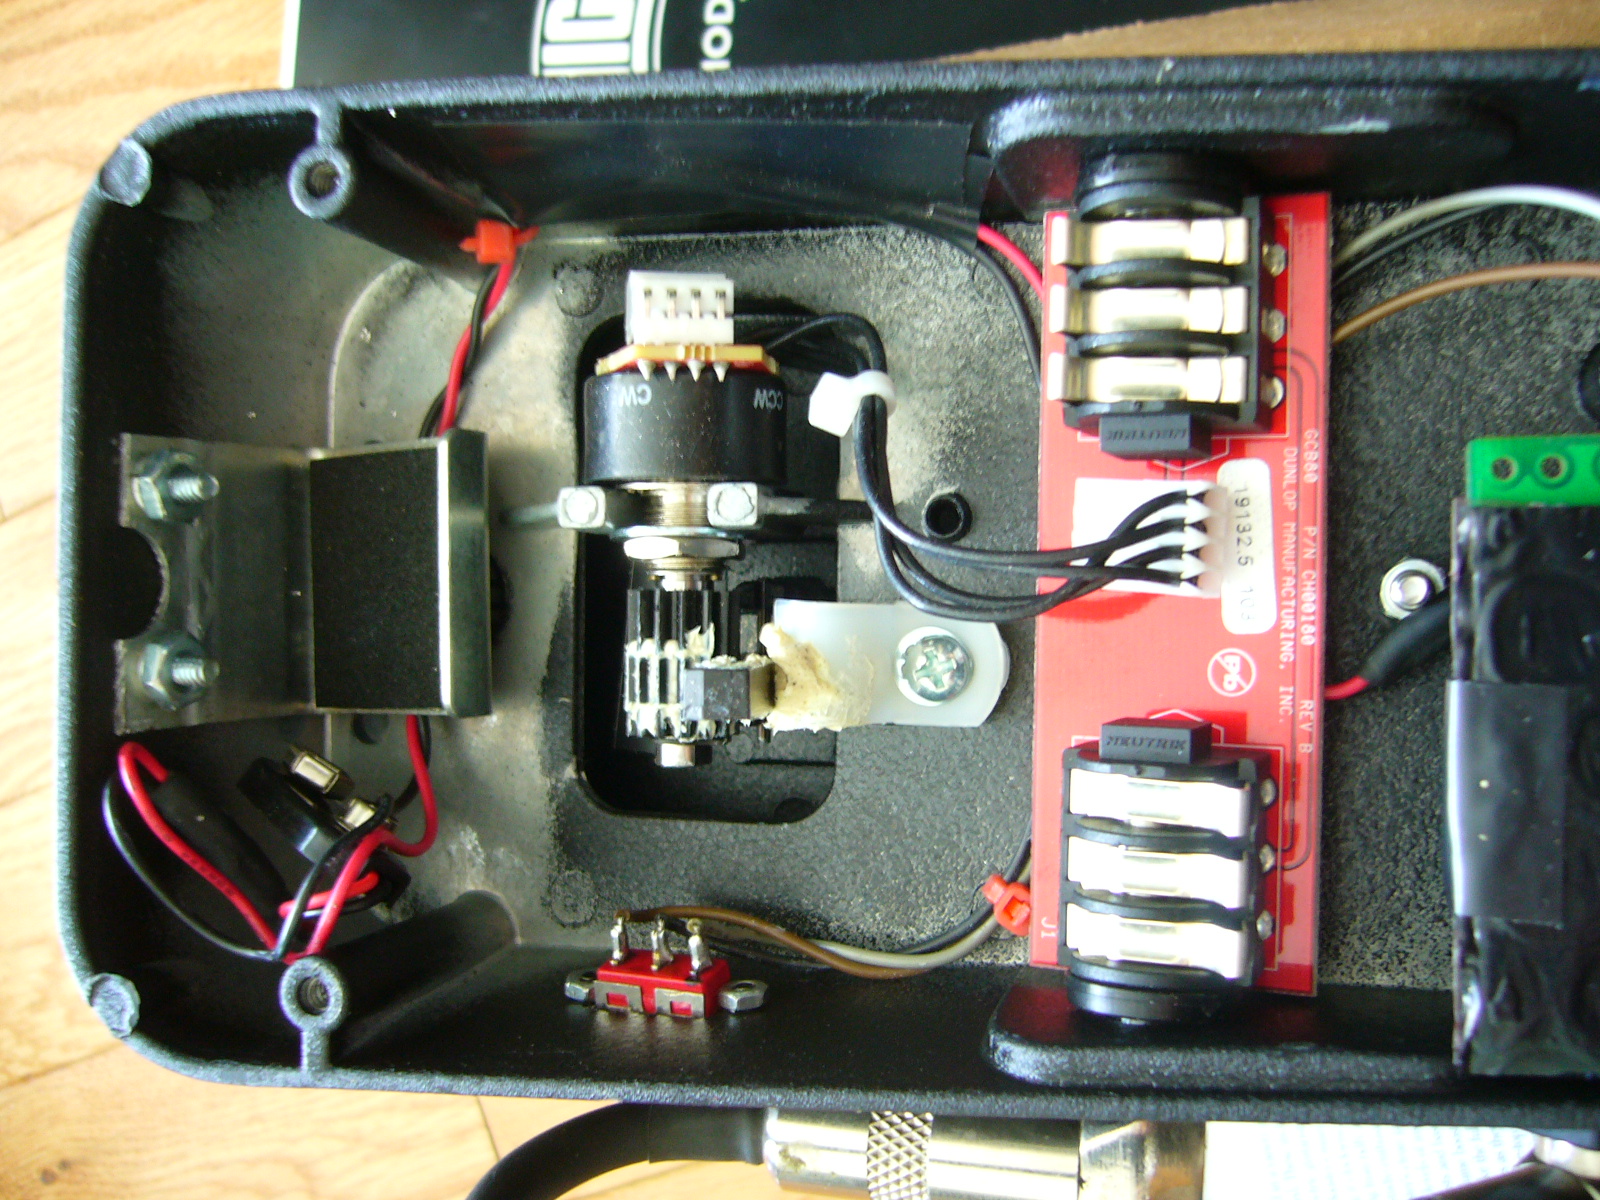
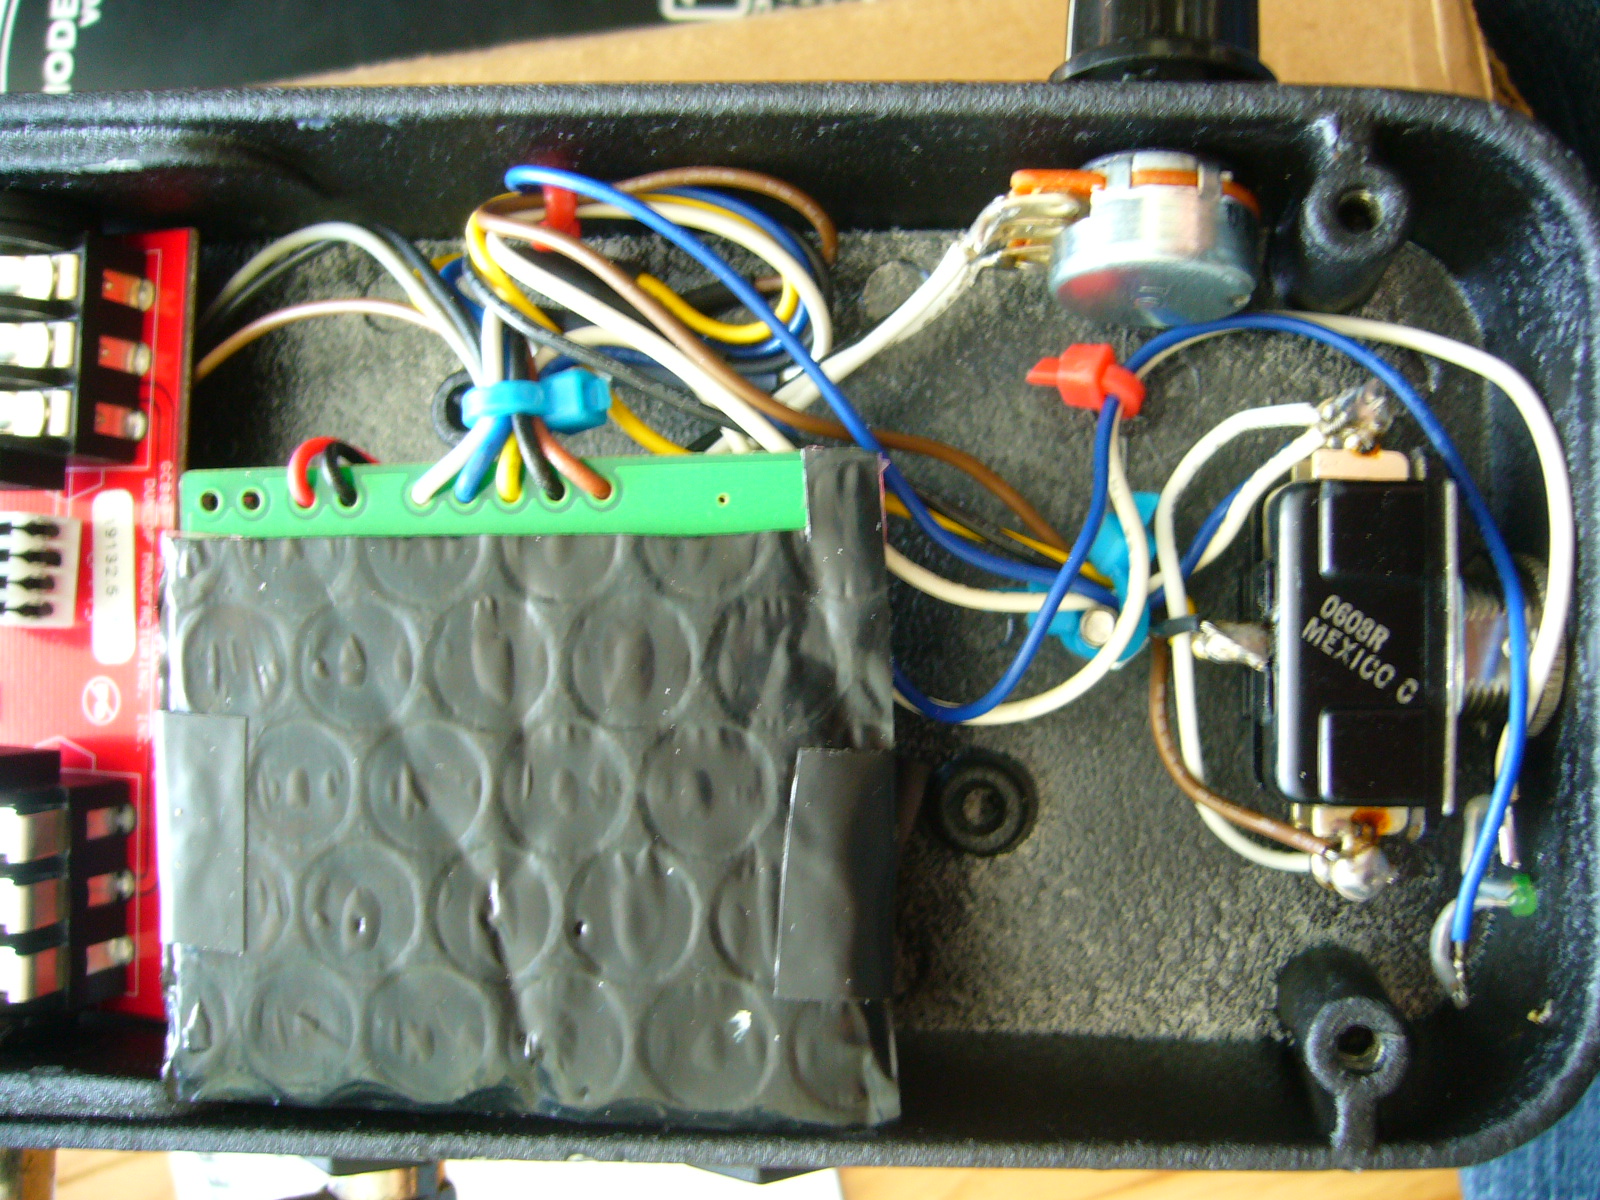
Wah Booster Mod Kick Pedal Dunlop & Duncan
If you have a Wah in your rig and you want quick boost in the same pedal. Here we used a Seymour Duncan Pickup Booster pedal’s insides and stuffed them into a Dunlop Crybaby Wah. By placing the button on the front face of the wah base, the switch is engaged by kicking. Holes were cut in the wah to accommodate the in/out from the booster. You can see in the photos, a 1/4″ patch was made between the two internal pedals from the wah right side. Then just place the wah anywhere in the front edge of your pedal board.

ON-THE-SIDE: There is a project underway to create a new pedal board. It is an electronic flat board/case of lexan single side frosted with a pcb inlay, patch point top, momentary/latch switch bottom, onboard power supply and inner electronic mounting center. Four groups will allow the builder to utilize header to pin custom modules and project mount areas for installing other manufactures internal components. Think of it as a giant breadboard for pedal hackers. The case has a translucent core, frosted exterior when closed and the project base’s pcb illuminates the board’s bottom panel. You can control color and brightness from the tactile pad on the top. 1/4″ Stereo In/Out and operates AC or DC.
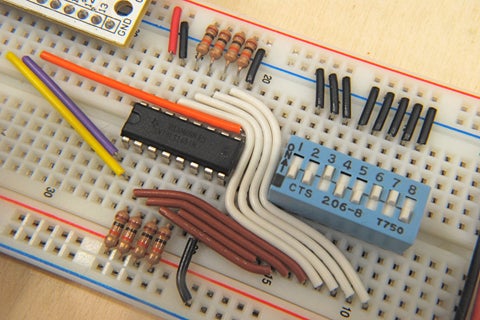

Well for all of the DIY’ers out there you can get up and running quickly with a similar concept design that looks very clean and to the point. With the Protis 1 by Mimmotronics Effects you can prototype out circuits and test in real time. Here is a link to their website. https://mimmotronics.com/protis1/ I am still awaiting their release of modular prototyping boards which could really spark further interest for new beginner designers. Also a design book of test circuits would be helpful if that doesn’t already exist.
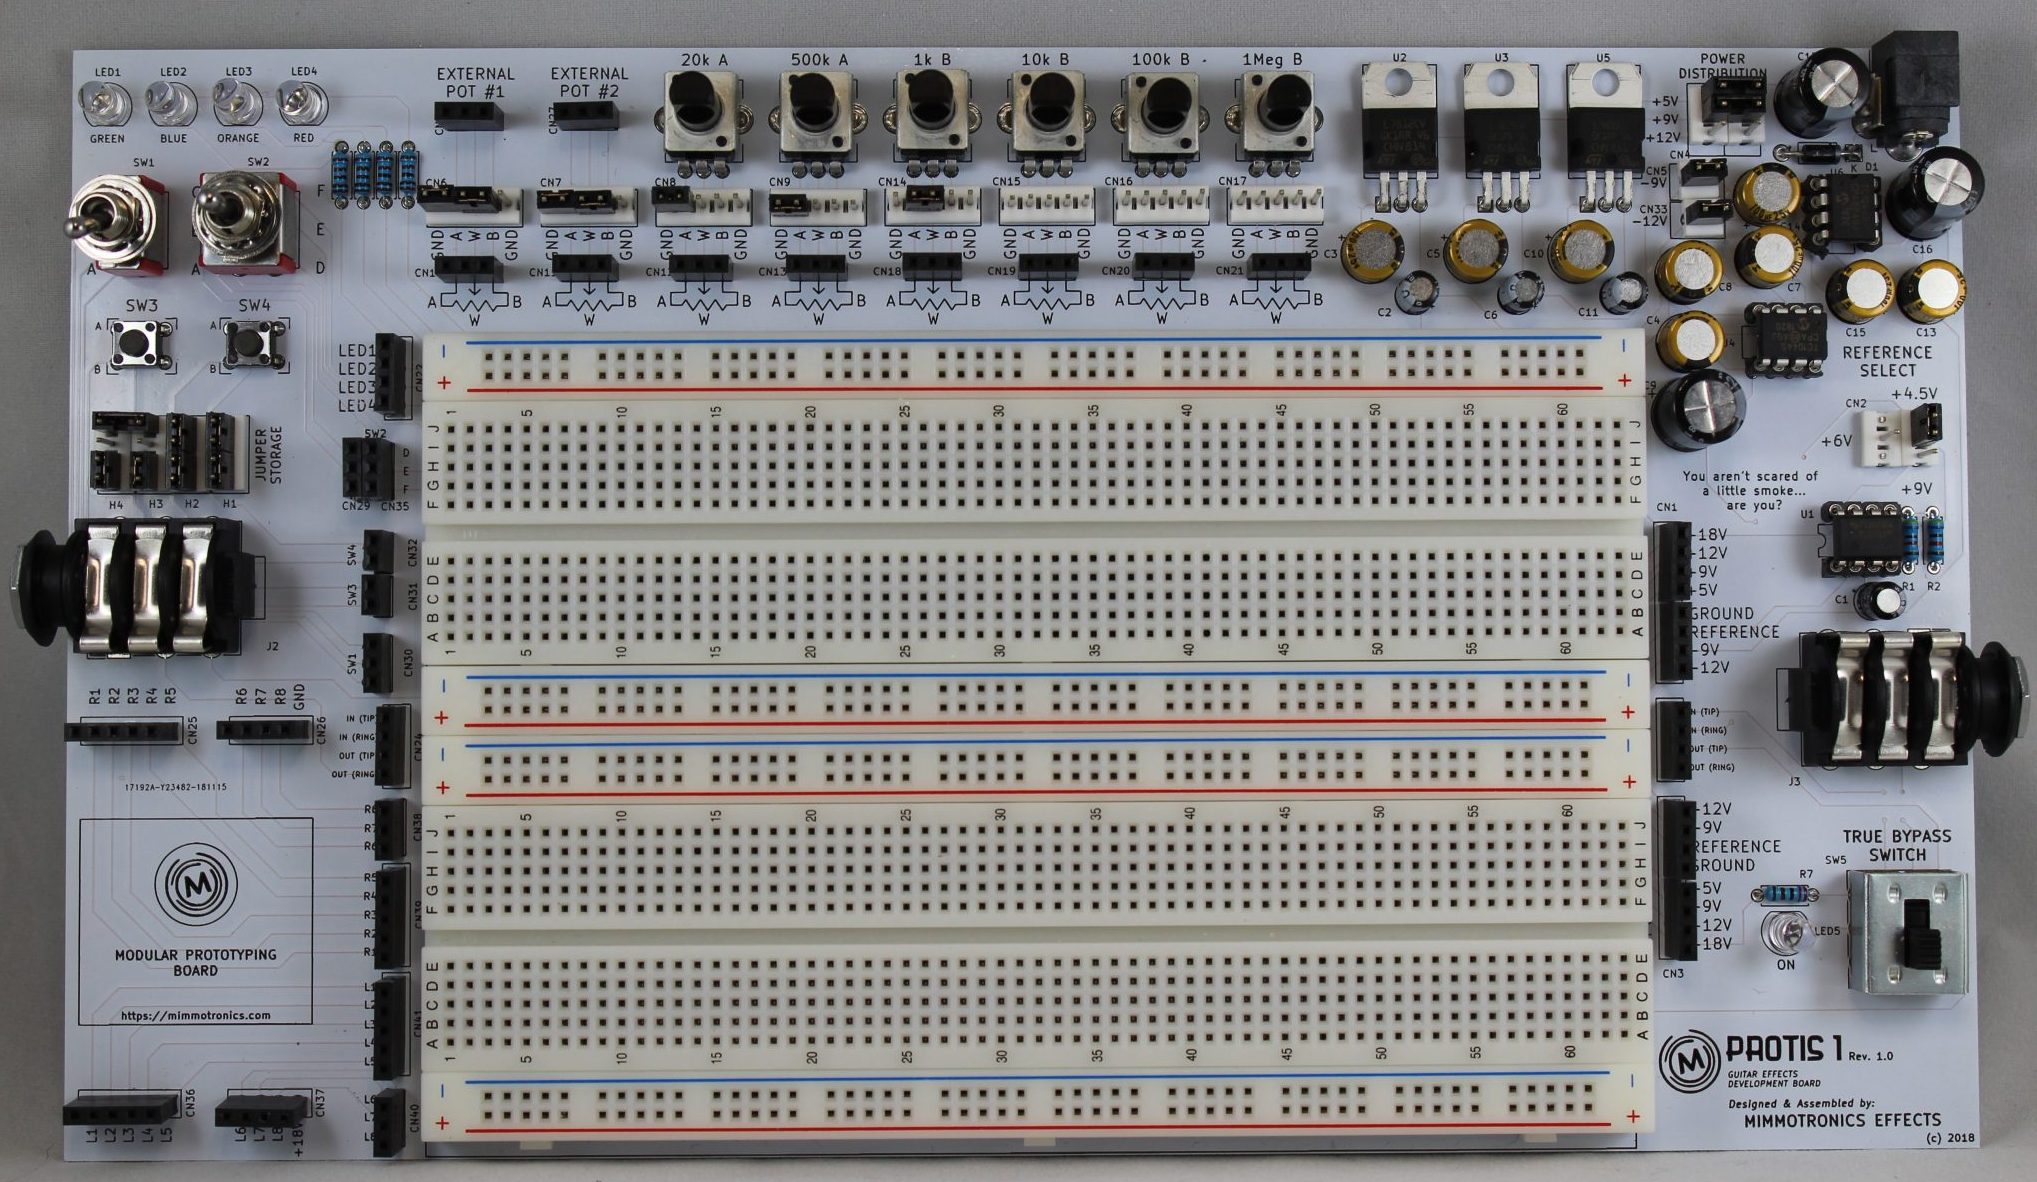
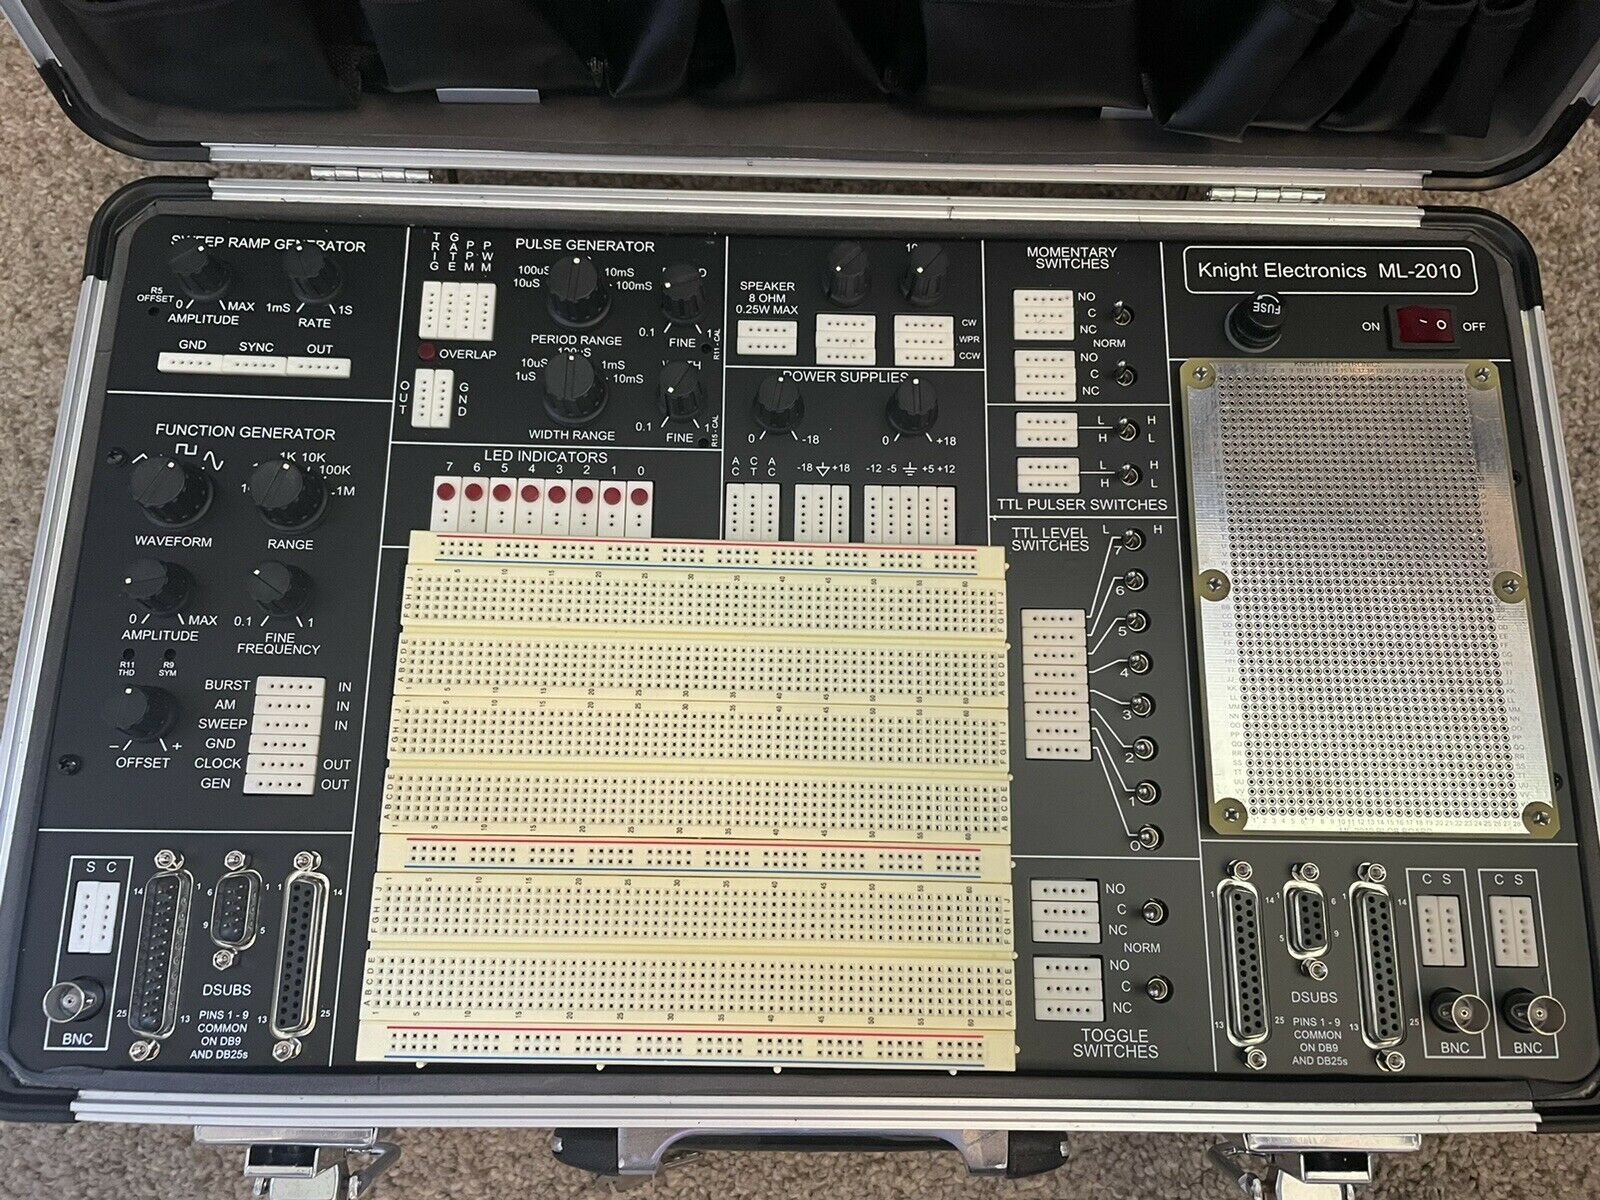
I actually ended up picking up a Knight ML2010 for $80 online and has a similar idea for prototyping. take a look at the picture below and you will see all of the built in functions within this little suitcase. What’s nice about the Protis 1 is that you can plug your guitar right into it mimicking an effects pedal.
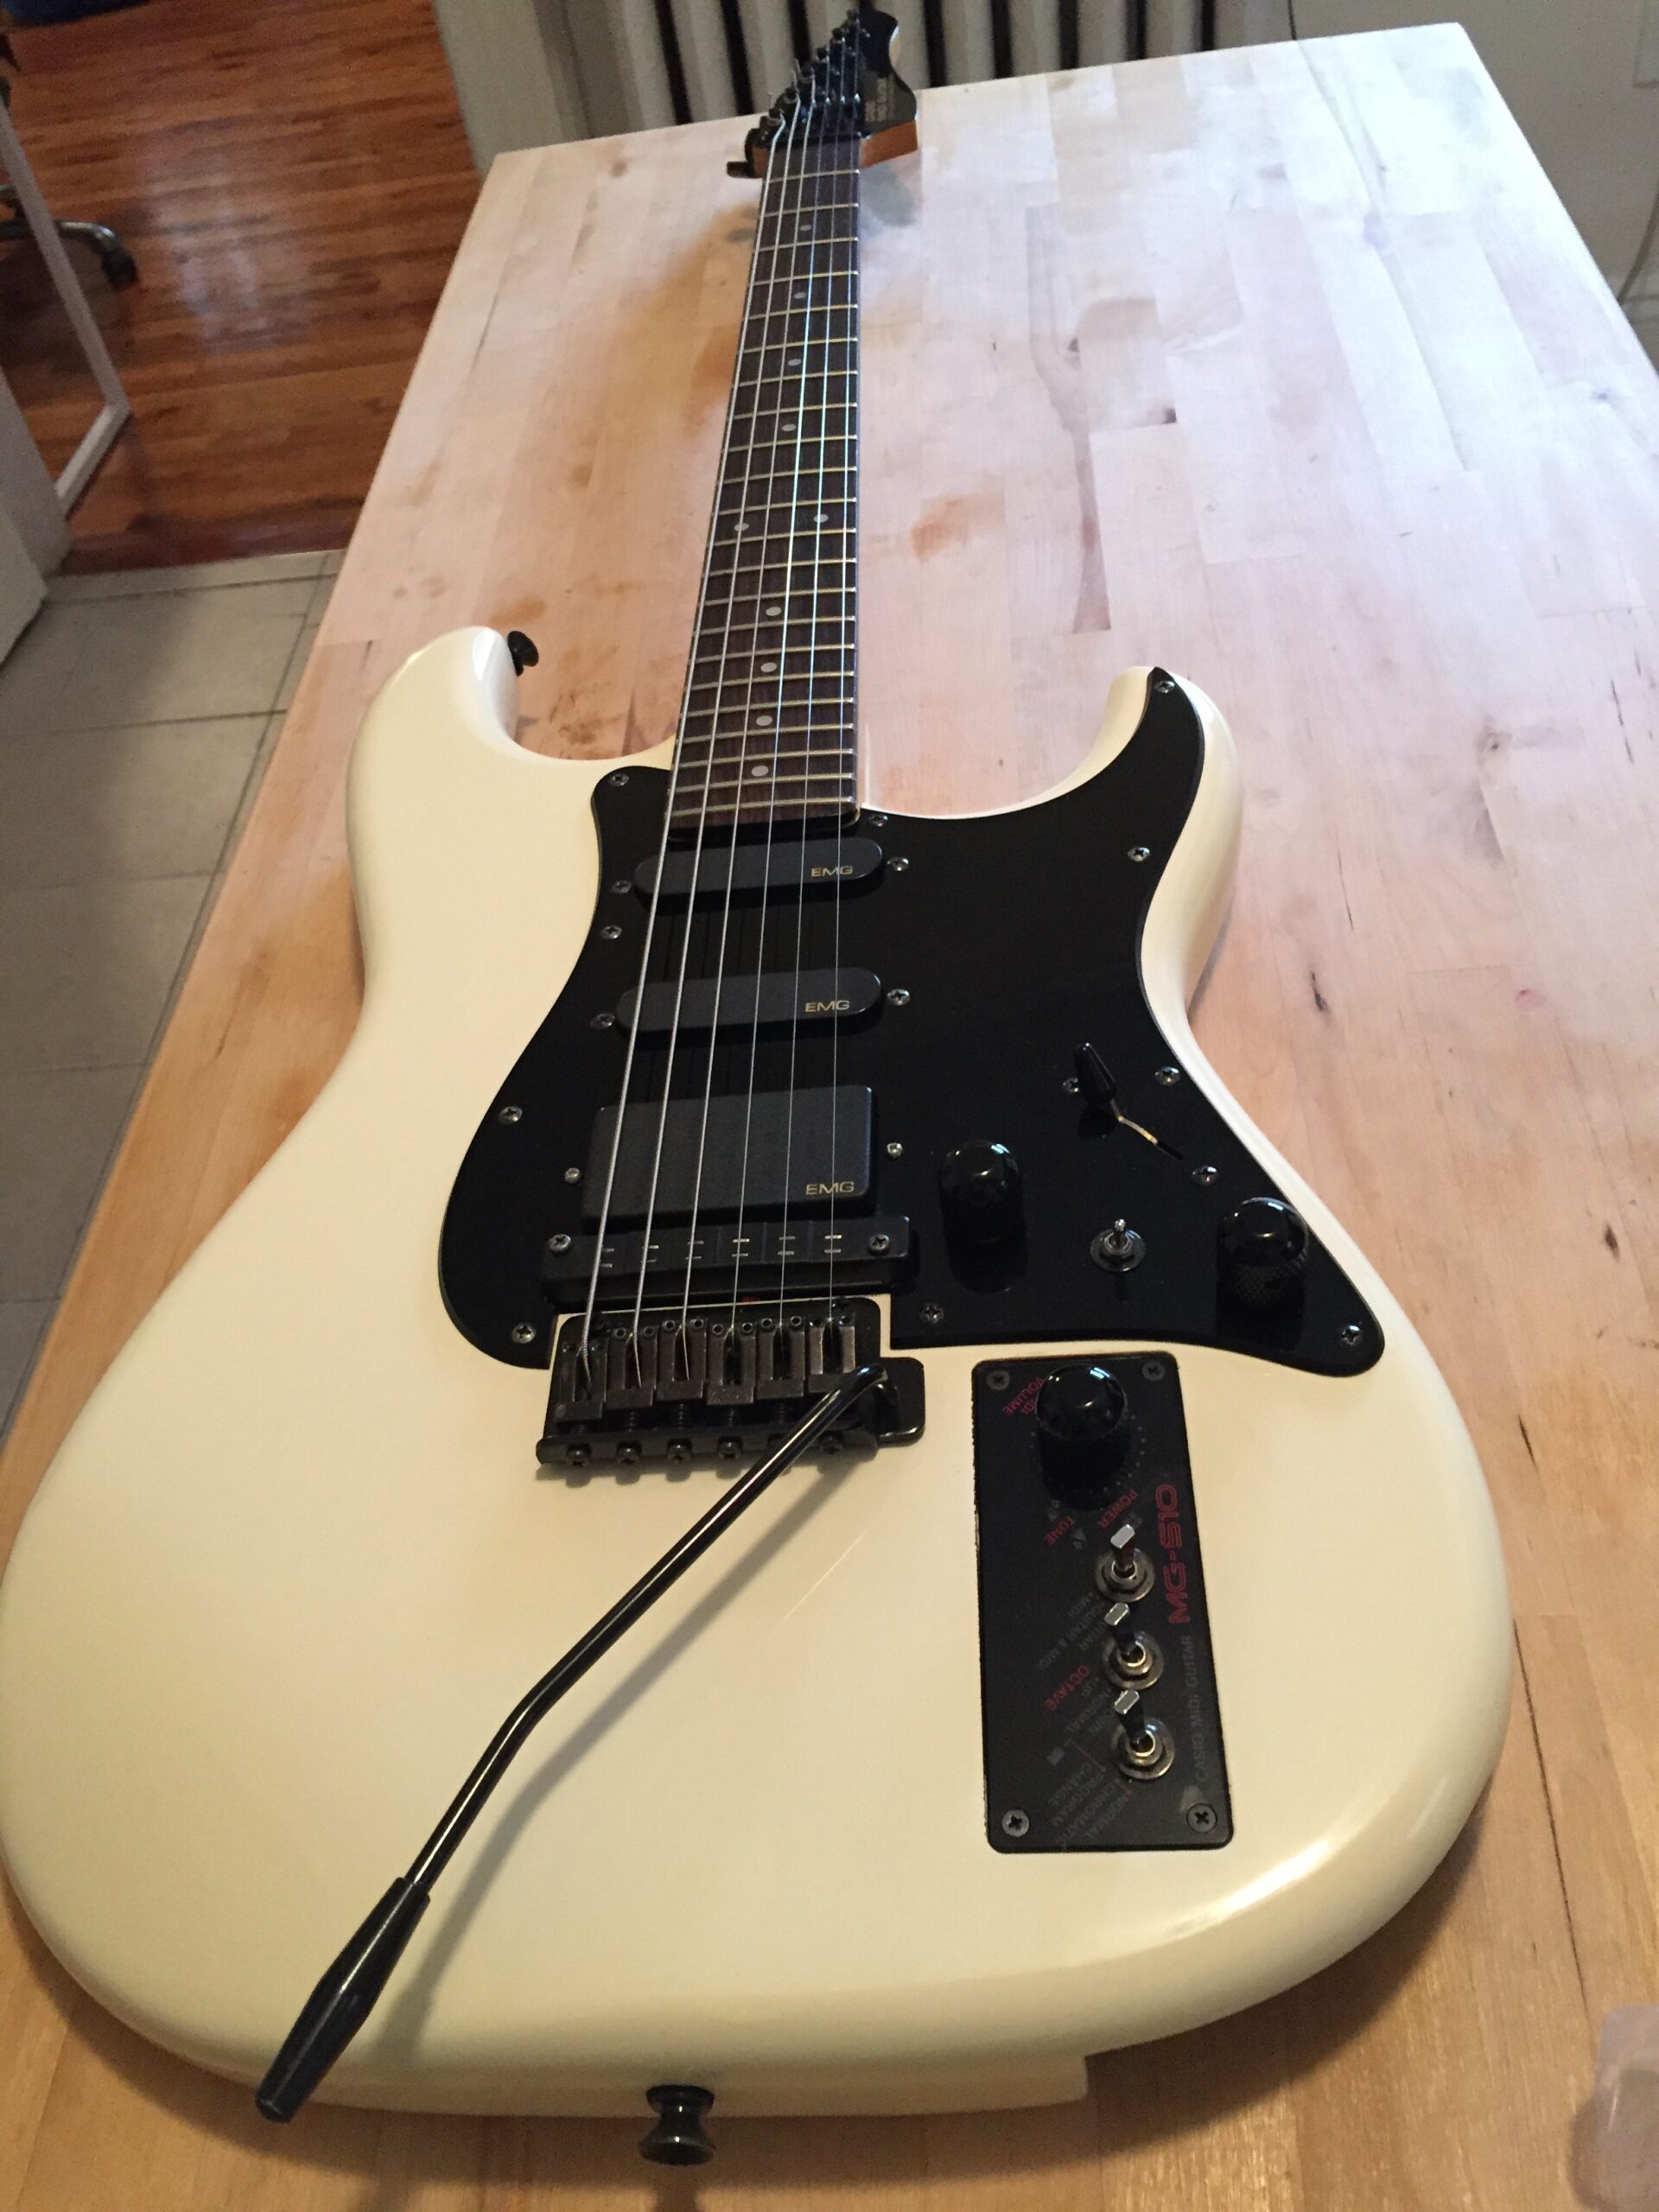
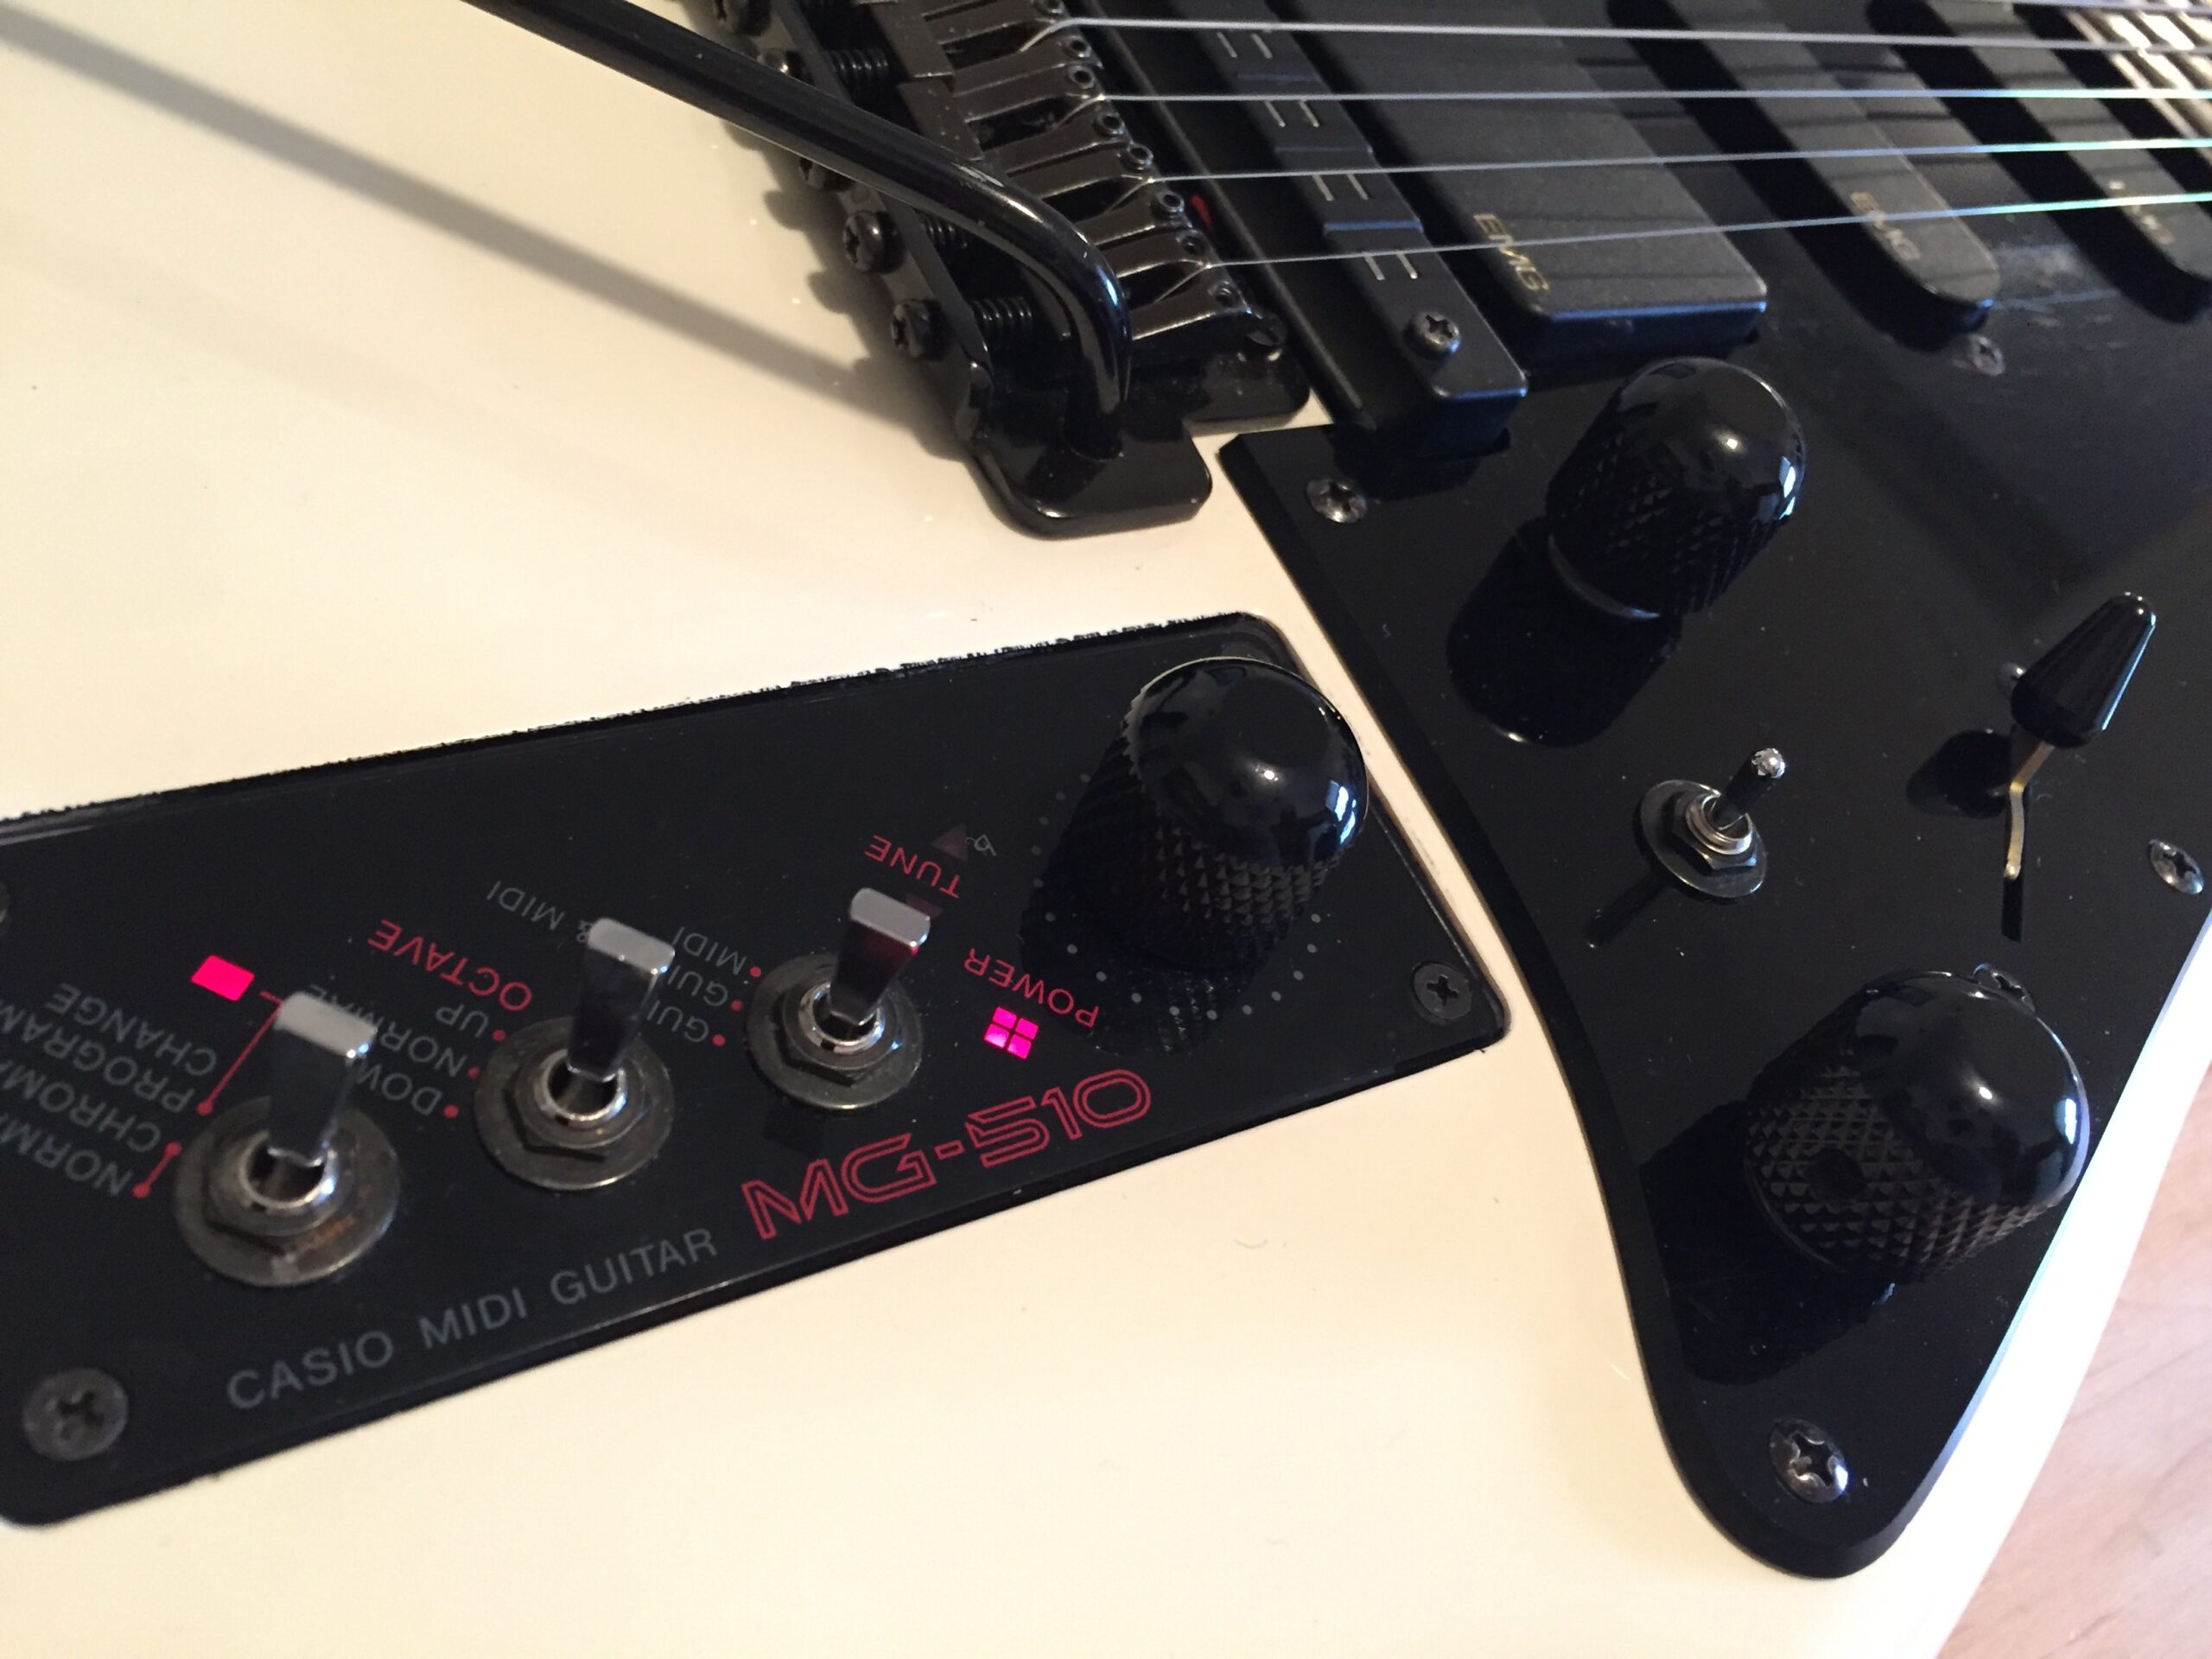
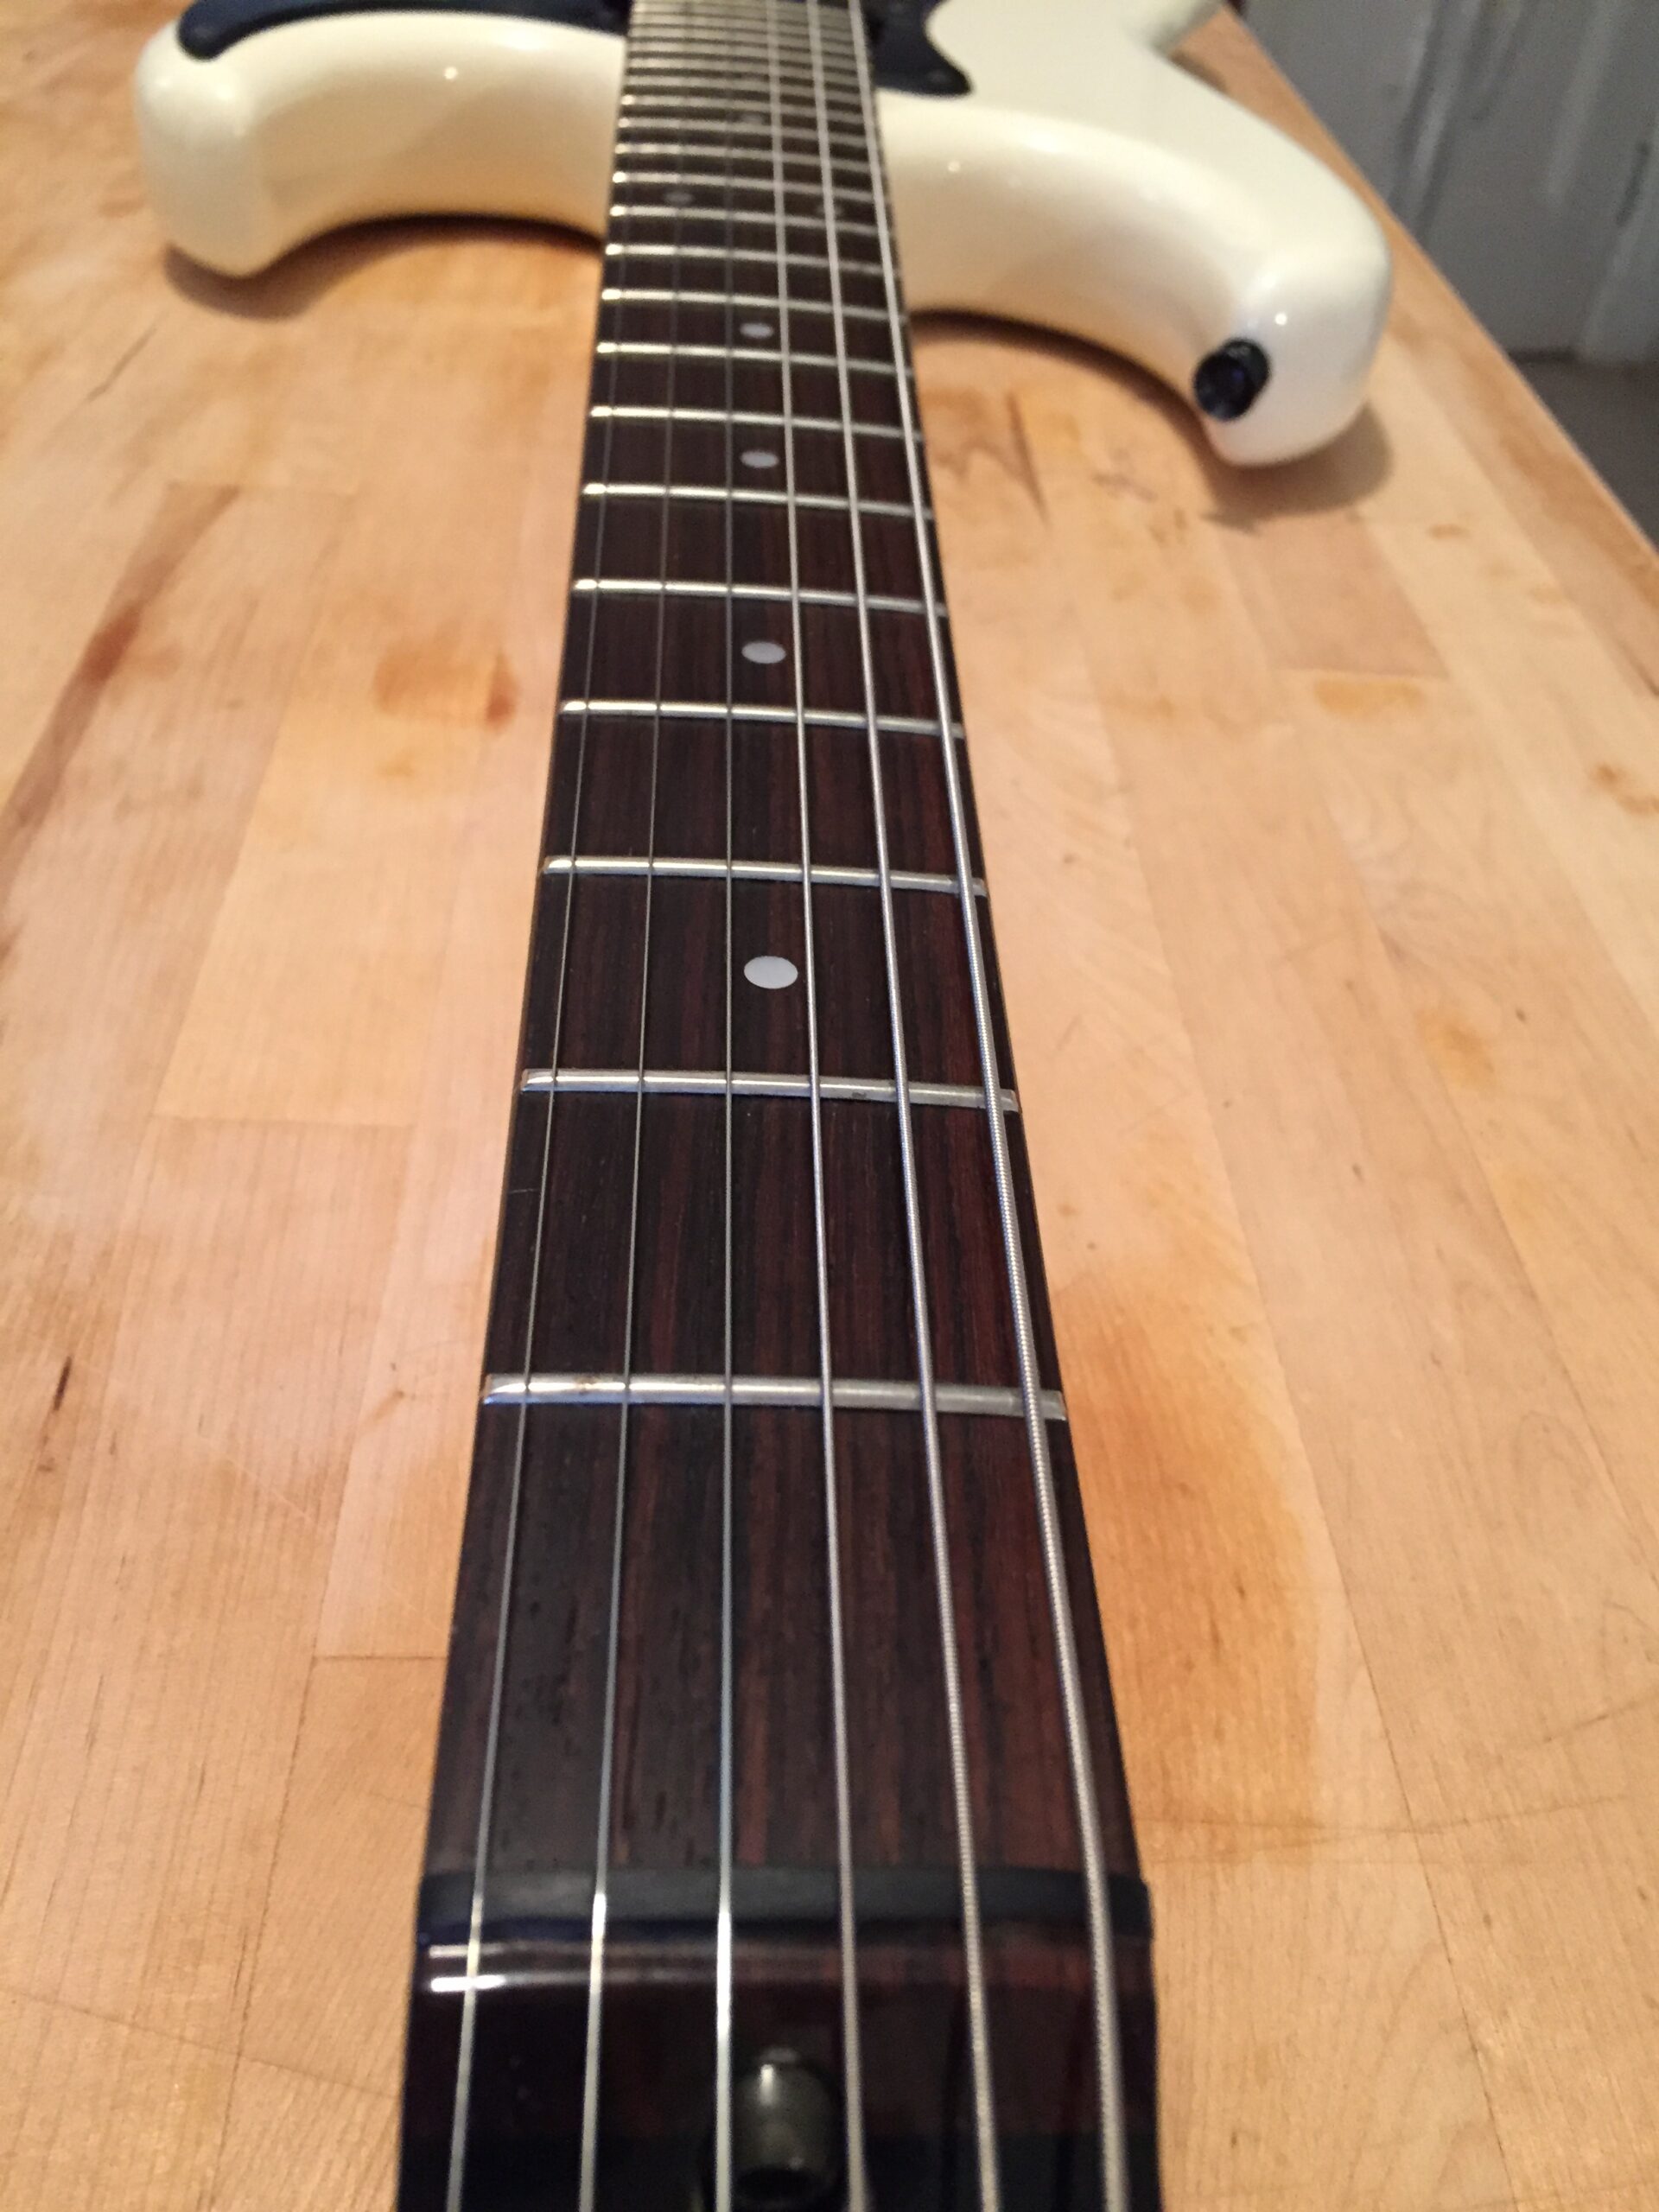
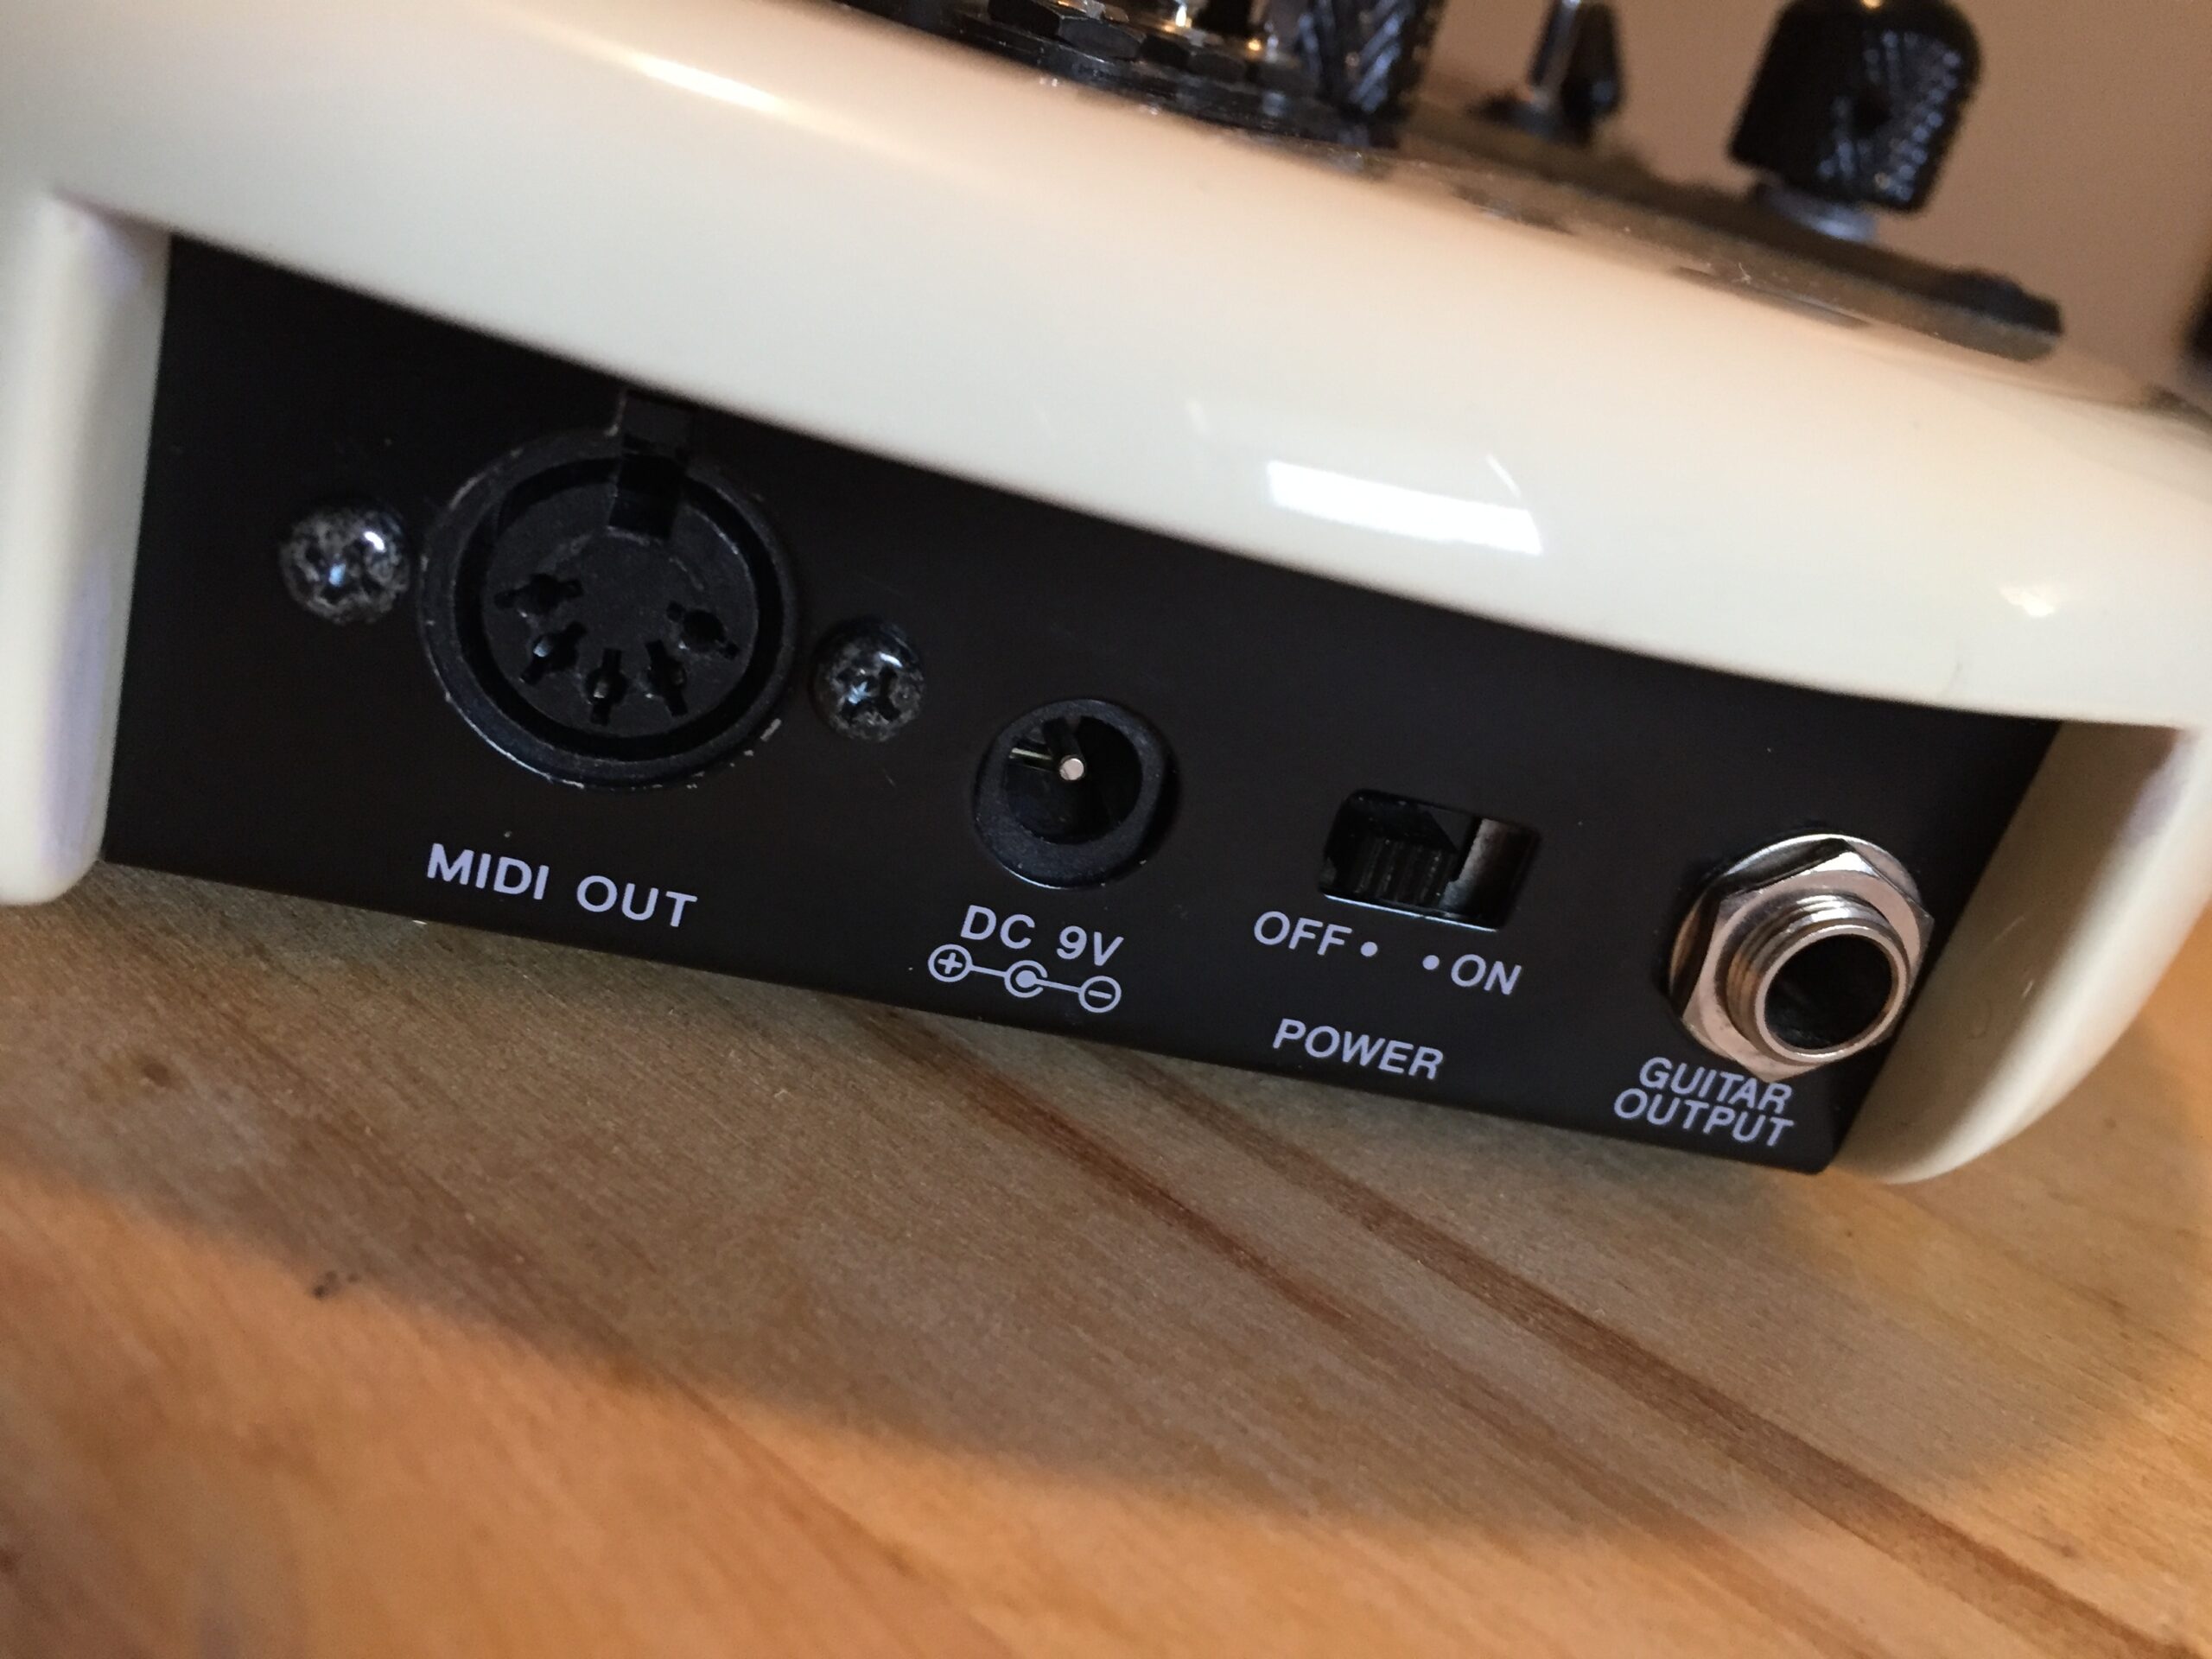
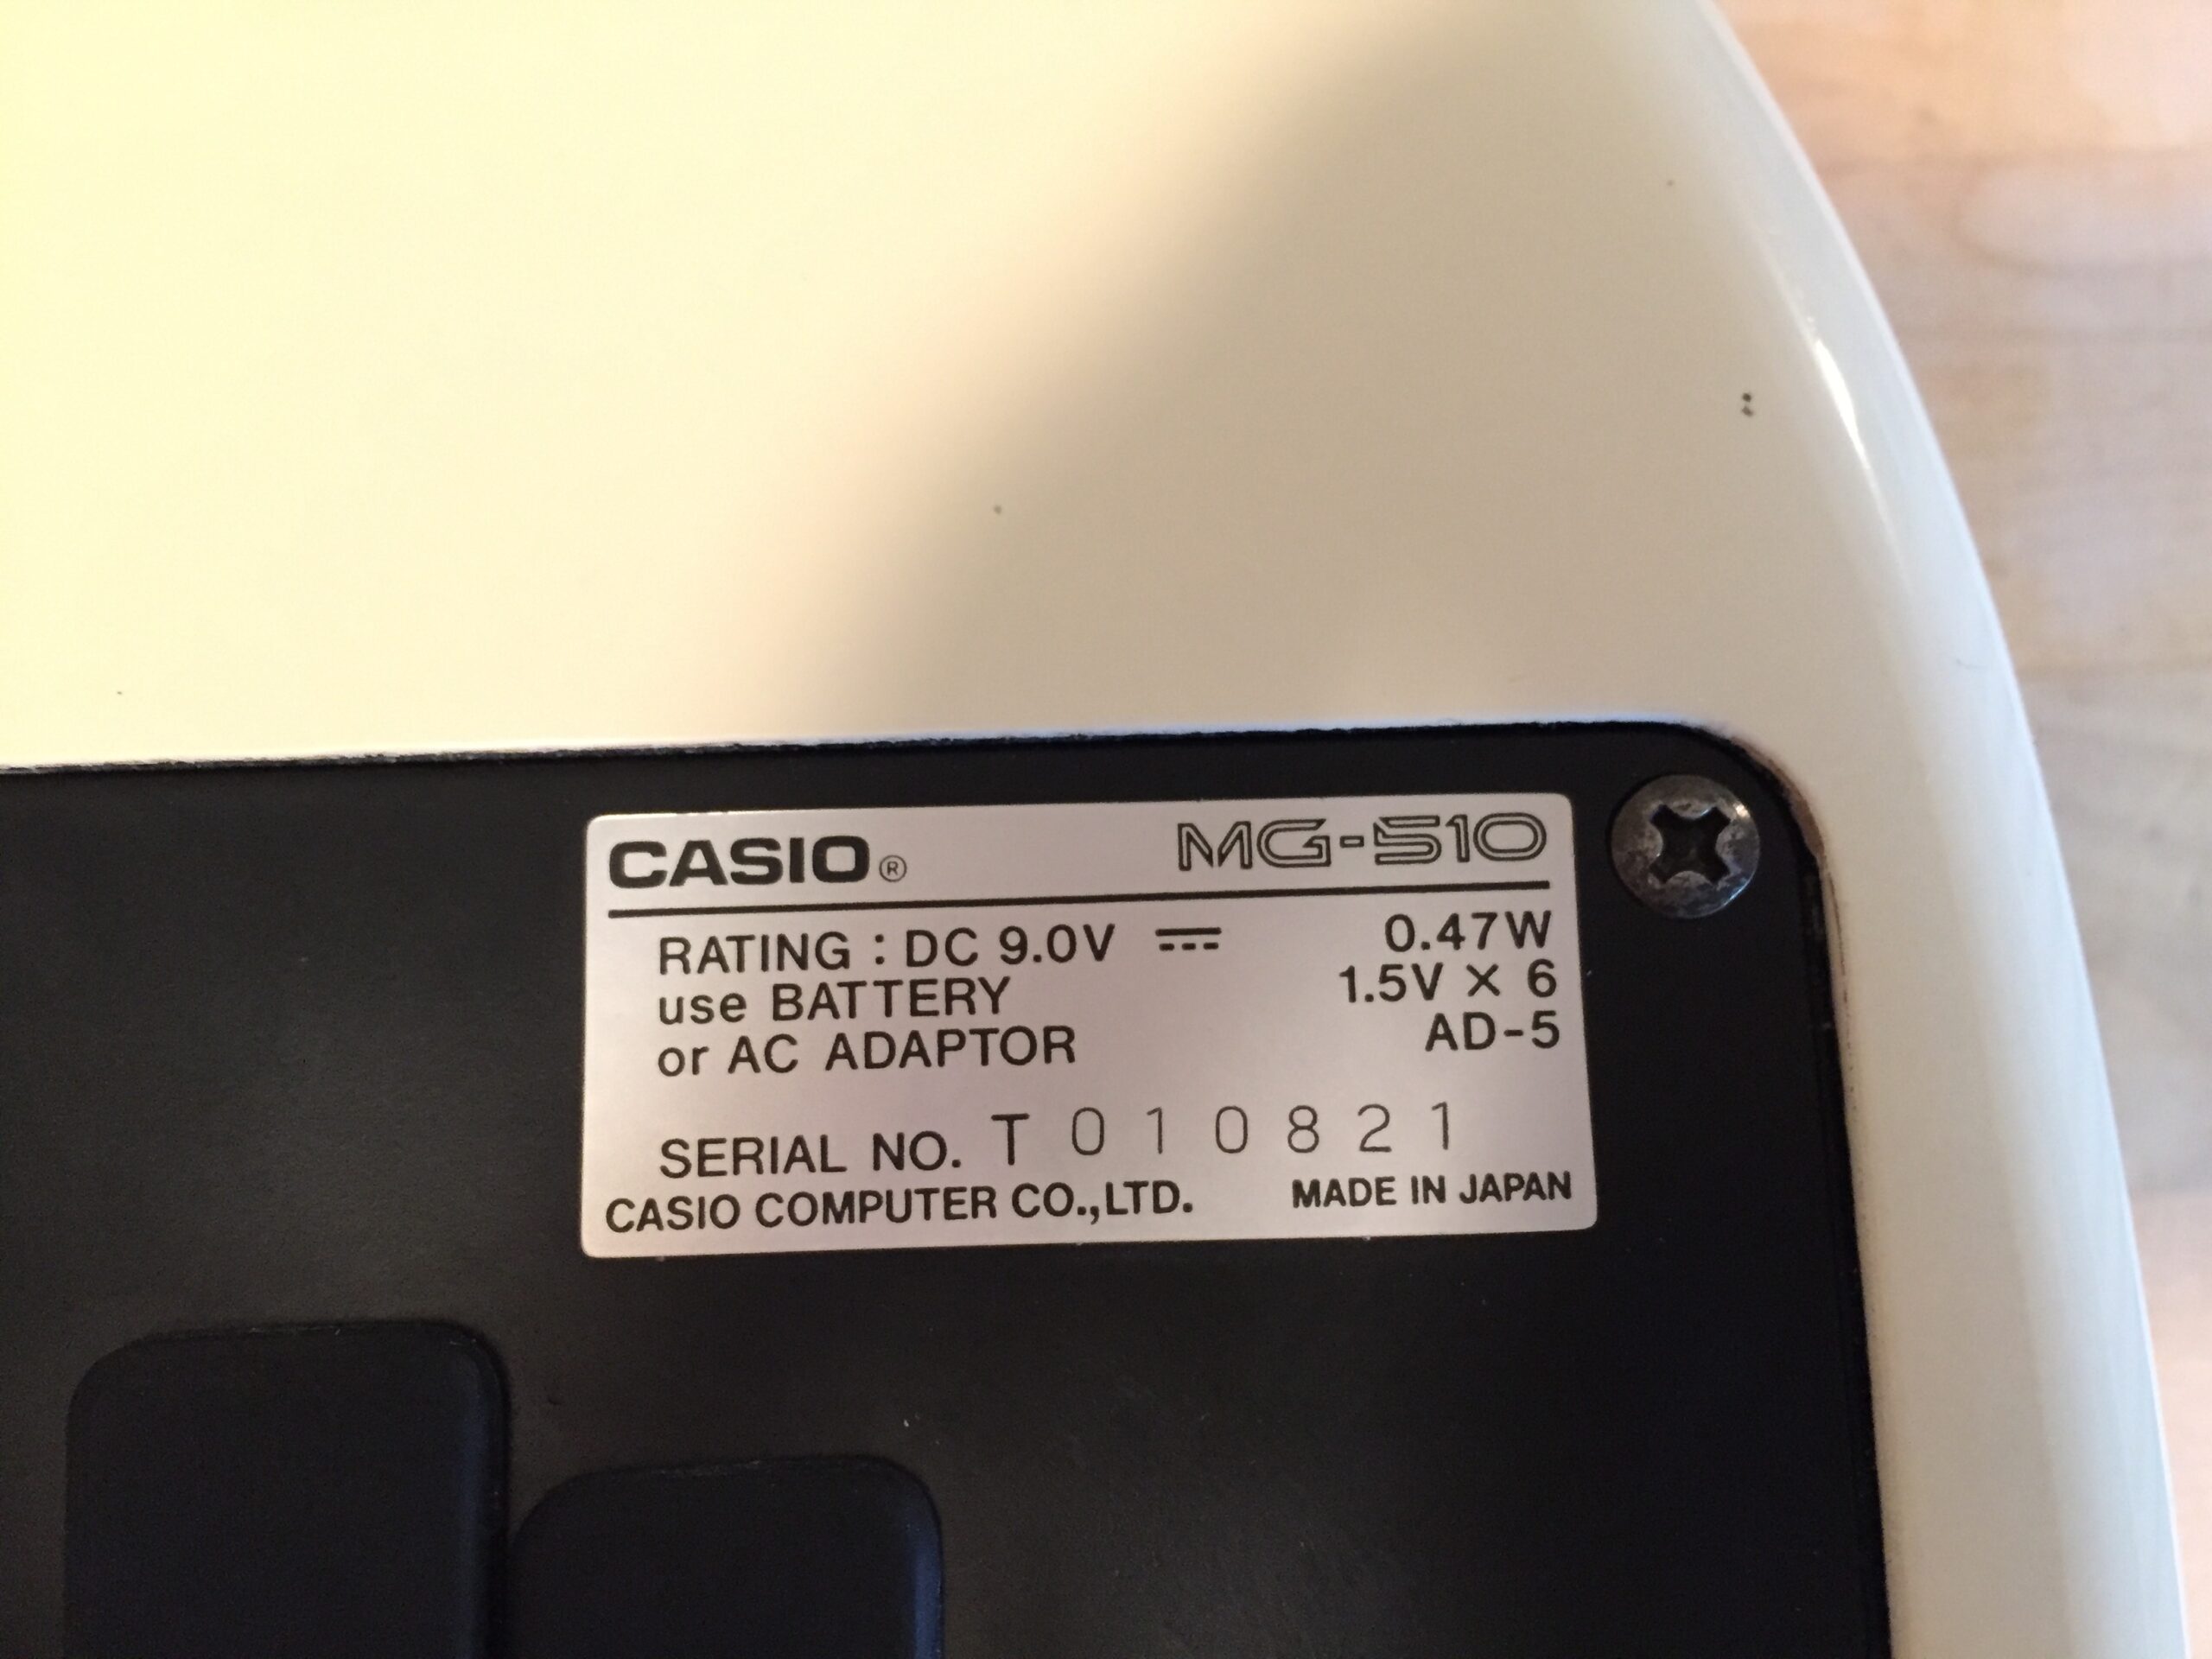
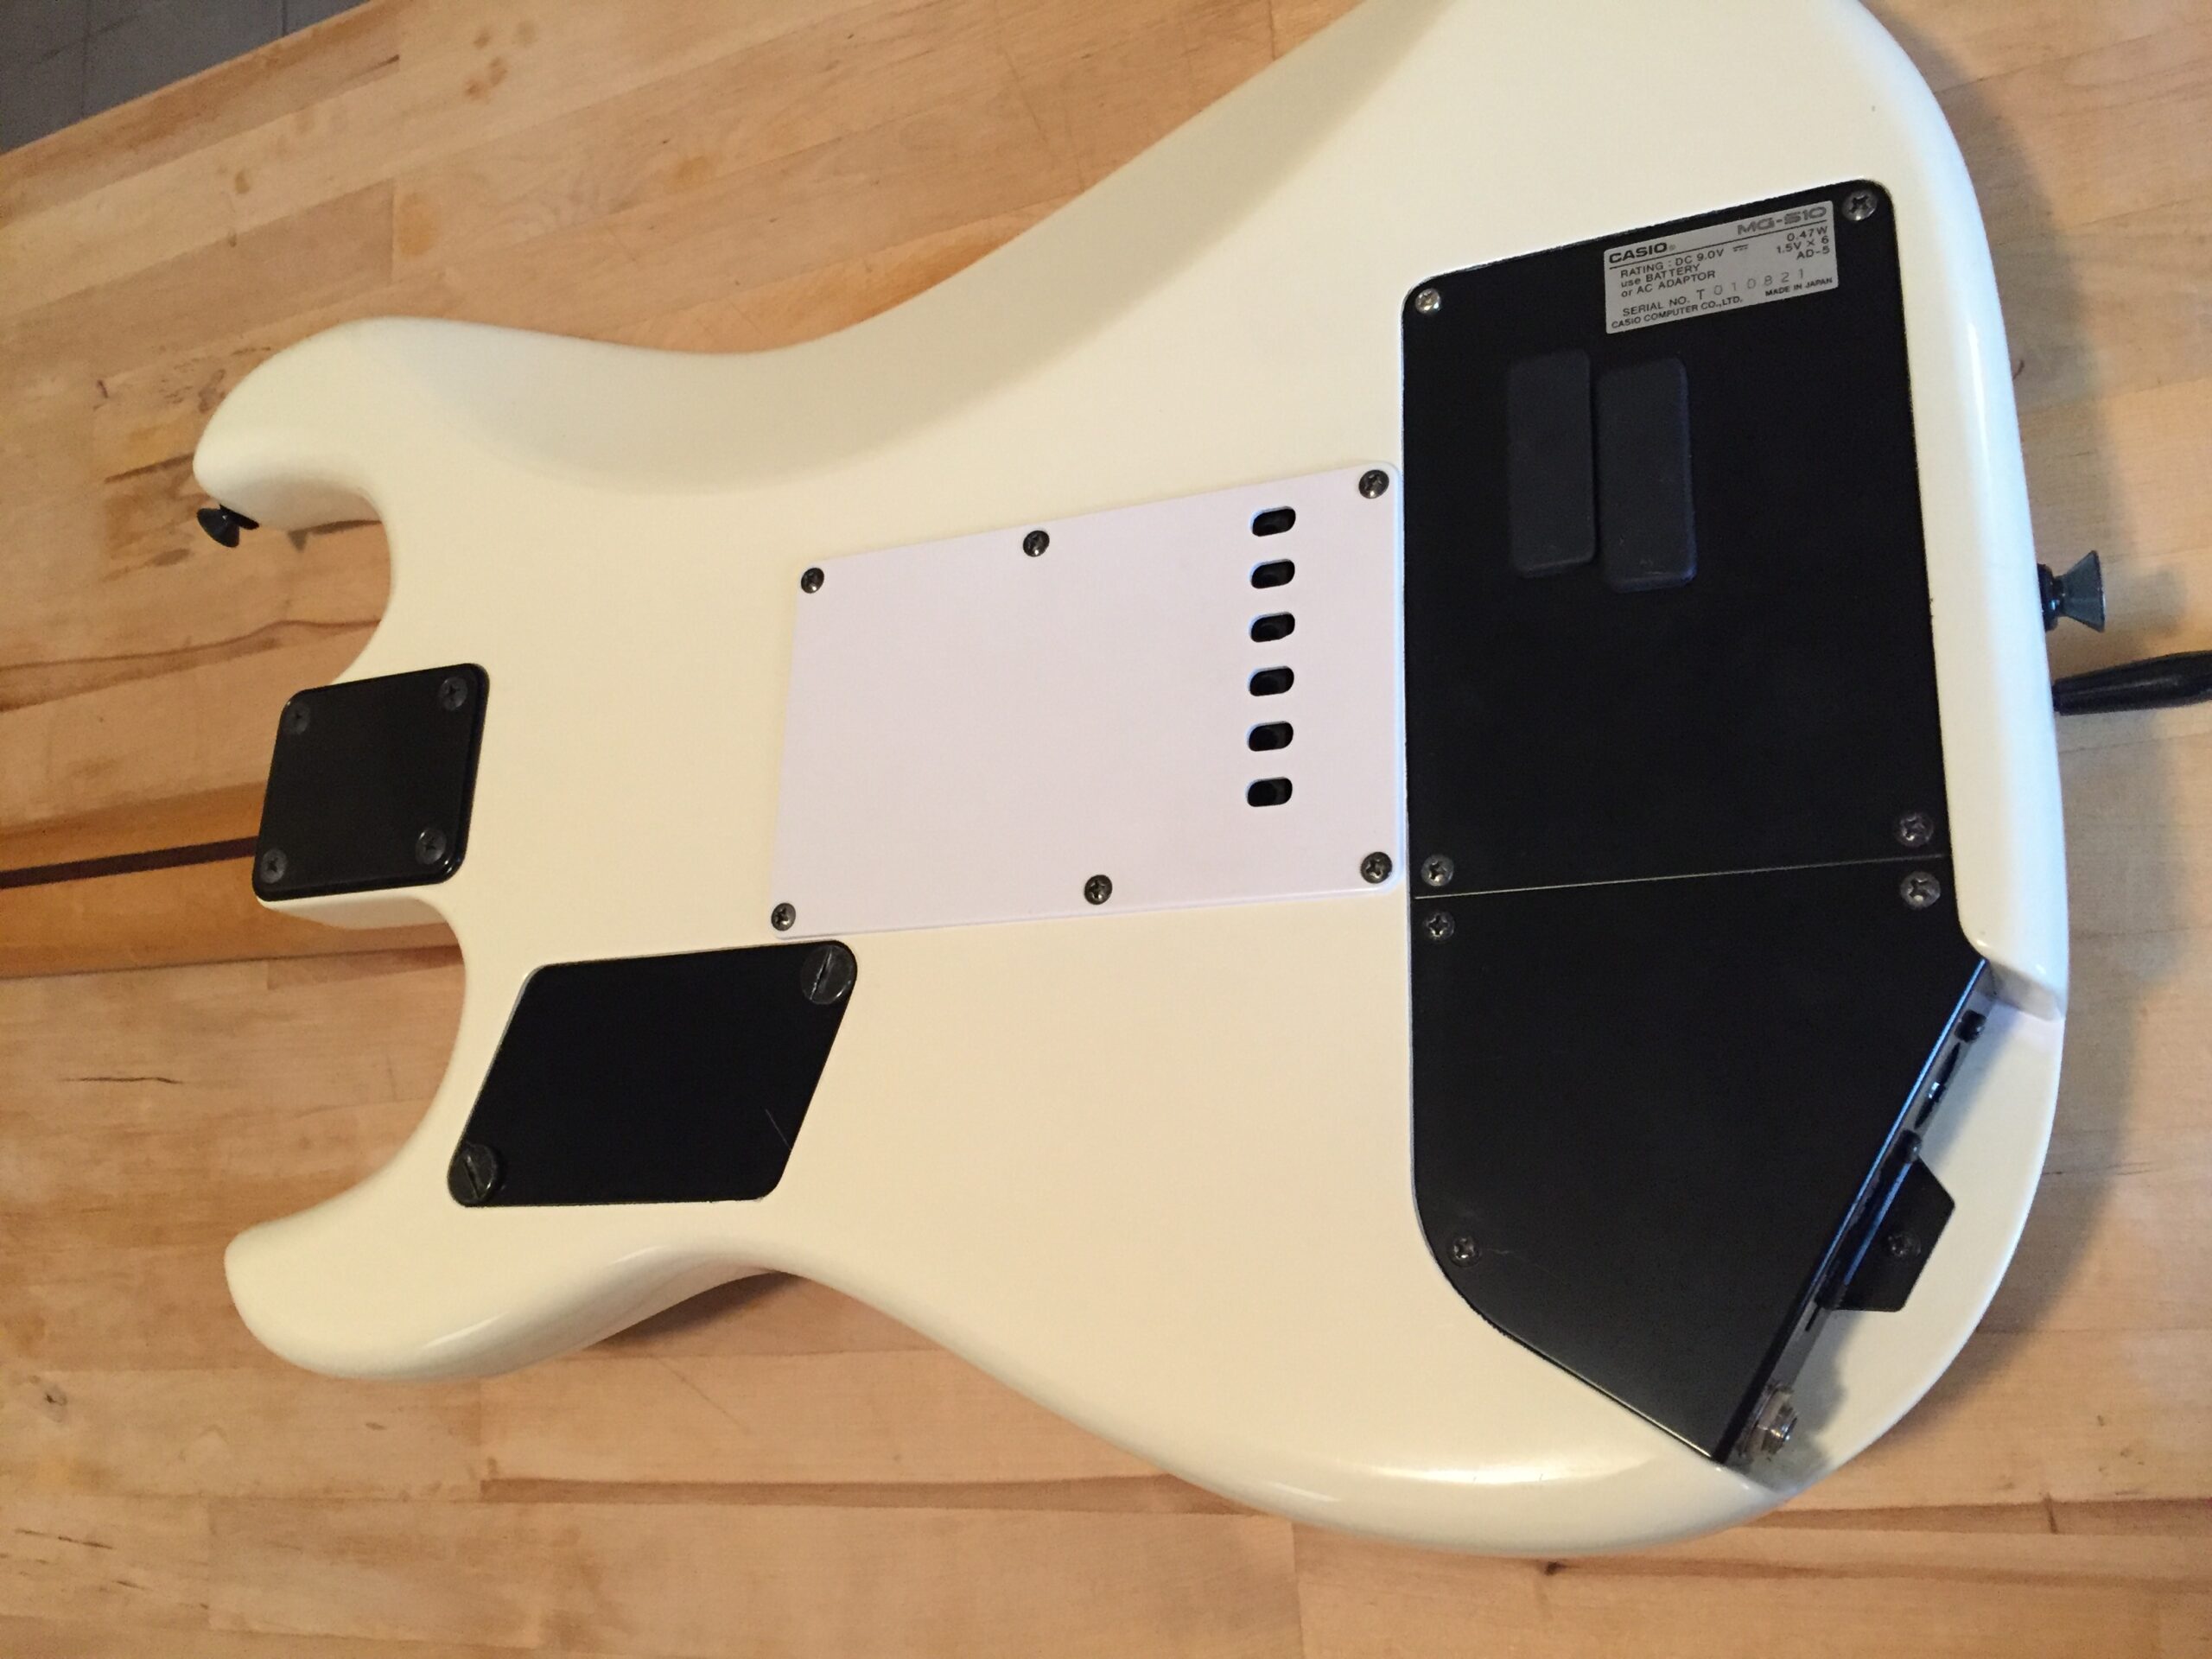
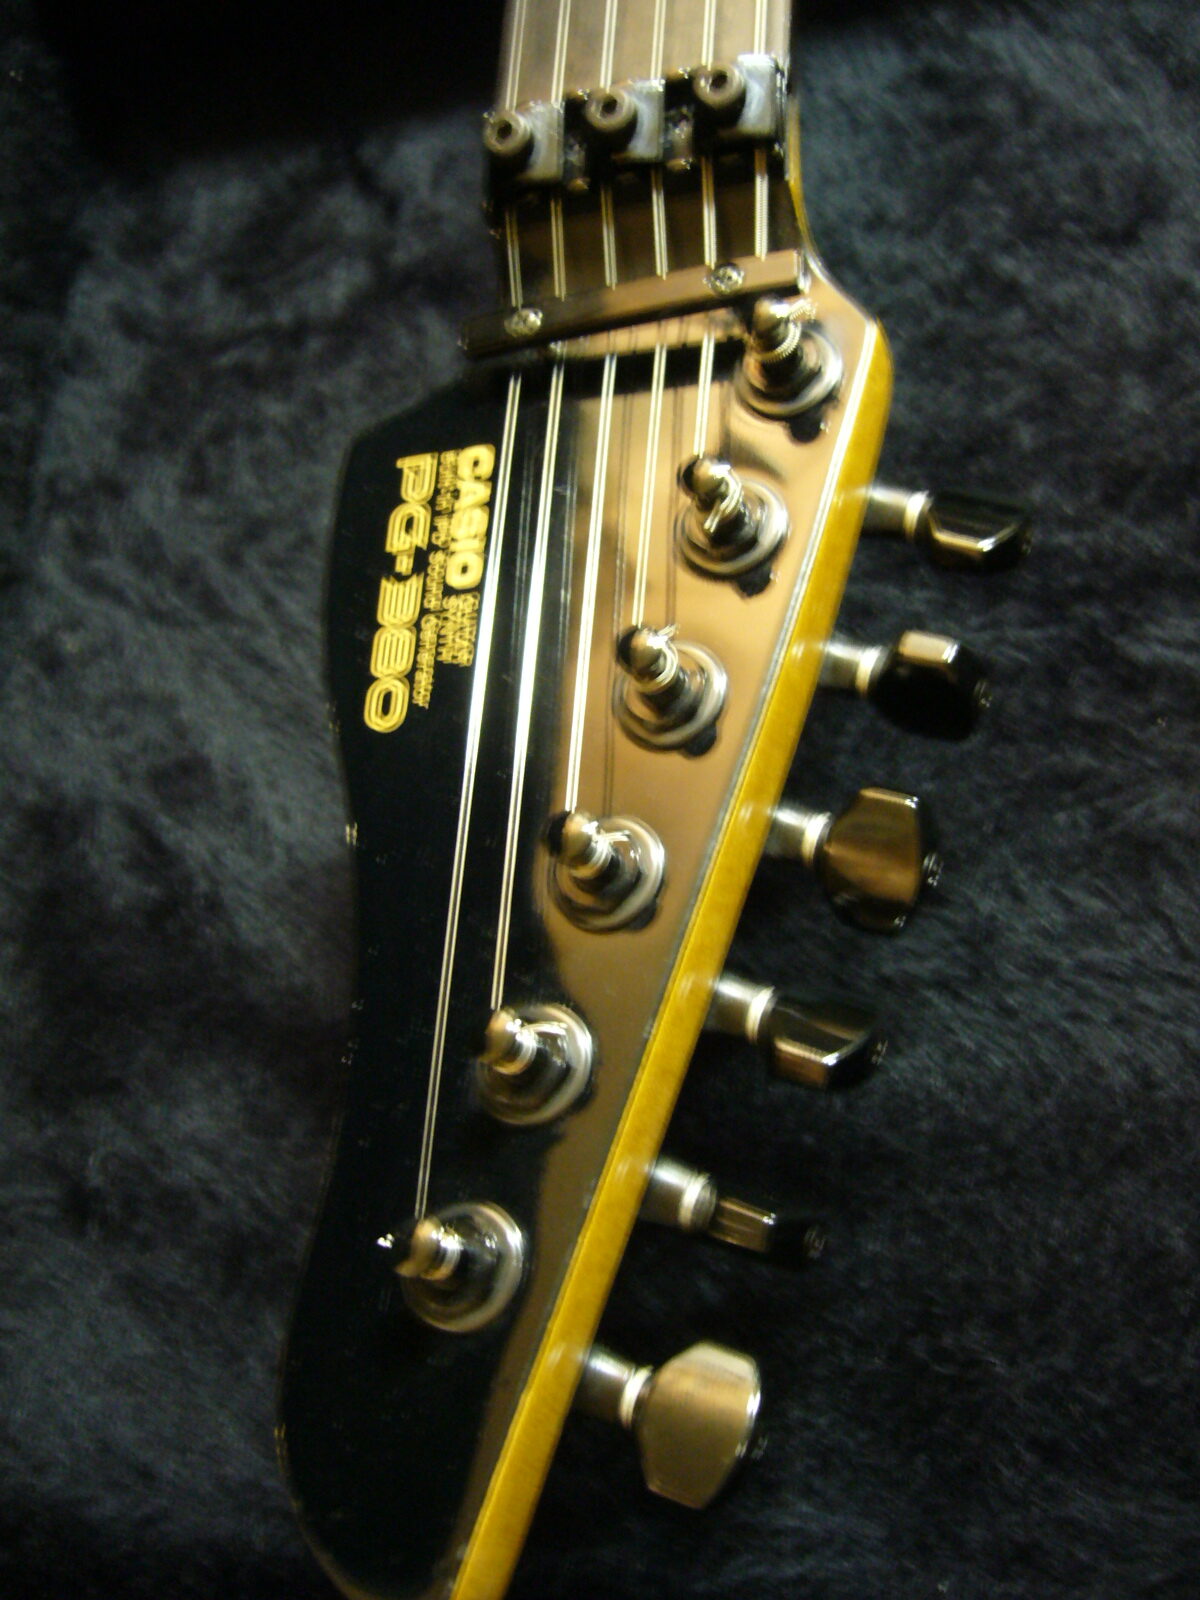
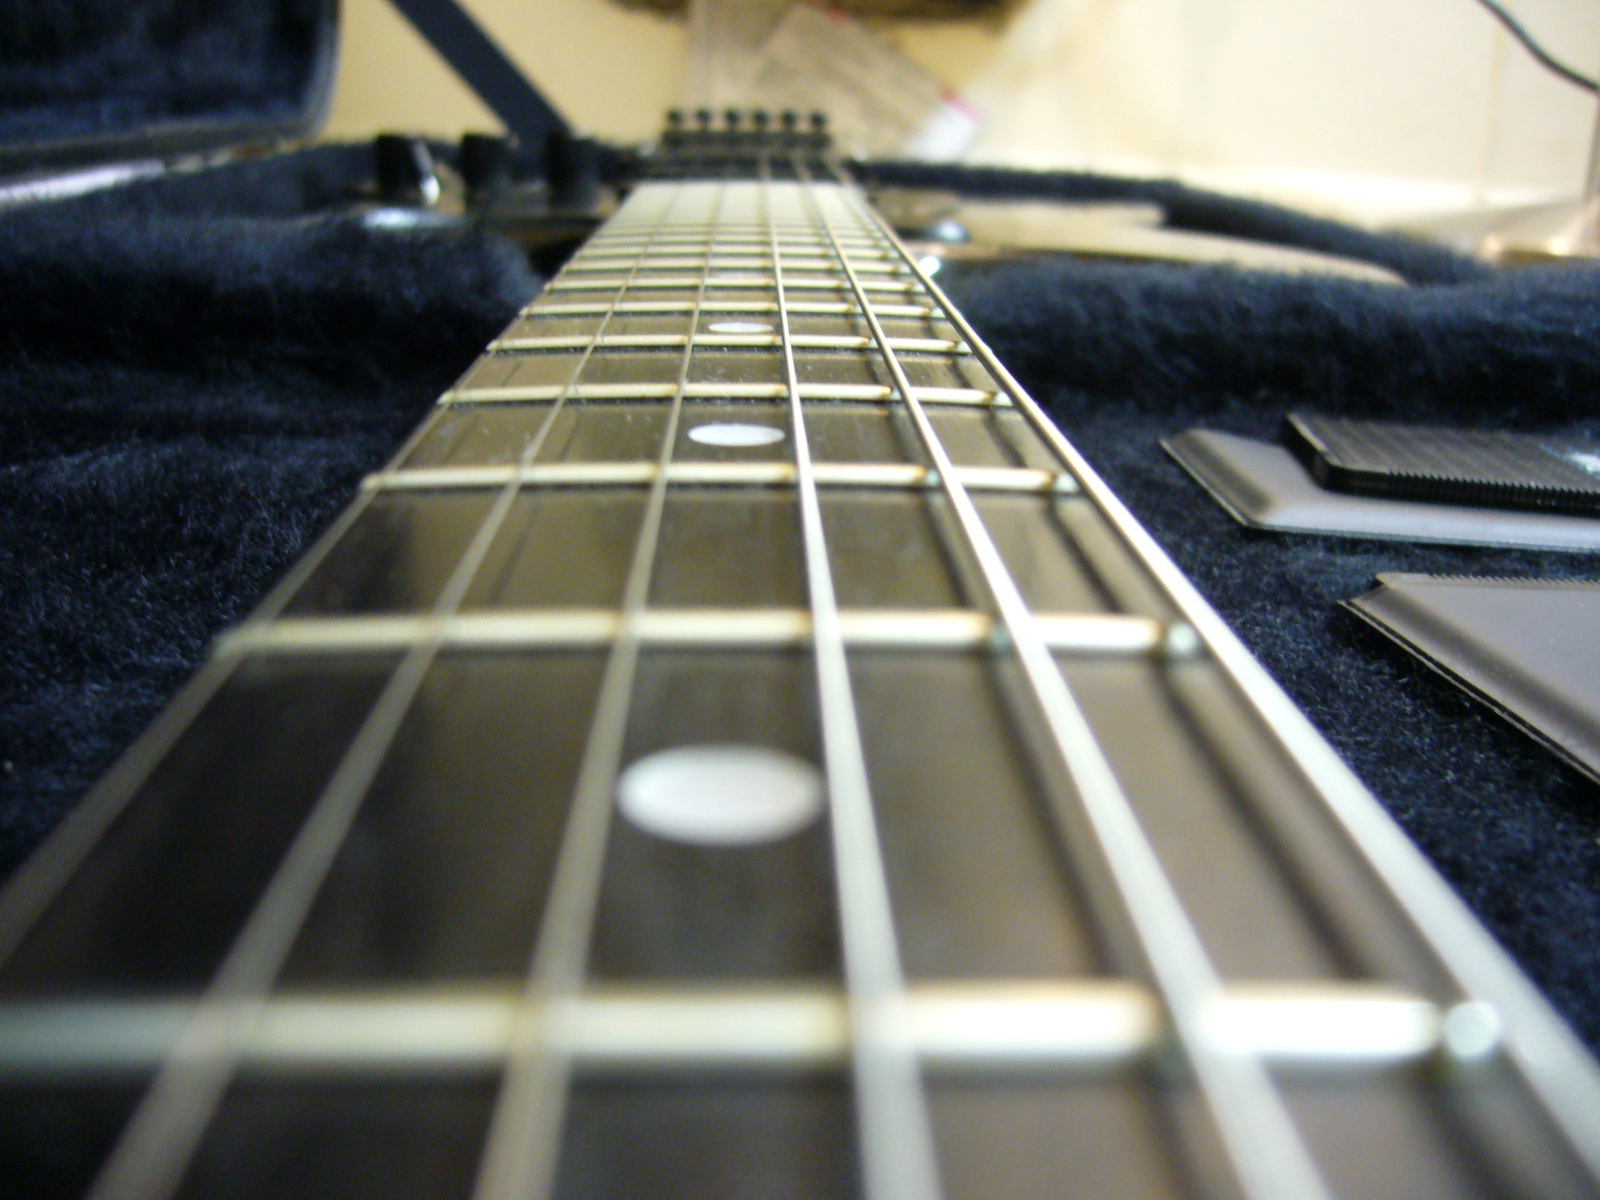
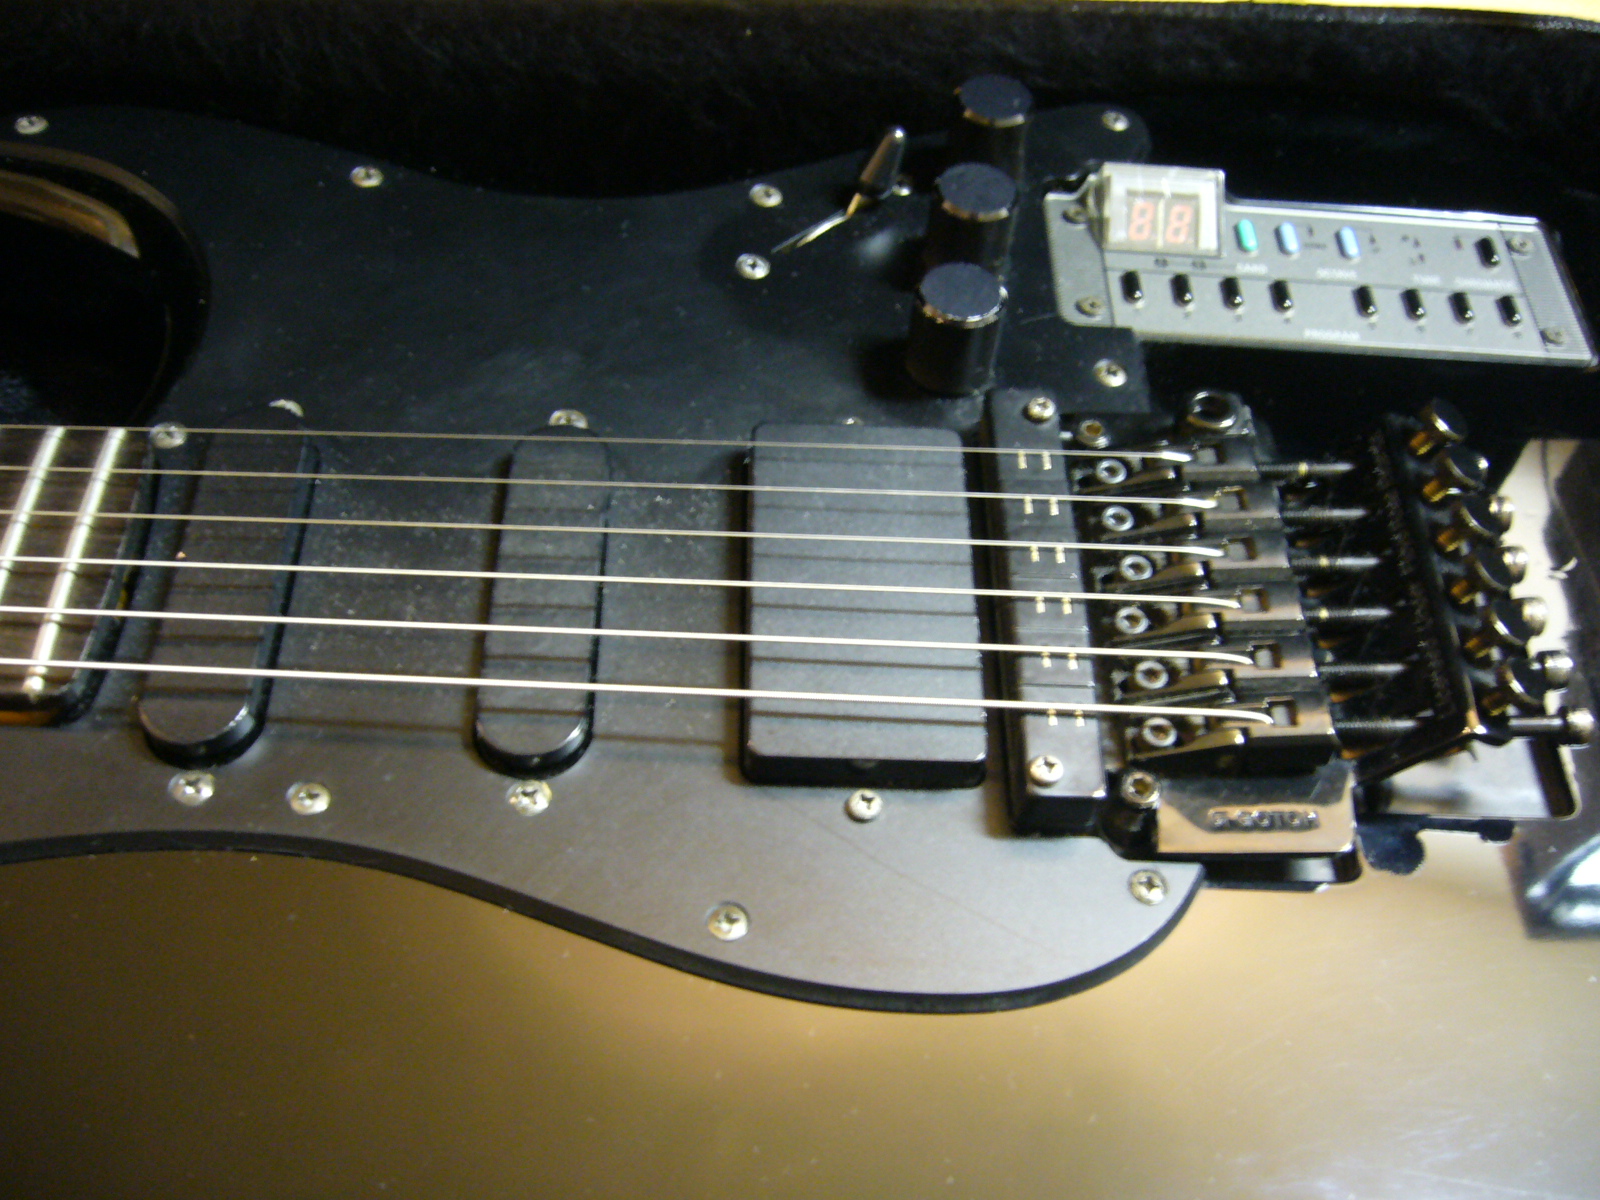
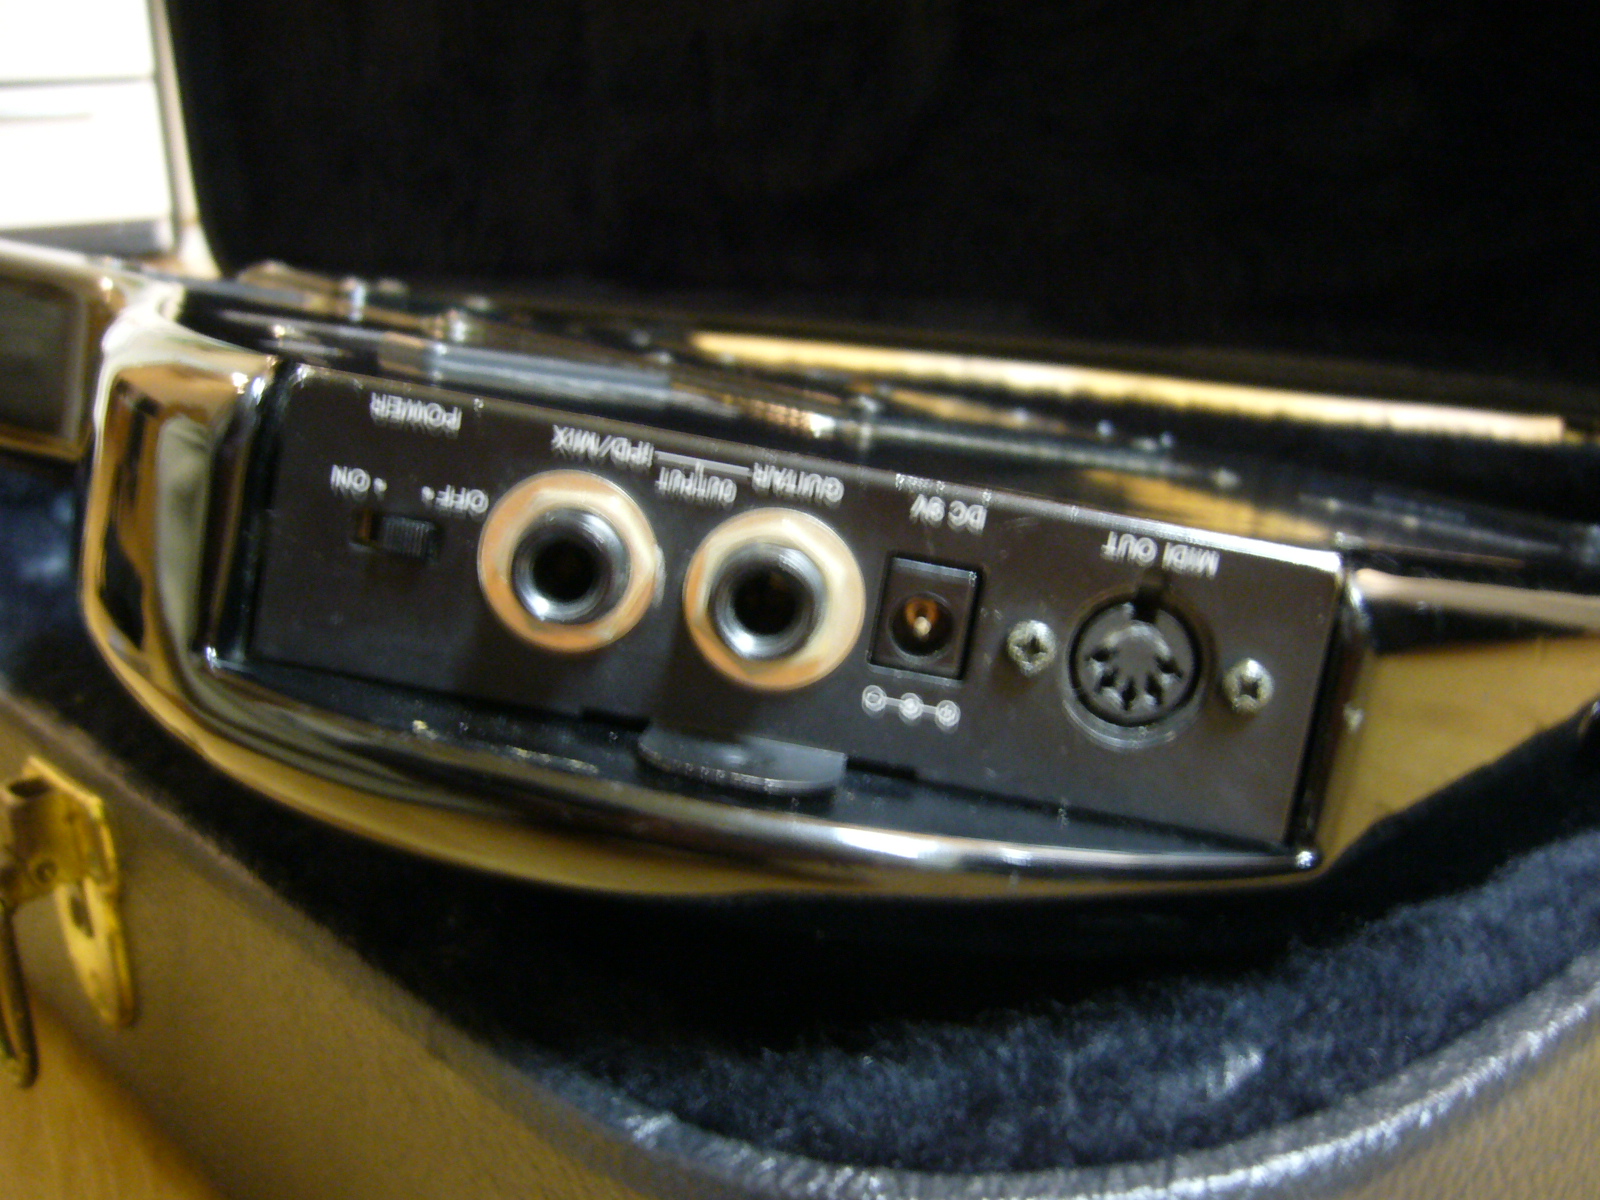
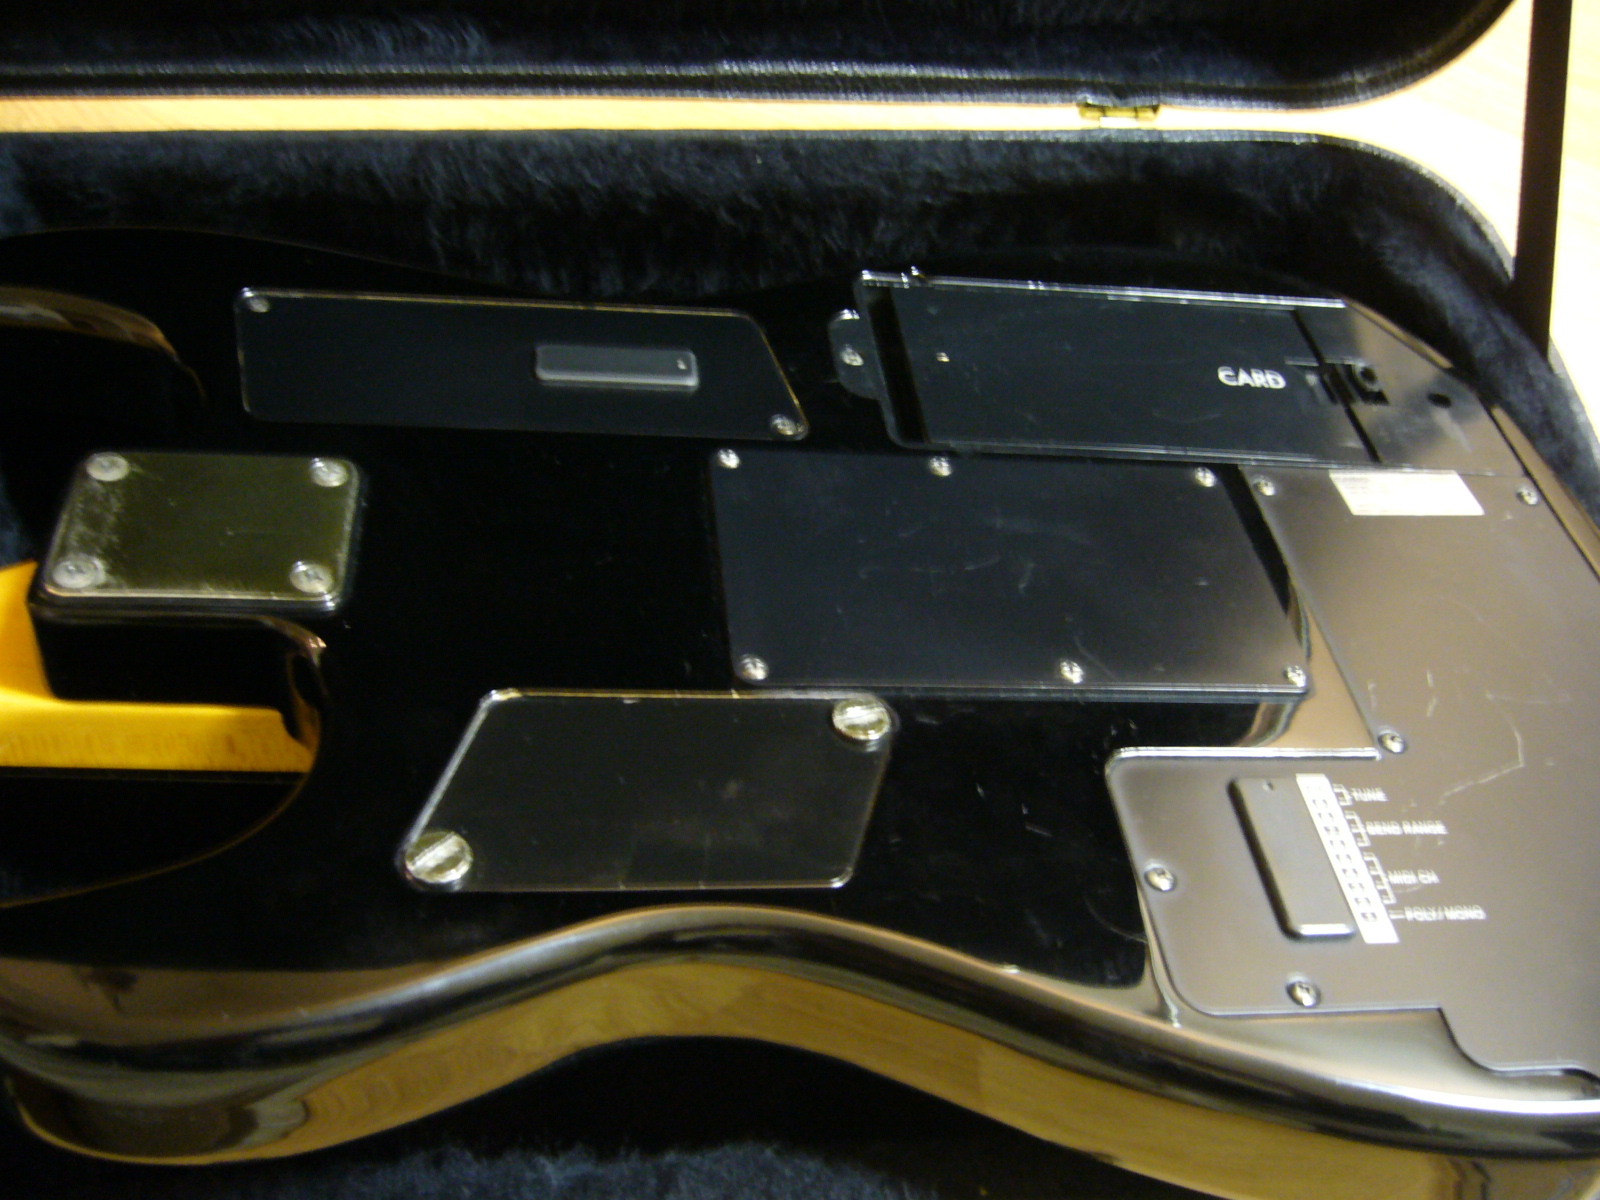
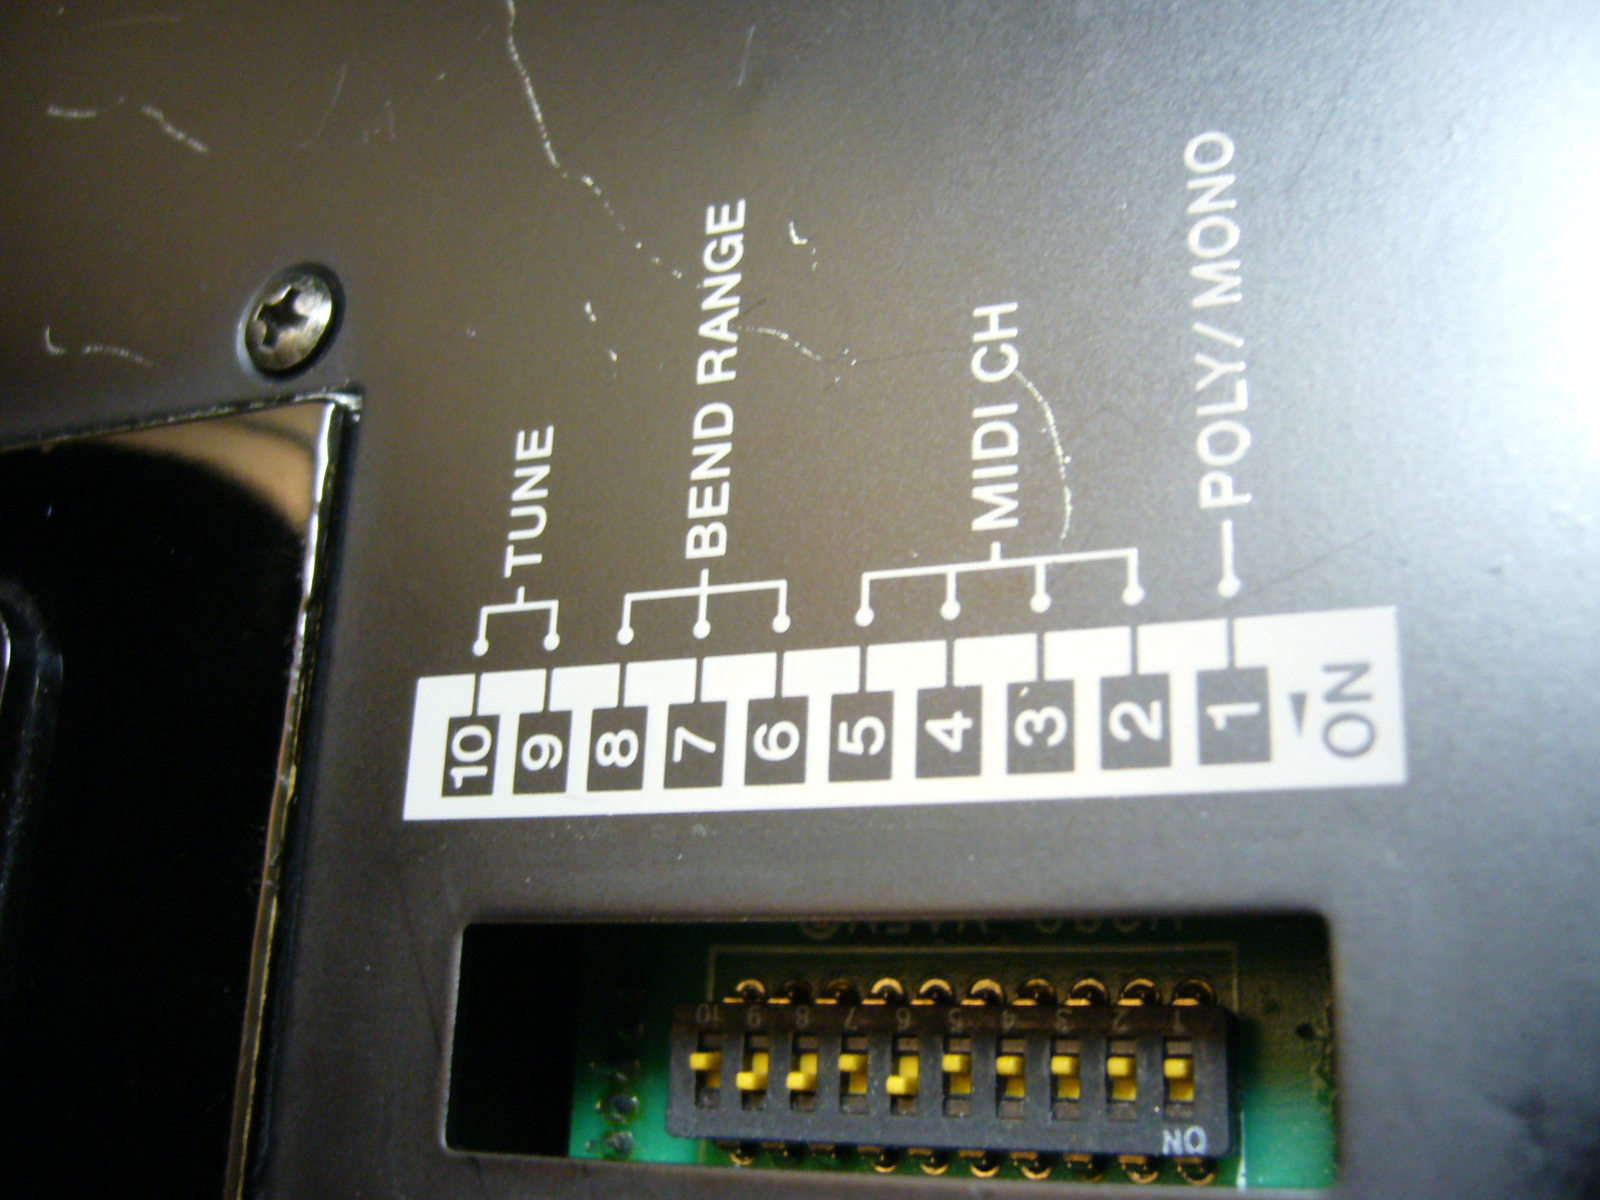
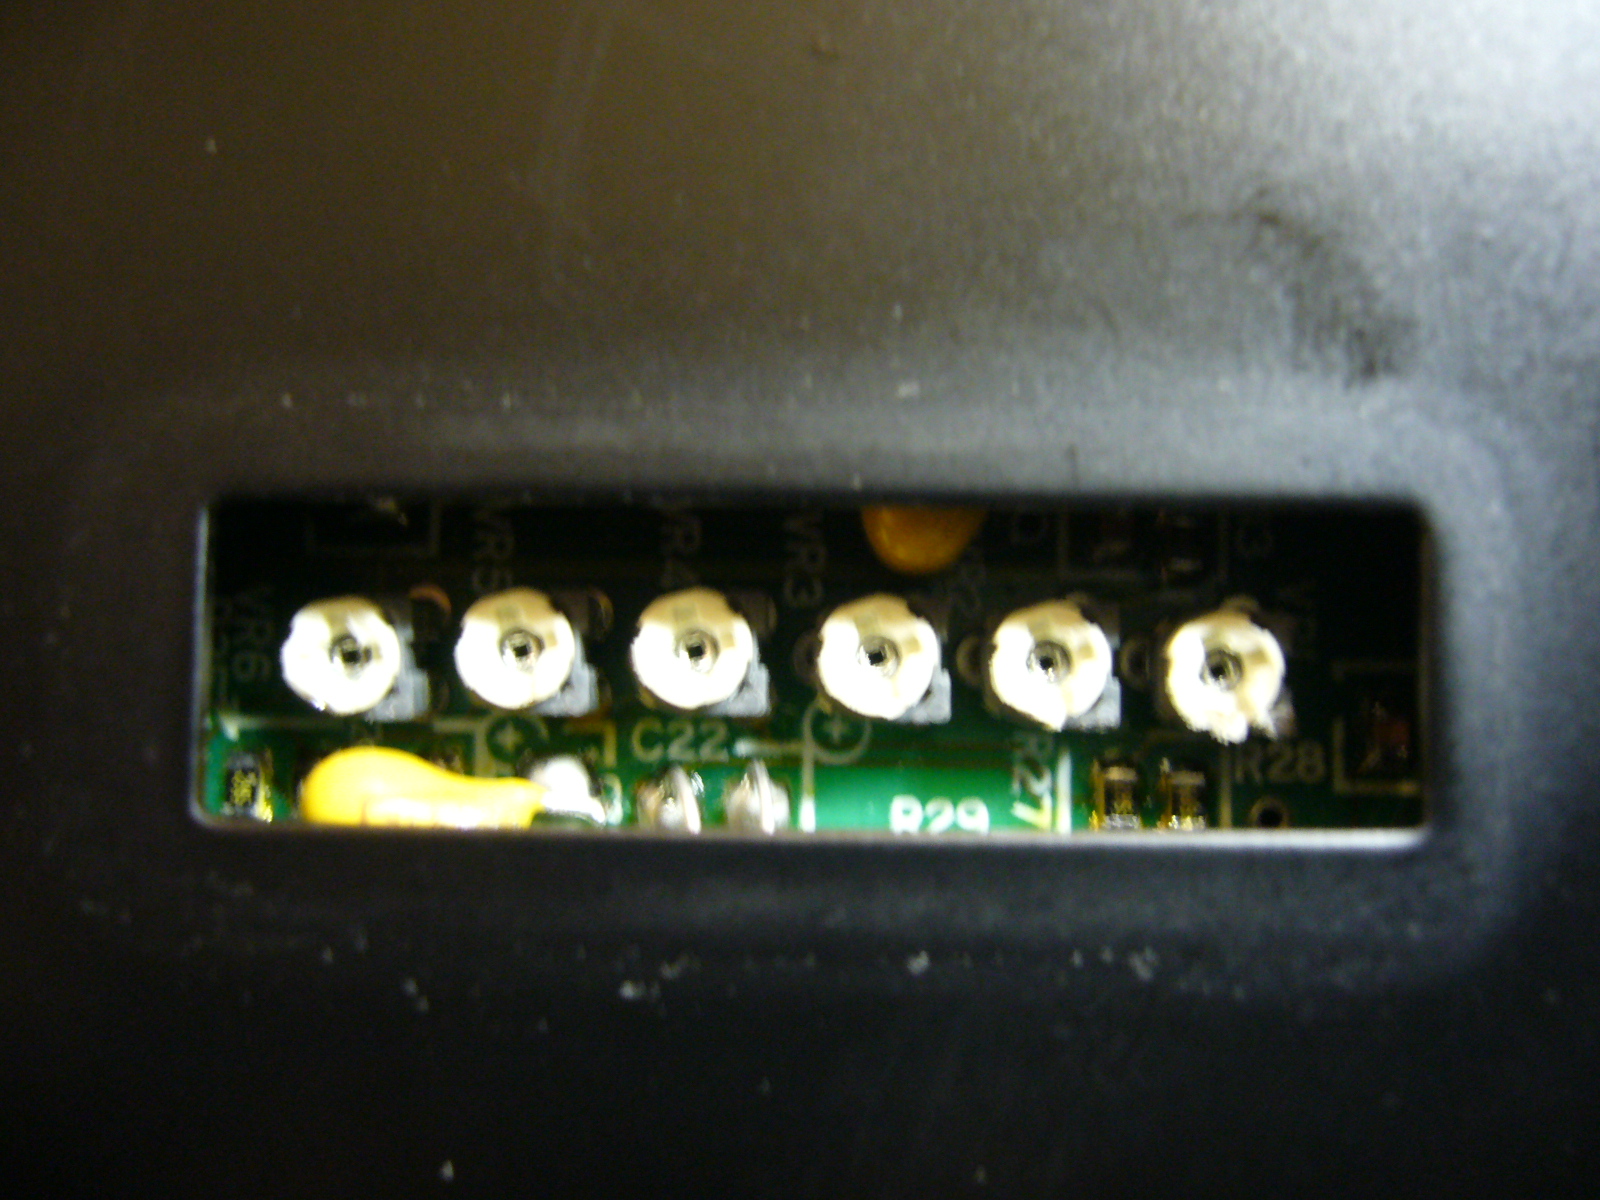
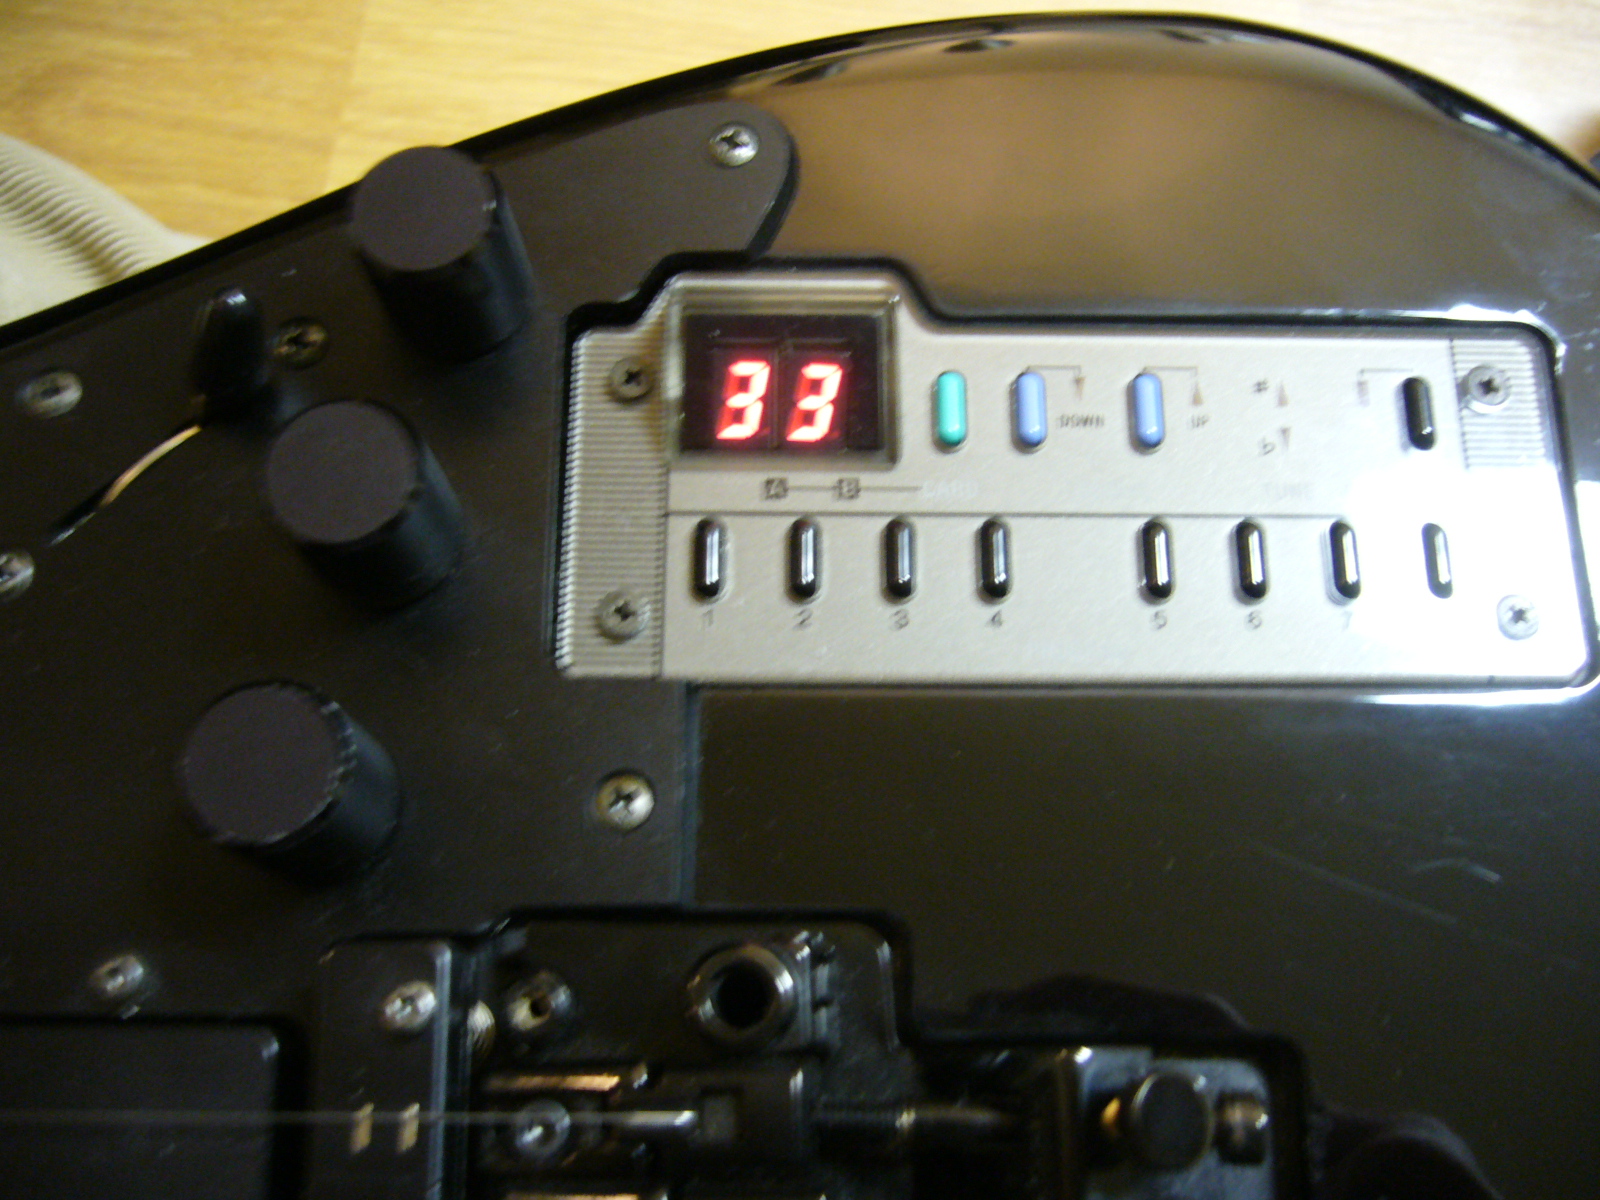
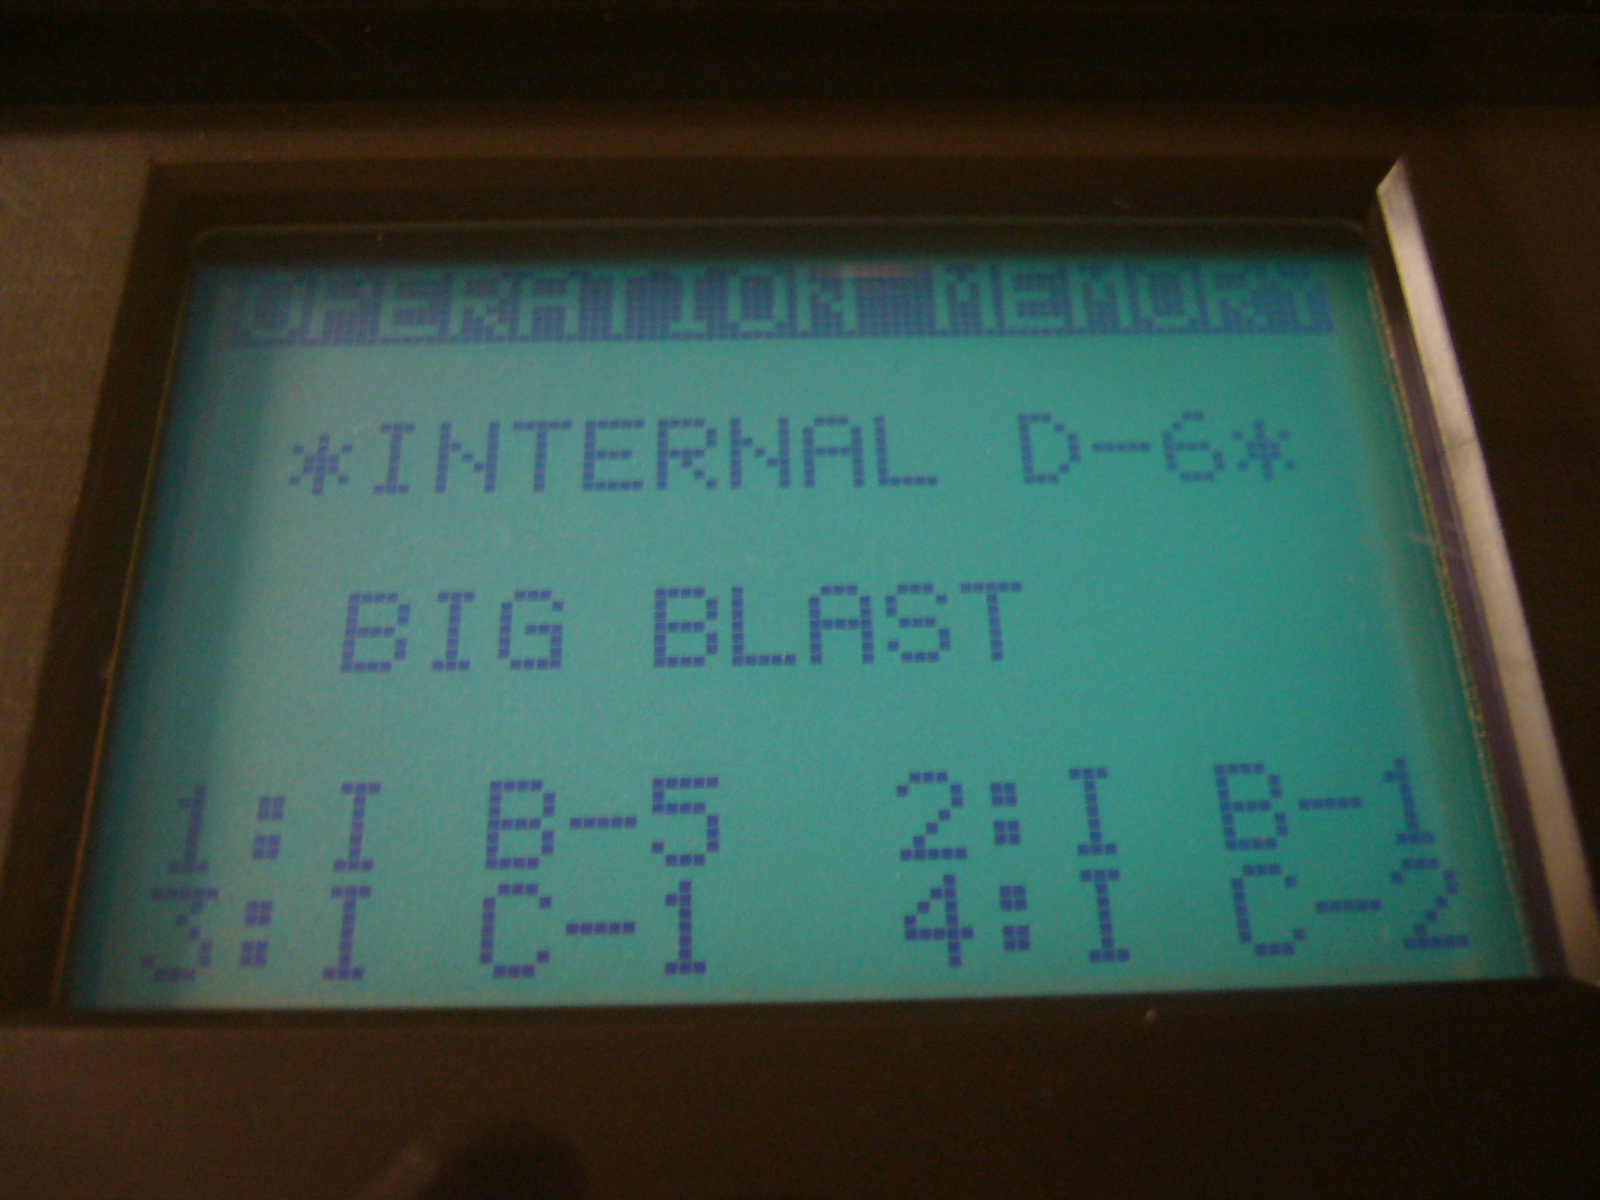
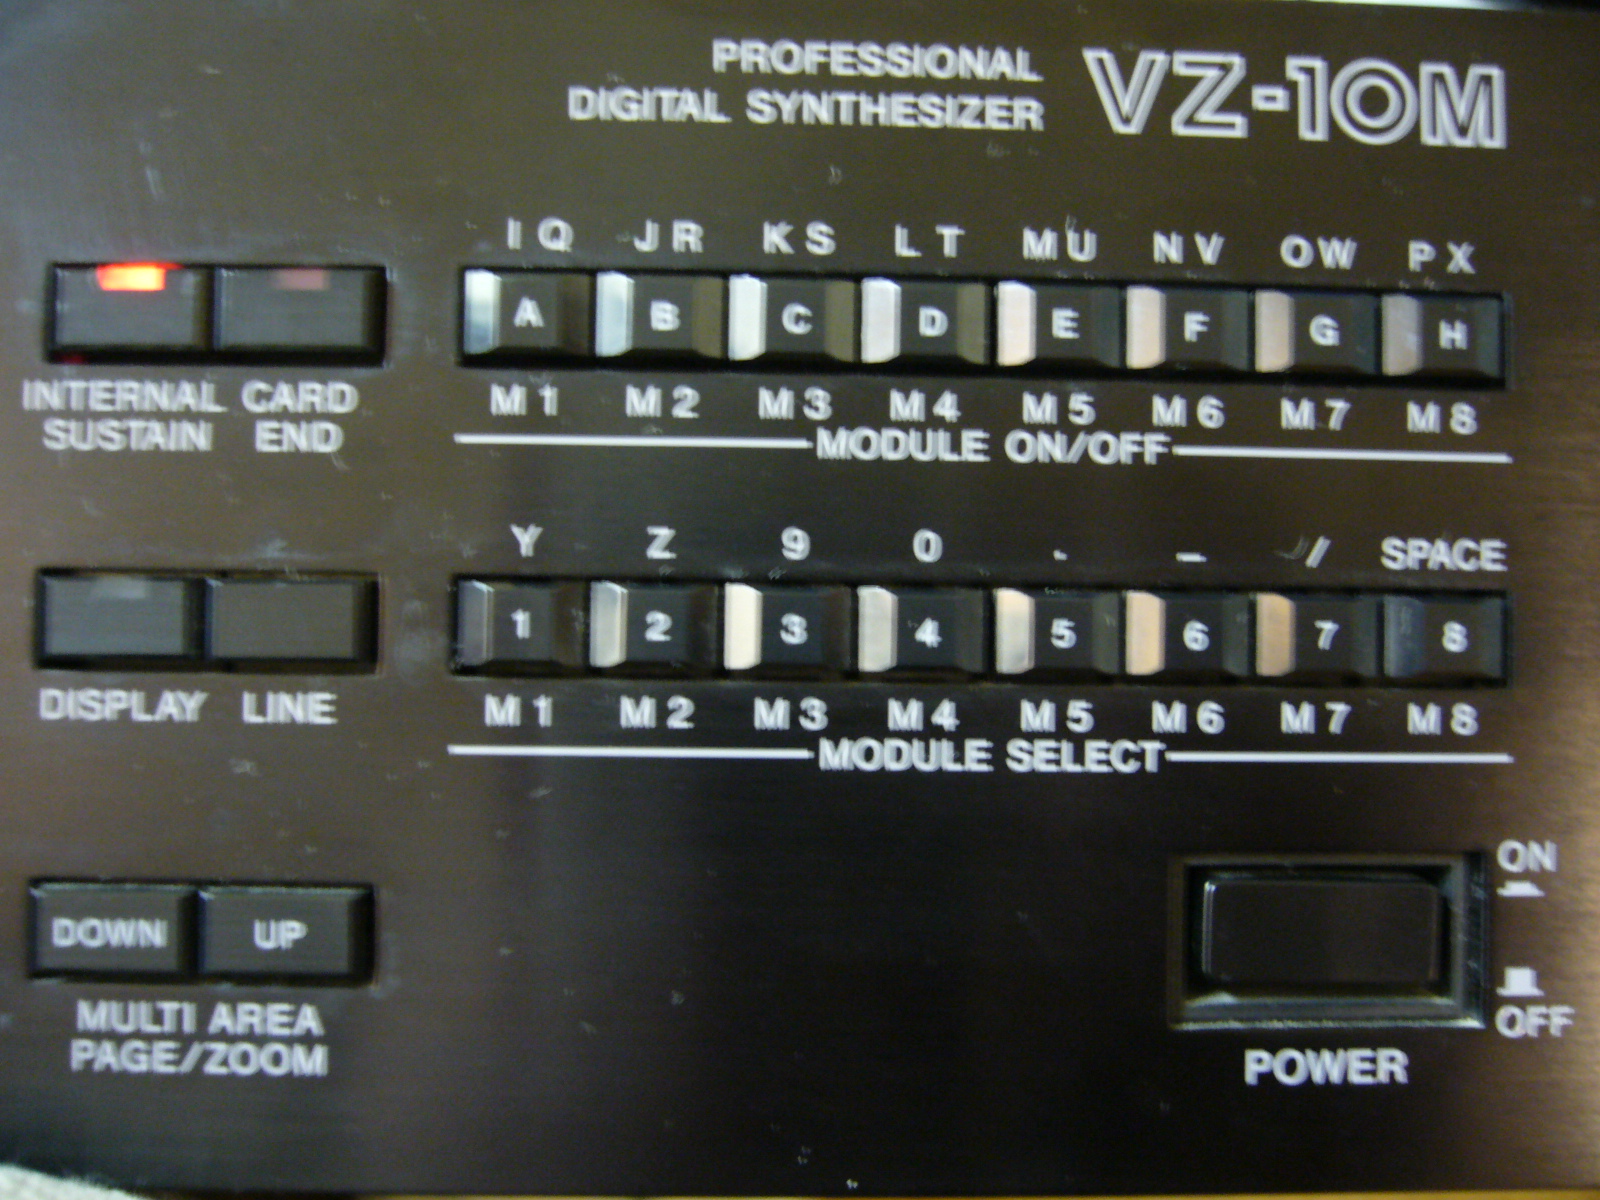
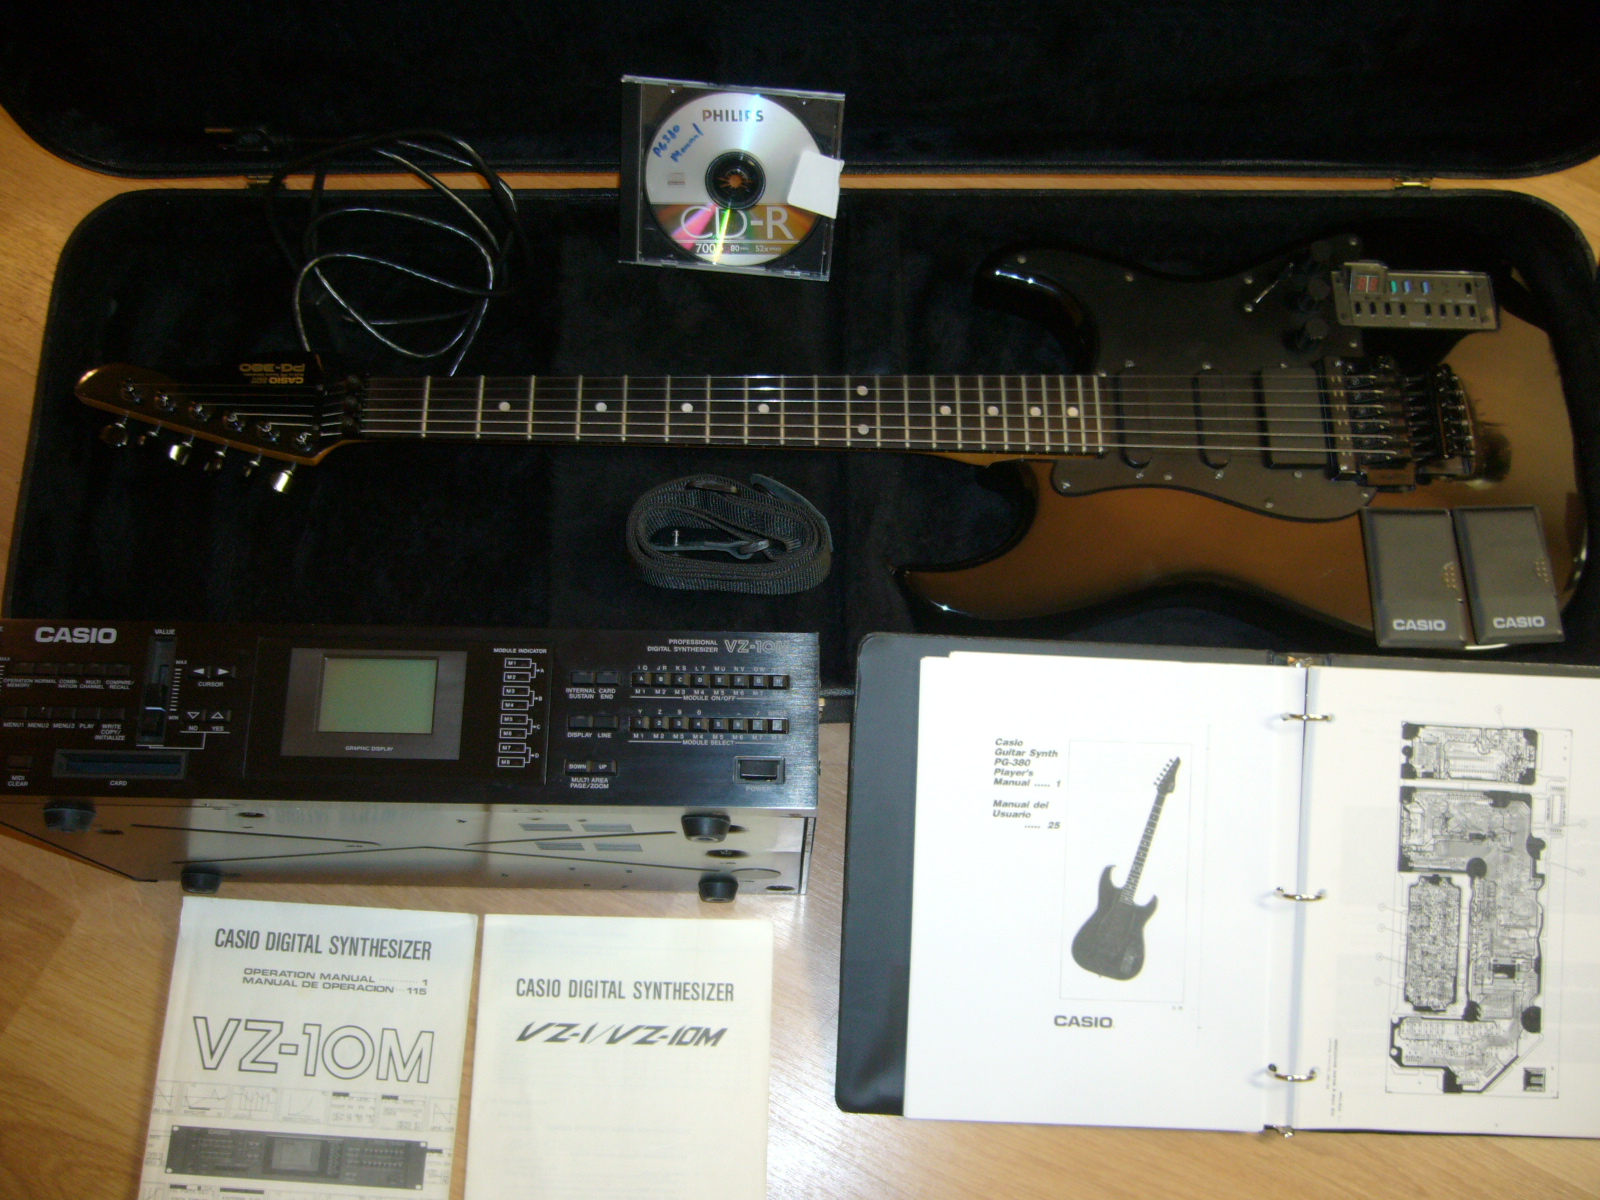
Casio PG-380 & MG-510 Synthesizer Guitars
Technology has developed quite a bit since these synth guitars made their debut some 30 yrs ago. Now there are interface boxes that convert your audio signal out to midi and allow you to use your standard guitar to control a synth. I certainly wish these concepts really developed further for guitars with onboard synth engines. There are two main concerns when seeking this type of equipment, polyphony and latency. Unfortunately if you were to acquire a guitar like this today you would probably end up replacing the sum of like 20 smt capacitors. Not the headache I want again but I’d like to share these cool guitar pics I had that were actually pretty advanced for their time.

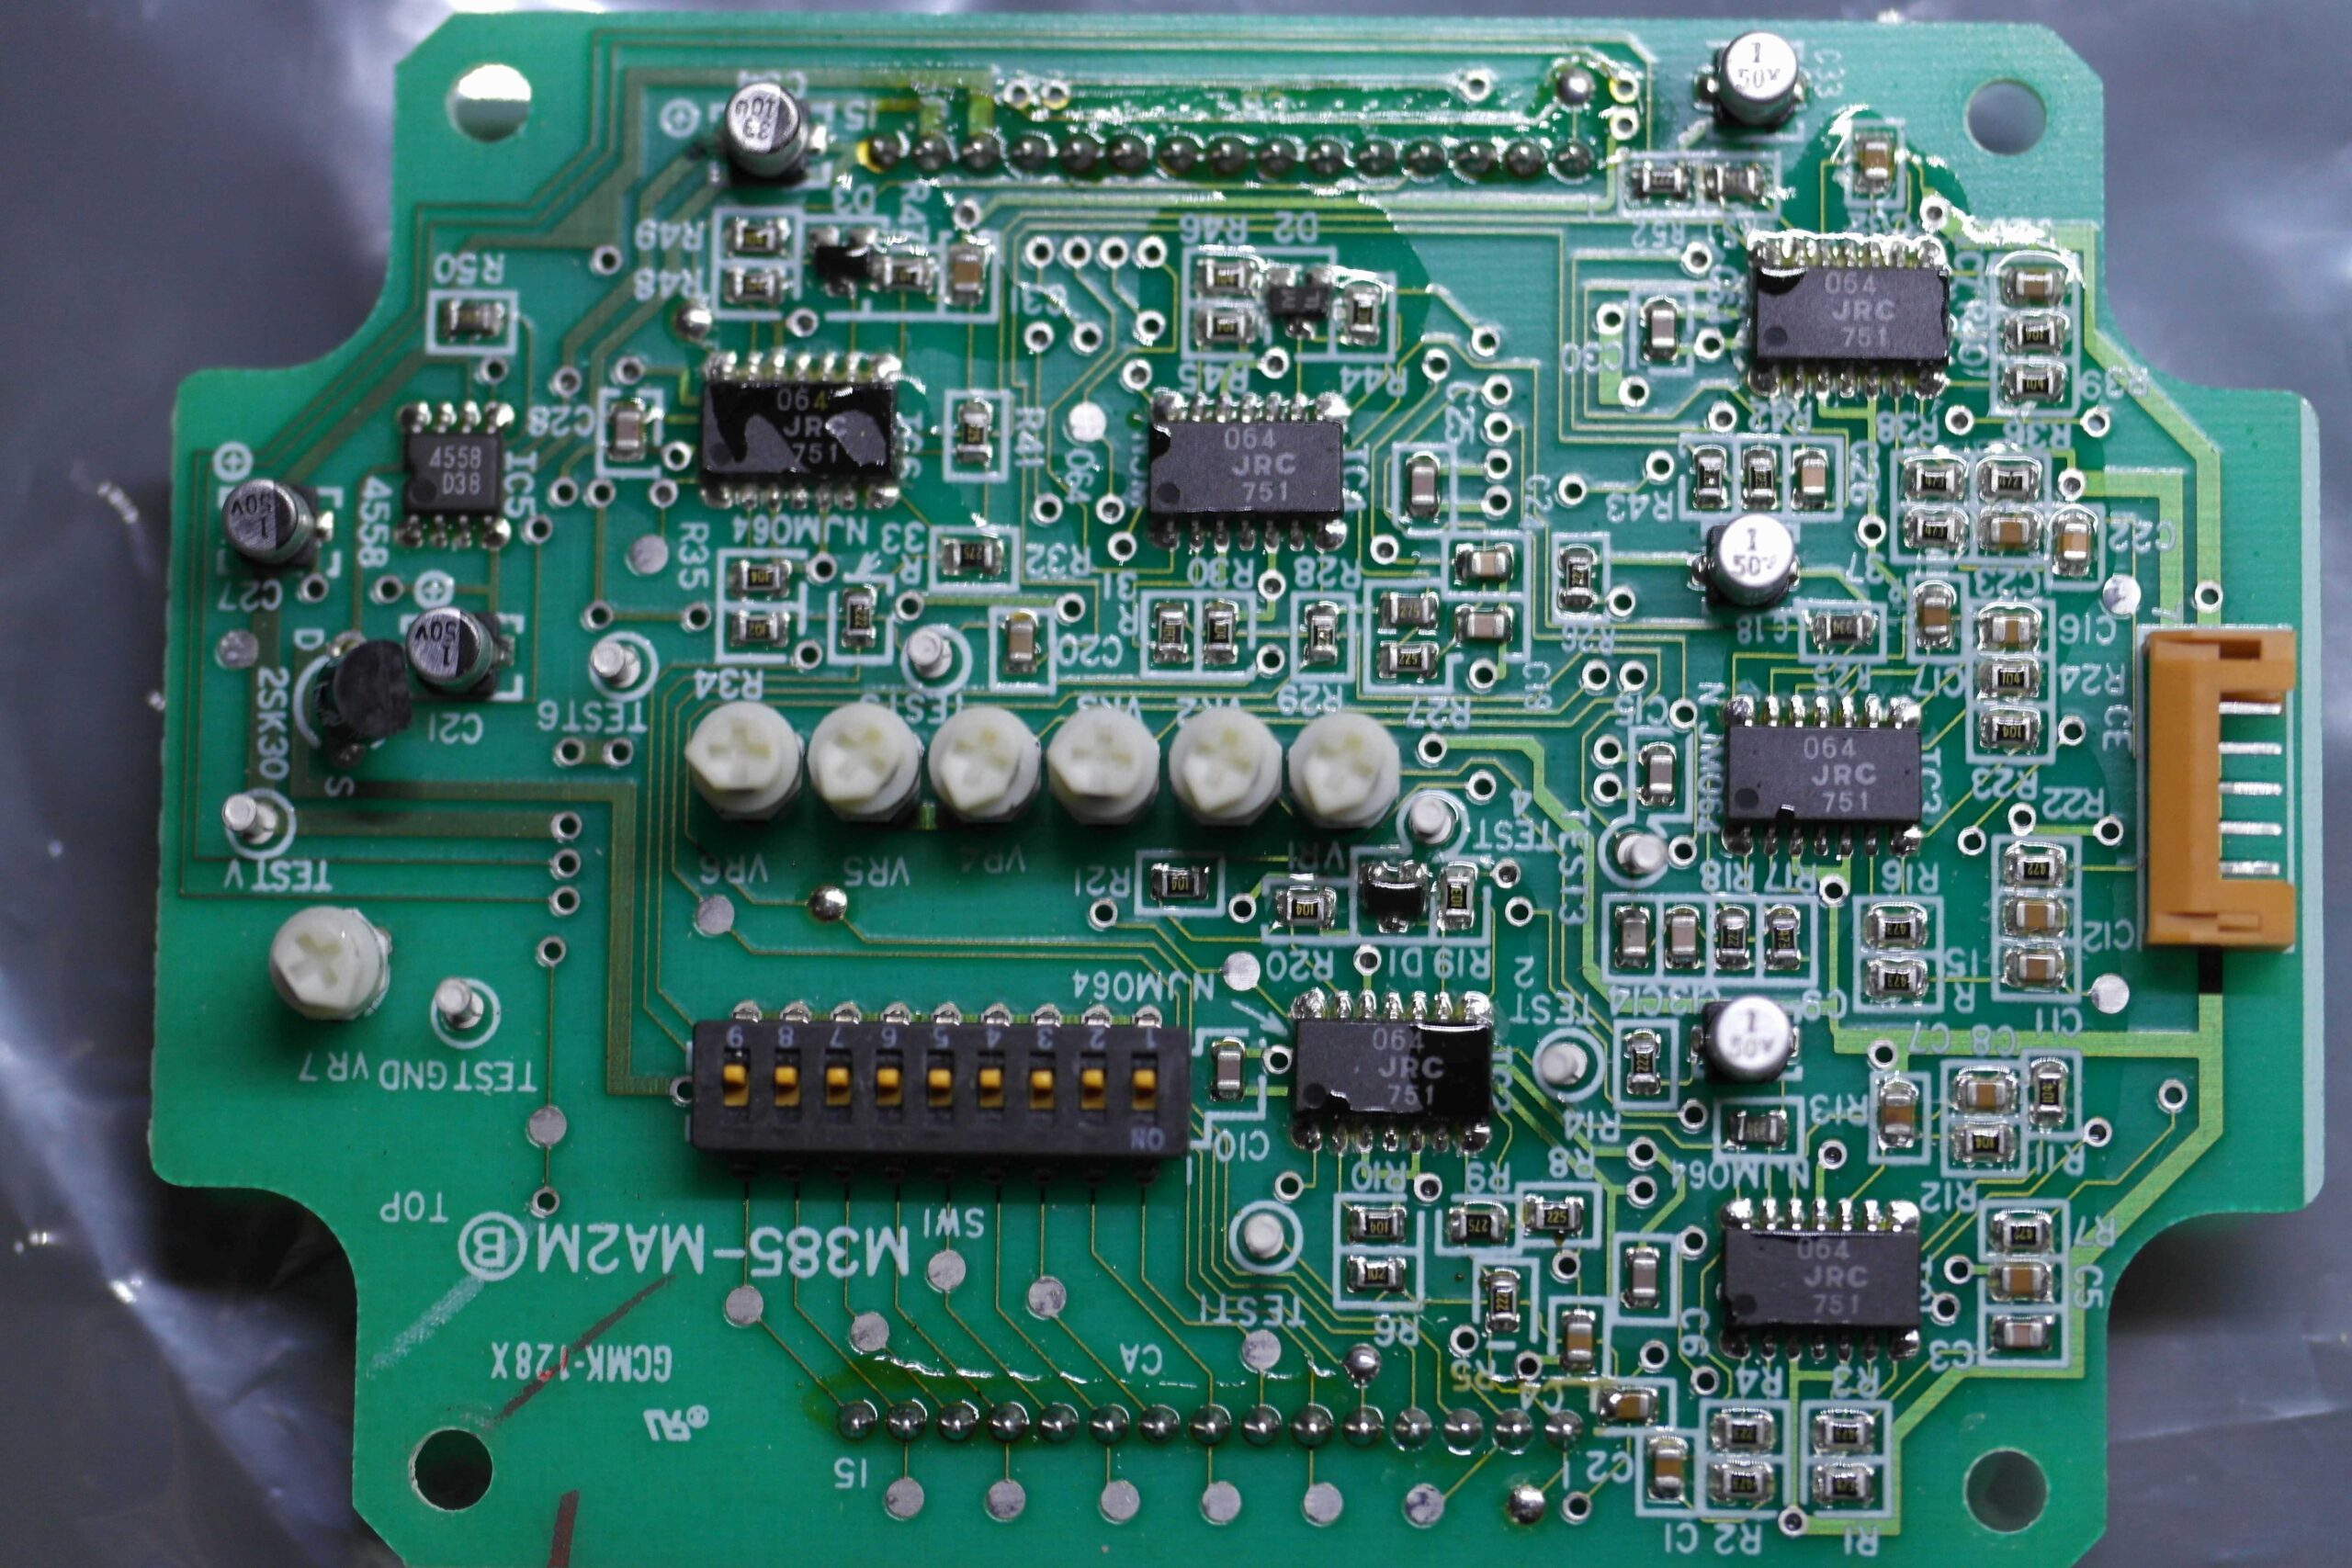
When I had these guitars I changed out all the capacitors which really helped the performance. I do recall the PG-380 lets you blend the synth and guitar sounds. What I remember the most was how smooth this guitar played as an instrument, super smooth. What you really need to understand before seeking one, is that it doesn’t respond super well if you shred, bend notes past the set midi bend range or play a lot of rhythm. What is does well is add unique parts, solos or ambient parts to your live sound.


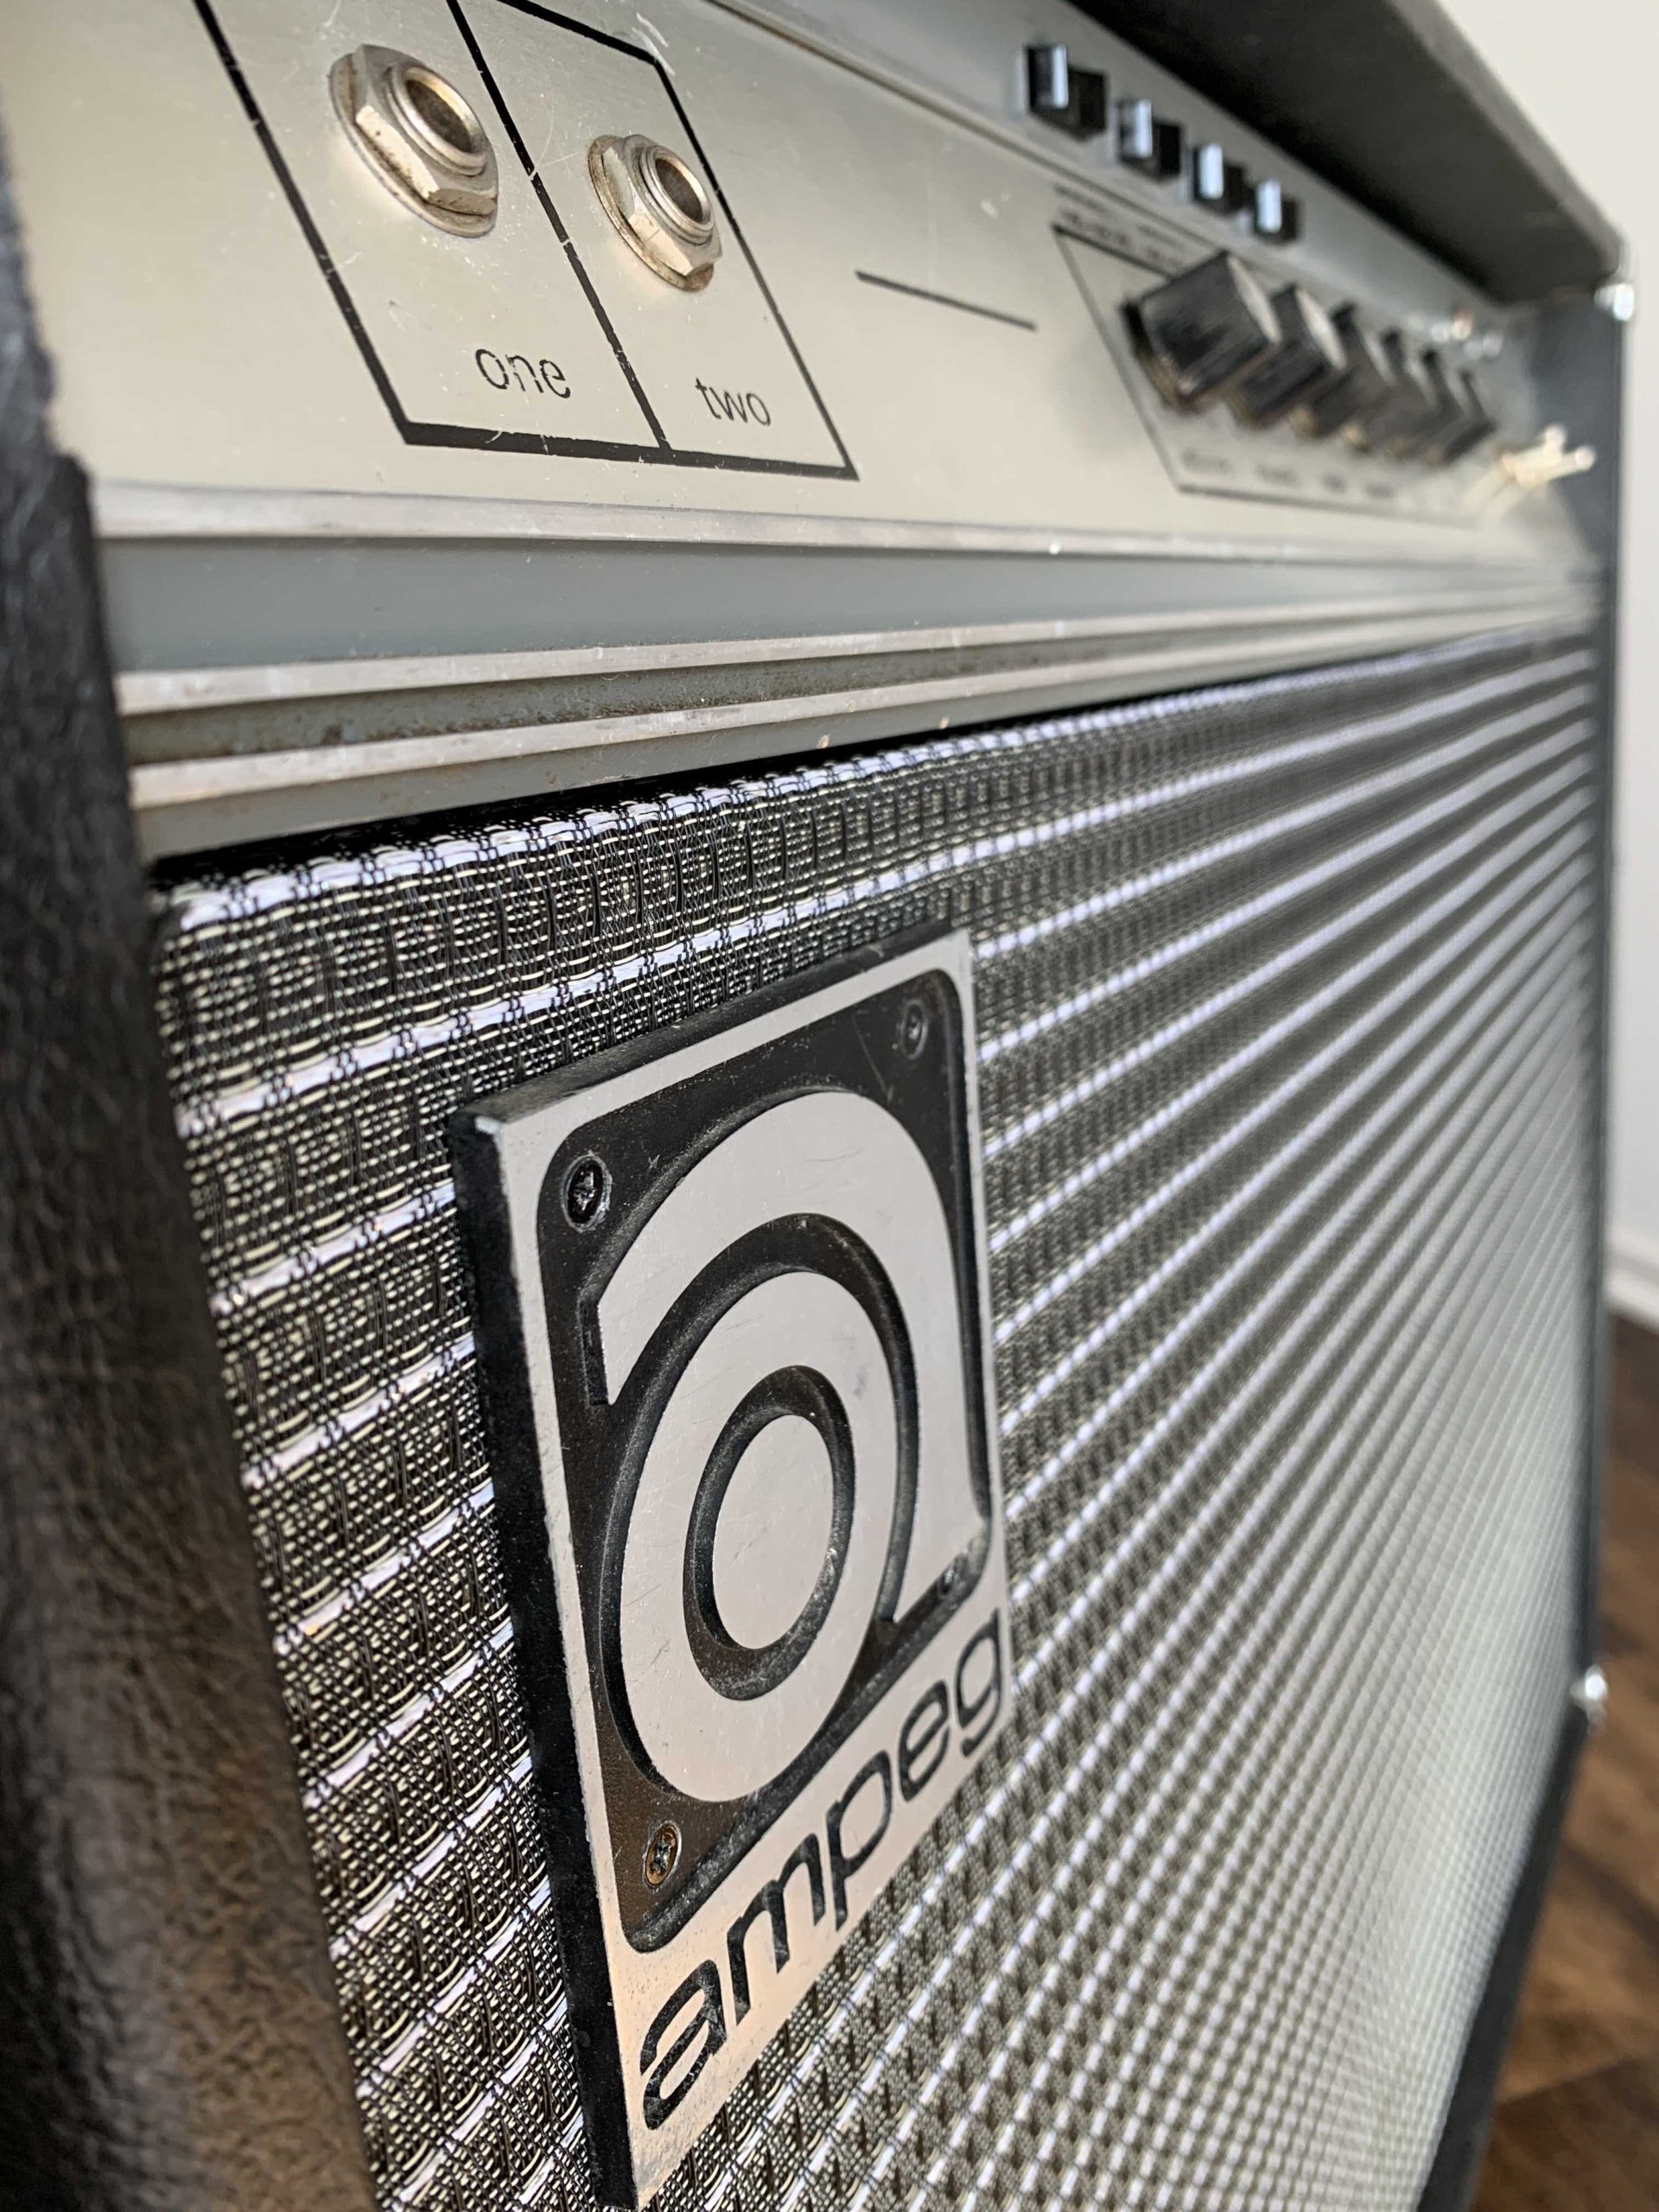
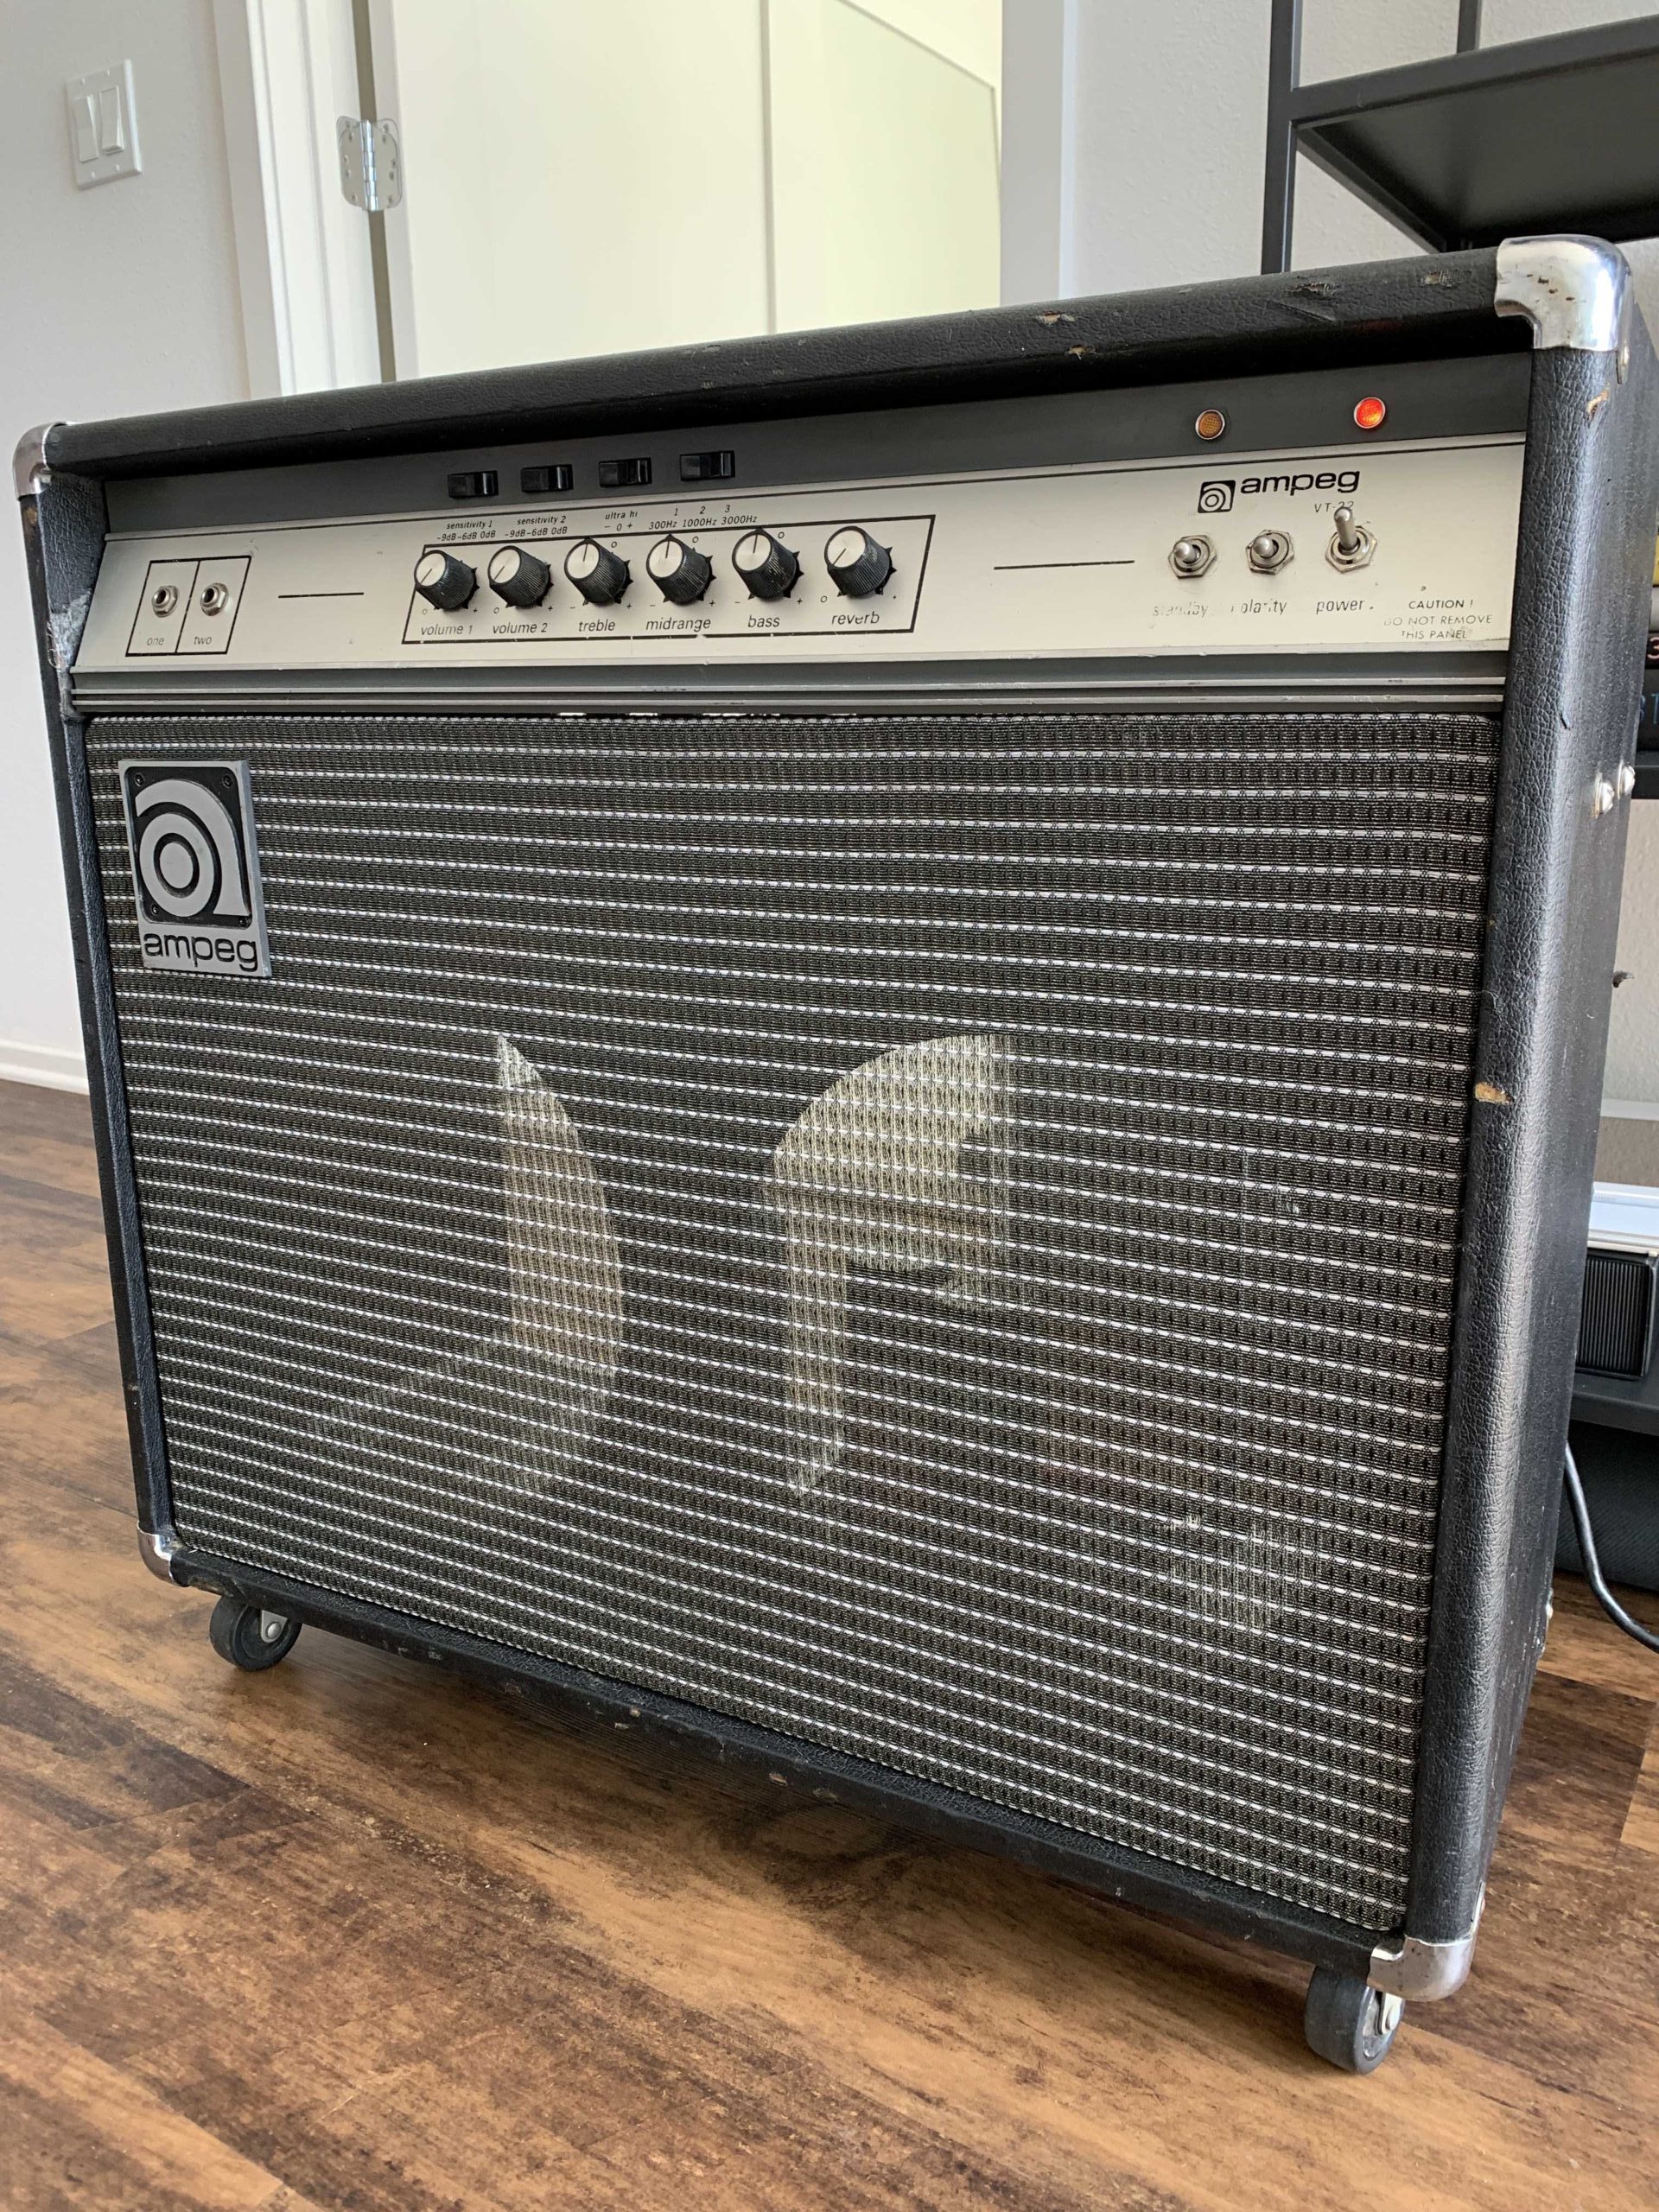
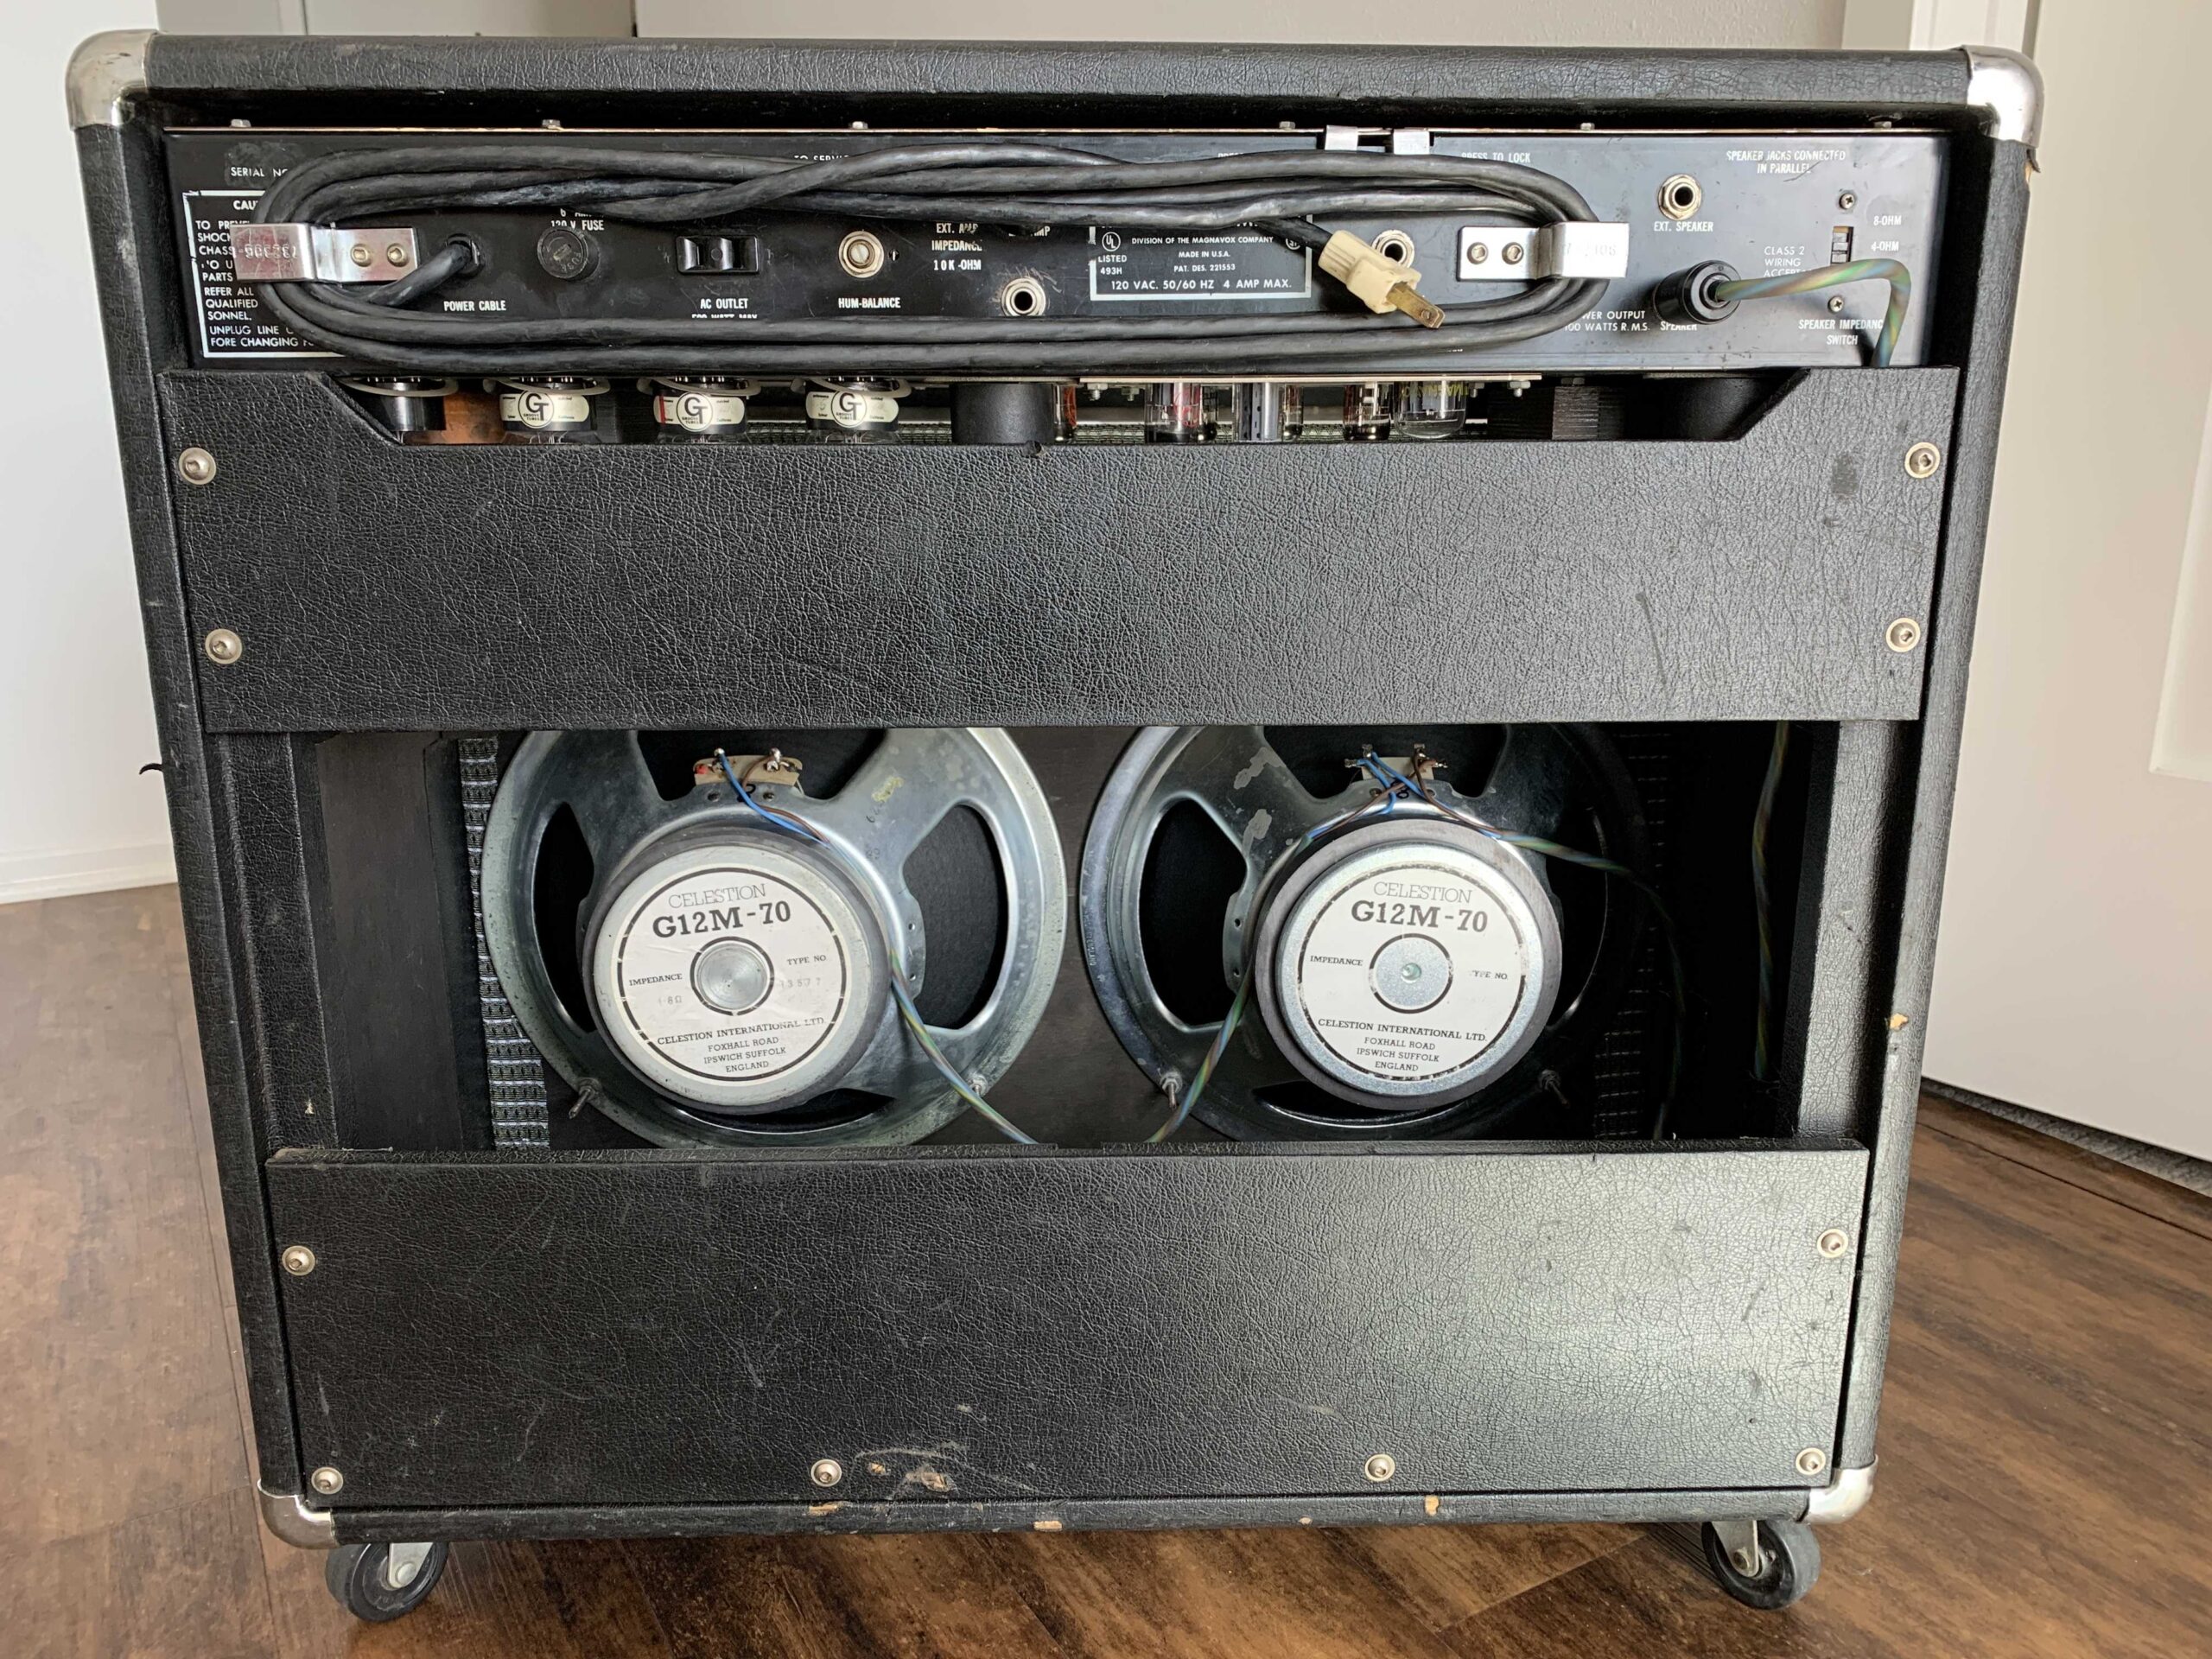
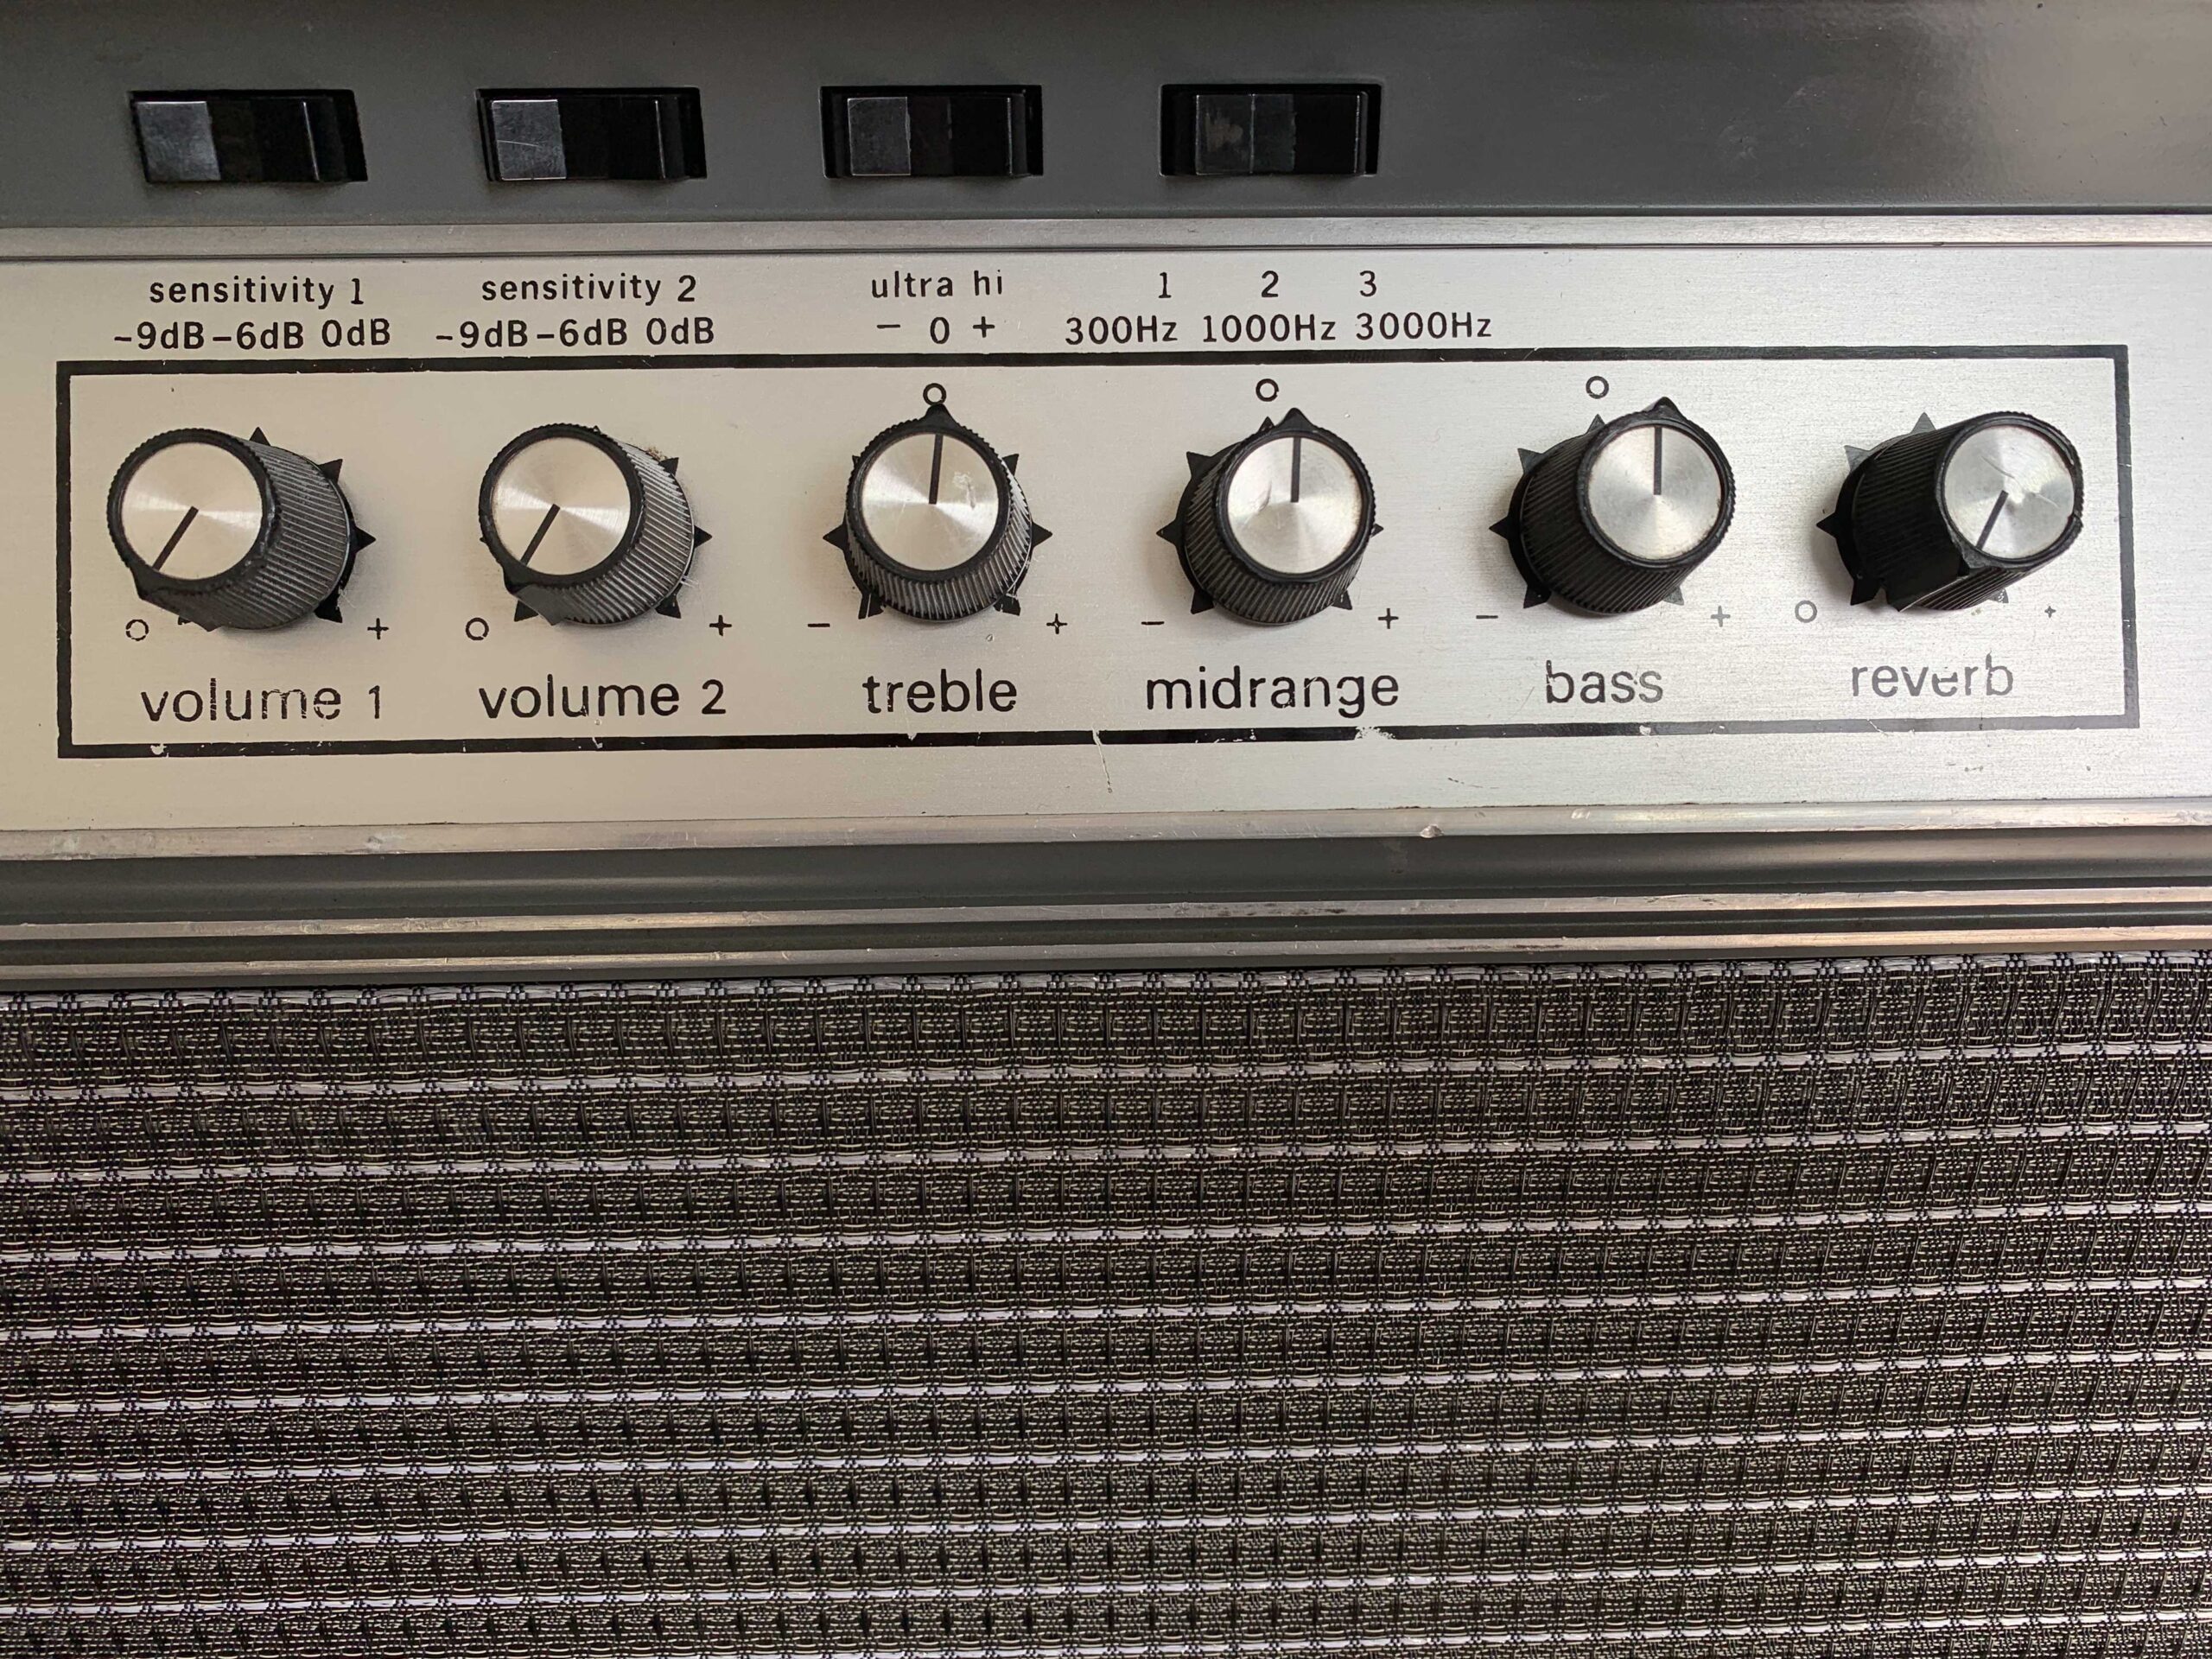
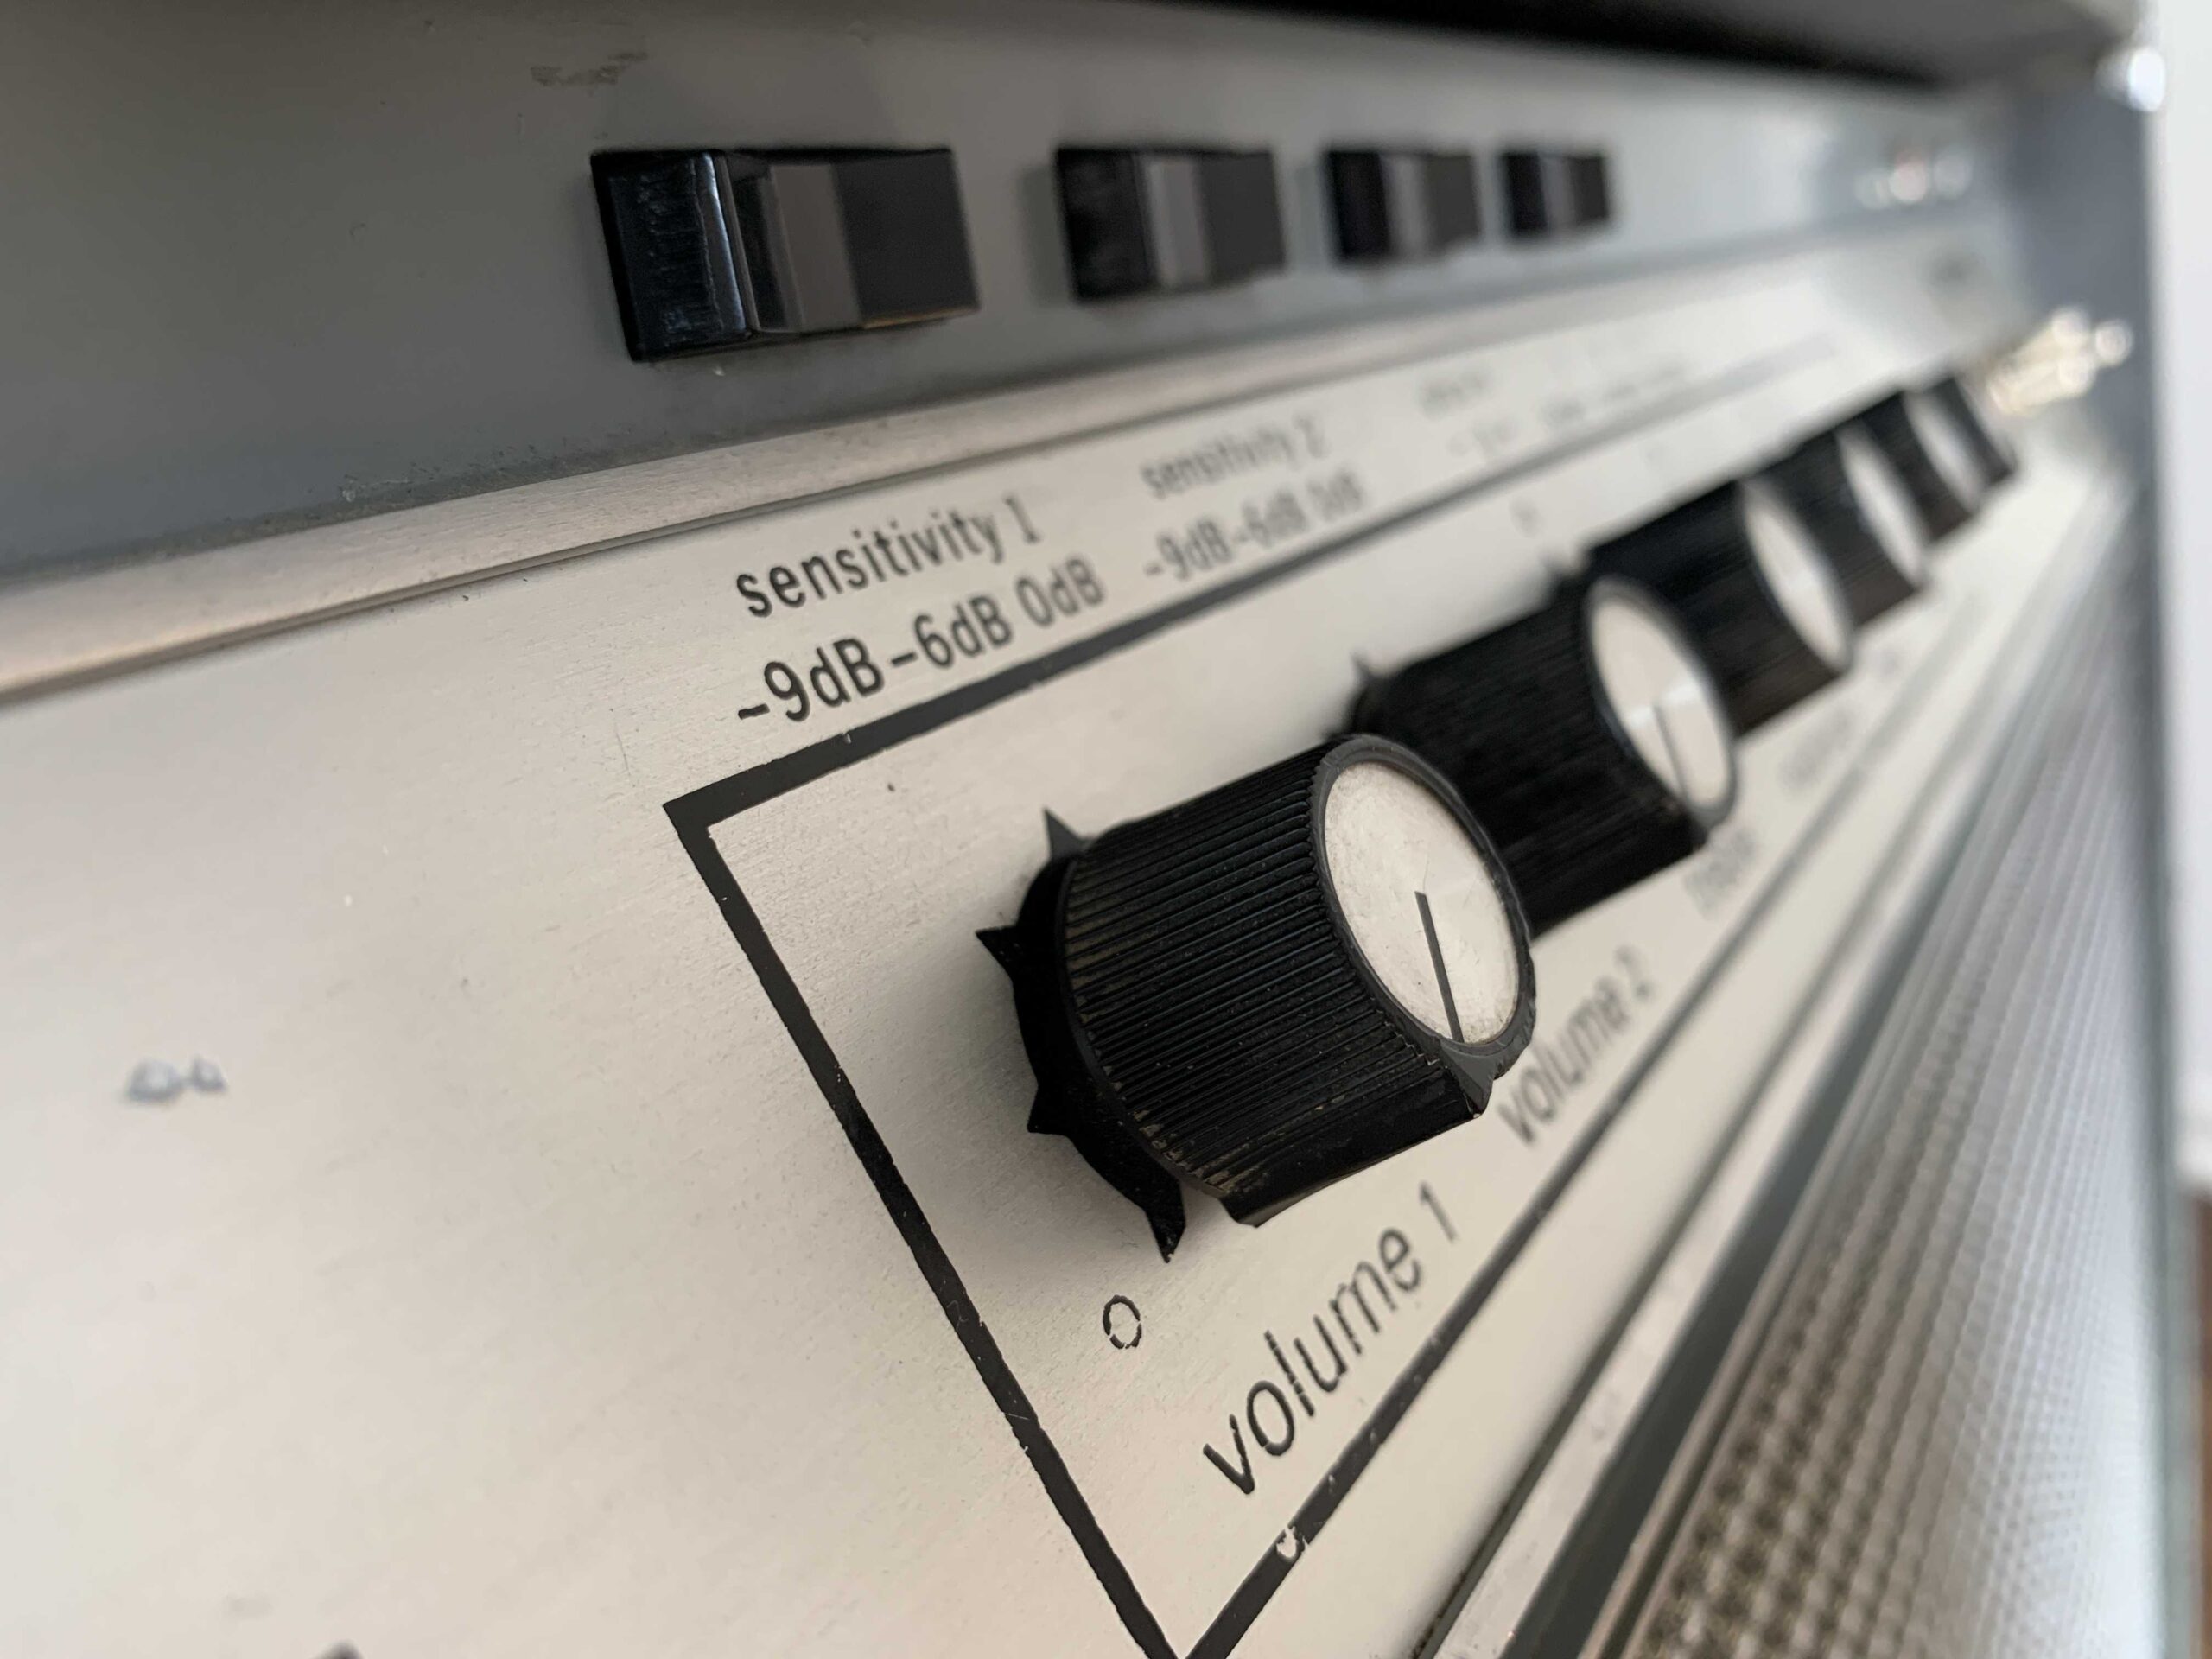
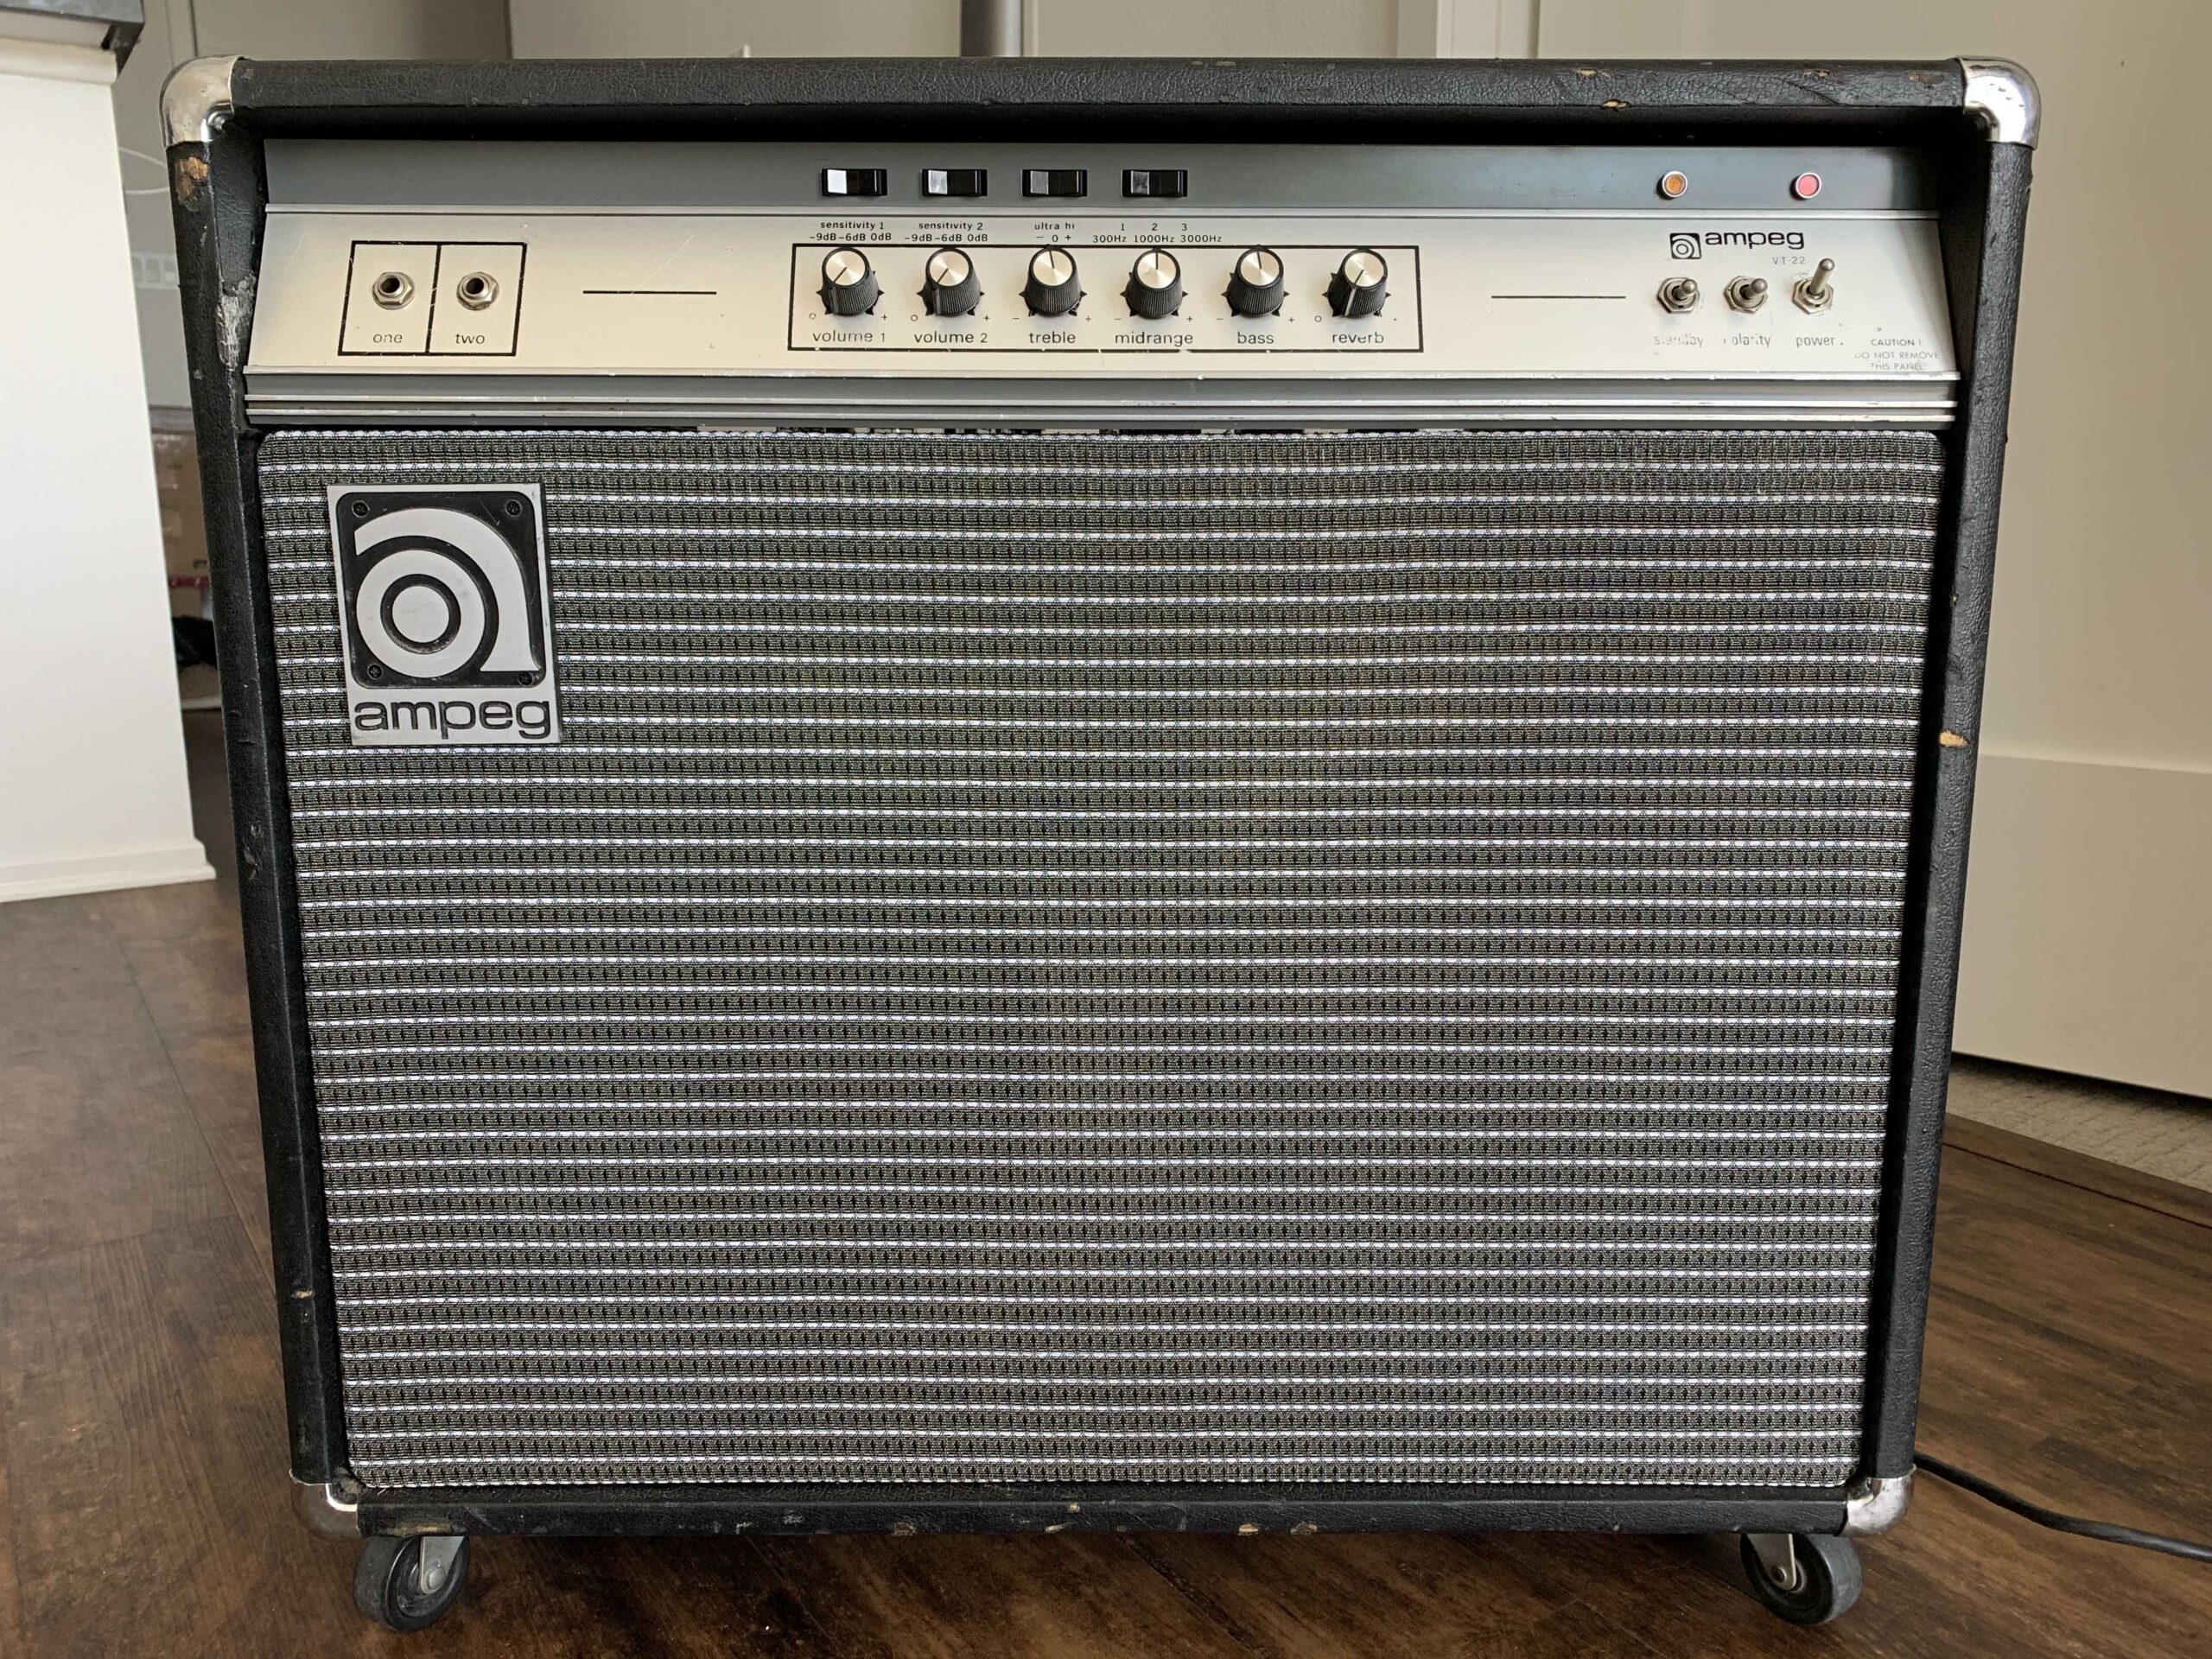
Ampeg VT-22 Restoration
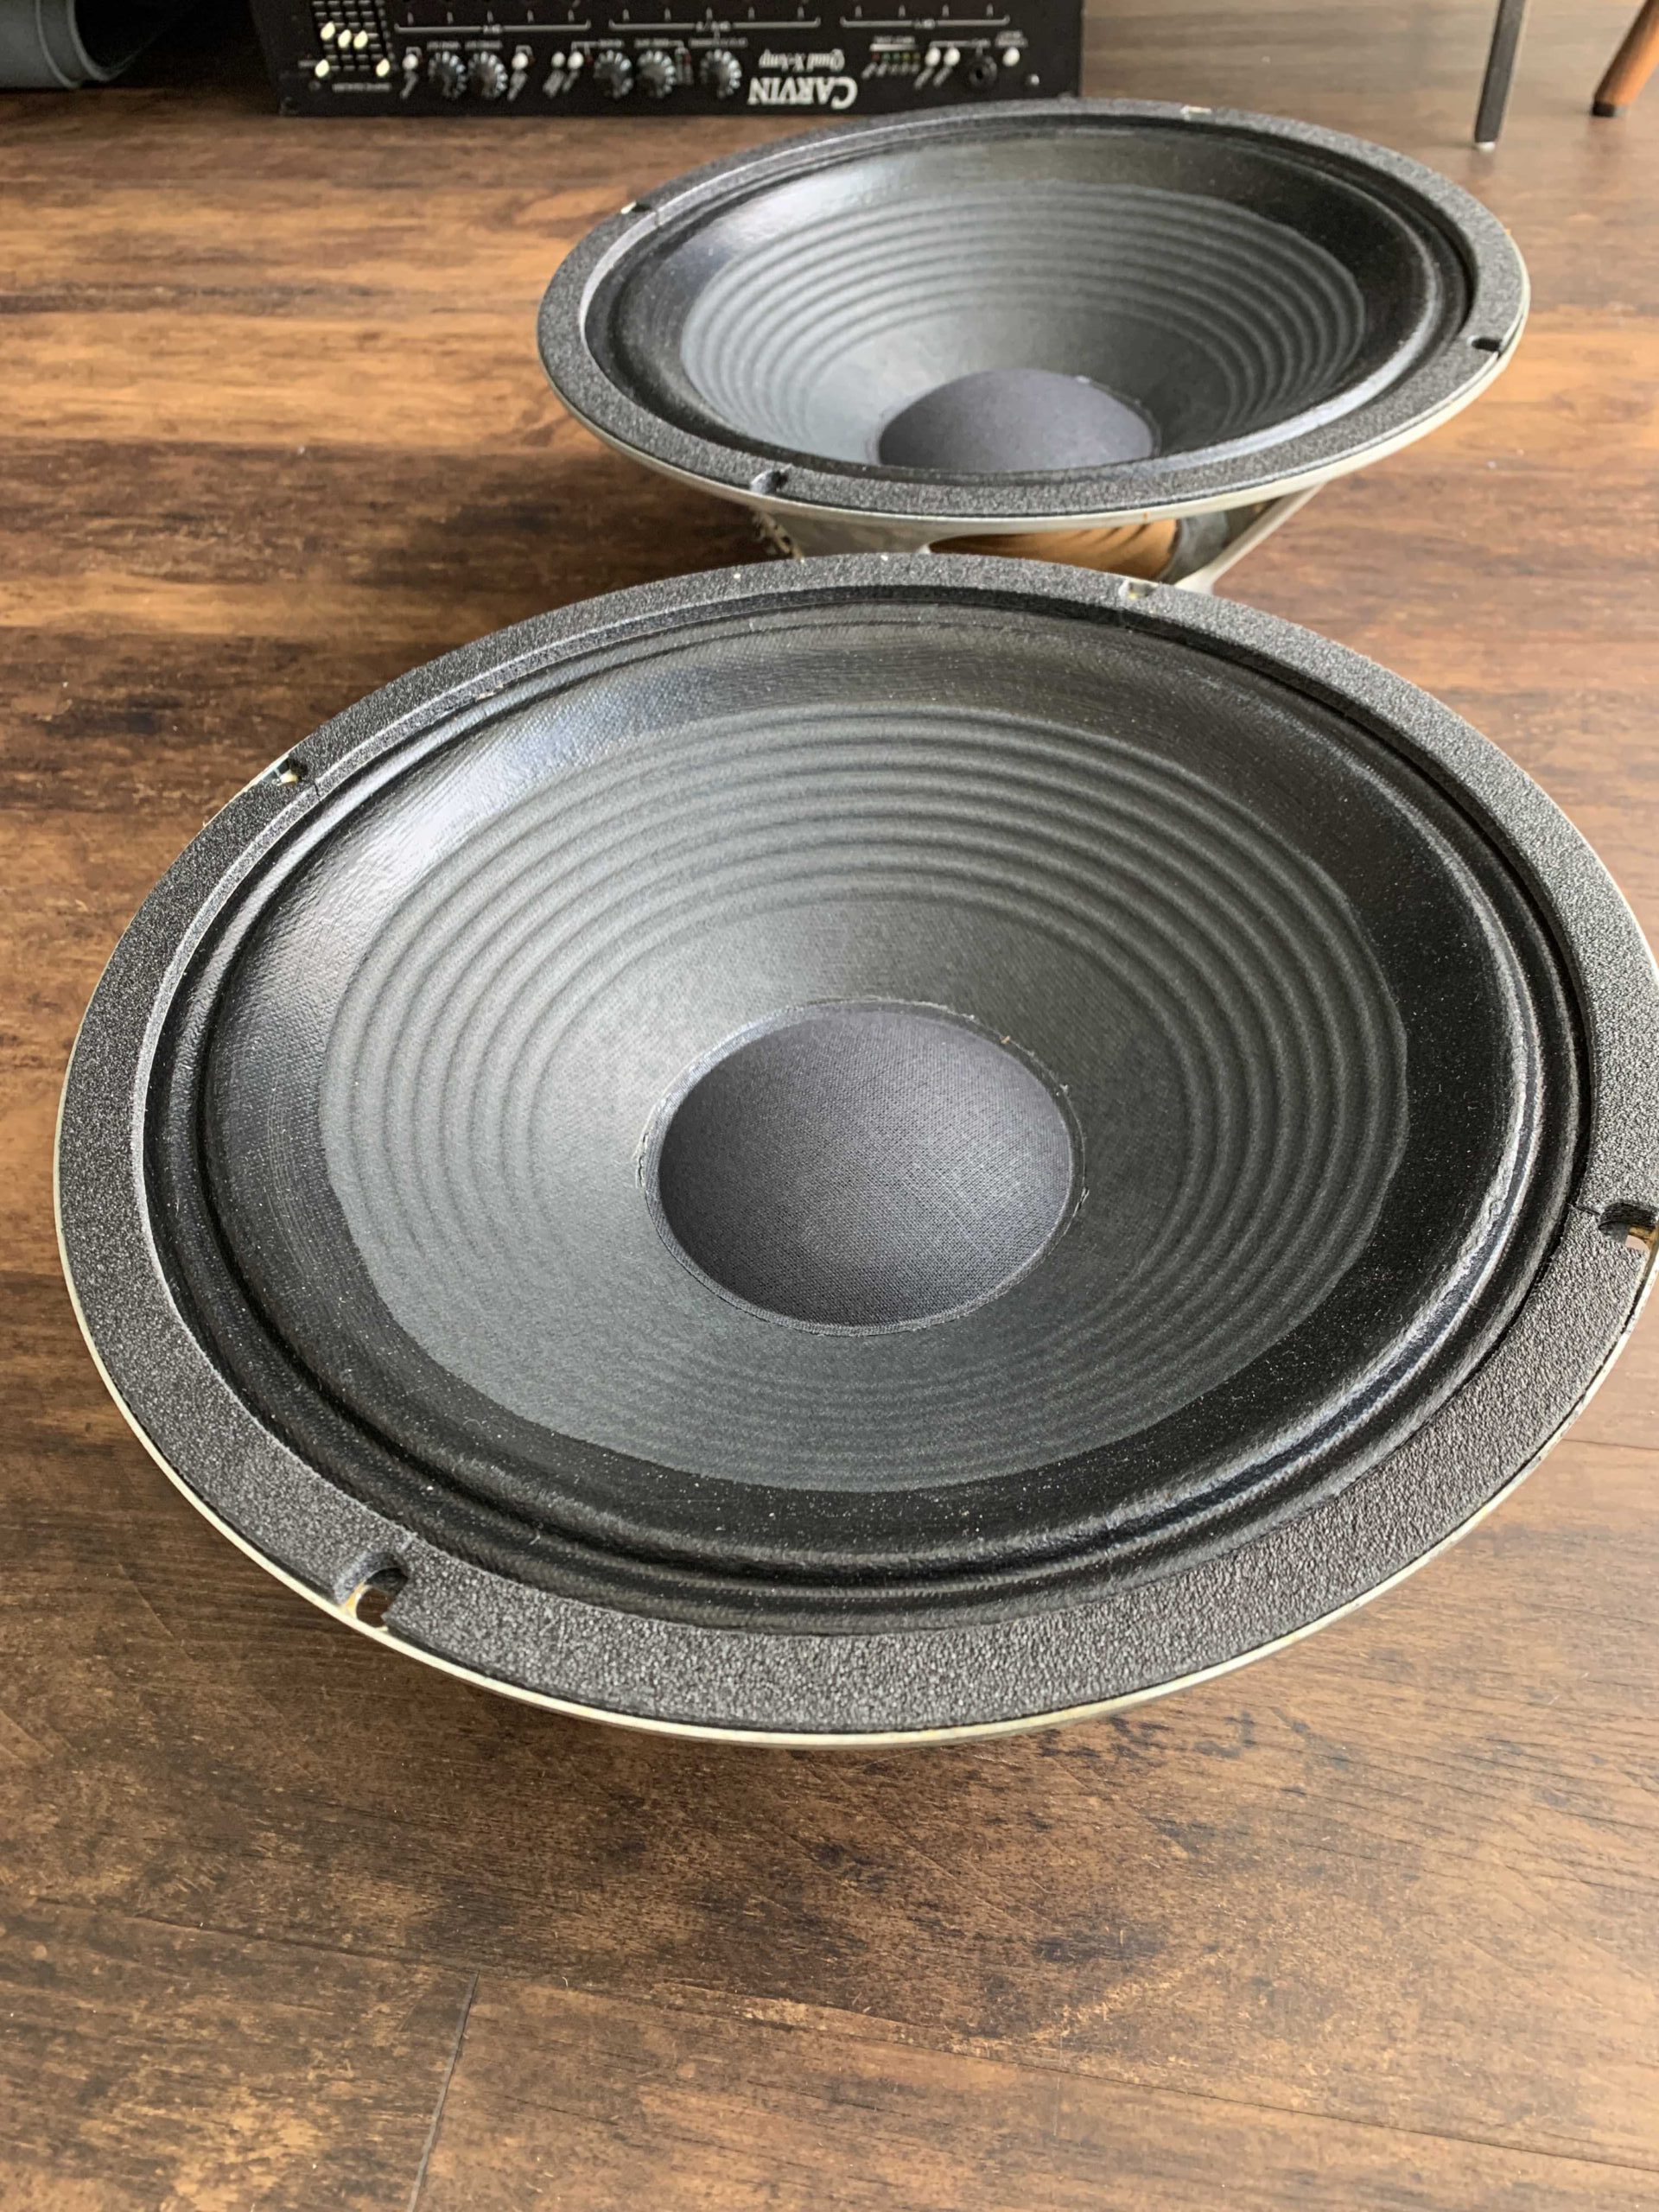
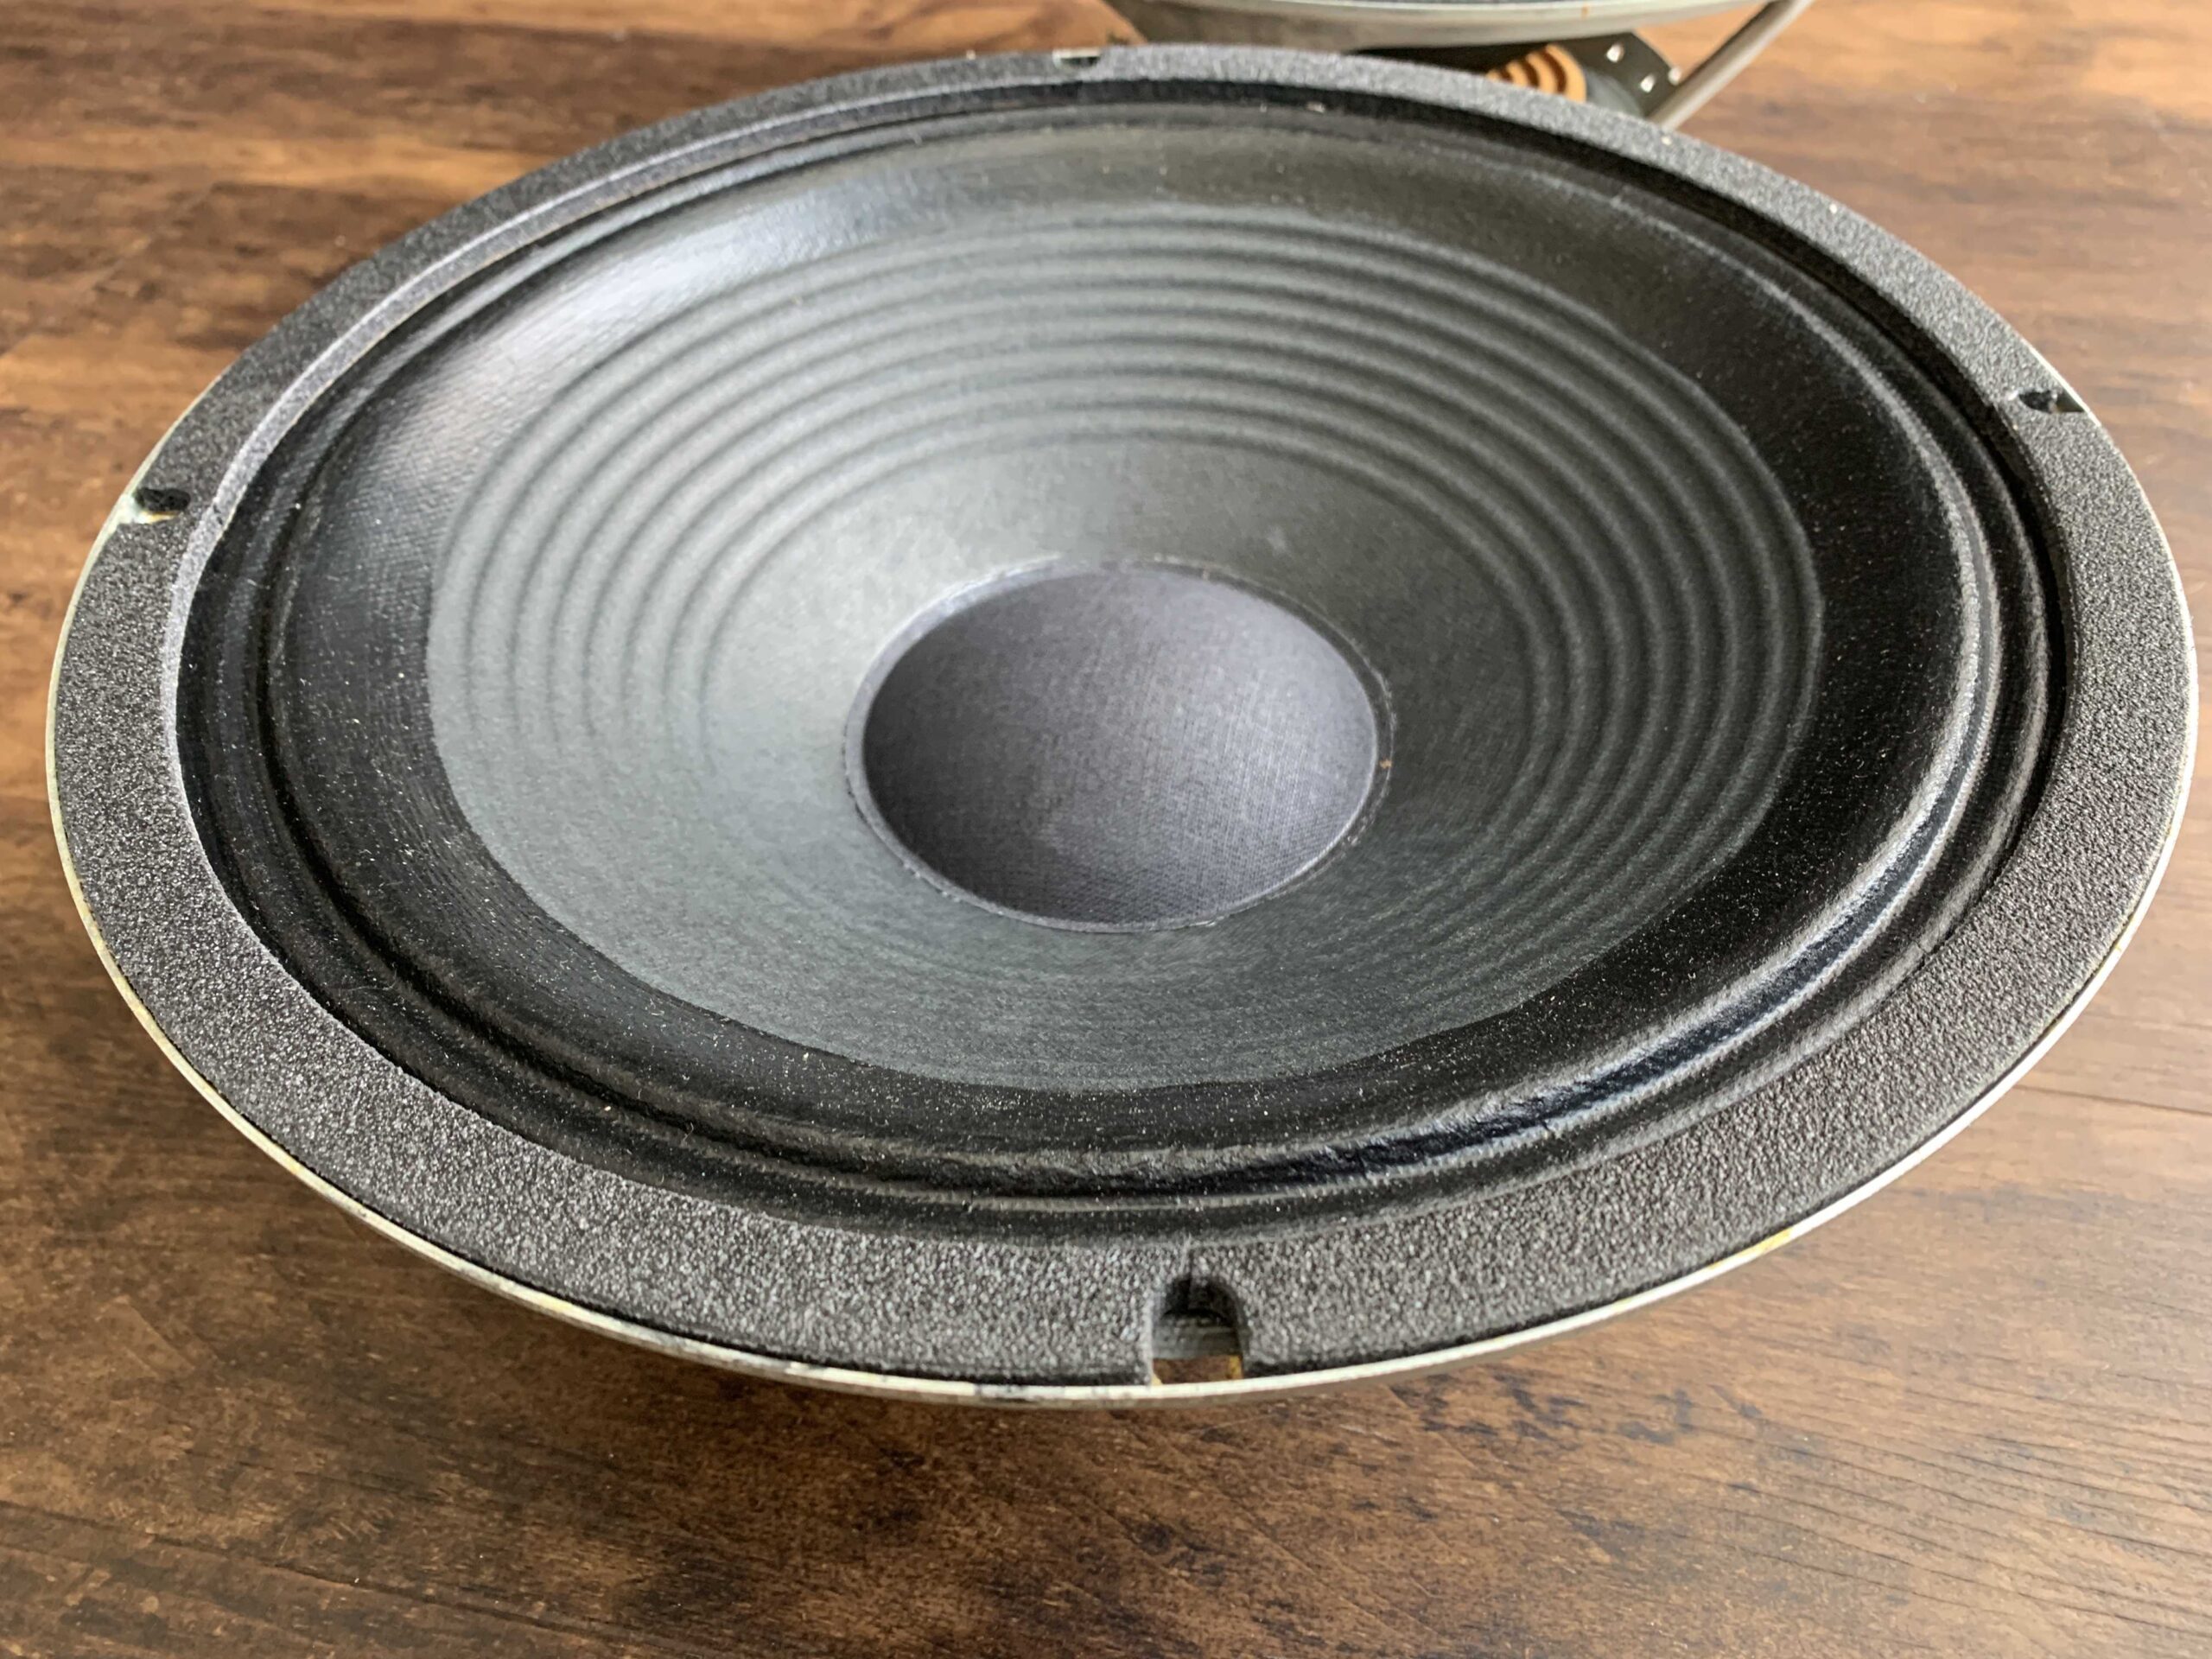
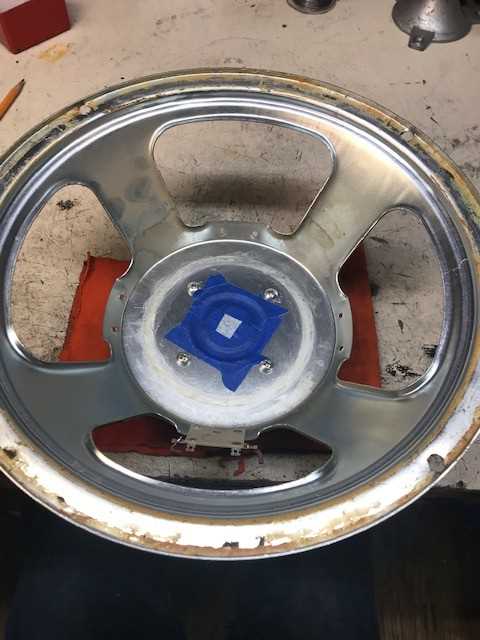
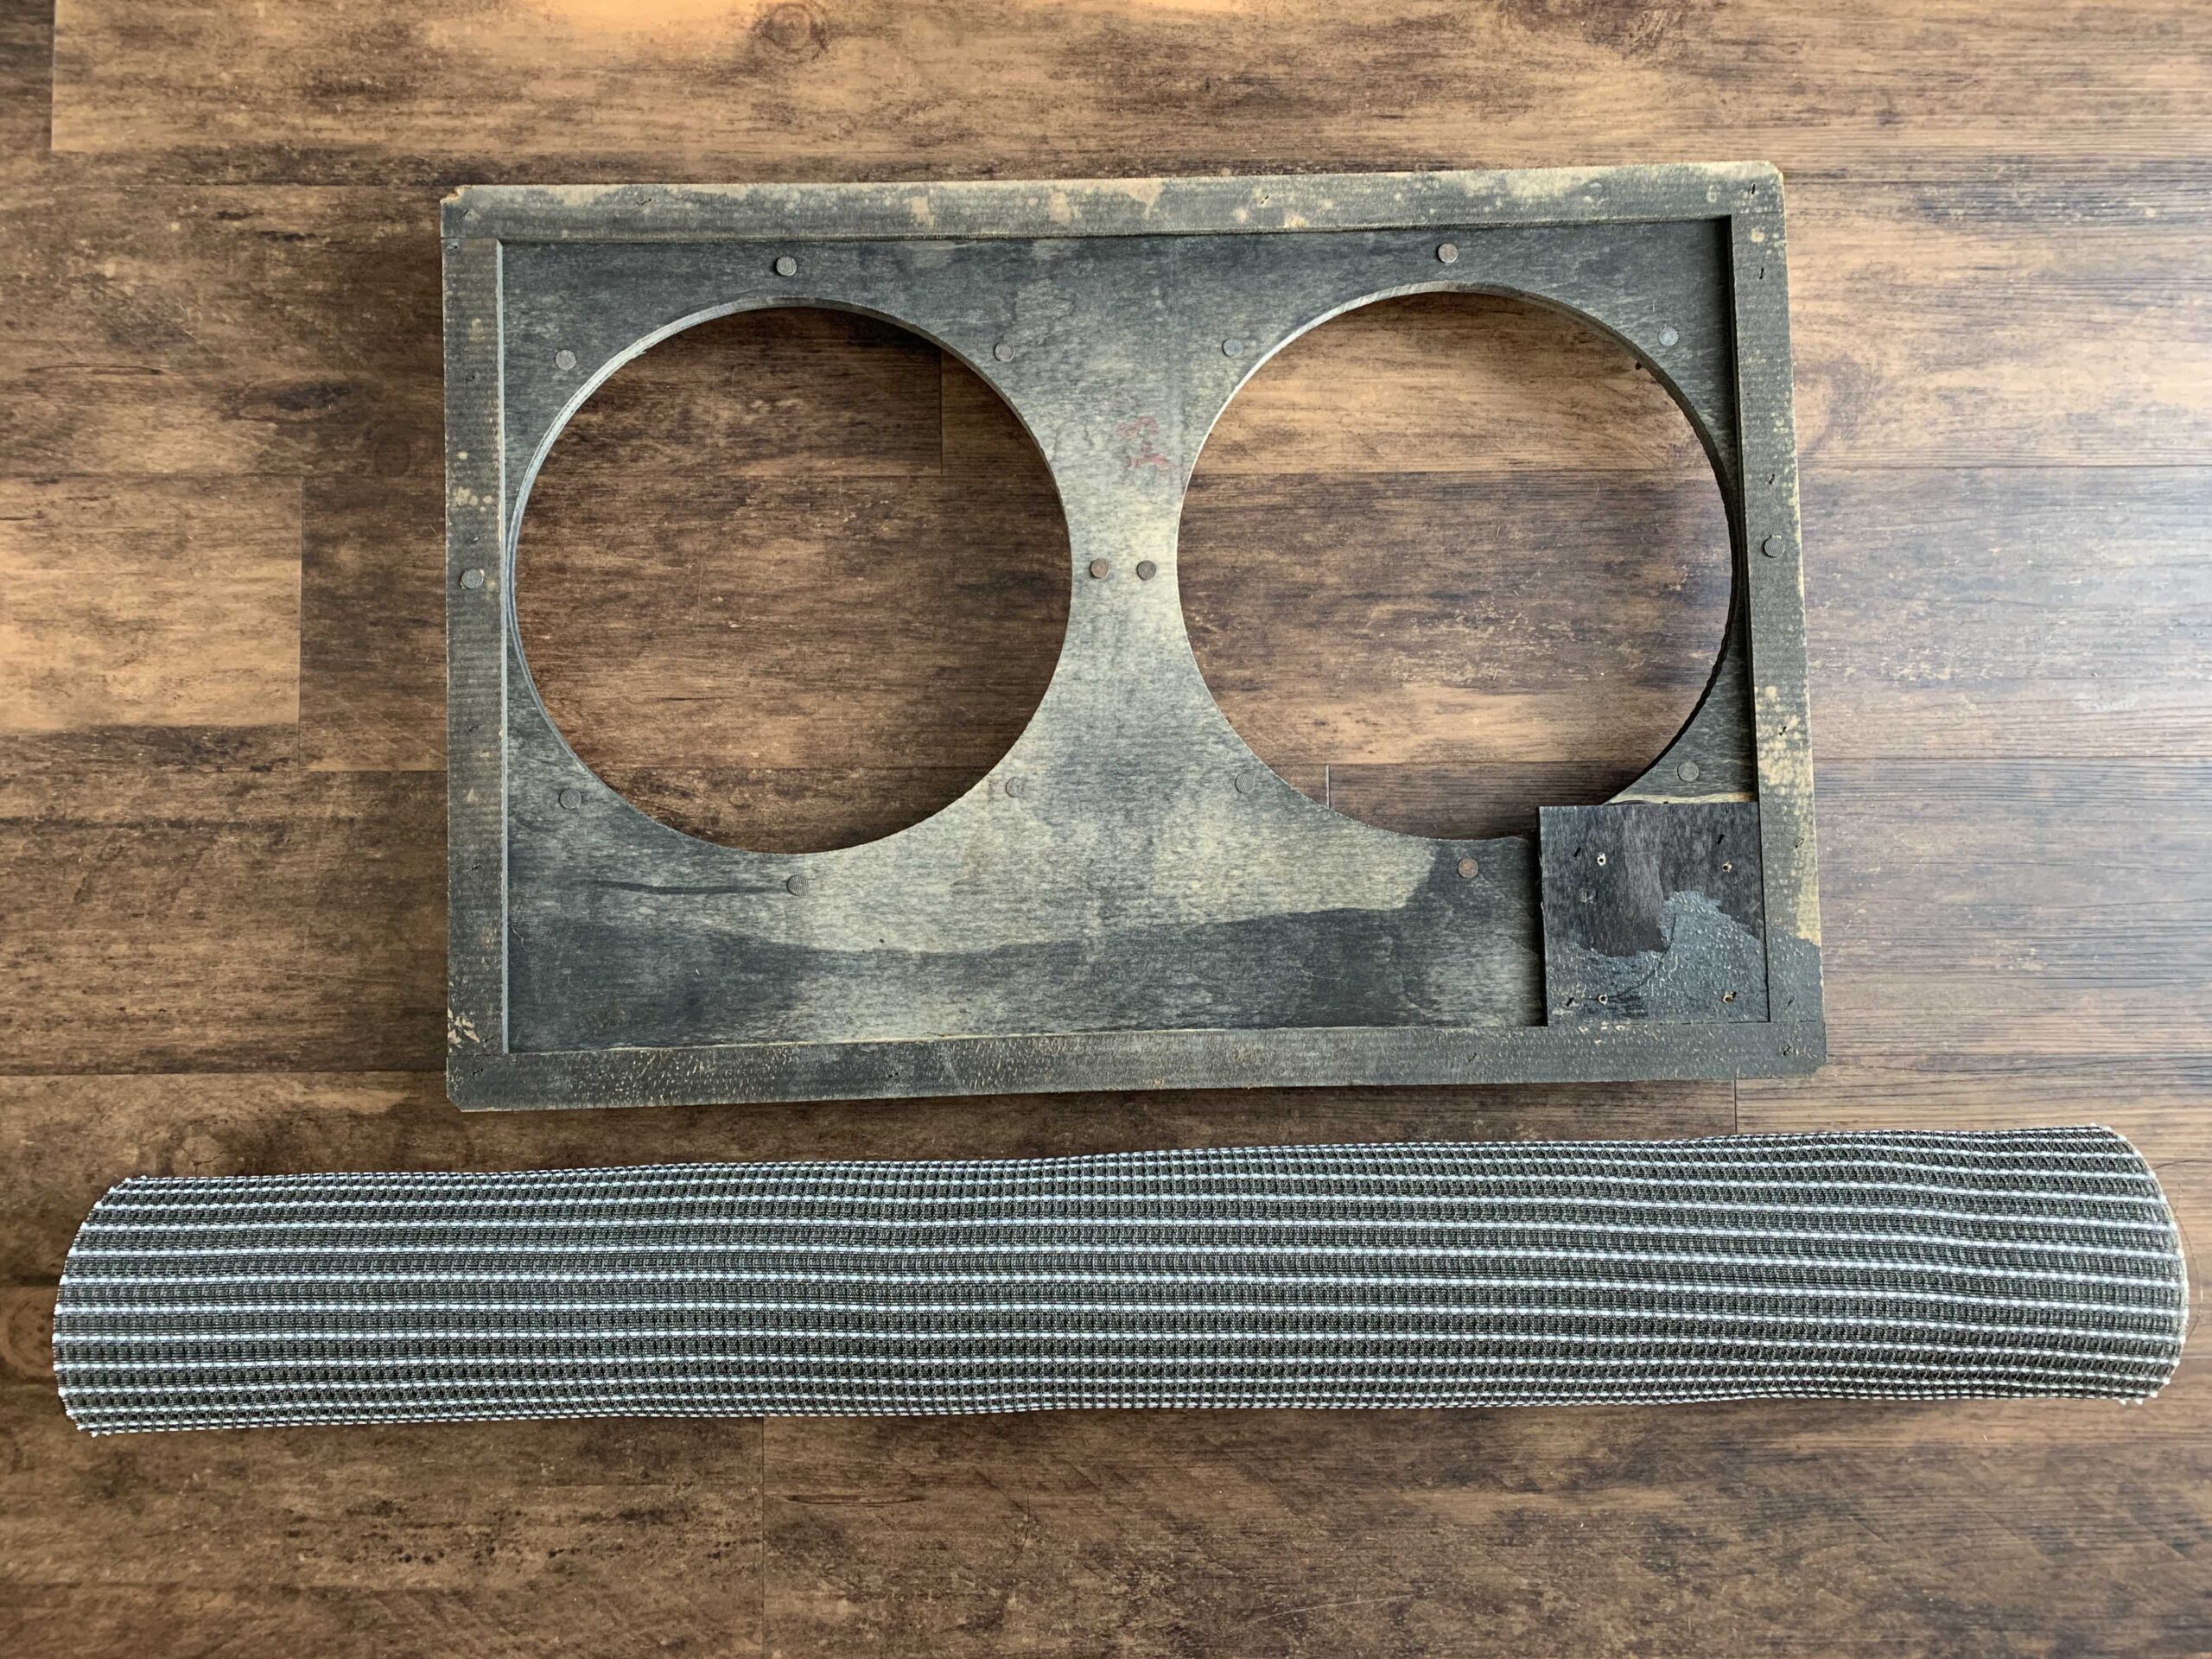
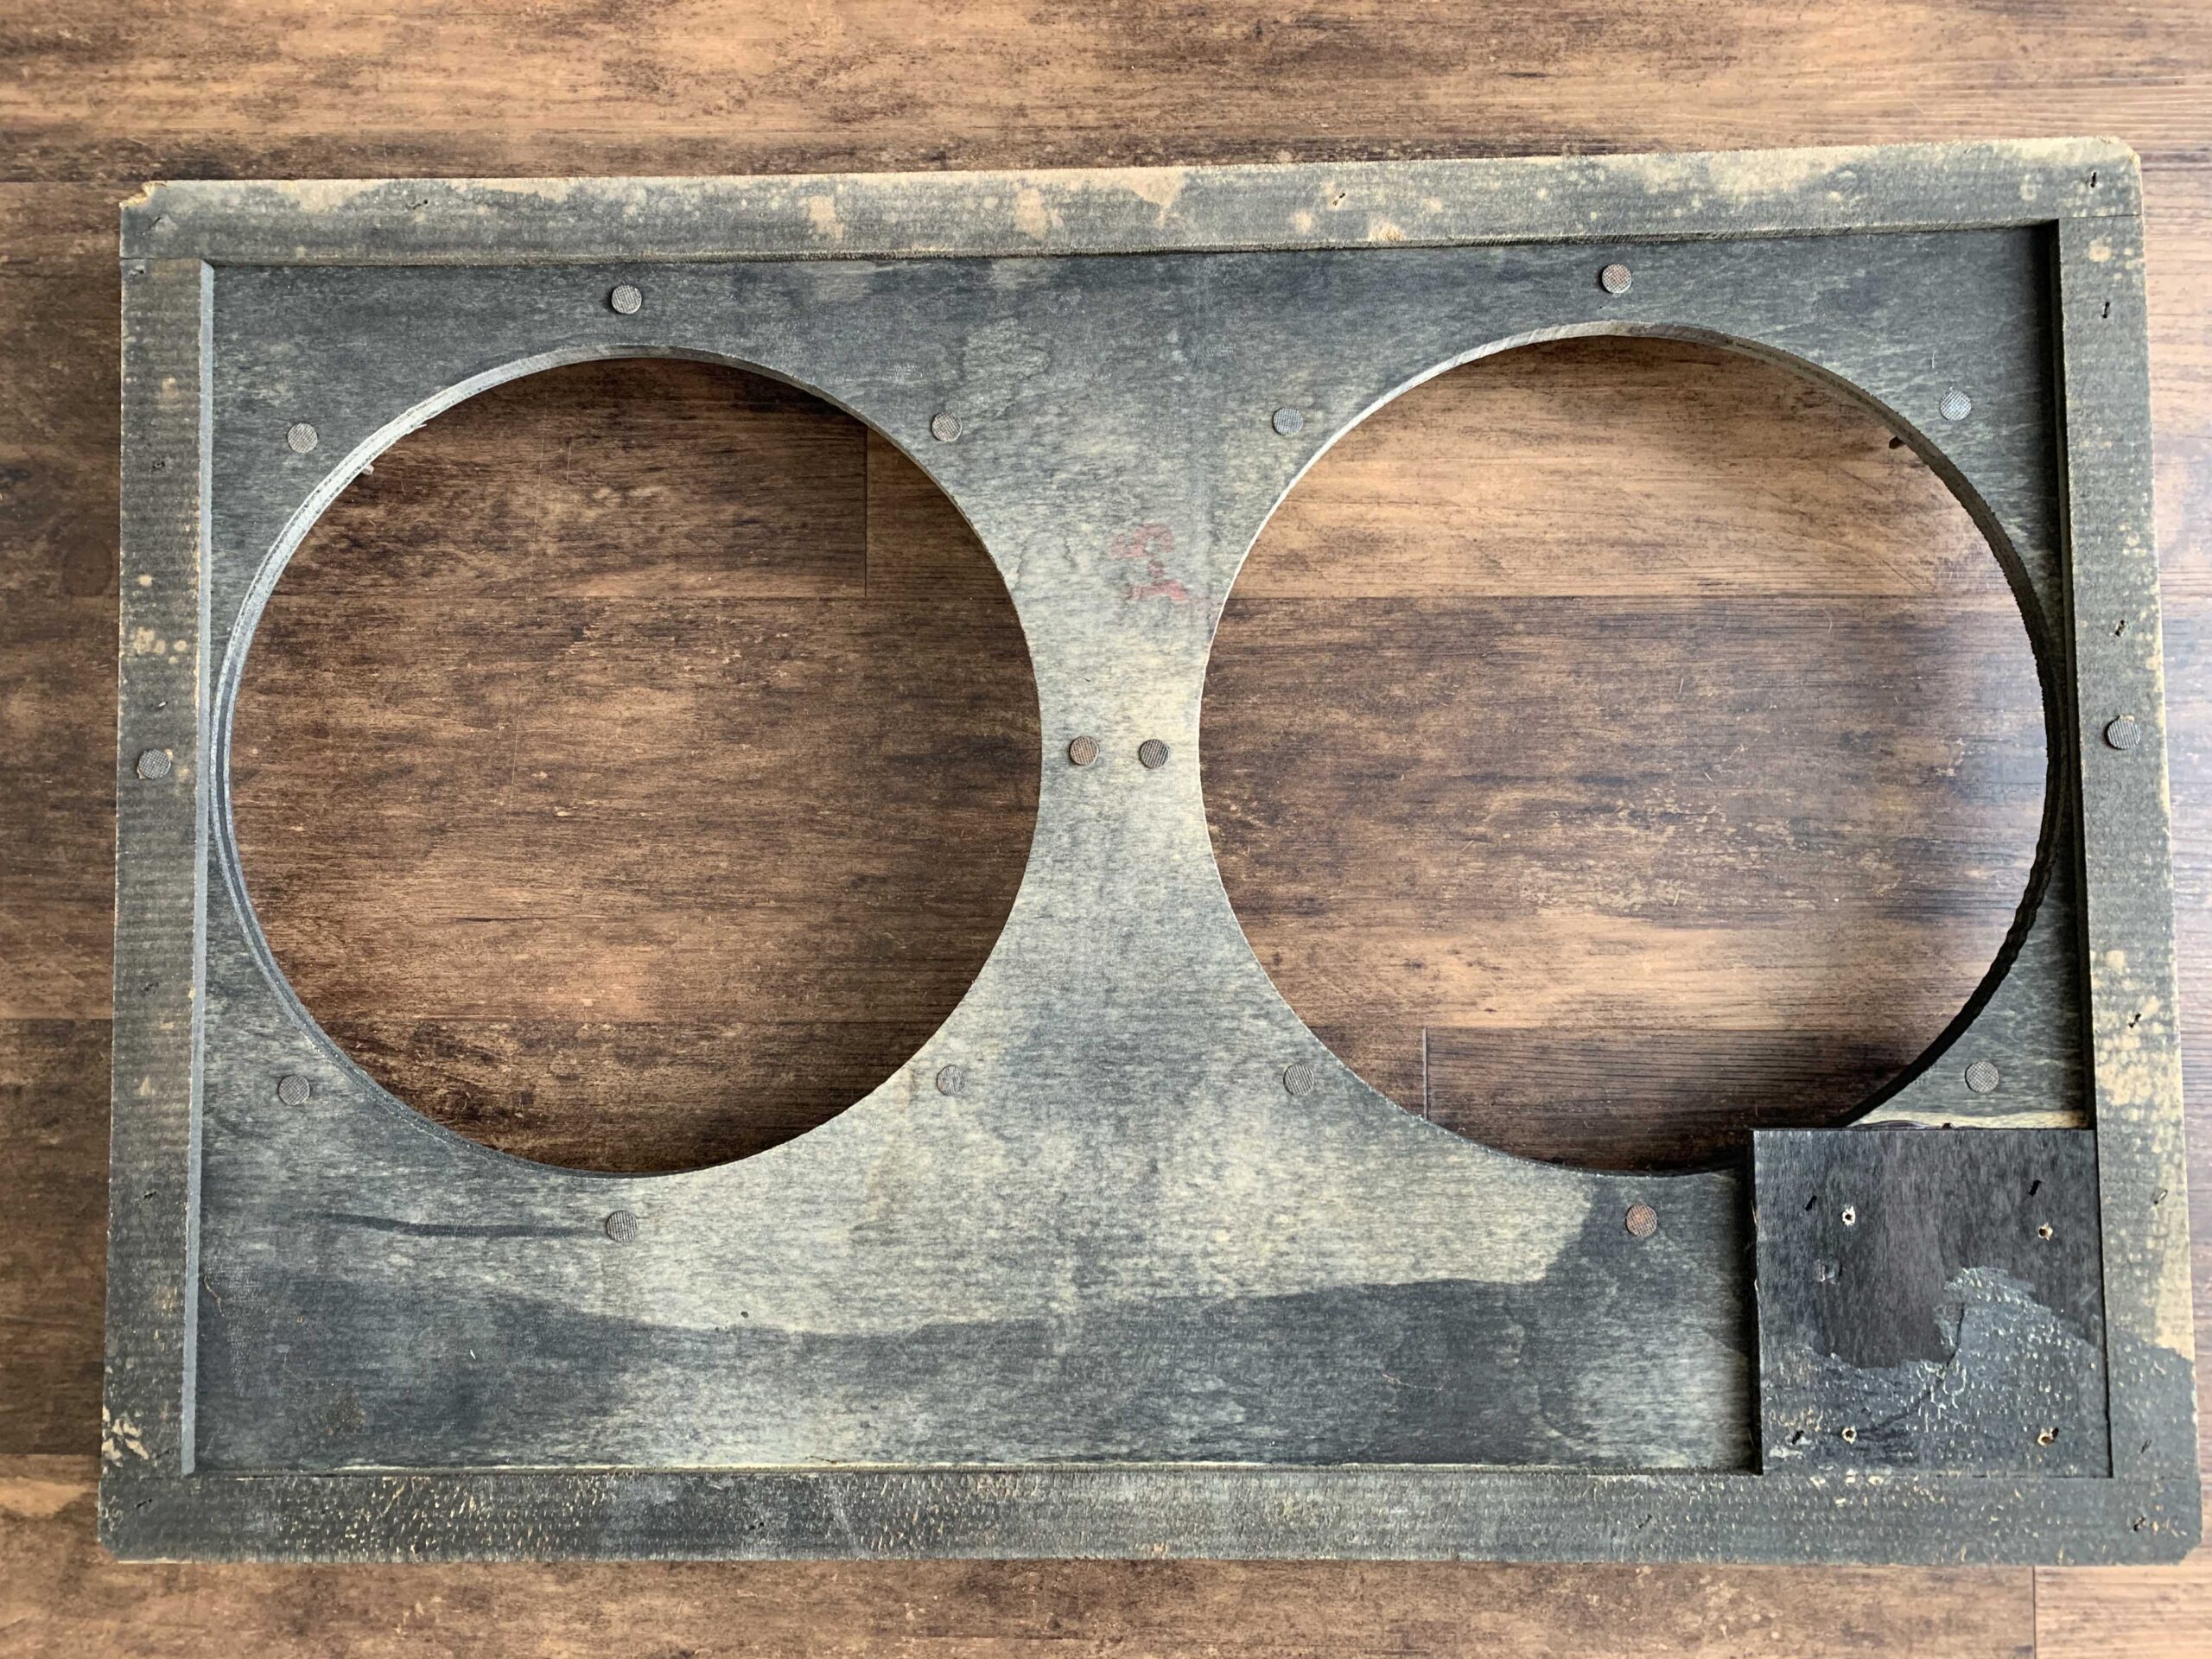
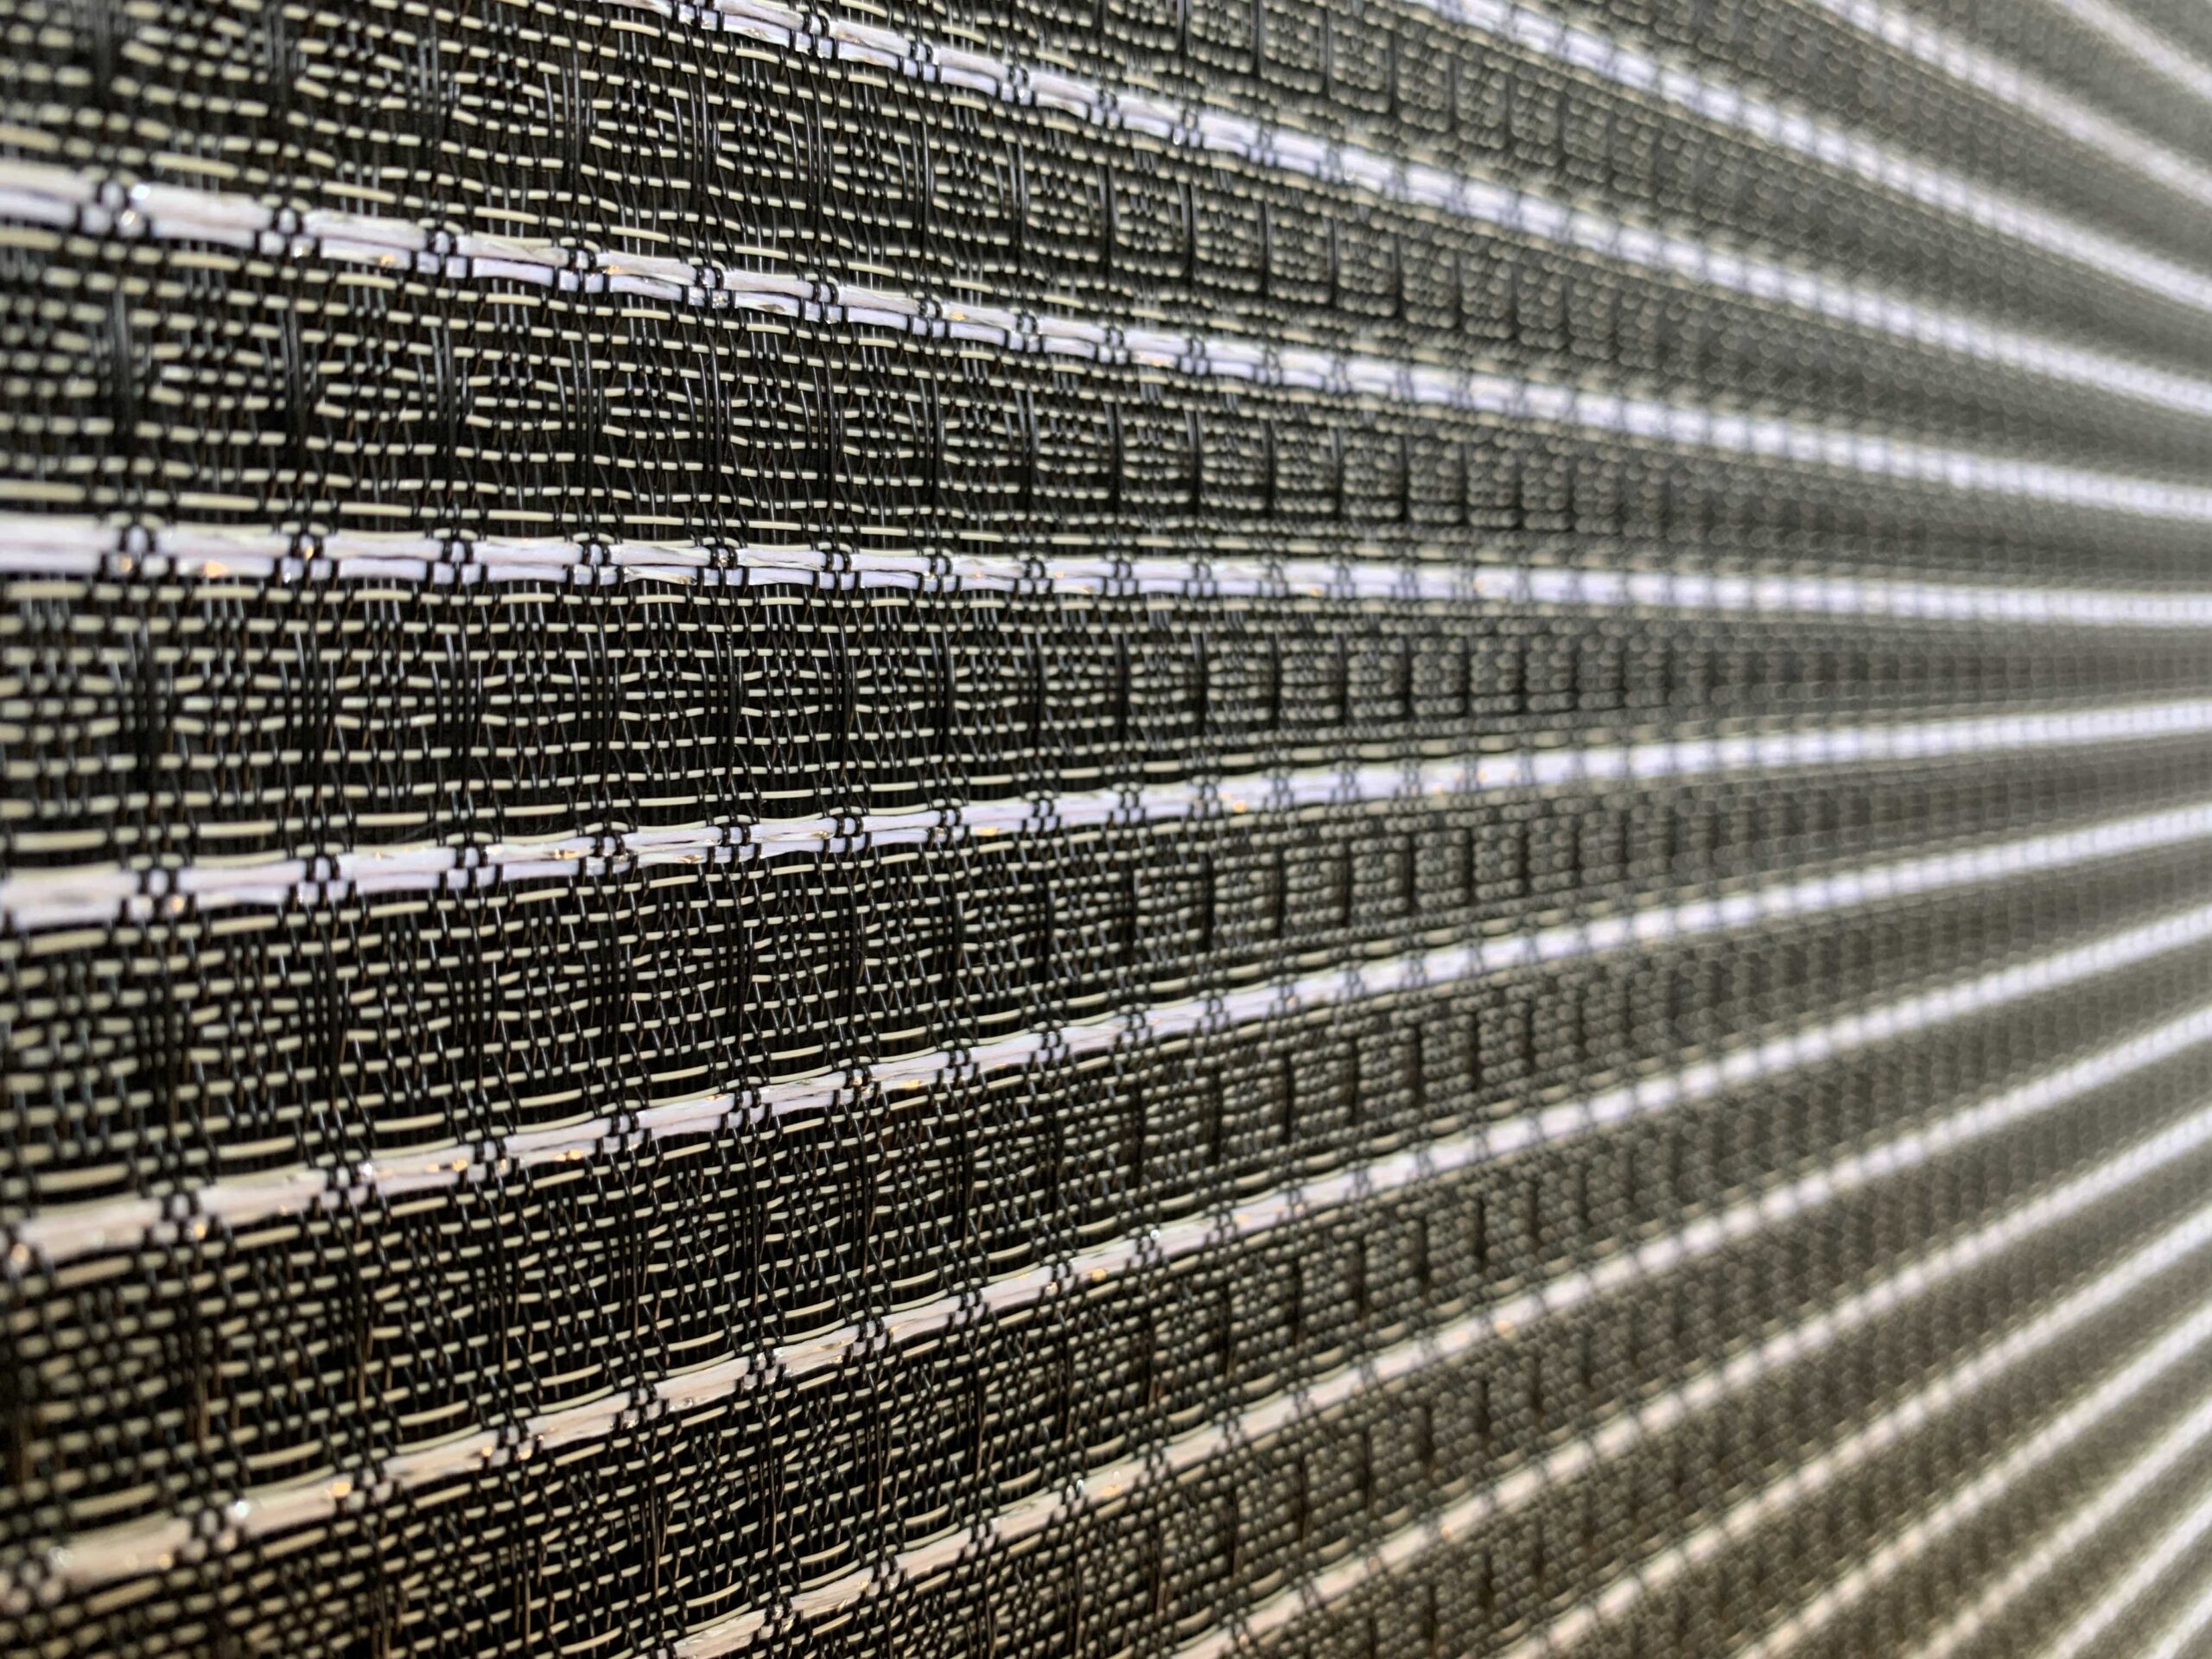
During the virus lock down I was on the hunt for a project to work on. I picked up an Ampeg VT-22 on craigslist in bad shape for $100. Unknown of it’s true condition, it sounded fun and I decided to tackle this one in stages to stay busy. Keep in mind, I decided to not power on this amp at all until the project was fully completed, a very risky action giving the unknown condition before starting to rebuild. Cosmetically it was filthy, needed a new grill cloth, new hardware, vinyl was peeling and many screws were loose. As for the speakers, one read zero ohms and the other was fluctuating upon reading, additionally a pre-amplifier and power tube was missing.
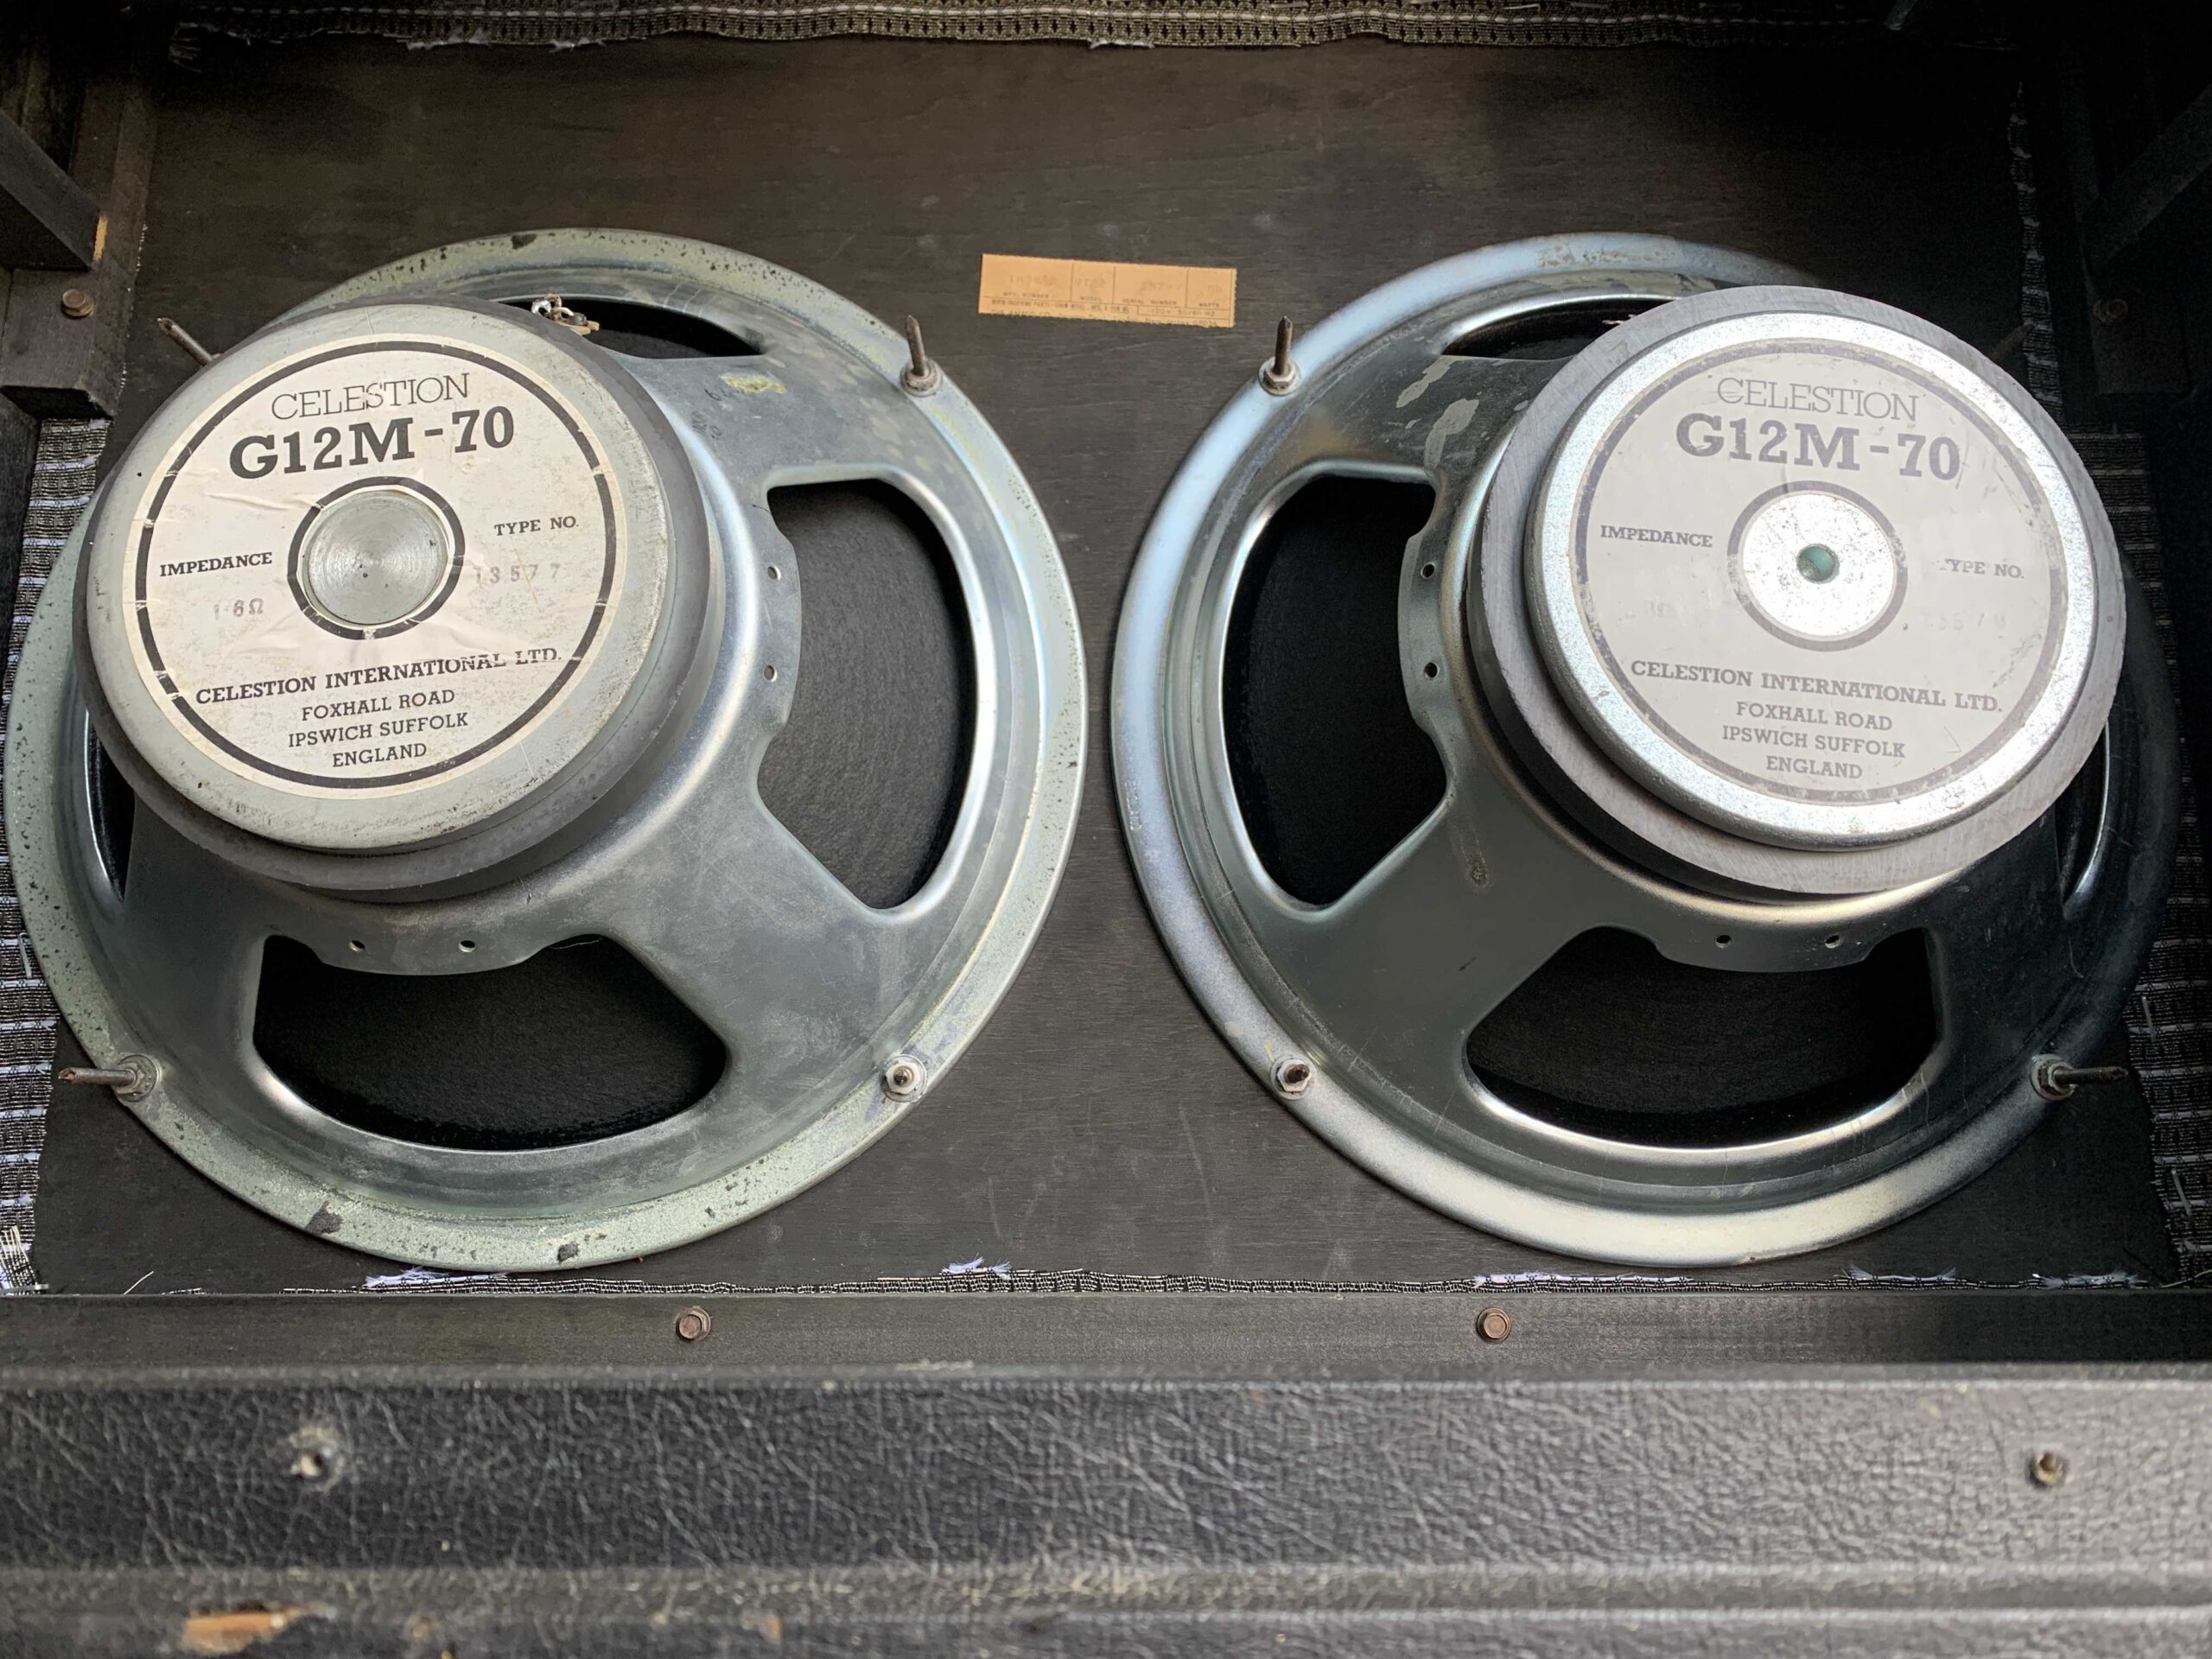
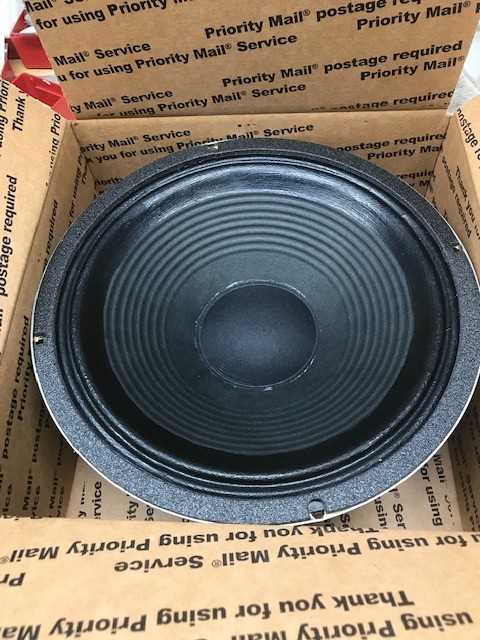
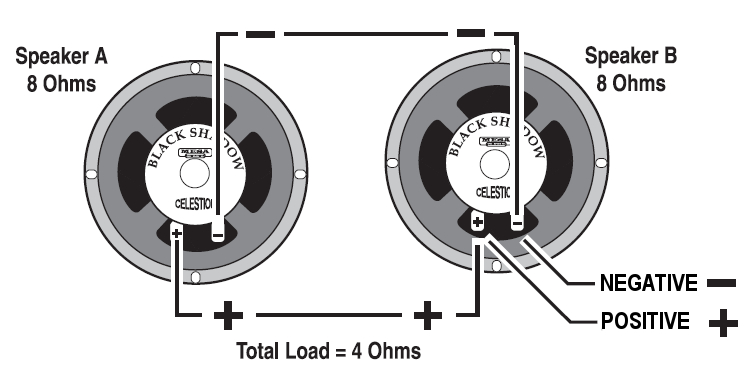
I started by cleaning the amp, inspected the circuits, and removed the speakers. The speakers I sent over to my friends at Gabriel Sound. They always do a great job restoring my vintage speakers. Check out their website https://www.speakerrecone.net/recones and the work they did on these vintage Celestian G12M-70’s. I requested to have 8 ohm coils installed and wired them up to be in parallel at 4 ohms.

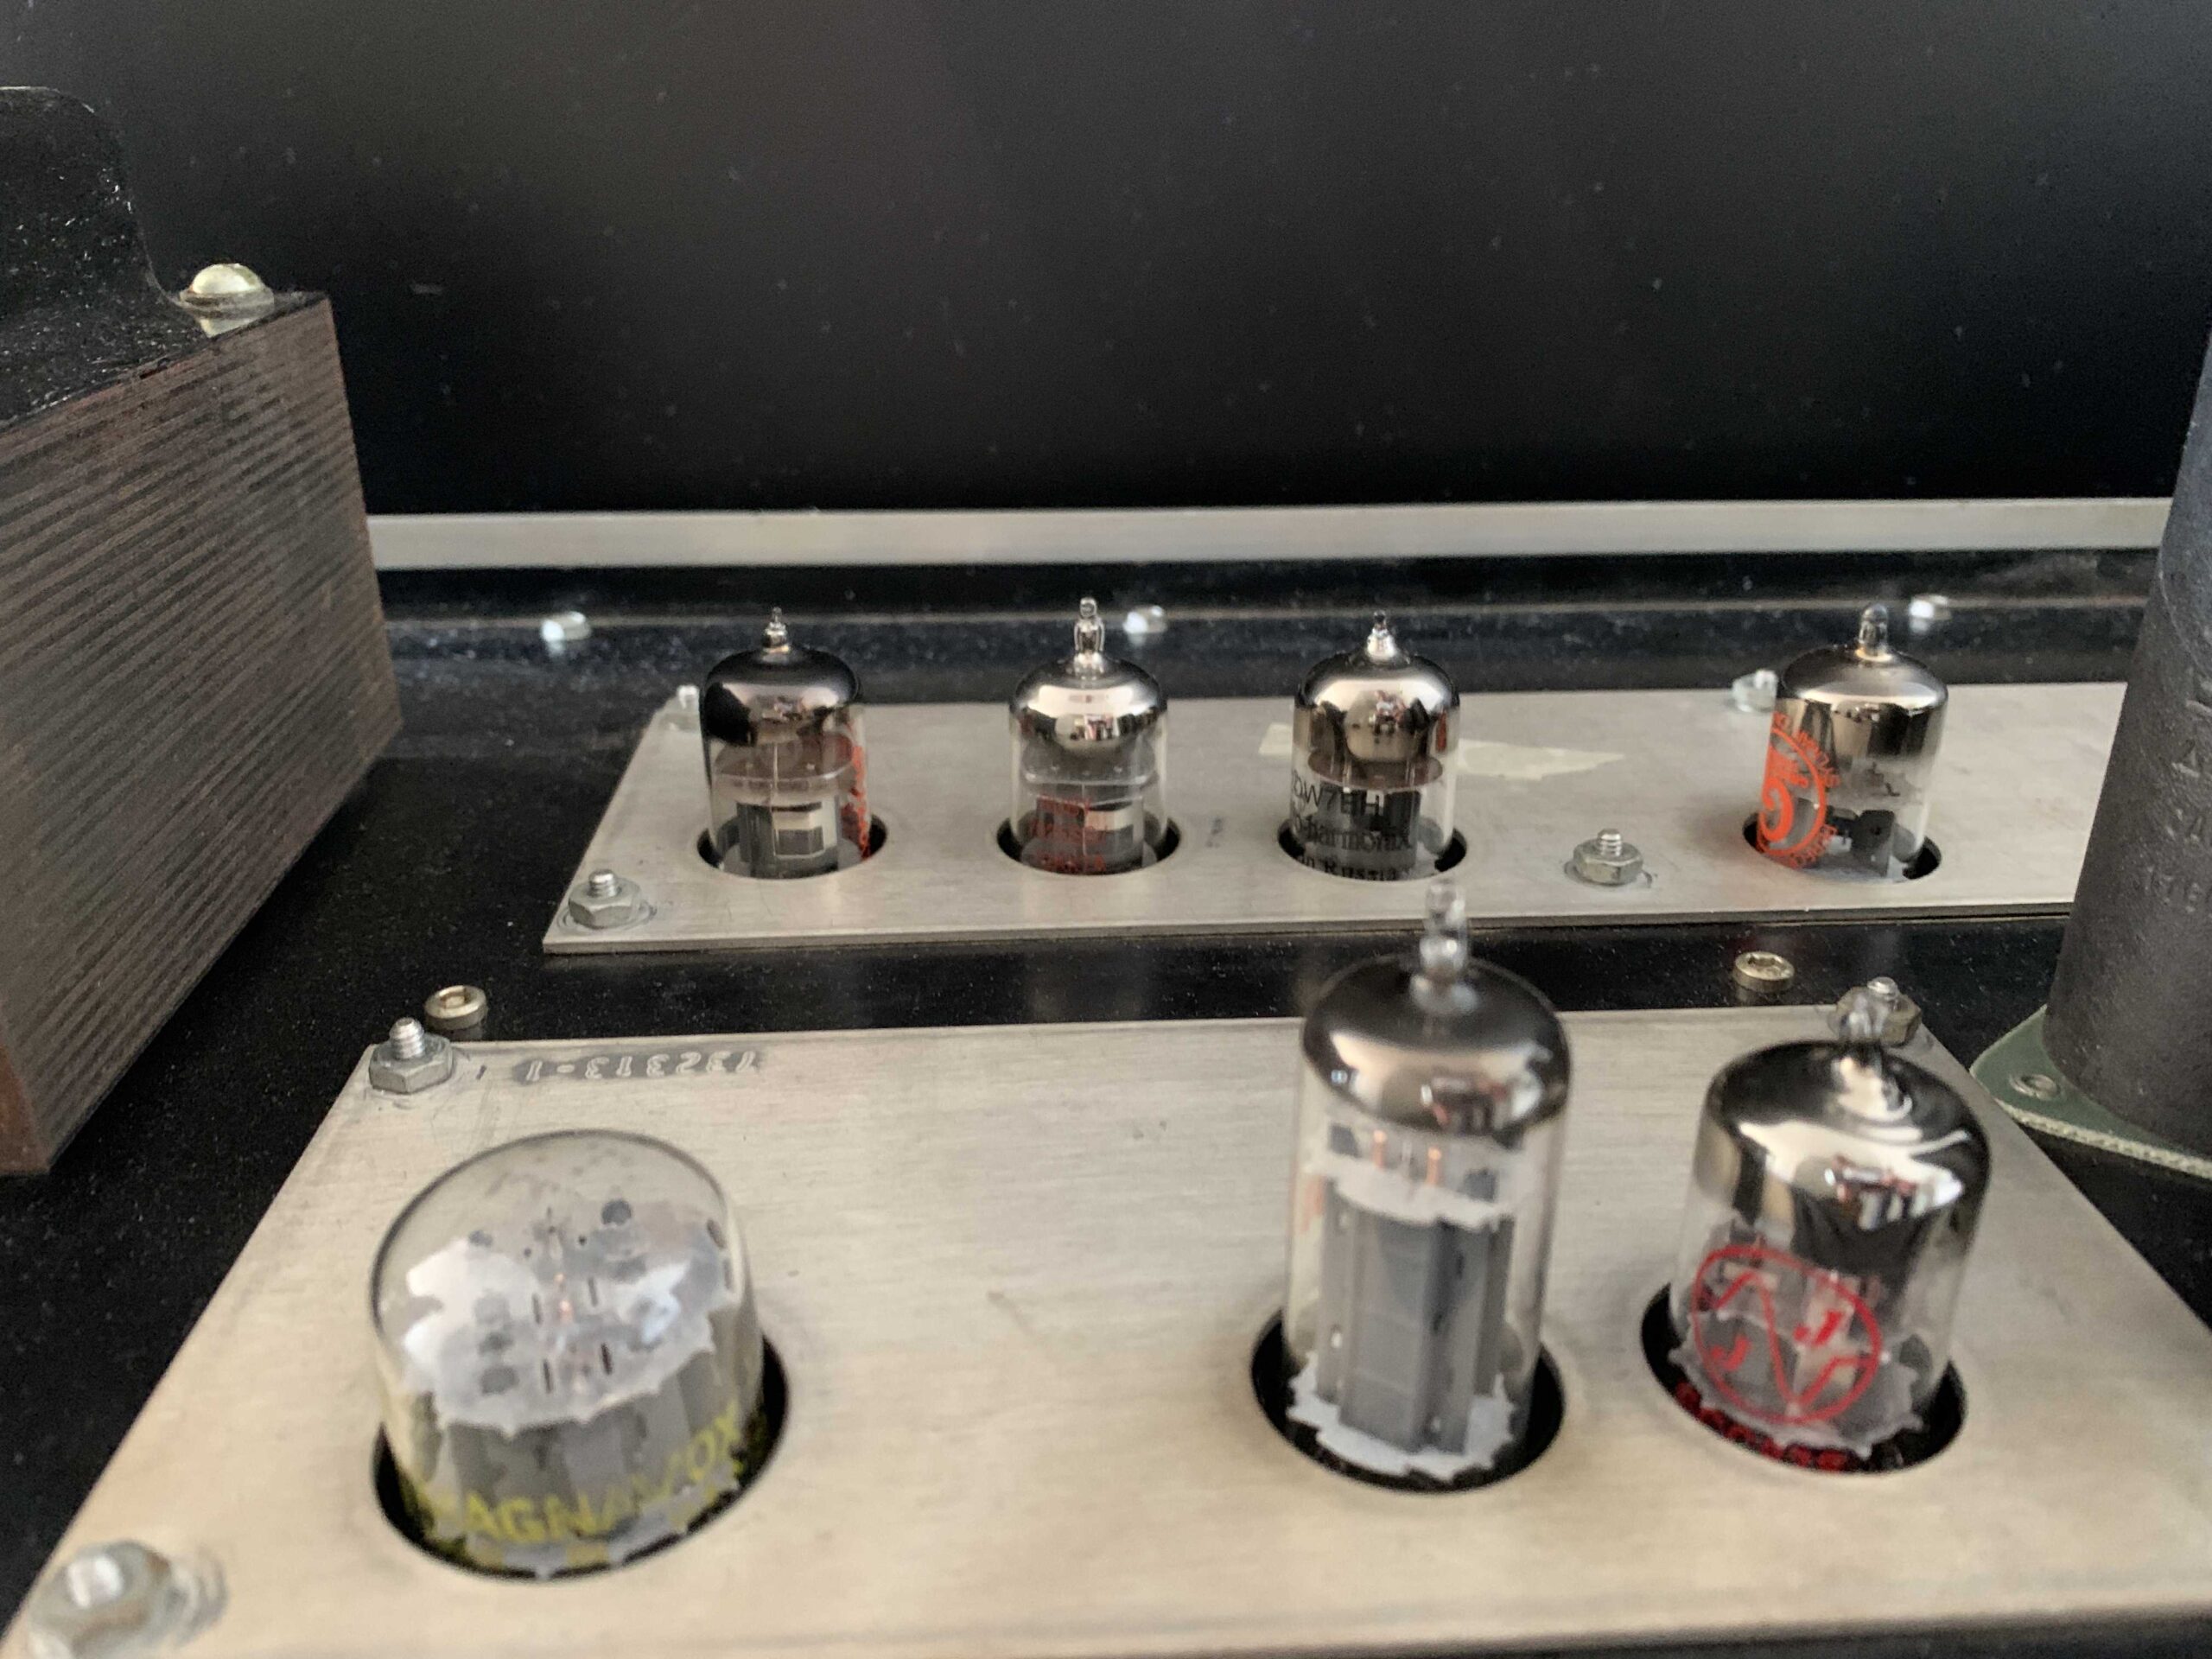
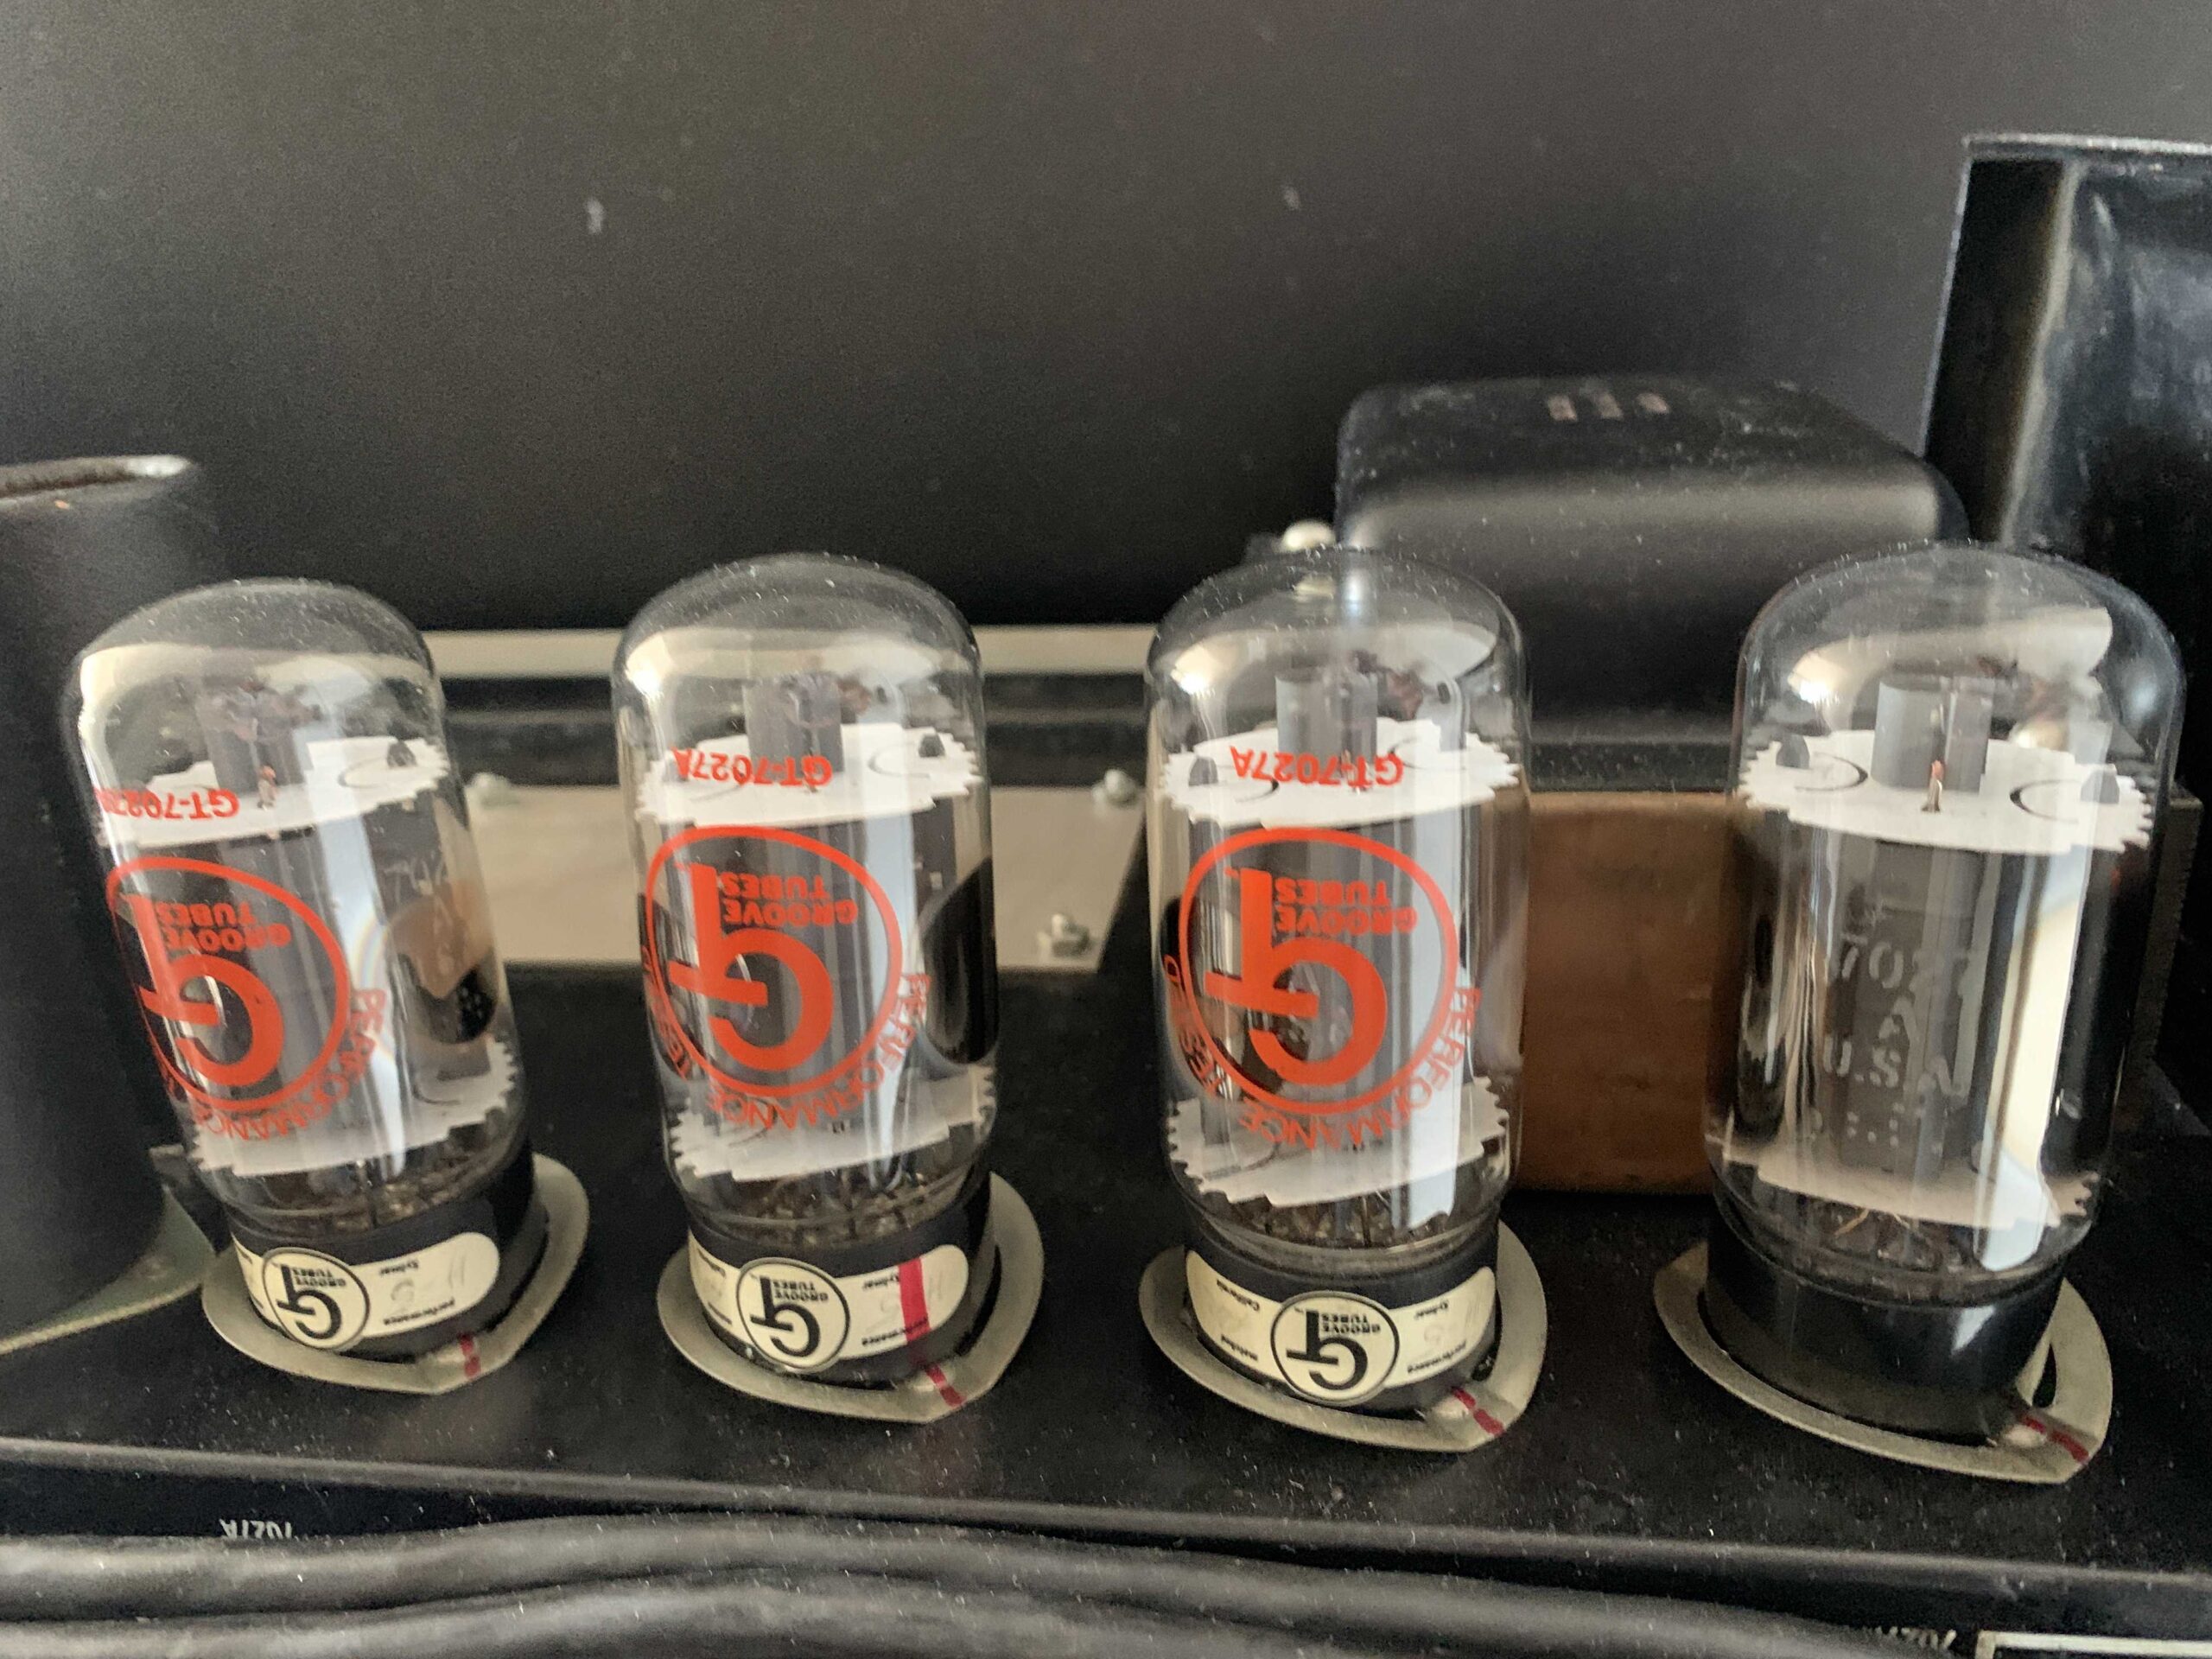
So while the speakers were out for rebuild, I started on the grill cloth and hardware. The cloth I bought on eBay for cheap and installed with a staple gun. The hardware I acquired from home depot and choose a durable stainless. I used my century 100 tube tester on the tubes and determined what needed to be replaced based on strength test. For the missing output tube, I purchased a clear top RCA nos tube to match the GT tubes that were already installed.
Luckily all the electronics were in good shape for their age and the only modification the prior owner made to this amp was an additional pot added to the amp output signal. Below are some pics of the amp’s insides and the tubes that I have installed.
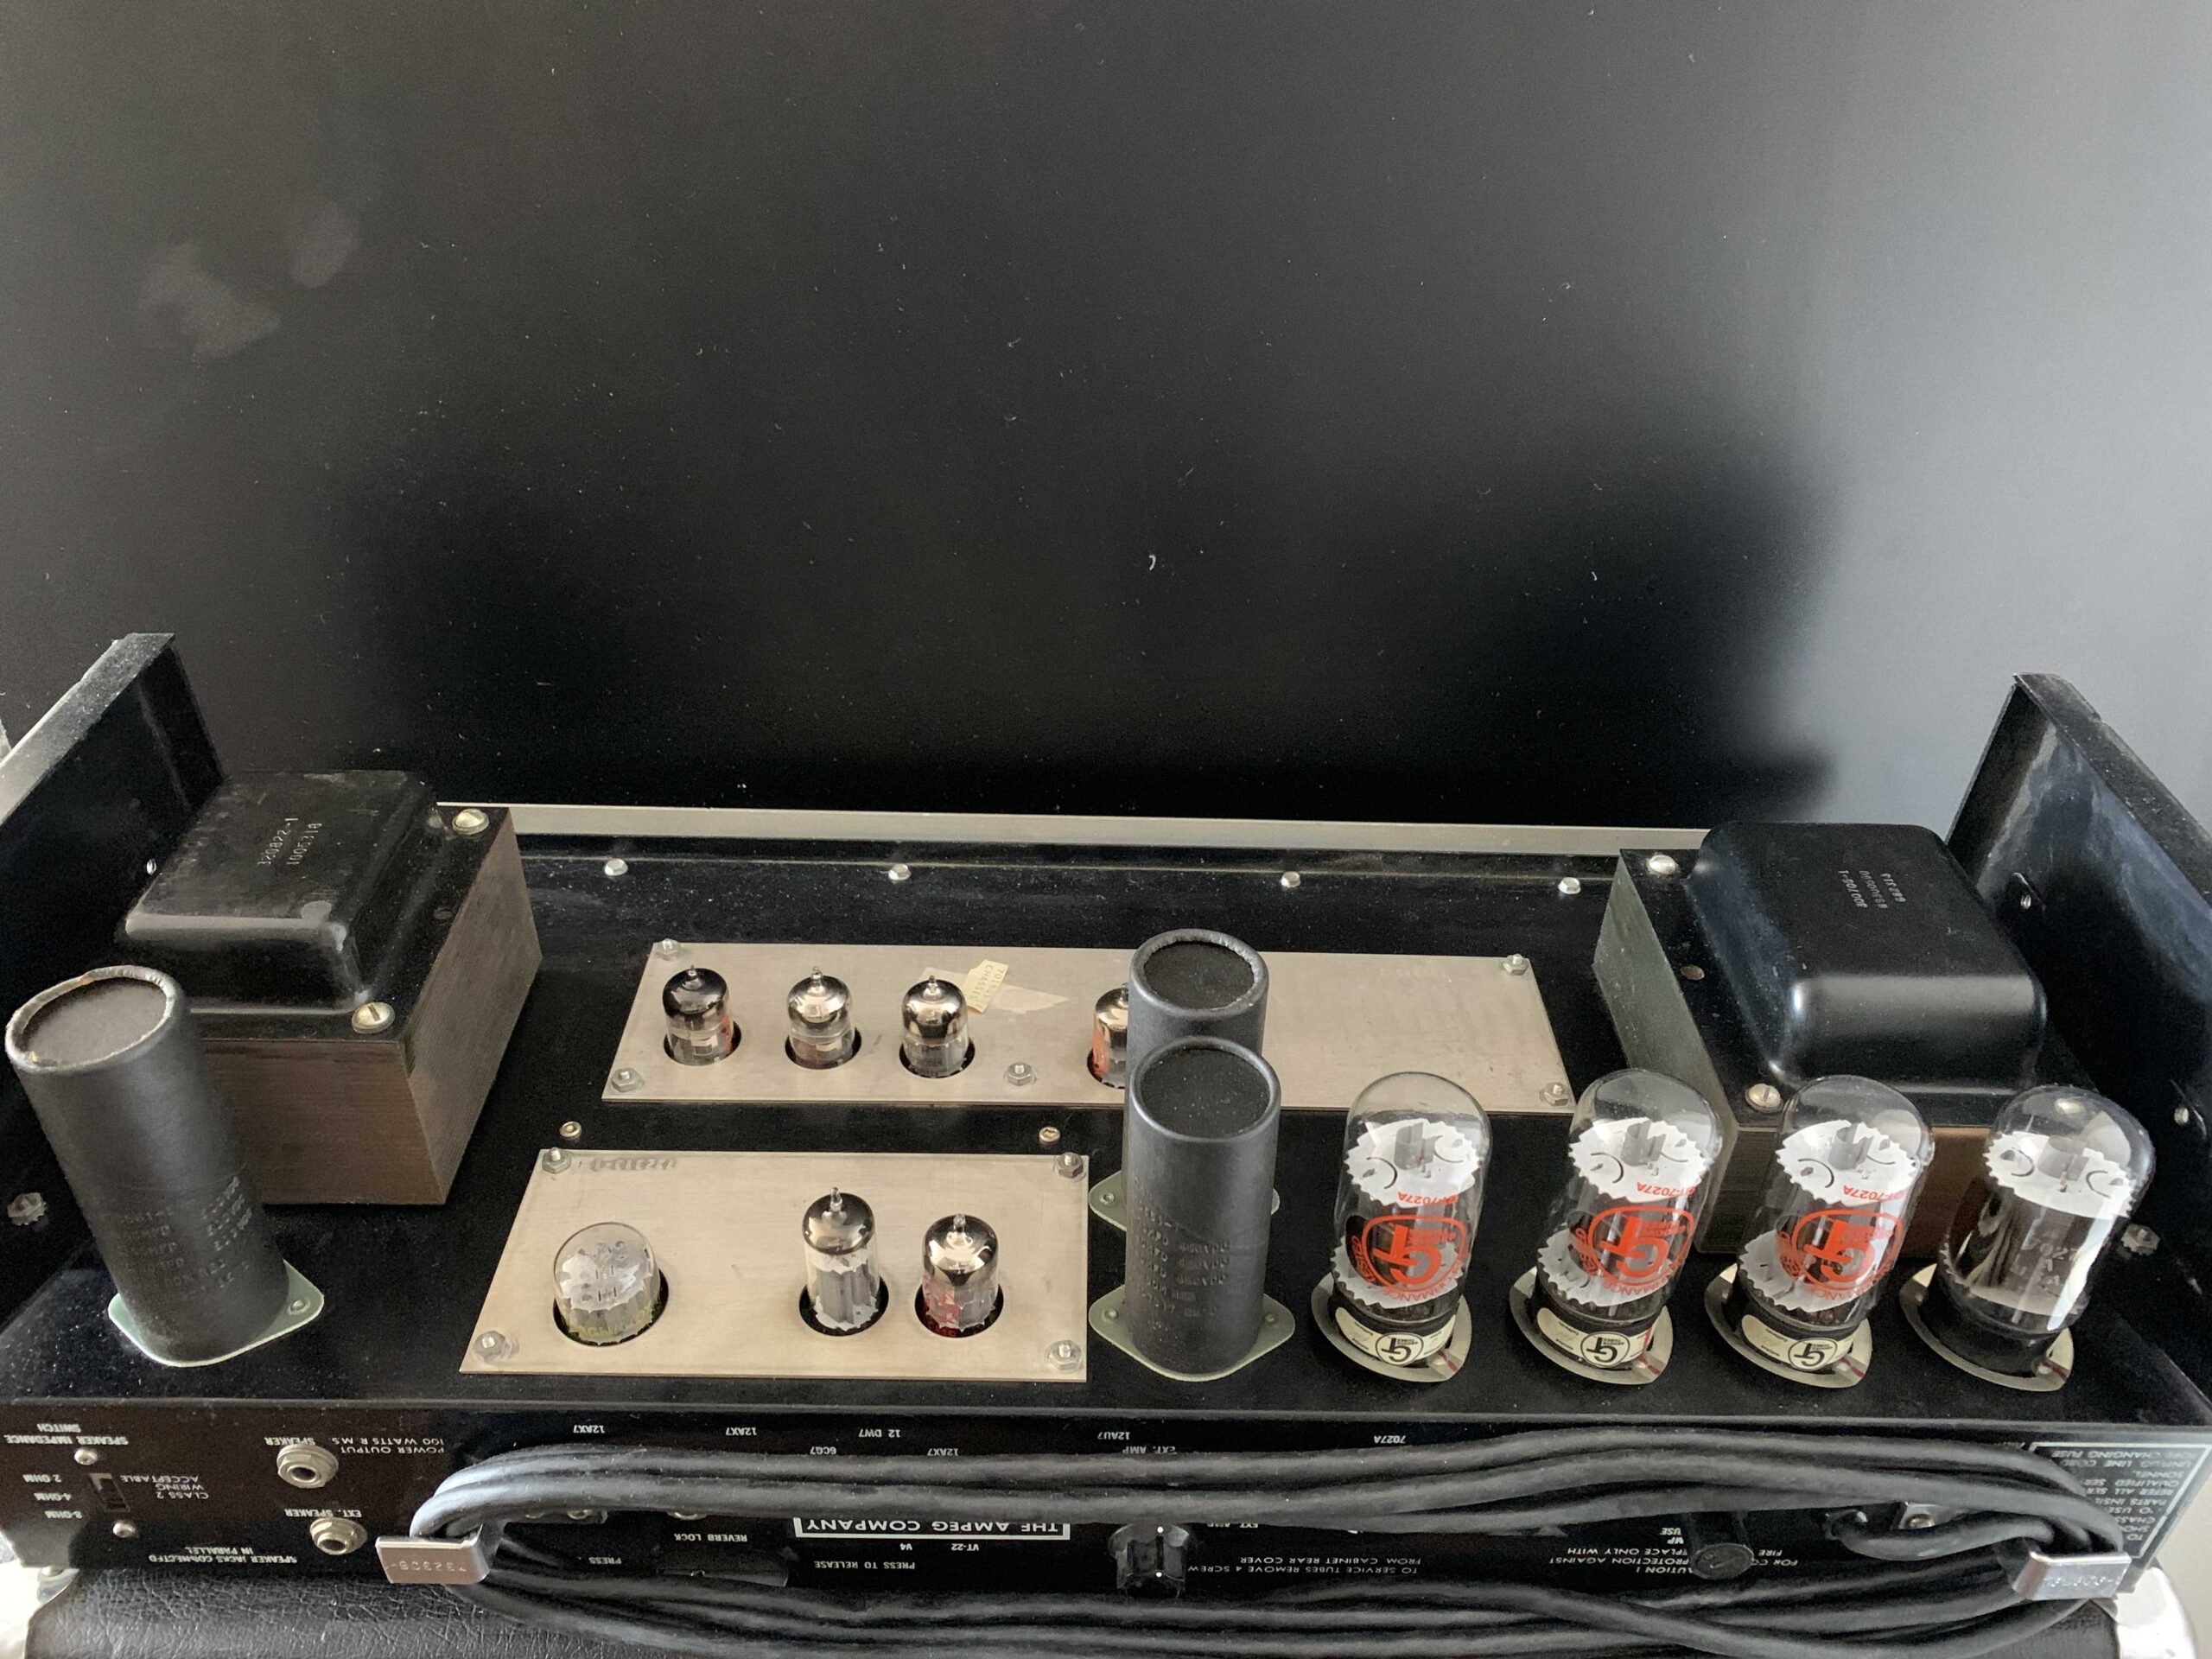
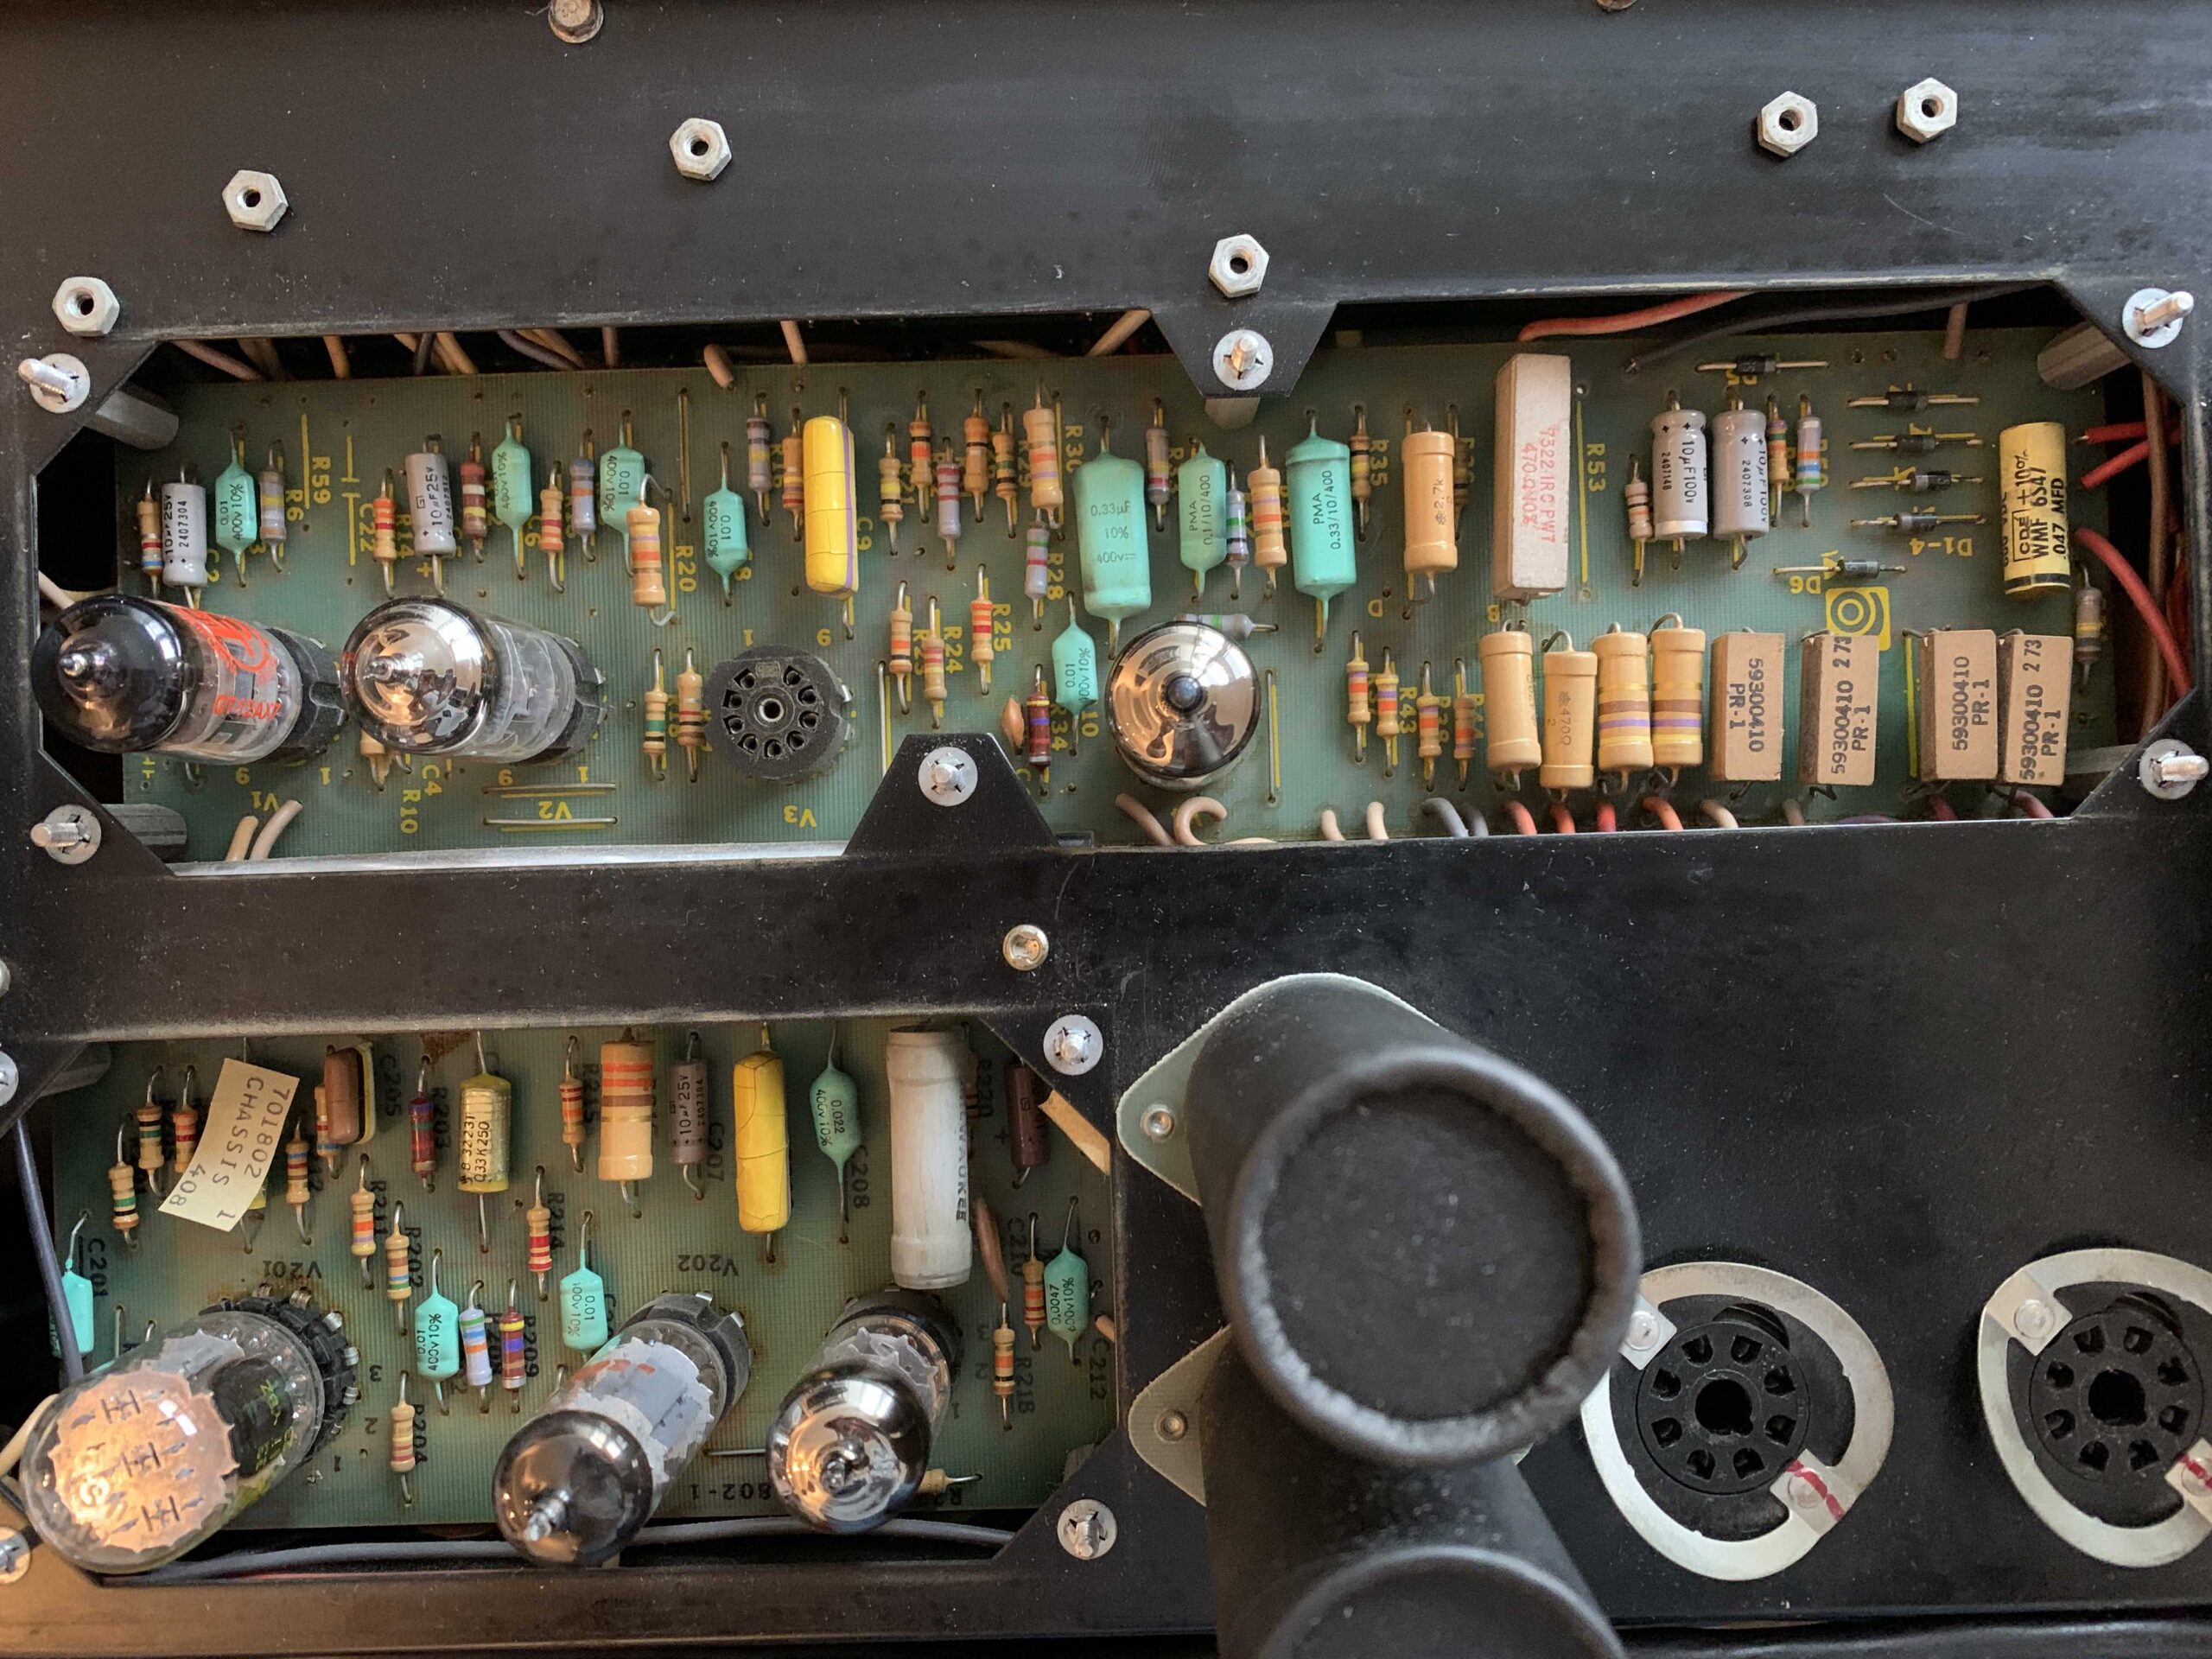
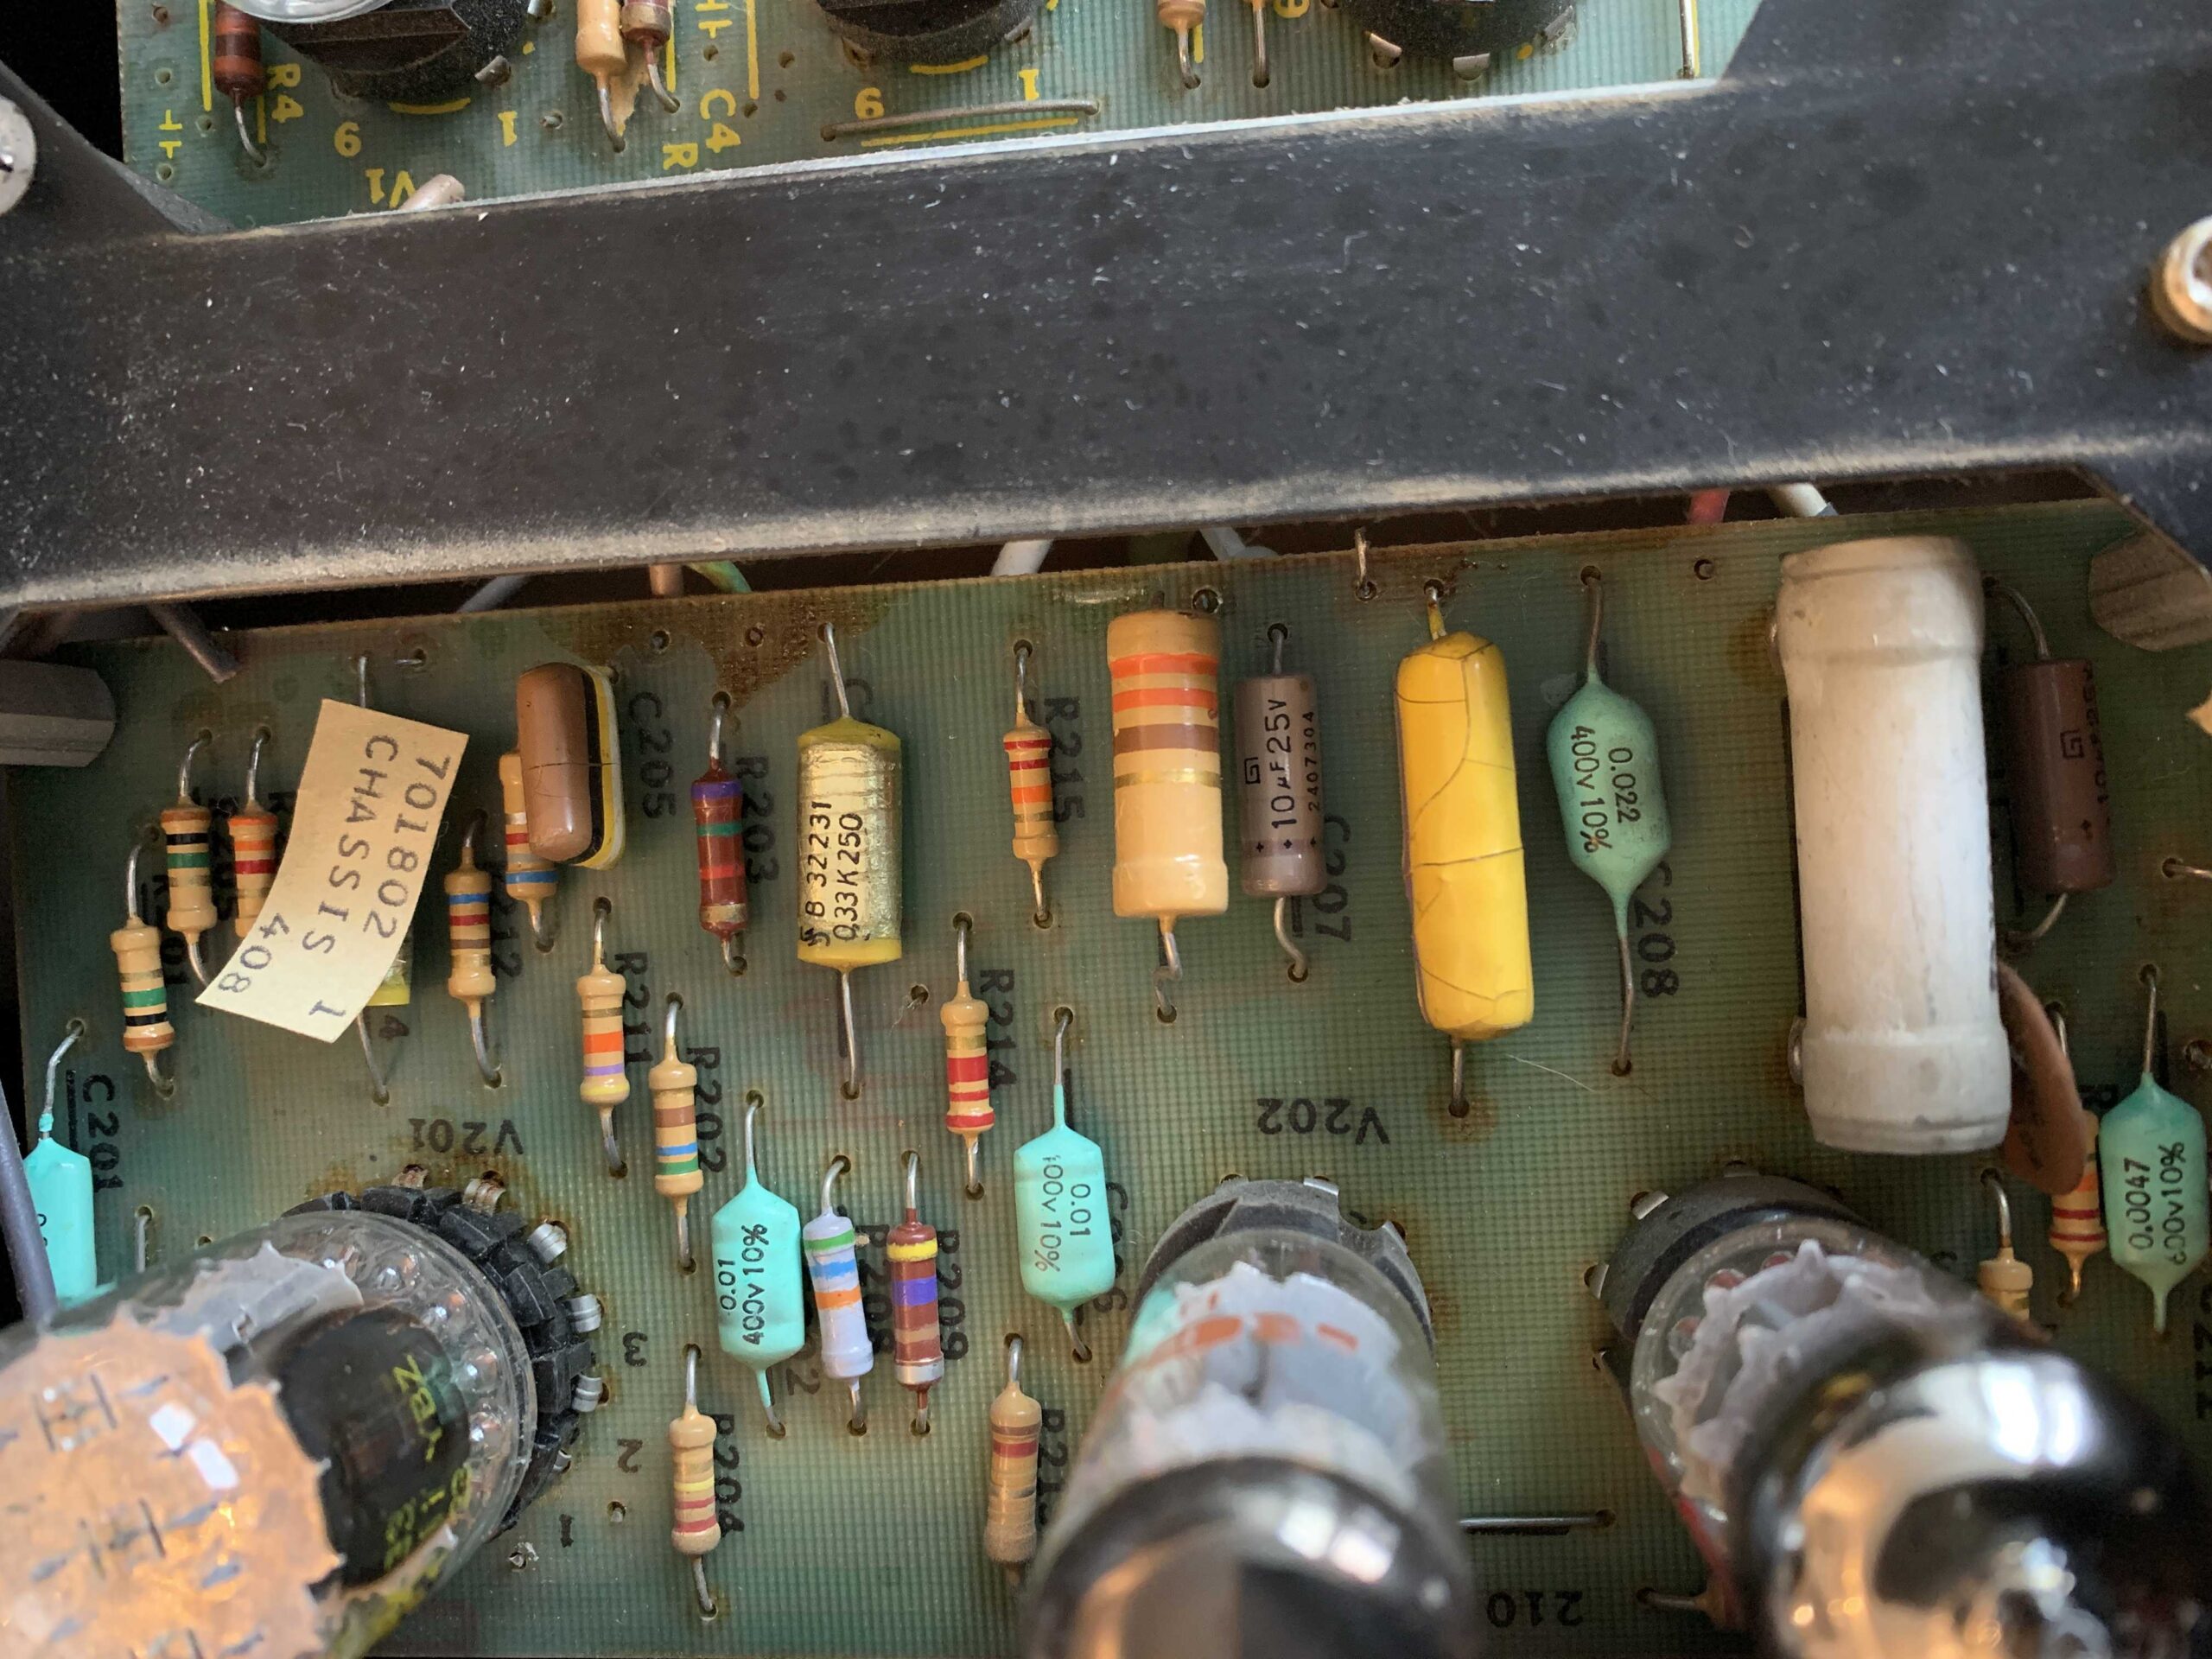
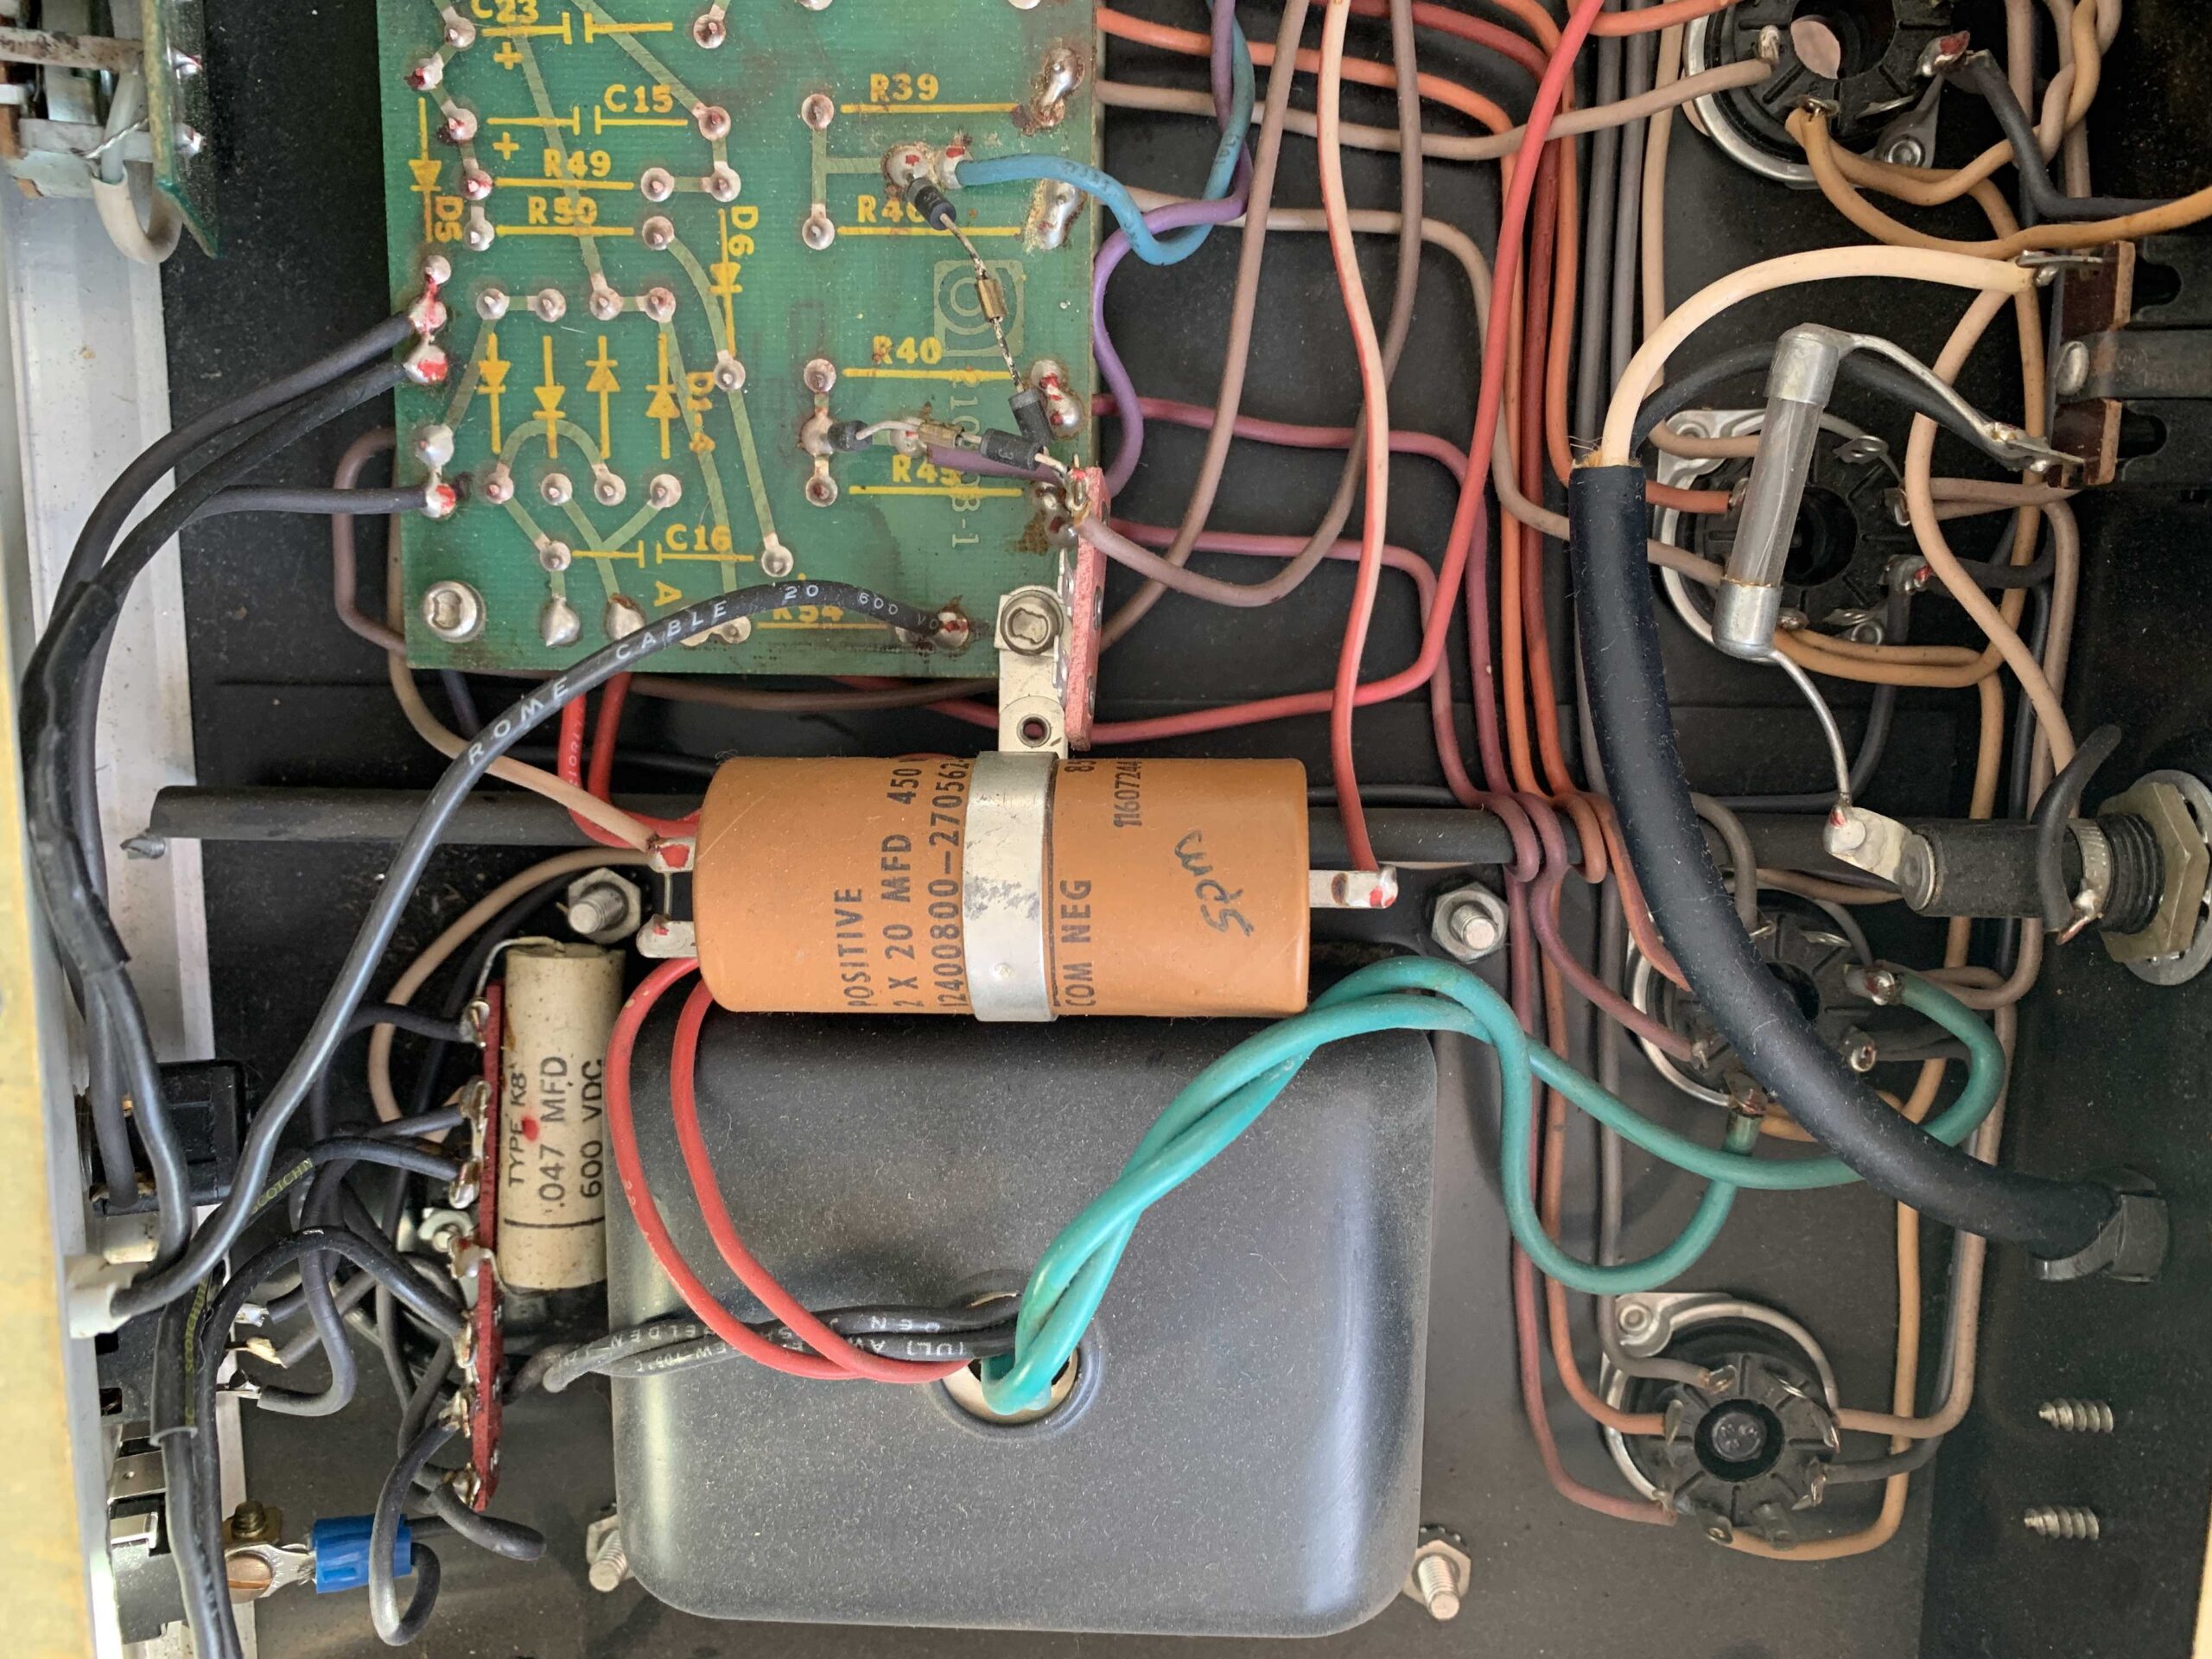
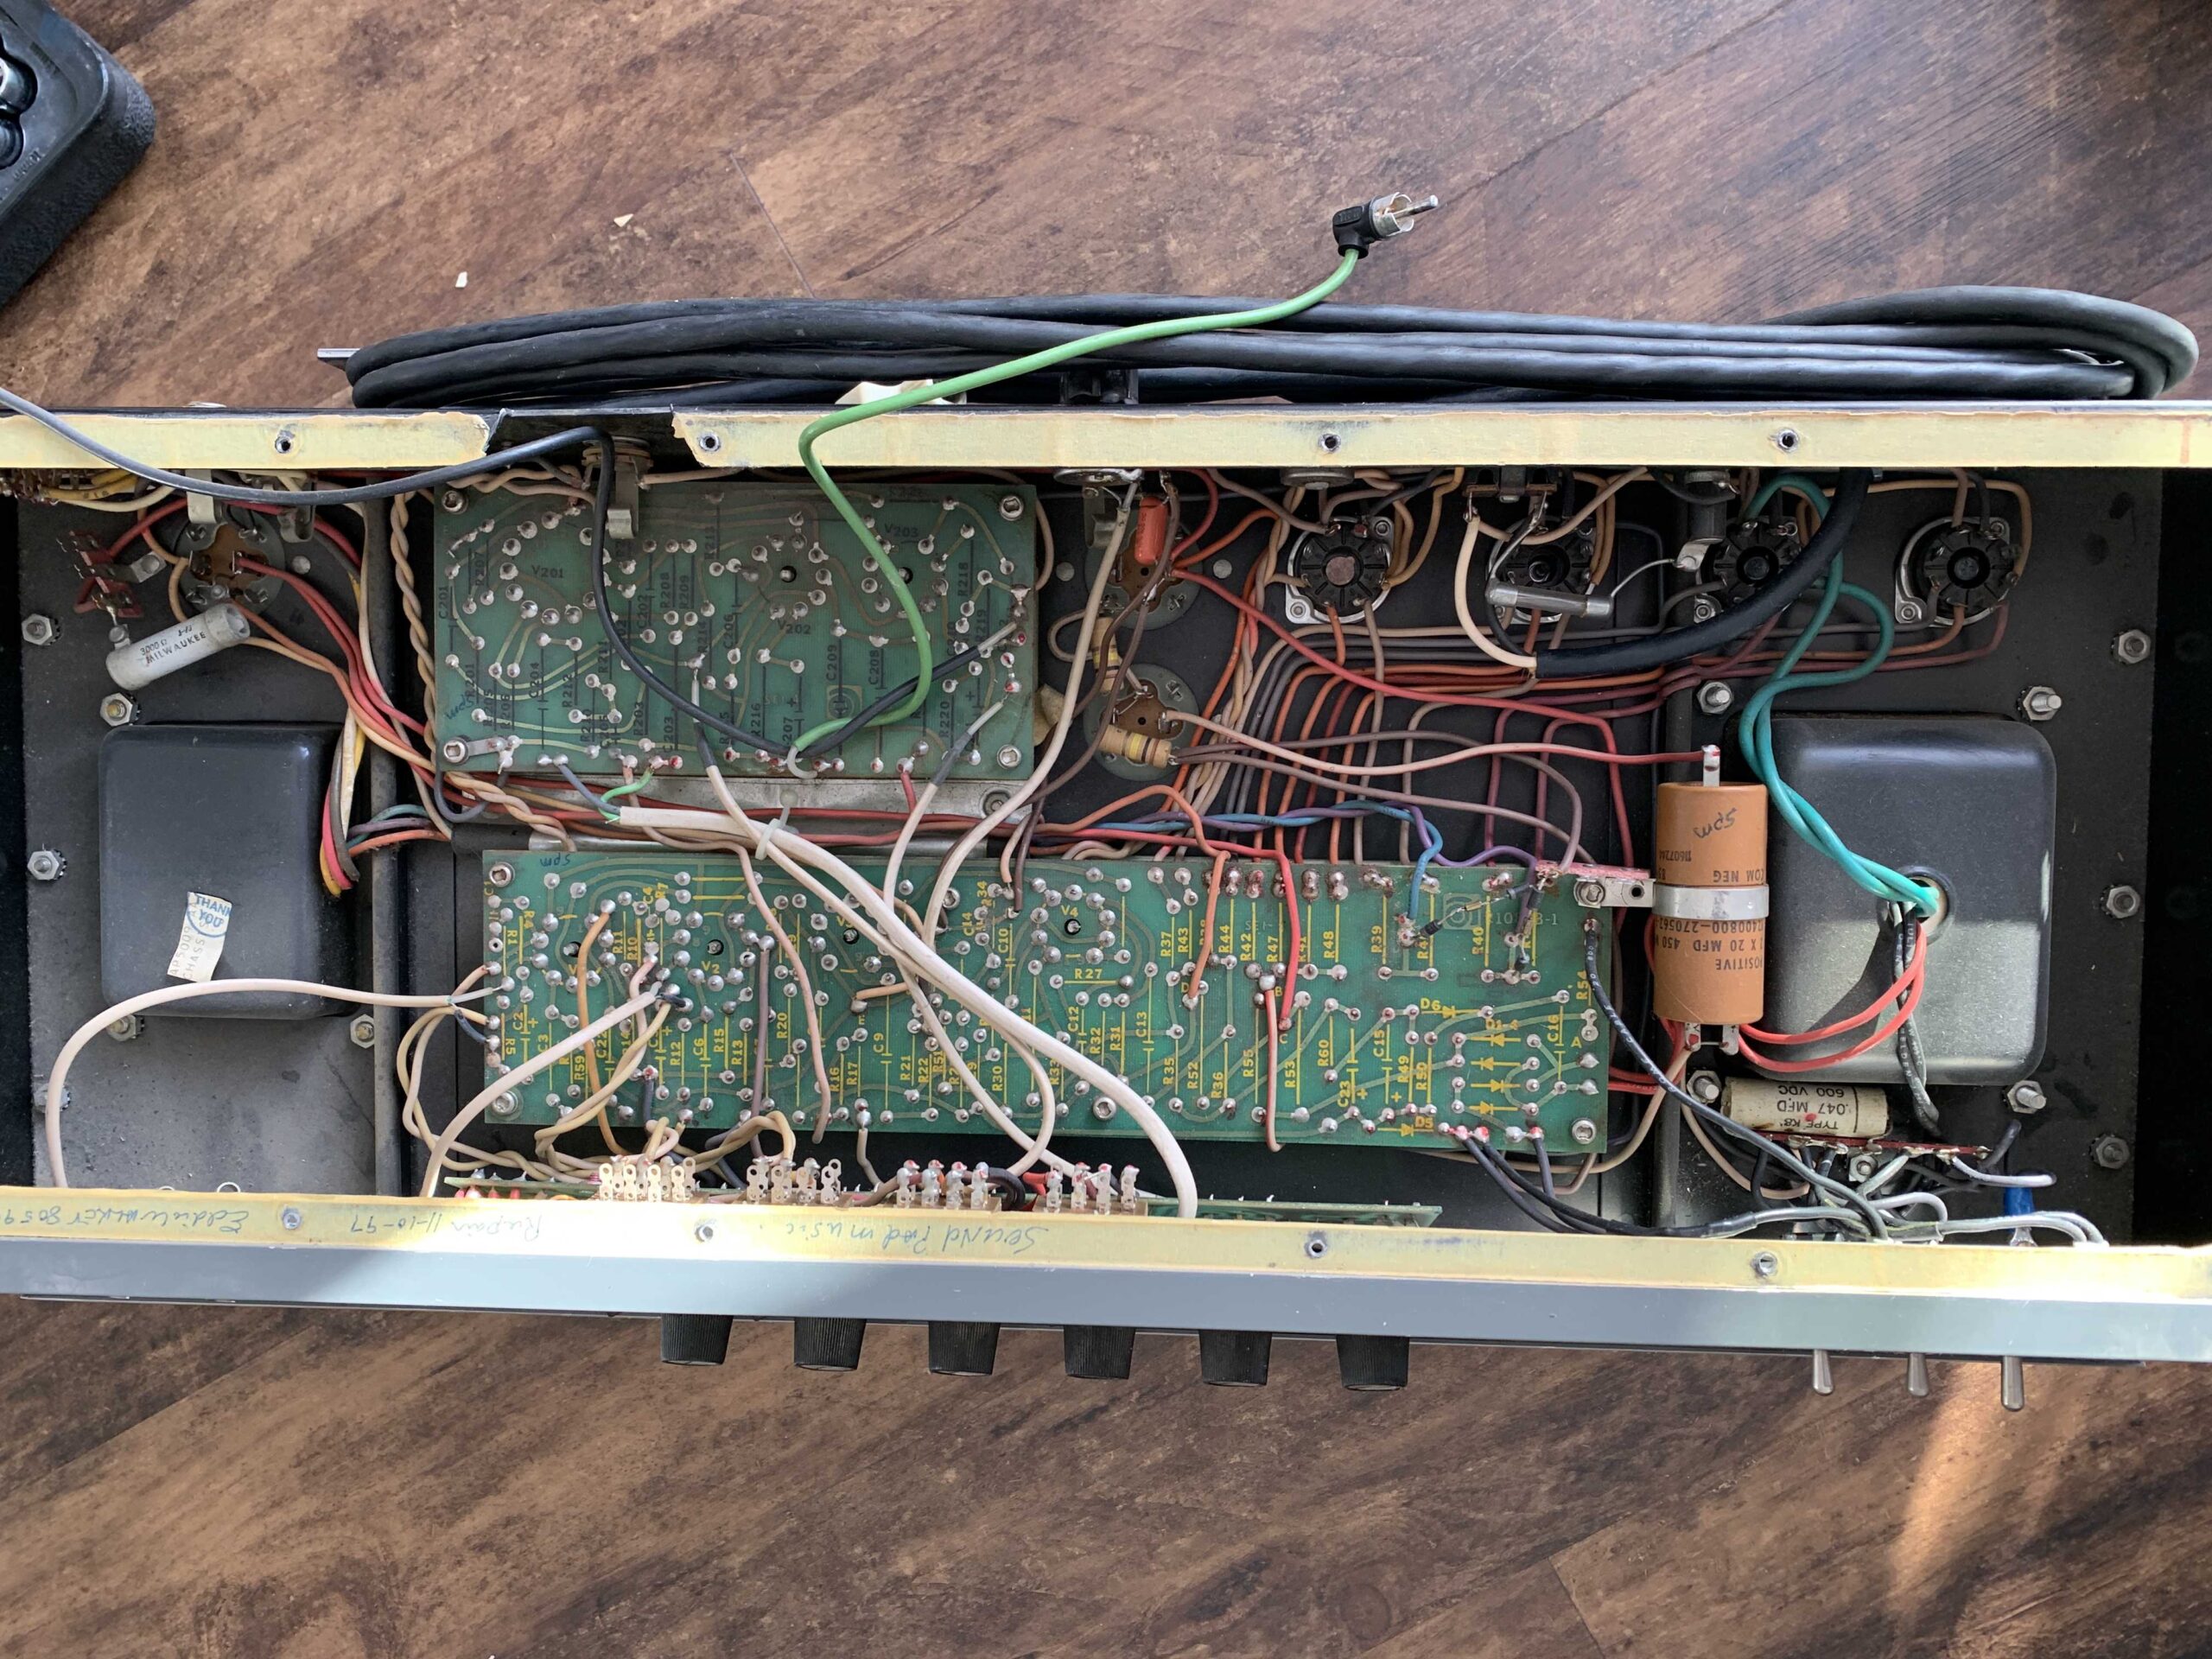
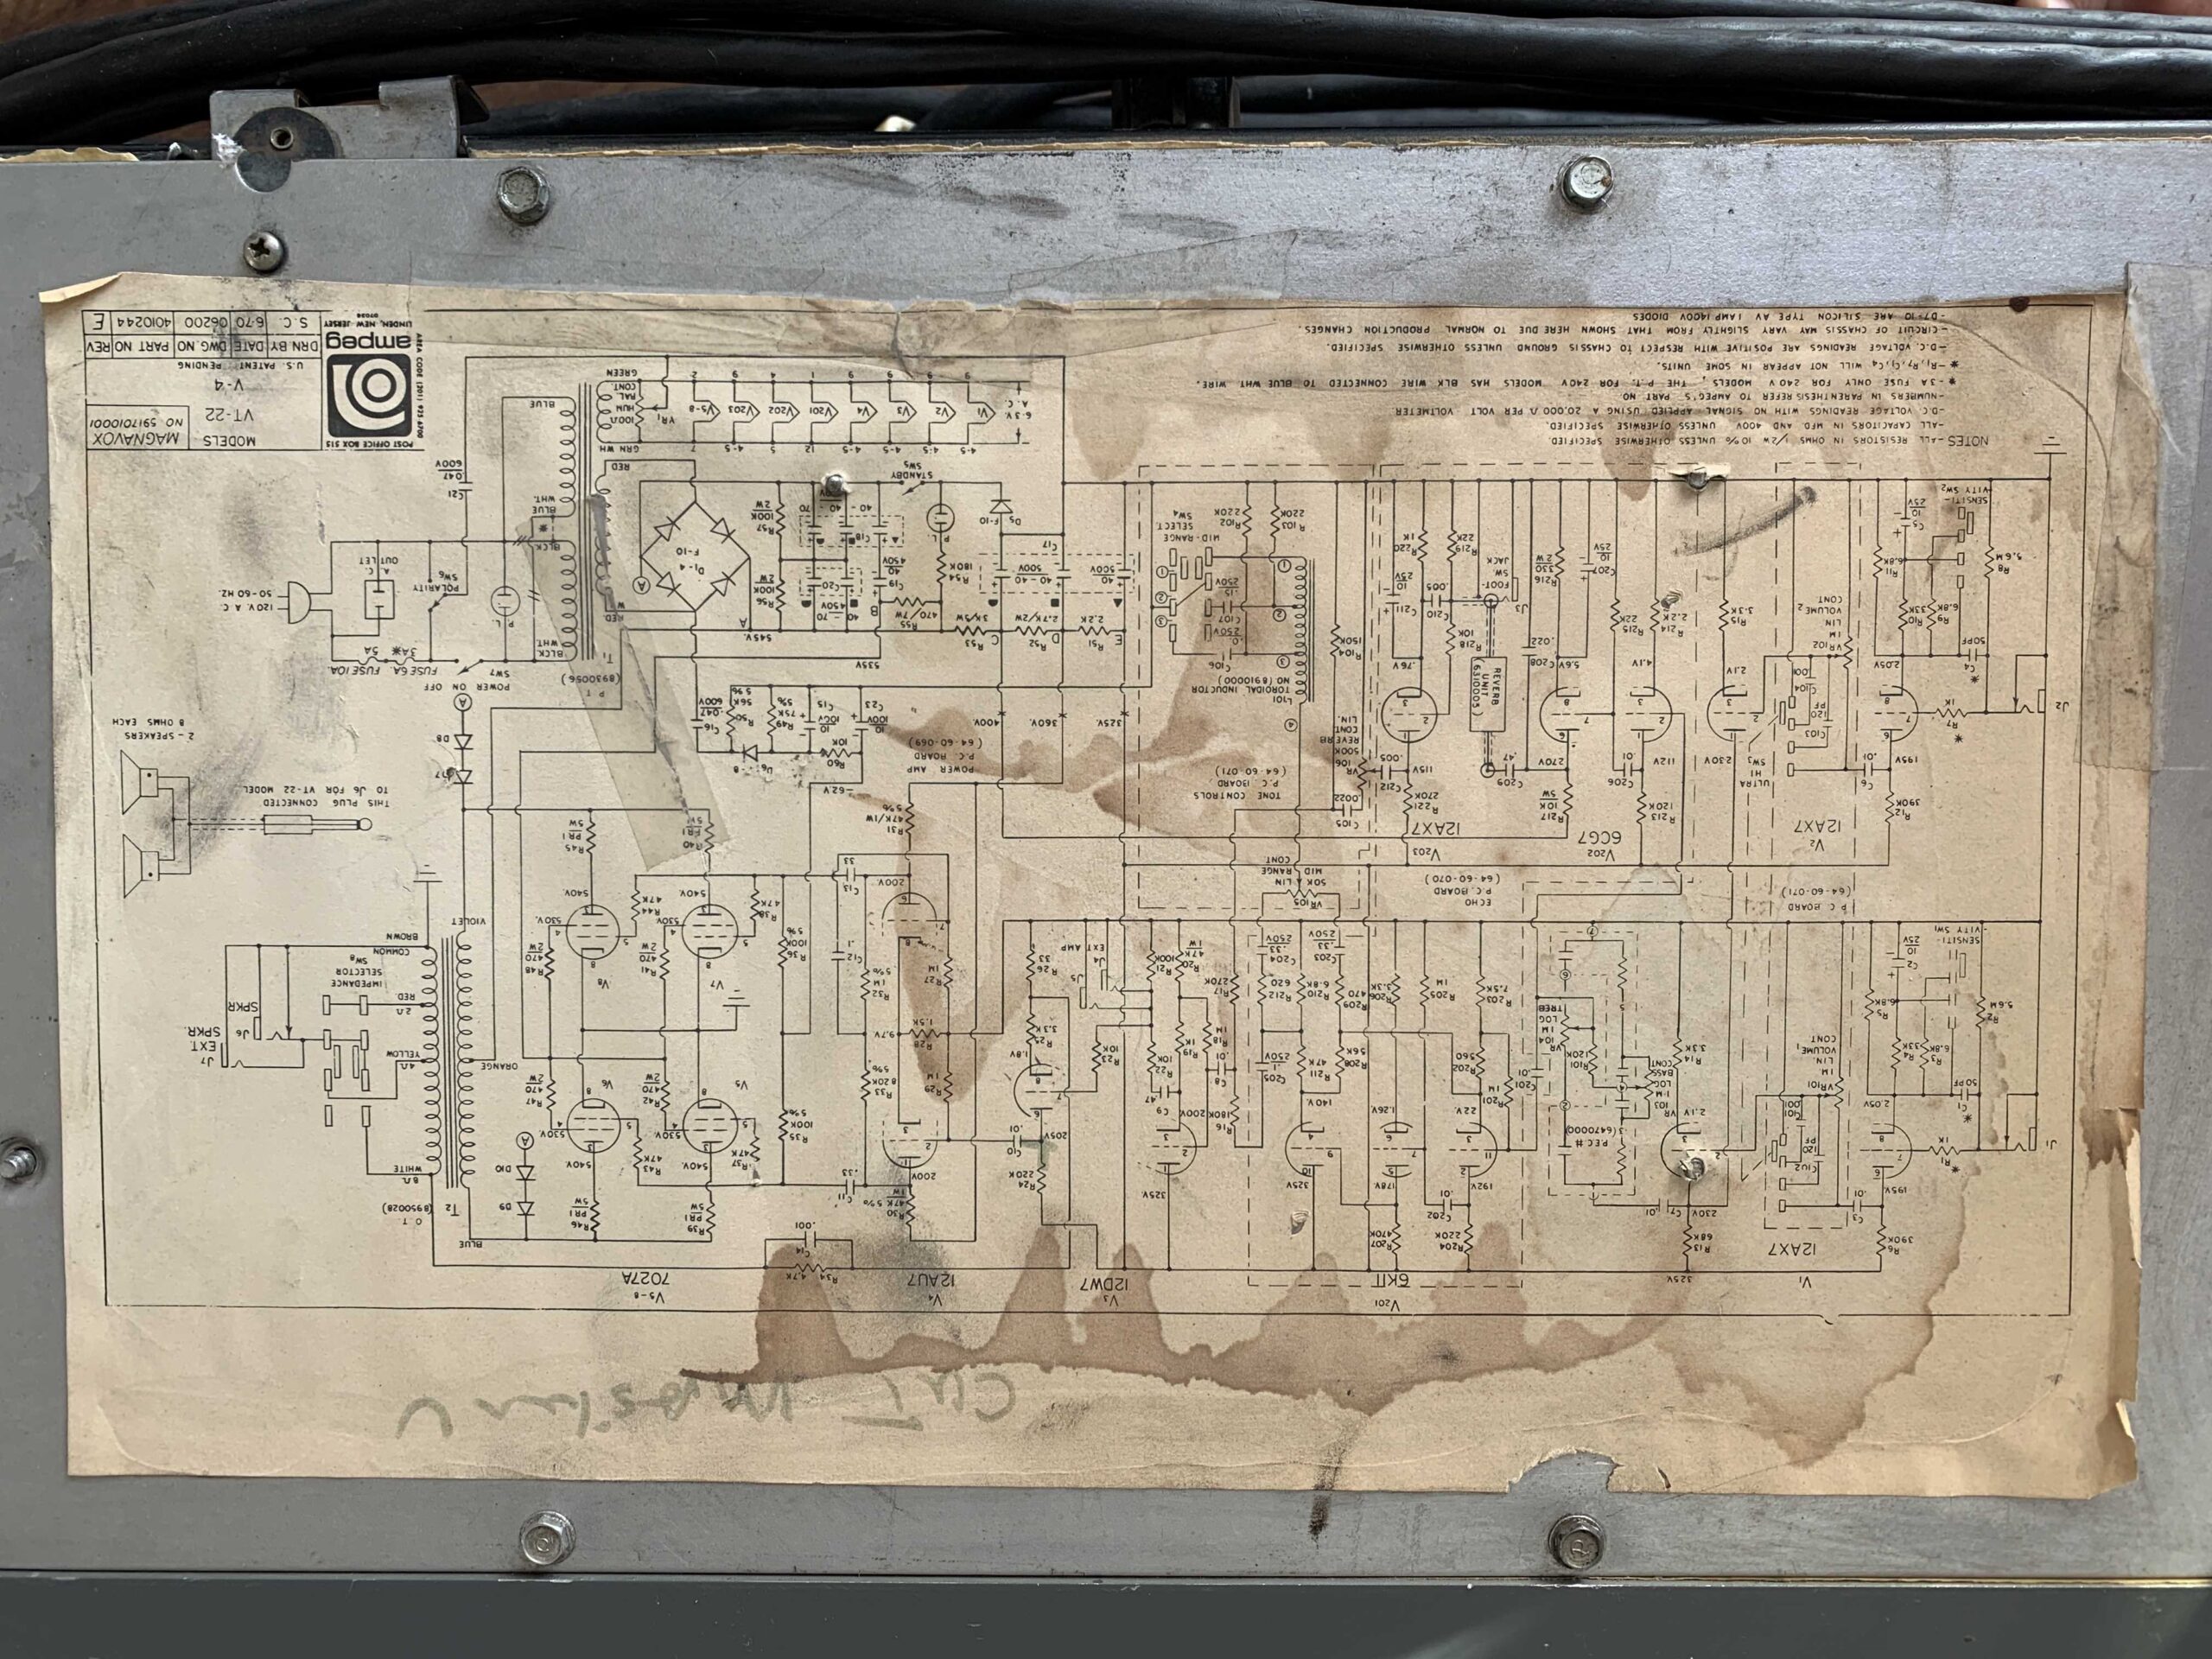
I am glad I fully opened up the amp, when I was at this stage I sprayed all the pots with fader lubricant/cleaner and used deoxidizer on all the connections. So after the amplifier was re-assembled I plugged in the unit and tested for functionality. I lifted the ground switch to reduce noise since the power plug does not have a ground plug. This amp is ridiculously loud and has the ability to sculpt any clean to mildly distorted guitar sound possible. Although there are only a few knobs for adjustment, the switches allow you to grab the correct range for your preference. The channels 1 (clean) and 2 (distortion) are blend-able and you can even send two signals in at once. This is not a stereo amp but it is very flexible and unique. I would have to say, the reverb is lush and overall I fell in love with this amp’s unique rich sound. This amp falls into that category of higher voltage plate amp and really seems alive when powered on, worth every penny in the used market. Best of all, when seeking these type of projects the gear is well documented, discussed and parts are readily available. Unlike my last project an Ampeg VT-120, the push pull pots are difficult to find and the amp guts are way over crowded. Here are some finished refurbished pictures and below you will find all the manuals plus ads I have collected.